Updated for Version “Luna I” — 30th September 2025

Genshin Impact Version Luna I introduces Nod-Krai, an autonomous region located in the southernmost part of Snezhnaya. The update also brings along three new characters, six freely obtainable weapons, two new artifact sets, and a brand-new Moonsign system.
This Genshin Impact guide assesses the new Luna I weapons and artifact sets and describes the best characters who use them. Expect the KQM Quick Guides for Lauma, Flins, and Aino to come out soon!
Note that the information given may change if new discoveries are made. More extensive testing is in progress.
Join our Discord to participate in the theorycrafting process.
Table of Contents
New Content
| New Region Nod-Krai | Nod-Krai is accessible after completing the Archon Quest, Prologue: Act III, “Song of the Dragon and Freedom” (available at Adventure Rank 18). Upon completion, a Waypoint north of Ochkanatlan in Natlan automatically unlocks. You do not have to complete any Liyue, Inazuma, Sumeru, Fontaine, or Natlan quests to go to Nod-Krai. |
| New Combat Mechanics Moonsign | Moonsign is a group of special mechanics enabled by the presence of Nod-Krai characters, improving their combat abilities and affecting the effects of some weapons and artifacts. Additionally, non-Moonsign characters increase the Lunar Reaction damage of all teammates based on the former’s stats. |
| New Maximum Level Lv. 100 | After Version Luna I, players can now level their characters to Level 95 and 100 with the item “Masterless Stella Fortuna,” which can be obtained through getting a Stella Fortuna on a 5-star character that is already at C6. Testing on which characters benefit the most from leveling past 90 is currently ongoing. |
| New Elemental Reaction Lunar-Bloom | Lunar-Bloom is a special reaction enhanced by Lauma from the normal Bloom reaction. While the Lunar-Bloom reaction by itself does not have any special mechanics when triggered, it can proc certain effects. |
| New Artifact Sets • Night of the Sky’s Unveiling • Silken Moon’s Serenade | Two new artifact sets obtained in Nod-Krai from the Domain “Frostladen Machinery.” They are also obtainable from Spiral Abyss Tier I and II Reliquaries. |
| New Nod-Krai Craftable Weapons • Serenity’s Call (Sword) • Master Key (Claymore) • Prospector’s Shovel (Polearm) • Blackmarrow Lantern (Catalyst) • Snare Hook (Bow) | Five new 4-star weapons that can be forged via recipes obtained in Nod-Krai. |
| New Event-Exclusive 4-Star Weapon Etherlight Spindlelute (Catalyst) | A free 4-star Catalyst obtained from the “Clink Clank Clash” event. It provides a large amount of ER and EM stats. |
| New Story-Reward 4-Star Weapon Moonweaver’s Dawn (Sword) | A free 4-star Sword obtained from the World Quest “Echoes of an Unfinished Past.” It provides a good Burst DMG Bonus buff to characters that have a low Energy cost. Players can only obtain one copy of it as of now. |
| New Limited-Banner 5-Star Weapon Nightweaver’s Looking Glass (Catalyst) | A new 5-star Catalyst that is Lauma’s signature weapon. Since the weapon’s full passive requires Lunar-Bloom, which currently can only be triggered with the presence of Lauma, Nightweaver’s Looking Glass is generally held by her. However, it can still be a decent EM stat stick outside of that. |
 Lauma | An event Wish–limited 5-star Dendro Catalyst character. Lauma deals Lunar-Bloom damage via her Skill and buffs all Bloom-related damage via her Burst. Lauma raises the party’s Moonsign by 1. |
 Flins | An event Wish–limited 5-star Electro Polearm character. Flins enables the Lunar-Charged reaction and deals significant Lunar-Charged damage via his Burst. Flins raises the party’s Moonsign by 1. |
 Aino | A 4-star Hydro Claymore character who is available to all players by progressing through the Archon Quest, Song of the Welkin Moon: Act I, “A Dance of Snowy Tides and Hoarfrost Groves.” Aino applies AoE Hydro via her Burst and raises the party’s Moonsign by 1. |
| New Permanent Event To Temper Thyself and Journey Far | New permanent event that lasts for a 12-week period. During this period, complete daily missions to achieve weekly goals. Complete 8 weekly goals to obtain 1 Crown of Insight, 1 Dust of Enlightenment, 1 Sanctifying Elixir, and 1 free Constellation for an owned 5-star character. There are up to 4 “To Temper Thyself and Journey Far” events per year. However, you can only redeem 1 Constellation through these events per character. |
Moonsign Mechanics Overview
Genshin Impact Version Luna I introduces unique mechanics involving Moonsign, which is tied to characters hailing from Nod-Krai. Moonsign mechanics come from Nod-Krai characters and affect mostly Nod-Krai characters’ combat prowess. As every Nod-Krai unit can increase the “Moonsign Level” of the team, they are considered “Moonsign characters.” Inversely, units that are not from Nod-Krai do not possess the Moonsign nature and do not affect the team’s Moonsign Level — they are considered “non-Moonsign characters.” Certain equipment and enemies are also affected by the presence of Moonsign mechanics.
Players are guaranteed Aino as a Nod-Krai character just by progressing through the Archon Quest, Song of the Welkin Moon: Act I, “A Dance of Snowy Tides and Hoarfrost Groves.”
Moonsign Level
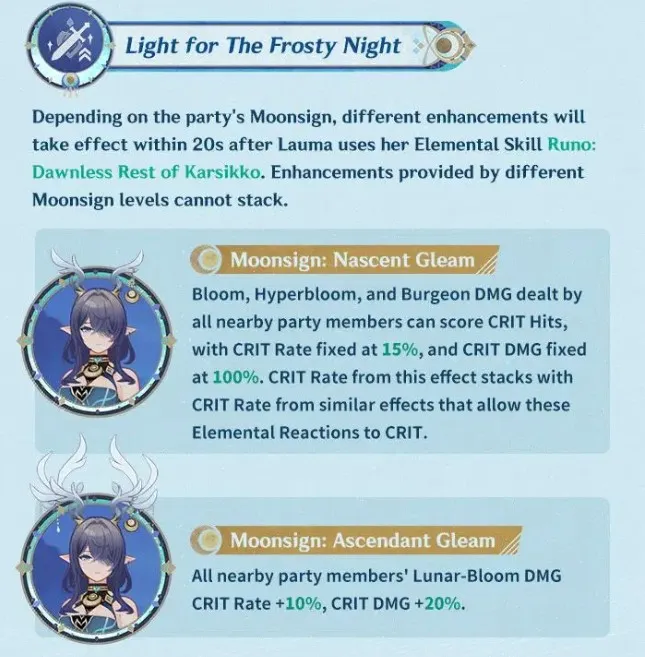
When Moonsign characters (currently Ineffa, Lauma, Flins, or Aino) are in the team, the team attains a Moonsign Level corresponding to the number of such characters. The maximum Moonsign Level is 2, which requires at least 2 Moonsign units.
- Moonsign Level 1: Nascent Gleam
- Moonsign Level 2: Ascendant Gleam
Each Moonsign Level gives different effects to certain Moonsign characters and certain equipment and they affect certain enemies differently. Unless stated otherwise, effects given by each Moonsign Level can stack.
Some examples of the effects of the Moonsign Level:
- Lauma’s A1 Passive gives differing buff effects depending on the team’s Moonsign Level. At Nascent Gleam, she buffs Bloom, Burgeon, and Hyperbloom damage by allowing them to crit. However, at Ascendant Gleam, this effect is replaced by a buff that increases the damage dealt by her Lunar-Bloom damage instead.
- The artifact set Night of the Sky’s Unveiling’s 4pc effect acts differently based on the Moonsign Level of the team. At Moonsign Level 1, the set gives the holder 15% CRIT Rate, while this buff is 30% CRIT Rate at Moonsign Level 2.
- Enemies from the “Wild Hunt” faction have a special HP bar that can be effectively dealt with by abilities enhanced by Moonsign Level 2: Ascendant Gleam.
Moonsign Team Bonus
When the team’s Moonsign Level is Ascendant Gleam, non-Nod-Krai characters provide Lunar Reaction DMG% buffs to the whole team upon casting their Skill or Burst, based on the corresponding personal stats of their Elements:
- Pyro, Electro, or Cryo characters: 0.9% Lunar Reaction DMG Bonus for every 100 ATK they have
- Hydro characters: 0.6% Lunar Reaction DMG Bonus for every 1000 Max HP they have
- Geo characters: 1% Lunar Reaction DMG Bonus for every 100 DEF they have
- Anemo or Dendro characters: 2.25% Lunar Reaction DMG Bonus for every 100 EM they have
The maximum amount of DMG Bonus gained this way is 36%. However, this buff cannot stack, and the buff is refreshed and updated the next time a non-Moonsign character uses their Skill or Burst.
Note: this DMG Bonus is added to the EM multiplier of the Lunar Reaction damage (Lunar-Charged and Lunar-Bloom).
Overview: these buffs encourage the use of non-Moonsign characters to increase the entire team’s Lunar Reaction damage, especially for teams with units that deal considerable Lunar Reaction damage, such as Ineffa.
Lunar Reactions
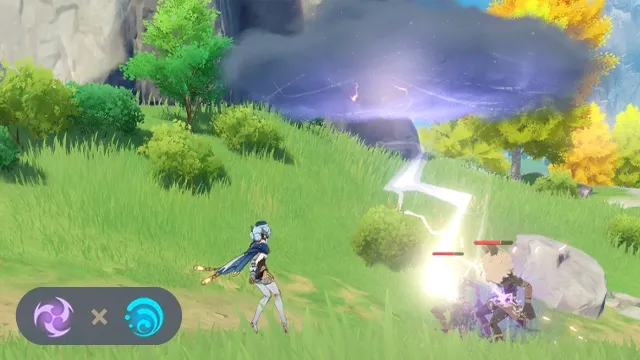
Lunar Reactions are the enhanced versions of conventional reactions, brought up by characters from Nod-Krai. These Lunar Reactions can be triggered by any teammates as long as there is a Nod-Krai unit that enables the reactions in the team. Each Lunar Reaction behaves differently from the others and from their conventional counterpart. Nod-Krai characters also have methods to deal Lunar Reaction damage directly from their kit. These attacks often have different scalings than the usual Lunar Reaction damage.
Lunar-Charged
Lunar-Charged (LC) is the special Electro–Hydro reaction that replaces Electro-Charged (EC) when certain Nod-Krai characters are in the team. LC was already introduced in Version 5.8 via the release of Ineffa. As of Version 6.0, there are two characters that can enable LC, namely Ineffa and Flins.
In a nutshell, LC takes the stats of all characters that apply Electro / Hydro and finalizes them into one single instance of reaction damage. The main methods to increase the Lunar-Charged damage are: raising character level, building EM or CRIT, getting Lunar-Charged / Lunar Reaction DMG Bonus, and having Electro RES Shred.
LC tends to be an improvement over normal EC as it allows many teammates to contribute to this teamwide reaction, and characters can still deal decent Lunar-Charged damage with a normal CRIT build, as opposed to EC requiring a high EM build.
LC is also an integral part of Ineffa’s kit. A large proportion of her damage comes from her direct LC attacks (her A1), which require the presence of thunderclouds summoned by the LC reactions. Additionally, Ineffa has a passive (Moonsign Benediction Passive) that increases her team’s LC damage.
Further information about Lunar-Charged mechanics can be found in the Lunar-Charged section of the Ineffa Quick Guide.
Lunar-Bloom
Lunar-Bloom (LB) is the special Dendro–Hydro reaction that replaces the normal Bloom reaction only when Lauma is in the team (as of the time of writing). When Lunar-Bloom is triggered, one Verdant Dew will be given to the whole team, with a cooldown of 2.5s. Verdant Dew can be used by certain characters to trigger special effects. As of now, the only usage of Verdant Dew is to allow Lauma to deal Lunar-Bloom damage from her Hold Skill.

Unlike Lunar-Charged (LC), the LB reaction does not have any effect on the created Dendro Cores, including its detonating damage or Hyperbloom / Burgeon damage. This means that buffs that increase LB damage (e.g. Lunar-Bloom / Lunar Reaction DMG Bonus) do not increase the rupture damage of Dendro Cores, or the damage of Hyperbloom / Burgeon. However, the triggering of the Bloom reaction in Lauma teams can still proc effects that require Lunar-Bloom / Lunar Reactions, for example the effect of 4pc Night of the Sky’s Unveiling or Lauma’s C1.
The only way to deal LB damage as of now is from Lauma’s kit. Specifically, Lauma’s Hold Skill can deal an instance of LB damage (and additional instances from her C6), similarly to Ineffa’s LC damage. Lauma’s LB damage scales off her EM, CRIT, and Lunar-Bloom DMG Bonus, and it does not cause self-damage like normal Bloom damage does.
Further information about Lunar-Bloom mechanics can be found in the Lunar-Bloom and Verdant Dew section of the Lauma Quick Guide.
New Artifact Sets Overview
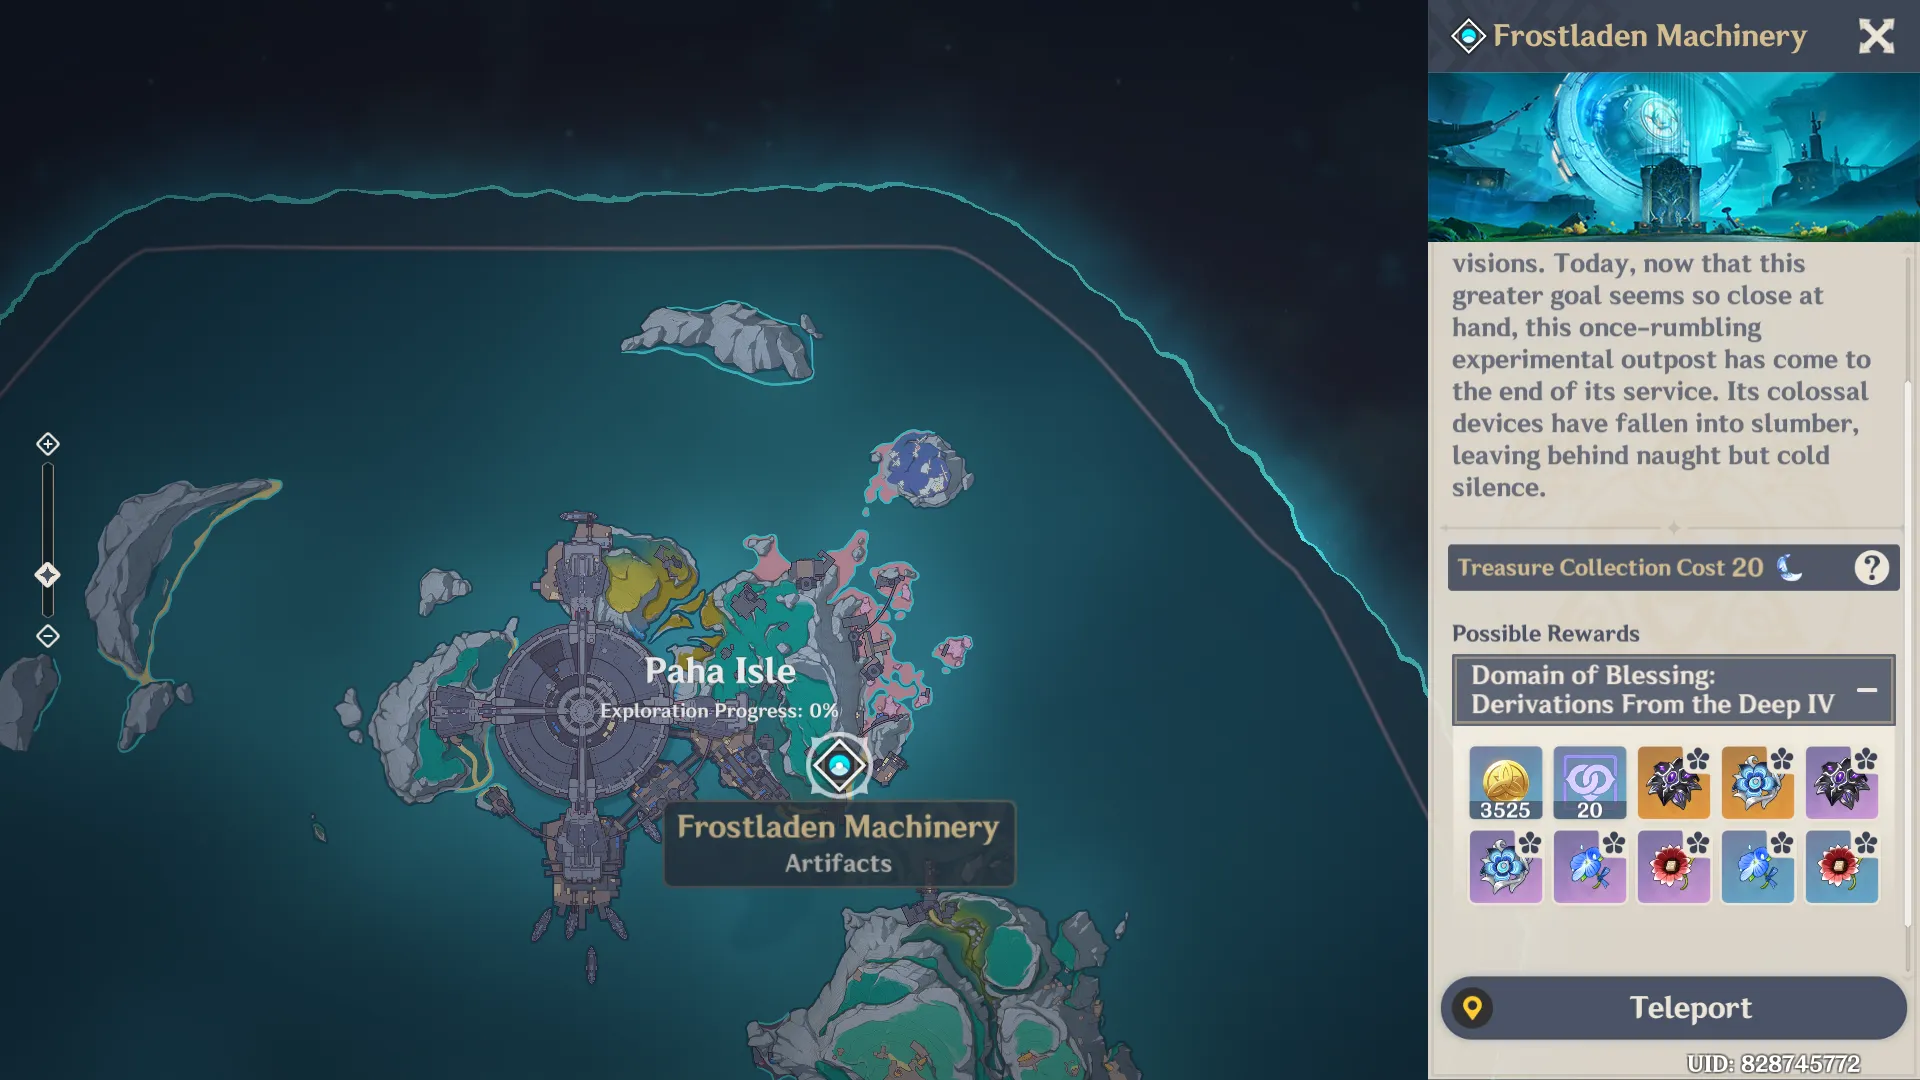
The new artifact sets are found in the Domain of Blessing called “Frostladen Machinery,” located on the Paha Isle, near the Statue of the New Moon.
Nod-Krai’s two new artifact sets are most impactful to characters from Nod-Krai, or characters played in teams with a Nod-Krai teammate.
DISCLAIMER: The following suggestions are based on early analysis. Please wait for further calculations and testing before investing a significant amount of Resin into farming these artifacts.
Silken Moon’s Serenade
 |  |  |  |  |
| 2-Piece Set Bonus | Energy Recharge +20%. |
| 4-Piece Set Bonus | When dealing Elemental DMG, gain the Gleaming Moon: Devotion effect for 8s: Increases all party members’ Elemental Mastery by 60/120 when the party’s Moonsign is Nascent Gleam/Ascendant Gleam. The equipping character can trigger this effect while off-field. All party members’ Lunar Reaction DMG is increased by 10% for each different Gleaming Moon effect that party members have. Effects from Gleaming Moon cannot stack. |
Notes on Silken Moon’s Serenade’s 4-Piece Set Bonus
- Off-field units can still trigger the effect.
- You can only receive either 60 or 120 EM based on the team’s Moonsign Level. Having Ascendant Gleam’s effect (120 EM) does not also give the effect of Nascent Gleam (60 EM).
- The Gleaming Moon: Devotion effect cannot stack, including both the EM buff and the Lunar Reaction DMG Bonus. However, the 10% Lunar Reaction DMG Bonus can stack with the 10% Lunar Reaction DMG Bonus from 4pc Night of the Sky’s Unveiling, which gives a different Gleaming Moon effect — Intent.
Which Character’s Can Use Silken Moon’s Serenade?
Any teams with at least one Nod-Krai / Moonsign character can hold the set for its teamwide EM and Lunar Reaction DMG% buffs. However, it is often reserved for support characters as they usually do not need as many specific stats.
Viable 2pc Set Users
| Characters With High ER Requirements | The 2pc set of Silken Moon’s Serenade can be useful for mixed sets on characters who value meeting their ER requirements. For example: 2pc SMS + 2pc EoSF for Yun Jin. |
Best 4pc Set Users
Aino | Aino herself increases Moonsign Level by 1, so she can always give the team at least 60 EM from the set. Her Burst’s decent duration (13.5s) makes her a good holder for the set from off-field. She also scales off EM (via her A4) and is often used in reaction teams where the EM buff is useful for the party’s and her own reaction damage. |
 Ineffa, Lauma | Good 4pc SMS holder as they both increase Moonsign Level and use EM well. The team will have full uptime on the EM buff as these two have long-lasting off-field Elemental Skill damage. Additionally, both Ineffa and Lauma can have high ER requirements, making the 20% ER from 2pc useful to have. |
| Supports in Aino, Ineffa, Lauma, and Flins Teams | These characters enable the set on all of their teammates. A long-lasting 60 / 120 EM buff along with 10% Lunar Reaction DMG Bonus is often too good of a deal to skip. Some examples of viable holders of 4pc SMS: • In a team of Lauma Nilou Aino Baizhu, either Aino or Baizhu can be on 4pc SMS, with the other one holding 4pc Deepwood. Lauma stays on-field, so 4pc Night of the Sky’s Unveiling is better for her personal damage. • Ororon can use 4pc SMS in a team of Ineffa Kokomi Sucrose. Since 4pc SMS can buff Lunar-Charged damage, it is more valuable than the DMG Bonus from 4pc Scroll that Ororon usually holds. |
Night of the Sky’s Unveiling
 |  |  |  |  |
| 2-Piece Set Bonus | Increases Elemental Mastery by 80. |
| 4-Piece Set Bonus | When nearby party members trigger Lunar Reactions, if the equipping character is on the field, gain the Gleaming Moon: Intent effect for 4s: Increases CRIT Rate by 15%/30% when the party’s Moonsign is Nascent Gleam/Ascendant Gleam. All party members’ Lunar Reaction DMG is increased by 10% for each different Gleaming Moon effect that party members have. Effects from Gleaming Moon cannot stack. |
The 2pc effect of Night of the Sky’s Unveiling (NotSU) provides a straightforward 80 EM buff, while the 4pc further gives 15% / 30% CRIT Rate to the equipping character after a Lunar Reaction is triggered. Similarly to 4pc SMS, the 4pc effect of NotSU also requires the presence of Moonsign: Nascent Gleam / Ascendant Gleam. Additionally, the set also gives a teamwide buff of 10% Lunar Reaction DMG Bonus when the aforementioned CRIT Rate effect is active.
Notes on Night of the Sky’s Unveiling’s 4-Piece Set Bonus
- The effect can only be triggered while on-field.
- You can only receive either 15% or 30% CRIT Rate based on the team’s Moonsign Level. Having Ascendant Gleam’s effect (30% CRIT Rate) does not also give the effect of Nascent Gleam (15% CRIT Rate).
- The Gleaming Moon: Intent’s Lunar Reaction DMG Bonus effect cannot stack even if there are multiple 4pc NotSU holders in the team, but it can stack with the 10% Lunar Reaction DMG Bonus from 4pc Silken Moon’s Serenade, which gives a different Gleaming Moon effect — Devotion.
Which Characters Can Use Night of the Sky’s Unveiling?
Because 4pc NotSU only requires Moonsign and Lunar Reactions to be triggered by any team members, this set is viable on many on-field damage dealers instead of just Nod-Krai DPS units, so long as a Nod-Krai teammate that can enable a Lunar Reaction is used. It is expected for upcoming Nod-Krai on-field DPS characters to use this set as their BiS.
Viable 2pc Set Users
| EM-Scaling Characters and Reaction DPS Units | The 2pc set of Night of the Sky’s Unveiling can be useful for characters that have EM scaling in their kits, or for units that deal considerable reaction damage. For example: 2pc NotSU + 2pc ATK% for Ineffa or Childe. |
Best 4pc Set Users
Flins | Flins’s teams run 2 Nod-Krai teammates to enable Moonsign: Ascendant Gleam and unlock his kit’s potential. As such, he can always make full use of 4pc NotSU and has it as his absolute best-in-slot set. |
| On-Field DPS Units in Ineffa Lunar-Charged Teams | Ineffa enables Lunar-Charged reactions and increases Moonsign by 1. The DPS unit in her team usually either triggers Lunar-Charged or triggers Vaporize and Overloaded off the Hydro–Electro double aura. This makes 4pc NotSU a good set on them with 80 EM, 15% CRIT Rate, and 10% teamwide Lunar-Charged DMG. With an additional Moonsign character, 4pc NotSU can provide up to 30% CRIT Rate, making it BiS for many units. Some examples of viable 4pc NotSU holders: • Ayato, Childe, or Sethos in an Ineffa Lunar-Charged team. • Arlecchino, Yoimiya, or Hu Tao in an Ineffa Overvape team. |
| On-Field DPS Units in Lauma Lunar-Bloom Teams | Similar to Ineffa, Lauma enables 4pc NotSU with her Lunar-Bloom reactions and Moonsign nature. 4pc NotSU users are often DPS units that deal substantial Talent damage. Some examples of viable 4pc NotSU holders: • Alhaitham, Tighnari, or Cyno in a Lauma Quickbloom team. |
Niche 4pc Set Users
Lauma | 4pc NotSU can be used to increase Lauma’s on-field playstyle’s personal damage, especially her Lunar-Bloom damage. Since the CRIT Rate effect of 4pc NotSU doubles at Moonsign Level 2, this set becomes stronger on Lauma with a second Moonsign character. |
Ineffa | 4pc NotSU is the best set for Ineffa if she plays on-field or can enter the field every 4s to refresh the passive. |
New Craftable Weapons Overview
Nod-Krai’s craftable weapons provide various secondary stats and passives that benefit different types of characters. Weapon descriptions are stated on a range of R1–R5.
DISCLAIMER: The following suggestions are based on early analysis. Please wait for further calculations and testing before investing in billets and ores to craft or refine these weapons.
Serenity’s Call (Sword)
| Base ATK: 454 | ER: 61.3% |
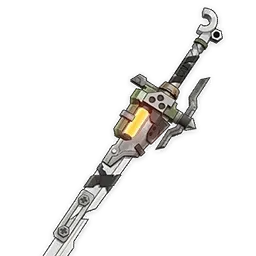 | Upon causing an Elemental Reaction, increases Max HP by 16–32% for 12s. When the party’s Moonsign is Ascendant Gleam: Max HP from this effect is further increased by 16–32%. This effect can be triggered even if the equipping character is off-field. |
Serenity’s Call is a good free-to-play option for HP-scaling Sword characters who want to use their Elemental Burst, as HP% with ER is a rare combination of stats to get from a Sword. This weapon mainly synergizes well with Nilou, who previously had mostly mediocre 4-star options, but it is good with most of the HP-scaling Sword users that use their Elemental Burst.
Best Users
Nilou | Serenity’s Call offers slightly less HP than a Lv. 90 Dockhand’s Assistant when the party’s Moonsign isn’t Ascendant Gleam. However, the additional ER can let Nilou use her Elemental Burst more often, which is always welcomed, but especially in Bloom teams where the Hydro character’s application is more limited. |
 Furina | Serenity’s Call is a very notable option for Furina’s damage. It is exceptionally good when the team has Moonsign: Ascendant Gleam, Furina has high ER requirements, and her personal damage is important. It performs similarly to Festering Desire without its passive, but surpasses it with the full passive from Ascendant Gleam. |
  Dahlia, Layla | Dahlia greatly appreciates the ER for using his Elemental Burst in order to deploy his HP-scaling shield, making this a pretty good weapon for him. While Layla usually has relatively low ER requirements, the additional HP can make her already-strong shield even better. |
Niche Users
 Kirara, Shinobu | Kirara and Shinobu are defense-oriented teammates whose shield / healing scales with HP and who often want to use their Elemental Burst, but they already have other craftable weapons. |
Master Key (Claymore)
| Base ATK: 454 | ER: 61.3% |
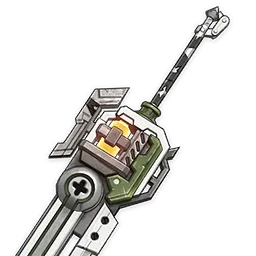 | Upon causing an Elemental Reaction, increases Elemental Mastery by 60–120 for 12s. Moonsign: Ascendant Gleam: Elemental Mastery from this effect is further increased by 60–120. This effect can be triggered even if the equipping character is off-field. |
Master Key can be useful for characters who want both ER and EM. However, it is only competitive with other options at Moonsign: Ascendant Gleam. What’s more, there are many 4-star Claymores that generally just perform better than Master Key, for example Favonius Greatsword and Flame-Forged Insight.
Best Users
 Dehya | With Aino and Ineffa enabling double aura plus Ascendant Gleam, Master Key is very potent on Dehya for its high ER secondary stat and up to 240 EM. |
Viable Users
Aino | Aino appreciates the ER secondary stat and uses the EM passive quite well due to her EM-scaling Burst and her reaction damage. However, because Aino’s personal damage makes up a small part of team DPS, using Favonius Greatsword to help the team’s ER requirements is often better. |
 Sayu | For Sayu, this Claymore increases her reaction damage and healing, on top of the ER stat to help with getting Burst back. Still, she suffers from the same issue as Aino, where using Favonius Greatsword for team utility is usually more beneficial. |
  Dori, Razor | Reaction damage dealers that have fairly high ER requirements and contribute more team DPS than Aino and Sayu. They can use Master Key decently if players do not have Flame-Forged Insight. |
 Kaveh | Kaveh wants both ER (for his high Burst cost) and EM (for his healing and Bloom damage). However, the impact of having more EM on him is not as significant as generating Clear particles for the whole team with Favonius Greatsword. |
Prospector’s Shovel (Polearm)
| Base ATK: 510 | ATK%: 41.3% |
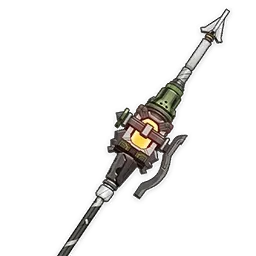 | Electro-Charged DMG is increased by 48–96%, and Lunar-Charged DMG is increased by 12–24%. Moonsign: Ascendant Gleam: Lunar-Charged DMG is increased by an additional 12–24%. |
Prospector’s Shovel is the first craftable Polearm that gives an ATK% secondary stat. This alone makes it a viable option for many ATK-scaling Polearm users that previously did not have good craftable weapons to use, i.e. Emilie, Xiao, and Escoffier. Furthermore, this weapon provides a large amount of Reaction DMG Bonus to Electro-Charged and Lunar-Charged. This mostly makes it a good option for Ineffa and Flins in teams with Moonsign: Ascendant Gleam.
Lunar-Charged DPS
Ineffa | Ineffa’s overall best craftable at Moonsign: Nascent Gleam, and her best F2P option at Moonsign: Ascendant Gleam, losing only to Deathmatch and Ballad of the Fjords among the 4-star options. |
Flins | Prospector’s Shovel is also Flins’s best craftable Polearm. It loses out only to Deathmatch and Ballad of the Fjords among 4-star options. Flins’s team should already have Moonsign: Ascendant Gleam, so this weapon’s passive is fully active without issue. |
Viable Users
 Xiao | Prospector’s Shovel is a decent F2P option if players have missed out on Missive Windspear. Xiao cannot utilize the weapon’s passive most of the time. |
 Emilie | Emilie’s 4-star selections are lackluster, so even an ATK% stat stick like Prospector’s Shovel is still notable enough for her. It performs equal to Missive Windspear as Missive’s passive is unreliable to trigger with Emilie. |
 Escoffier | Escoffier tends to have fairly high ER requirements in many teams, so she can use ER Polearms better than the two above, making Prospector’s Shovel only recommended in low-ER-requirement scenarios where she does not have access to 5-star weapons or Deathmatch. |
Blackmarrow Lantern (Catalyst)
| Base ATK: 454 | EM: 221 |
 | Bloom DMG is increased by 48–96%, and Lunar-Bloom DMG is increased by 12–24%. Moonsign: Ascendant Gleam: Lunar-Bloom DMG is increased by an additional 12–24%. |
An EM secondary stat with a Bloom-damage-buffing passive limits this Catalyst to work on Hydro / Dendro units in a (Nilou) Bloom team only. The Lunar-Bloom DMG Bonus buff (which is improved with Moonsign Level 2) only specifically works on Lauma as of the time of writing.
Best Users
Lauma | Blackmarrow Lantern is one of Lauma’s best weapons to use, especially at lower ER requirements where Etherlight Spindlelute’s ER loses its value. |
Viable Users
 Kokomi, Barbara | Kokomi and Barbara can use this Catalyst to increase their Bloom damage in a Nilou Bloom team. However, it is better to use a high-refinement Sacrificial Fragments on them instead, for different reasons: for Kokomi, being able to recast your Skill allows better adaptation if enemies run away from her jellyfish’s range; for Barbara, Sacrificial Fragments decreases the cooldown of her Elemental Skill, thus enabling shorter rotations and improving healing output. |
| EM-Scaling Characters and Reaction DPS Units | Blackmarrow Lantern is a simple EM stat stick for other characters, although there are usually better options to choose, like Sacrificial Fragments or Wandering Evenstar. |
Snare Hook (Bow)
| Base ATK: 454 | ER: 61.3% |
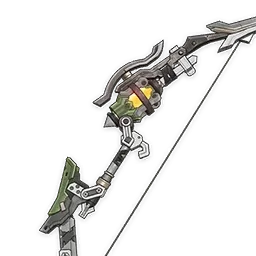 | Upon causing an Elemental Reaction, increases Elemental Mastery by 60–120 for 12s. Moonsign: Ascendant Gleam: Elemental Mastery from this effect is further increased by 60–120. This effect can be triggered even if the equipping character is off-field. |
Similar to Master Key, Snare Hook can be used on characters that want both ER and EM, which essentially means reaction DPS units with high ER requirements. However, there are very few Bow users like this, so Snare Hook is generally not as useful as Master Key.
Viable Users
 Yelan | Snare Hook is a decent option for Yelan in a Nilou Bloom team. It increases her Bloom damage with the EM passive and helps her reach ER requirements easier. |
 Venti | This Bow gives Venti a balance between EM and ER, which are the most relevant stats for his Swirl DPS playstyle. Still, Venti’s ER needs are often in the medium range, so he can afford to run Stringless — a more damaging option — instead. |
   Faruzan, Gorou, Collei | These characters can use the Bow as an ER stat stick and nothing else. Because Favonius Warbow is always better, it is only notable if your Favonius Warbow is busy elsewhere. |
New Story-Reward 4-Star Weapon Overview
Moonweaver’s Dawn (Sword)
| Base ATK: 565 | ER: 27.6% |
 | Increases Elemental Burst DMG by 20–40%. When the equipping character’s Energy Capacity does not exceed 60/40, their Elemental Burst DMG is increased by an additional 16–32%/28–56%. |
Moonweaver’s Dawn can be obtained from the World Quest “Echoes of an Unfinished Past.” It gives an ATK% secondary stat and a passive that incentivizes using it on characters who scale with ATK, have a low Energy cost on their Elemental Burst, and deal a large part of their damage through said Burst. As of Version “Luna I,” it cannot be refined.
Best Users
 Skirk | This weapon is one of Skirk’s best 4-star options in teams where she acts as a quickswap Burst DPS, as her Elemental Burst is an extremely powerful multi-hit nuke that consumes all her Serpent’s Subtlety points instead of being a traditional one that costs Energy. Therefore, she has unconditionally full uptime on this weapon’s passive, making it one of the better 4-star weapons for this role. |
Not Recommended
 Keqing | Since Keqing’s Charged Attacks represent a high amount of her personal damage, this weapon isn’t particularly useful compared to her 4-star alternatives. It can perform better in teams where she’s played as a quickswap DPS without taking much field time, but these teams aren’t common. |
 Ayaka | While a large majority of Ayaka’s damage comes from her Elemental Burst, Moonweaver’s Dawn just performs worse than Finale of the Deep in teams without a healer. |
New Event-Exclusive 4-Star Weapons Overview
Etherlight Spindlelute (Catalyst)
| Base ATK: 510 | ER: 45.9% |
 | For 20s after using an Elemental Skill, the equipping character’s Elemental Mastery is increased by 100–200. |
Etherlight Spindlelute can be used on characters that build EM and have high ER requirements. Its main rival in the EM–Energy Catalyst category is Sacrificial Fragments. Sacrificial Fragments provides a large amount of EM, and its Skill refresh passive allows the holder to cast another Skill, whose particles often help recharge the Burst better than 45.9% ER. However, Etherlight Spindlelute can be more beneficial to characters whose Skill generates particles over time and who do not gain much from casting two Skills in sequence (Lauma, Nahida).
Best Users
Lauma | Lauma’s best F2P weapon, and often second only to her signature, Nightweaver’s Looking Glass. The reason it performs better than Sacrificial Fragments is because Lauma’s Skill does not generate particles on cast, but on the damage-over-time hit instead. Additionally, Lauma’s Hold Skill requires Verdant Dew to deal Lunar-Bloom damage, so casting it twice in quick succession does not give the second Hold Skill many or any Verdant Dew to deal damage. |
Nahida | A decent option that helps Nahida’s ER requirements in teams where she uses her own EM to buff the on-fielder. Similar to Lauma, a second Skill cast from Sacrificial Fragments does not do much for her. |
Kokomi, Barbara | This weapon helps Kokomi’s and Barbara’s ER requirements in Nilou Bloom teams and gives them a large amount of EM. Sacrificial Fragments can still be sometimes preferred for Skill repositioning (Kokomi) and better Skill uptime and healing (Barbara). |
Viable Users
| EM-Scaling Characters and Reaction DPS Units | Similar to Blackmarrow Lantern, Etherlight Spindlelute can be used as a straightforward EM stat stick. |
New Event Wish-Exclusive Weapon Overview
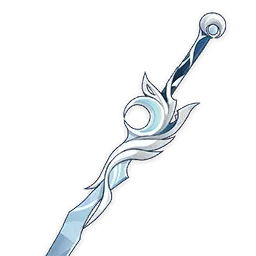
Nightweaver’s Looking Glass (Catalyst)
| Base ATK: 542 | EM: 265 |
 | When the equipping character’s Elemental Skill deals Hydro or Dendro DMG, they will gain Prayer of the Far North: Elemental Mastery is increased by 60 for 4.5s. When nearby party members trigger Lunar-Bloom reactions, the equipping character gains New Moon Verse: Elemental Mastery is increased by 60 for 10s. When both Prayer of the Far North and New Moon Verse are in effect, all nearby party members’ Bloom DMG is increased by 120%, their Hyperbloom and Burgeon DMG is increased by 80%, and their Lunar-Bloom DMG is increased by 40%. This effect cannot stack. The aforementioned effects can be triggered even if the equipping character is off-field. |
Lauma’s signature and best-in-slot weapon. It gives a heavy amount of EM through its secondary stat and passive, although the conditions to trigger it are quite limited both in terms of character and team types. For the “Prayer of the Far North” effect, Lauma, Kokomi, and Nahida are the only notable users that can trigger it. However, the second effect, “New Moon Verse,” and the rest of the passive (Bloom-related DMG Bonus buffs) can only be activated by having Lauma in the team.
Best Users
Lauma | Lauma’s best-in-slot weapon. She can easily trigger and maintain all effects of the passive, gaining herself 120 EM and buffing the team with a hefty amount of Bloom-related Reaction DMG Bonus. There is little reason to use Nightweaver’s Looking Glass on someone other than Lauma in her teams. |
Viable Users
Kokomi | Without Lauma, Kokomi can only receive 60 EM from the passive, making the weapon just a decent option for her in Nilou Bloom teams. |
Nahida | Similarly to Kokomi, Nahida uses this weapon as a stat stick for a total of 325 EM. |
| EM-Scaling Characters and Reaction DPS Units | For other Catalyst users, Nightweaver’s Looking Glass is a plain 265 EM stat stick that can be used but is not recommended to pull for. |
Bloodsoaked Ruins (Polearm)
| Base ATK: 674 | CRIT Rate: 22.1% |
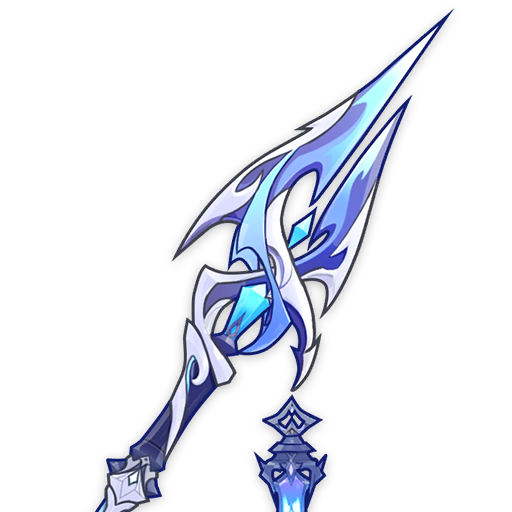 | For 3.5s after using an Elemental Burst, the equipping character’s Lunar-Charged DMG dealt to opponents is increased by 36%. Additionally, after triggering a Lunar-Charged reaction, the equipping character will gain Requiem of Ruin: CRIT DMG is increased by 28% for 6s. They will also regain 12 Elemental Energy. Elemental Energy can be restored this way once every 14s. |
Flins’s signature and best-in-slot weapon. However, Bloodsoaked Ruins’ restrictive trigger conditions make it a niche Polearm for other characters. Currently, the weapon passive can only be triggered and utilized in a Lunar-Charged team with Flins or Ineffa. Without the passive, Bloodsoaked Ruins is just another 5-star CRIT stat stick.
Best Users
Flins | Flins’s best-in-slot weapon. While the Lunar-Charged DMG Bonus is not active for his whole field time, it buffs his Elemental Burst, which is the most important part of his damage. He can also easily maintain the CRIT DMG buff, and the Flat Energy refund helps greatly with his fairly high ER requirements. |
Viable Users
Ineffa | Ineffa has trouble maintaining the uptime of this Polearm’s passive. She only uses her Burst at most every 15s, so the Lunar-Charged DMG Bonus effect is almost non-existent with its 3.5s duration. The CRIT DMG buff also only lasts 6s, and it can only be activated while she is on-field. The only thing that works well is the 12 Flat Energy regain, which decreases her ER requirements by a decent amount. Overall, this weapon is only a decent 5-star option on Ineffa for general use, although its performance increases if Ineffa is played as an on-field DPS |
 Cyno, Raiden | Bloodsoaked Ruins is a good pick for Cyno and Raiden in an Ineffa Lunar-Charged team. While the Lunar-Charged DMG Bonus effect does not work well on them, the CRIT DMG buff and Energy refund do, and both Cyno and Raiden appreciate these effects. |
Credits
Writers:
- acerbus114, pjeljr
Contributors: ren718.exe, lostguide, auraolis