
Updated for Version 7.0

Stellar Glimmer reactions are a new set of Elemental Reactions enabled when characters with a Stellar Linchpin are in the party. These character’s passives convert pre-existing reactions into their Stellar variants. These new reactions bring new mechanics and damage formulas, which this guide aims to explain and better aid character and team building.
Definitions
Stellar Glimmer – Stellar-Conduct and/or Stellar Swirl
Aura – The element that is currently on the target.
Trigger – The application of an element onto an existing aura, which triggers a reaction.
Gauge – The amount of an element (Typically applied in units of 1U, 2U, or 4U).
Table of Contents
Stellar-Conduct
When Electro is applied onto an enemy with Cryo aura, or vice versa, Stellar-Conduct (SSC, abbreviation of Stellar Superconduct) is triggered. After triggering, a Starlight Prism will be created, transforming the area into a Polestar Field. Certain characters inside the Polestar Field will enter the Radiance: Stellar-Conduct state, enhancing their Talents. The Polestar Field will also grant buffs to the party and lower Physical RES of enemies within the field. Applying Cryo and Electro onto opponents will increase the buffs given. The reaction itself does not deal damage and the only way to deal SSC damage is through character abilities.
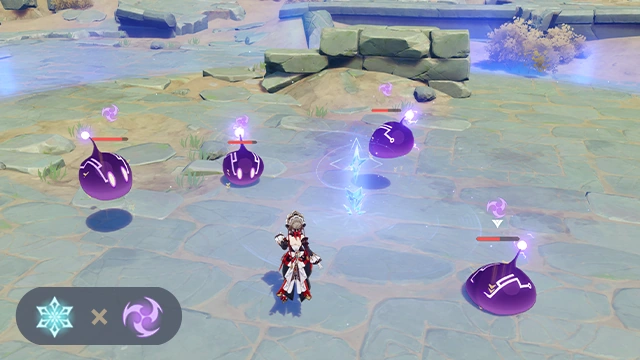
After a Polestar Field is created, hits from Cryo and Electro attacks that apply an element (as limited by ICD) are recorded by the field. The initial hit that creates the Polestar Field is not included. Every 4s, the count is reset, and buffs lasting 4s are granted based on the number of hits recorded.
| Number of Hits | 0 | 1 | 2 | 3 | 4 | 5 | 6 | 7 | 8 | 9 | 10 | 11 | 12 |
| Reaction Multiplier | 1 | 1.45 | 1.5 | 1.55 | 1.6 | 1.65 | 1.7 | 1.75 | 1.8 | 1.85 | 1.9 | 1.95 | 2 |
| Cryo and Electro DMG Bonus | 20% | 29% | 30% | 31% | 32% | 33% | 34% | 35% | 36% | 37% | 38% | 39% | 40% |
| Physical RES Shred | 40% | ||||||||||||
As shown in the table above, the Reaction Multiplier (see formula section) and Cryo and Electro DMG Bonuses scale with the number of hits recorded.
This reaction is currently only enabled by the following characters:
- Sandrone
- Odette
- Cryo MC
Additional Information
- SSC damage can be either Cryo or Electro type damage (indicated by text color).
- Applying Elements on multiple enemies with the same attack only grants one stack.
- If there is no Polestar Field present, triggering SSC on multiple targets will summon the field without stacks.
- Cryo application from Cryo Swirl and Stellar Vortex explosion (see Stellar Swirl section) also count for Polestar Field stacks.
Stellar Swirl
When Anemo is applied to an enemy with Cryo aura, Stellar Swirl (SSW) is triggered. Upon triggering this reaction, one instance of Stellar Anemo damage is dealt, and a level 1 Stellar Vortex is created. After 3s, the Vortex explodes, dealing one instance of Stellar AoE Cryo damage. After a Stellar Vortex is created, triggering SSW two or more times causes the Vortex to grow into a level 2 Vortex, which causes the explosion to deal increased damage across a larger AoE.
The damage dealt is based on all characters who applied Cryo and all Anemo characters that triggered the reaction. Triggering SSW will grant party members the Radiance: Stellar Swirl state, enhancing certain characters’ Talents.
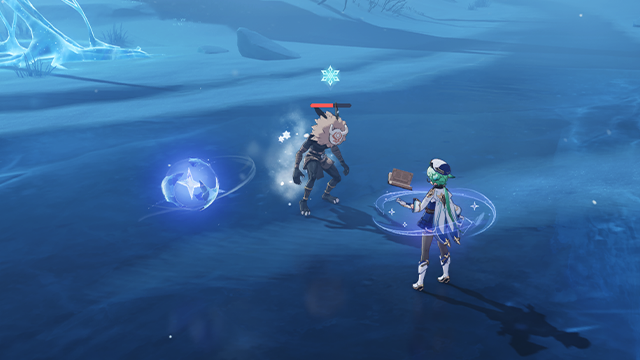
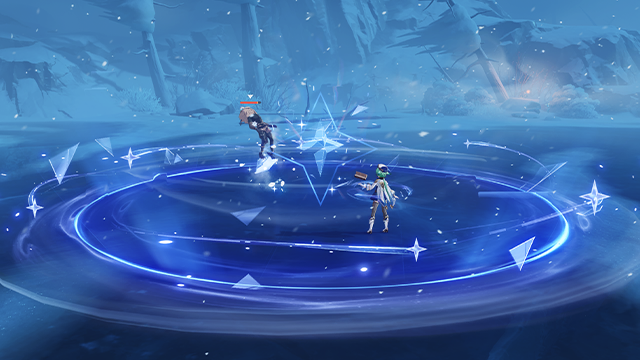
Only one Stellar Vortex can exist within a certain area at a time. Five additional triggers cause the Vortex to detonate prematurely and further increases the AoE (with no change in damage).
For 5s after a Stellar Vortex explodes, it grants characters the ability to perform a high jump. This can only be performed once per Vortex explosion.
This reaction is currently only enabled by the following characters:
- Sandrone
- Odette
- Cryo MC
Additional Information
- SSW damage can be either Cryo or Anemo type damage (indicated by text color).
- The initial Anemo hit does not apply an element while the Cryo explosion applies 1U of Cryo.
- If there is no Stellar Vortex present, triggering multiple Swirls in AoE from a single attack will only spawn a level 1 Vortex.
- Each individual SSW in AoE adds to the Vortex.
Damage Formulas
Level Multiplier
| Level | 10 | 20 | 30 | 40 | 50 | 60 | 70 | 80 | 90 | 95 | 100 |
| Multiplier | 34.14 | 80.58 | 136.29 | 207.38 | 323.60 | 492.88 | 765.64 | 1077.44 | 1446.85 | 1561.47 | 1674.81 |
Stellar-Conduct
As previously stated, currently the only way to deal SSC damage is through character abilities. Direct SSC damage is calculated as follows:
As stated in the SSC section, the Reaction Multiplier scales with the number of Cryo and Electro applications recorded by the Polestar field.
Stellar Swirl
Two different types of SSW damage exist: Reaction and Direct SSW damage. Reaction SSW damage is dealt by both the single Anemo damage instance and the Stellar Vortex explosion. Direct SSW damage is dealt directly by a character through their Talents without triggering a reaction. This is noted in Character Talent descriptions, such as Odette’s Elemental Skill or Mizuki’s Witch’s Revelation Talent.
For Reaction SSW damage, the damage calculation is done in two steps. First, an individual calculation is performed for all characters that have contributed to the reaction by applying either Cryo or Anemo. The formula for individual calculation is as follows:
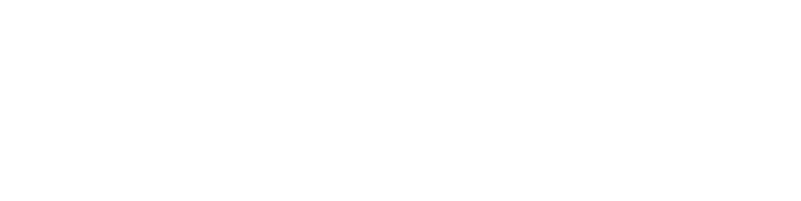
The Reaction Multiplier is different for the Anemo and Cryo hits:
- For the initial Anemo hit, the Reaction Multiplier is always 0.75.
- For the Cryo explosion hit, the Reaction Multiplier changes based on the level of the Stellar Vortex.
- For a level 1 Stellar Vortex, the Reaction Multiplier is 2.
- For a level 2 Stellar Vortex, the Reaction multiplier is 3.
Second, the individual damage is ranked from highest to lowest and summed into the final value as follows:

We can see that the highest individual damage is most significant, and the following contributors get their damage reduced by 1/2 and 1/12 respectively. This means that while everyone does contribute, only the highest and second highest contributors’ damage really matters for the final result. This punishes players less for running support characters that are not built for Stellar damage, as their damage contribution is already insignificant.
Direct SSW damage is calculated as follows:
Additional Information
- The %EM Bonus for these reactions uses the same formula as shown below:

- Stellar Glimmer Reaction Base DMG Bonus is not to be confused with ordinary Reaction DMG Bonus. It is currently only provided by characters with certain Passive Talents.
- Reaction DMG Bonuses can be obtained through character kits or equipment. Some examples of this would be the passive effect of Cashflow Supervision, the 4pc effect of Disenchantment in Deep Shadow, or Diona’s C6 (after completing Witch’s Revelation).
- Stellar Glimmer Reaction Elevation is currently only obtainable through Constellations of limited 5-star units.
- Characters can only be affected by one Radiance state at a time. When more than one state can be triggered, Radiance: Stellar-Conduct will apply first.
- These reactions, as shown in the formulas above, are affected by Electro, Cryo, and Anemo RES, respectively.
- They are not affected by enemy DEF (nor DEF Shred).
- Elemental CRIT Bonuses also apply to the respective Stellar Glimmer Reaction damage (e.g. Sara’s C6, Faruzan’s C6).
- These reactions are not affected by regular Elemental DMG Bonus nor Common DMG Bonus (e.g. Elemental Goblets, Furina’s DMG Bonus, Elemental Skill/Burst Bonus)
- Direct Stellar Glimmer damage does not scale with level.
- At the time of writing, there are very limited sources of Additive Base DMG Bonus for Stellar Glimmer Reactions. Note that unless explicitly stated to be for Stellar Glimmer damage, generic Additive Base DMG buffs do not apply to Stellar Glimmer damage. The current sources are as follows:
- Qiqi’s C6 (after completing Witch’s Revelation)
- Cyno’s A4 (after completing Witch’s Revelation)
- Mizuki’s C1 (only for SSW damage triggered from reaction)
Gauge Mechanics
Though more reactions have been added, the scope of Elemental Gauge Theory remains largely unchanged. The gauge mechanics for both Stellar Reactions follow the same pattern as their non-Stellar counterparts; however, there is one unique characteristic to Stellar Swirl: triggering SSW does not spread Cryo onto nearby opponents. Instead, the Vortex applies 1U of Cryo upon explosion (as previously stated). This means you will have more Cryo application in single-target.
Frequently Asked Questions
How exactly do I build my characters for Stellar Glimmer Damage?
For most characters that can deal direct Stellar Glimmer damage, the majority of their damage comes from the aforementioned. To maximize their direct damage, stacking CRIT and their scaling stat (such as ATK for Sandrone, Yae, Odette) is recommended. While EM does increase direct damage due to the EM bonus as previously shown, it stacks additively with Stellar Glimmer% buffs and there is often an abundance of both EM and Stellar% buffs available. As such, EM should be treated as usable rolls, but should not be prioritized. (Note: Characters that scale directly with EM, such as Mizuki, are an exception to this.)
For characters who cannot deal direct SSC damage, prioritize building for their usual Talent damage or buffing stats.
For characters that cannot deal direct SSW damage, EM can be treated as a nice stat bonus but should not be prioritized. CRIT should still be prioritized as it increases both Talent and SSW damage.
Does DMG% bonus help Stellar Damage?
No. As previously stated under the Additional Information section of the damage formulas, ‘regular’ damage bonuses do not apply to Stellar damage. This includes elemental damage goblets, Furina’s common damage bonus buff, as well as any talent typed damage bonuses such as Elemental Skill or Burst bonus. For example, any Elemental Burst bonus given to Sandrone will not increase the SSC damage done by her Elemental Burst. Any DMG% buff that does not explicitly state it is for SSC, SSW or Stellar Glimmer does not apply to Stellar Glimmer damage. This also applies to Additive Damage bonuses as well, such as Qiqi’s C6. Unless explicitly stated, generic Additive Damage buffs (such as Shenhe’s Quills) do not apply.
Do I need level 90 for Stellar Glimmer damage?
For direct SSC DPS units, level 90 is quite a small increase compared to other Transformative Reaction damage dealers. This is because direct damage does not have a Level Multiplier unlike most other Transformative Reactions.
The above is still relevant for direct SSW damage dealers. While Reaction SSW damage will be present in SSW teams, the majority of SSW damage is still direct. Thus, level 90 is not a high priority for SSW units.
Credits
Writer(s): ren718.exe
Contributors: acerbus114, idkanonymized