A Navia Guide
Written by Rezmir
Updated for Version “Luna IV”

“From mediating disputes and providing protection, to solving conundrums — you name it, Spina di Rosula does it. And I, Navia, have the honor of being its renowned president… …Though those who play by our rules call me ‘Boss.’”
Table of Contents
Introduction
Navia is a 5-star Geo Claymore user who empowers her Elemental Skill through the Crystallize reaction, offering unique gameplay. She is an on-field damage dealer, using her Gunbrella to deal out big hits. This guide will review Navia’s best weapons, best artifact sets, best teams, Talent priority, combos, preferred artifact stats, and more!
Why Play Navia?
“Nice to meet you! I am Navia, the esteemed president, leader, commander-in-chief, executive director, and Boss of Spina di Rosula. You strike me as somebody special - a person of character. Something tells me that this is the beginning of a long partnership between us… perhaps even as long as all the titles in front of my name.”
Pros
- Easy to play with plenty of room for optimization
- Front-loaded damage with big numbers
- A good option for Geo-favoring content
- Unique kit focusing on the Crystallize reaction
- Flexible team building can accommodate various enemy mechanics
Cons
- Underwhelming Constellations
- Highly contested teammates (e.g. Furina, Bennett, Xilonen)
- Limited AoE, although this can be alleviated with proper positioning
- Bennett is difficult to replace
- Using a Geo teammate with constructs can require some practice due to their fragile nature
Infographic
Glossary
FAQ
What is Navia’s rotation length?
Navia’s rotation time is flexible and will be dictated by her team. In some cases, despite Navia’s cooldown for two Skills being effectively 18s, she can run shorter rotations, like 16–17s, because of her Skill having two charges. Eventually these teams will run into cooldown issues, which can be problematic if you do not start with both Skill charges off cooldown (e.g. when you need to generate Energy at the start of a fight).
Why is Bennett often used in Navia’s teams?
Bennett’s buff is ridiculous; the sheer amount of stats he provides Navia is unmatched for her personal damage.
Should I use Sacrificial Greatsword?
No. The value gained from an extra Skill is outperformed by the stats that more offensive weapons provide.
When does Navia use 2 or 3 Skills?
Some teams allow for rotations that utilize a third Skill every second or third rotation (depending on how well you can execute said rotations). Using a third Skill can also be useful to finish off a low-health enemy, which lets you avoid having to set up another rotation.
When does Navia tap her Skill and when does she hold it?
As a general rule, you should tap your Skill when you’re at 6 Shrapnel stacks already to avoid wasting stacks for the next Skill, and short hold (shE) it otherwise. This is because holding her Skill pulls nearby Crystallize shards to Navia. Note that, if Bennett is present, using Navia’s Tap Skill immediately after she takes the field can cause that Skill to not receive Bennett’s buff because its application is in discrete ticks.
Is Xilonen/other 5-star unit required?
While Xilonen is a sizable upgrade, she is by no means necessary. Navia has very accessible 4-star teammates like Kachina, who is obtainable for free, or Bennett and Fischl, both of whom can be purchased from the Starglitter Shop.
What should I prioritize, Navia’s weapon or Xilonen?
Xilonen is generally the preferred choice as Navia has access to good F2P options like Tidal Shadow or UOMMS.
How much off-field PHEC application do Navia’s teams require?
Crystallize has a global ICD of 1s; this means Navia’s teams can get away with quite little off-field PHEC application like Furina’s or even Mona’s.
What is Navia’s strongest team?
Navia doesn’t have one clear-cut best team for all scenarios. In fact, one of her biggest strengths is that her teams can accommodate nearly any functional team core — meaning you will be able to adjust your team based on the content ahead (provided you have the necessary characters).
Playstyles
On-field Damage Dealer
Most of Navia’s teams focus on her personal damage, concentrating the majority of the team's resources on buffing her as much as possible. This playstyle utilizes her kit to its fullest extent, making use of her Geo Normal Attacks after each Skill usage. Around half of her damage is located in her Skill, which is buffed by collecting Crystallize shards, so rotations and teams will aim to maximize Crystallize shard generation.
Quickswap Damage Dealer
Due to Navia’s damage being front-loaded into her Skills, she can cut her field time short to allow another unit to make use of their on-field capabilities. Limiting Navia’s field time also lowers Crystallize shard generation (provided the other on-fielder isn’t also Geo) as she will not be able to fully utilize her Geo Normal Attacks. This playstyle is generally less popular and doesn’t maximize Navia’s potential, so it will not be the main focus of this guide, but will still be covered where relevant.
Talents
Talent Priority
 >
>  >
> 
Skill > Normal Attack > Burst
Around half of Navia’s damage comes from her Skill, and thus should be prioritized when leveling her Talents. Her Normal Attack Talent contributes meaningful damage because of her A1 Passive, and should be leveled after. Her Burst does relevant damage, albeit less than her Normal Attacks, and should be leveled last. In teams where Navia does not utilize her Normal Attacks as much, level her Burst second; in teams where Navia does not use any Normal Attacks at all, this Talent can be ignored entirely. Navia’s Plunge playstyle elevates the importance of her Normal Attack Talent, even outshining her Skill if played optimally.
Assumptions:
Navia - Xilonen - Furina - Bennett
4pc Nighttime
ATK% | Geo% | CR; Tidal Shadow R5
You can find calcs here: Navia Calcs
| Talent level | DMG relative to 9/9/9 |
| 10/10/10 | 106% |
| 9/9/9 | 100% |
| 8/10/8 | 100% |
| 6/9/6 | 91% |
| 9/6/6 | 88% |
| 6/6/9 | 84% |
| 1/9/1 | 79% |
Talent Overview
Normal Attack | Blunt Refusal
Talent Description
Normal Attack
Performs up to 4 consecutive strikes.
Charged Attack
Drains Stamina over time to perform continuous spinning attacks against all nearby opponents.
At the end of the sequence, performs a more powerful slash.
Plunging Attack
Plunges from mid-air to strike the ground below, damaging opponents along the path and dealing AoE DMG upon impact.
Navia’s Normal Attacks are a decent portion of her damage due to her Skill granting her 4s — further extended via hitlag — of both a Geo Conversion and a Normal Attack DMG Bonus through her A1. This incentivizes weaving Normal Attacks after using her Skill for the damage and Crystallize shard generation. Her third Normal Attack has the rare property of being considered a projectile by the game, and its hitbox will stay active even if it is dash cancelled shortly after starting the animation. This can be particularly relevant in some of her combos to get more damage out of her 4s Conversion duration. Xianyun enables Navia to utilize her stronger Plunging Attacks.
Elemental Skill | Ceremonial Crystalshot
Talent Description
When a character in the party obtains an Elemental Shard created from the Crystallize reaction, Navia will gain 1 Crystal Shrapnel charge. Navia can hold up to 6 charges of Crystal Shrapnel at once. Each time Crystal Shrapnel gain is triggered, the duration of the Crystal Shrapnel charges you already have will be reset.
When she fires, Navia will consume all Crystal Shrapnel charges and open her elegant yet lethal Gunbrella, firing multiple Rosula Shardshots that can penetrate opponents, dealing Geo DMG to opponents hit.
When 0/1/2/3 or more charges of Crystal Shrapnel are consumed, 5/7/9/11 Rosula Shardshots will be fired respectively. The more Rosula Shardshots that strike a single opponent, the greater the DMG dealt to them. When all 11 Rosula Shardshots strike, 200% of the original amount of DMG is dealt.
In addition, when more than 3 charges of Crystal Shrapnel are consumed, every charge consumed beyond those 3 will increase the damage dealt by this Gunbrella shot by an additional 15%.
Hold
Enter Aiming Mode, continually collecting Elemental Shards created by Crystallize reactions. When released, fire Rosula Shardshots with the same effect as when the Skill is Tapped.
Two initial uses.
Arkhe: Ousia
Periodically, when Navia fires her Gunbrella, a Surging Blade will be summoned, dealing Ousia-aligned Geo DMG.
Navia’s Skill makes up the majority of her damage, with the rest of her kit built around increasing its damage potential through providing Crystal Shrapnel stacks. When Navia uses her Skill, she fires a powerful shotgun blast from her Gunbrella that will pierce all enemies within range. Note that this includes enemies right behind her! Her Skill will also summon a Surging Blade on a 7s cooldown, dealing Ousia-aligned Geo damage. This damage instance does not apply Geo, and therefore cannot trigger Crystallize reactions.
Navia’s Skill can be either tapped or held to suit various scenarios. When tapped, Navia immediately fires her Gunbrella towards the closest enemy. When held, Navia enters aiming mode with her Gunbrella, drawing in nearby Crystallize shards and giving her full horizontal control of where she fires. The Skill button can also be held for a short time and immediately released to absorb close Crystallize shards and fire in the direction the camera is currently aimed while still saving some time compared to holding for longer. It is worth noting that in Aimed Mode, there is practically no vertical freedom, meaning that Navia’s Skill cannot always hit all of her projectiles on certain flying enemies.
Whether you should hold or tap her Skill will depend on how many Shrapnel stacks are currently in Navia’s possession. If she is at 6 stacks, there is no gain from holding her Skill beyond lining up her aim in multi-target. Even at 5 stacks, you may want to tap her Skill if it means getting more stacks on your next Skill. Ultimately, this decision will come down to experience and game knowledge depending on the specific team and scenario. Also keep in mind that Bennett’s buff does not apply instantly, so mashing her Skill right after swapping to Navia can cause it to go unbuffed (holding the Skill or just waiting a bit solves this issue). You can see if Bennett’s buff is applied to Navia by checking if she is affected by Pyro (this is shown as a little Pyro icon above your health bar).
The primary means by which Navia boosts her Skill’s damage is gathering Crystal Shrapnel stacks. Navia gains 1 Crystal Shrapnel stack whenever a shard generated by the Crystallize reaction is picked up by any member of the team. Navia can hold up to a maximum of 6 stacks. Crystal Shrapnel stacks are consumed upon using her Skill, boosting the number of projectiles and damage done. With 0/1/2/3 stacks consumed, 5/7/9/11 projectiles are fired, with the Skill gaining a Base DMG multiplier based on the number of projectiles that hit an enemy, up to 200%. For every stack consumed above 3, Navia’s Skill gains 15% Geo DMG Bonus, up to 45% at maximum.
The table below illustrates the Talent multiplier difference between a 0-stack Skill where only 1 projectile hits and a 3-stack Skill where all 11 projectiles hit. It shows the importance of having at least 3 stacks whenever possible and making sure all projectiles hit the opponent(s).
(Base Skill TL9 MV: 671.2%)
| # of Stacks | # of Projectiles Hit | Base DMG Multiplier | Final MV | % of 0-Stack Skill (5 Projectiles) |
| 3 | 11 | 200% | 1342.4% | 166.7% |
| 10 | 190% | 1275.3% | 158.3% | |
| 2 | 9 | 166.66% | 1118.6% | 138.9% |
| 8 | 160% | 1073.9% | 133.3% | |
| 1 | 7 | 140% | 939.7% | 116.7% |
| 6 | 136% | 912.8% | 113.3% | |
| 0 | 5 | 120% | 805.4% | 100% |
| 4 | 115% | 771.9% | 95.8% | |
| 3 | 110% | 738.3% | 91.7% | |
| 2 | 105% | 704.8% | 87.5% | |
| 1 | 100% | 671.2% | 83.3% |
The next table shows the potential damage differential between having 3-6 Crystal Shrapnel stacks, factoring in the additional Geo DMG Bonus.
Assumptions:
Navia - Xilonen - Furina - Bennett
4pc Nighttime
ATK% | Geo% | CR; Tidal Shadow R5
No DMG% on Navia’s weapon, 11 projectiles hit
You can find calcs here: Navia Calcs
| # of Stacks | % of 3-Stack Skill |
| 6 | 123 - 125% |
| 5 | 115 - 117% |
| 4 | 108% |
| 3 | 100% |
With these insane multipliers and buffs, Navia’s teams should almost always look to provide her with a lot of Crystallize shards, as her damage is tied to how many stacks she can get per Skill usage. As the damage of her Skill scales with the number of projectiles that actually hit enemies, it is recommended to use her Skill at close range. While her Skill does have some reach, the spread of the projectiles is quite high, and the only way to guarantee maximum damage to any enemy is to be extremely close to it.
As mentioned in the FAQ, Navia can use an extra Skill in a lot of her teams with longer rotations, as the Skill charges will naturally build up. Moreover, Navia can “steal” a Skill from the next rotation to front-load more damage into the current rotation, whether it be dealing more damage in vulnerability windows of enemies or simply finishing off a chamber to save the next rotation's setup time. This is a valuable aspect of Navia’s kit and should be utilized whenever possible. It will be discussed in more detail here.
Elemental Burst | As the Sunlit Sky's Singing Salute
Talent Description
On the orders of the President of the Spina di Rosula, call for a magnificent Rosula Dorata Salute. Unleashes a massive cannon bombardment on opponents in front of her, dealing AoE Geo DMG and providing Cannon Fire Support for a duration afterward, periodically dealing Geo DMG to nearby opponents.
When cannon attacks hit opponents, Navia will gain 1 charge of Crystal Shrapnel. This effect can be triggered up to once every 2.4s.
Upon using Navia’s Burst, a large AoE Geo damage blast will be unleashed with additional cannonfire continuing for 12s, firing 17 shots of small AoE Geo damage over its duration at the closest enemy in front of Navia. These hits will also grant her 1 Crystal Shrapnel stack per hit, with a cooldown of 2.4s.
While Navia's Burst is less significant than her Skill, it is still an important part of her kit. It contributes a relevant portion of damage and provides additional utility in the form of Geo application for Crystallize reactions as well as direct Crystal Shrapnel stack generation. In teams without a secondary source of sustained Geo application (i.e. where the second Geo is Xilonen, Ningguang, etc.), using Navia’s Burst later in the rotation to ensure Shrapnel stacks for all her Skills is optimal.
Her Burst is also unique in that it does not have a static circular range, but rather will follow Navia around.
 Ascension 1 Passive | Undisclosed Distribution Channels
Talent Description
For 4s after using Ceremonial Crystalshot, the DMG dealt by Navia's Normal Attacks, Charged Attacks, and Plunging Attacks will be converted into Geo DMG which cannot be overridden by other Elemental infusions, and the DMG dealt by Navia's Normal Attacks, Charged Attacks, and Plunging Attacks will be increased by 40%.
This passive incentivizes Navia to use her Normal (or Plunging) Attacks after using a Skill. Not only does she gain 40% DMG Bonus on said attacks, but the Geo Conversion also aids her in generating more Crystallize shards for following Skill uses.
 Ascension 4 Passive |Mutual Assistance Network
Talent Description
For each Pyro/Electro/Cryo/Hydro party member, Navia gains 20% increased ATK. This effect can stack up to 2 times.
This passive provides Navia with up to a 40% ATK buff for having two PHEC teammates. The two units do not have to be of separate Elements, e.g. two Pyro units will maximize this passive. This just provides further incentive to her team having PHEC teammates, as she already wants them to generate Crystallize shards consistently. Although this passive is a decent increase to her personal damage, it does not need to be maximized. Plunge teams with Xianyun, for example, usually forgo one stack.
 Utility Passive | To Dawn's First Light
Talent Description
Gains 25% more rewards when dispatched on a Fontaine Expedition for 20 hours.
Standard Expedition passive.
Combos
There are multiple Normal Attack combos that can fit into Navia’s 4s Conversion duration, with varying levels of difficulty. It should be kept in mind that the majority of her damage lies outside of her Normal Attacks, and thus learning a combo that does more damage is not particularly important.
Disclaimer: Navia’s Normal Attack combos are highly flexible and can be cut short to accommodate shorter rotations or enemy immunity/vulnerability phases.
| NA Combo | Total DMG% of N4 | Personal DPS % of N4 | Video Link |
| N2D N2D N2 | 129% | 98% | Combo Video |
| N4D N1 | 122% | 95% | Combo Video |
| N3D N2 (general use) | 111% | 100% | Proper Execution Video Slow Execution Video |
| N4 | 100% | 100% | - |
Note: N4D N1 and N2D N2D N2 are often not usable if repositioning is needed as they require somewhat precise cancels. It is easy to tell if you made a mistake in these strings as your last hit will be Physical.
The combo used should be chosen based on the scenario and team. A shorter combo can accommodate a shorter rotation, leading to a total team DPS gain, while a longer combo can fill downtime for teammates with long cooldowns (like Furina or Xiangling). In addition, a longer string can be used to squeeze out a bit of extra damage during an enemy’s vulnerability window. Regardless, the damage difference between combos is not large, so you should do whichever you can manage consistently; it is a lot better to guarantee all your hits than attempt a string you cannot perform well.
Navia’s Normal Attacks have standard ICD, meaning she can — disregarding Crystallize’s global 1s ICD — apply Geo once per 3 hits / 2.5s. Note that these are separate conditions, and while the time rule will reset the hit rule, the inverse does not occur. This leads to a theoretical output of 3 Geo applications no matter which combo is used. However, some of these combos when performed too quickly lose one application due to Crystallize’s global ICD, with the notable exception of N3D N2, as its applications are naturally spaced out enough to bypass this problem. This means that teams with lower Geo application (namely those without an off-field Geo applier or rotations without Navia’s Burst) may prefer N3D N2 to guarantee an extra Crystallize shard. While altering the other combos to avoid this is technically possible, it is rather precise and not advisable for the minimal gain it provides.
Alternatively, it is possible to circumvent Crystallize’s global ICD entirely by utilizing a strategy known as “booking”, which refers to pressing any of the in-game pause menus — like the Adventurer’s Handbook, hence the name — after generating a Crystallize shard. While this menu is open, timers like the one in Abyss are put on pause, but Crystallize’s global ICD (and other things like particle travel and swap ICD) aren’t. This allows for every Geo application to generate a Crystallize shard. Note that booking does not work in Stygian Onslaught and the gain from this is minimal outside of hyperoptimized clears, but it is an option at your disposal.
Plunge:
Using Xianyun enables Navia to swap her usual Normal Attack string with more damaging Plunging Attacks. Executing 4 High Plunges after each Skill is quite hard and it is perfectly fine to do 3 High Plunges or 4 Low Plunges instead — or a mix of Low and High Plunges depending on what you can manage consistently. It is not worth doing 4 Plunges if the last Plunge ends up being Physical. Every High Plunge is a 22% damage gain over a Low Plunge (assuming an instance of collision damage occurred), but given that Plunging Attacks are not Navia’s only source of damage, it is not that important to maximize this. Remember to Plunge on top of the enemy to maximize collision damage instances, as these are 40% of a High Plunge’s multiplier each — even more for a Low Plunge.
Plunge teams shift Navia’s damage focus more towards her Plunging Attacks rather than her Skill and as such increase the priority of her Normal Attack Talent. If you can manage 4 High Plunges during your Skill’s Conversion, it is now the top priority. Otherwise, Navia’s Skill Talent level is of similar importance to her Normal Attack Talent level, with her Skill being very slightly ahead (Navia Calcs).
Crystallize Management
Because Navia’s main source of damage — her Elemental Skill — is directly tied to the amount of Crystallize shards she has access to, managing this resource appropriately is important. It should be noted that following a proper rotation and holding every Navia Skill will — in the vast majority of cases — result in functional Crystallize management already.
Crystallize has a global 1s ICD, meaning any extra Geo application while Crystallize itself is on cooldown is effectively wasted. This global ICD is why Navia’s teams do not require strong off-field PHEC application. Teams with “high Crystallize shard generation” have said level of generation due to both having more frequent application (where the 1s ICD of Crystallize is the limiting factor) and longer application, as Navia’s Burst alone only lasts 12s, which does not cover an entire rotation.
It is also important to note that Crystallize shards will expire naturally after 15s. Additionally, if there are more than 3 shards on the field at any given time, all shards except the newest three will disappear after 2s. For the purposes of Geo Resonance and 4pc Nighttime, it is also nice to know that Crystallize shields last for 15s.
A key idea that should be discussed is manually picking up Crystallize shards. This eliminates the need to hold Navia’s Skill, which, even when held only briefly, still has a noticeably longer animation time than tapping it. With Bennett this is less relevant; since you will be waiting for Bennett’s buff to apply anyway, holding Navia’s Skill is not wasting time. Manually picking up Crystallize shards also provides greater control of Shrapnel distribution over multiple Skills, which is especially relevant in teams with low Geo application that can make use of a third Skill every so often. As these teams are not guaranteed to get a lot of Crystallize shards for the last Skill use (although they will still generate a sufficient amount), having a bigger influence of which Skill gets how many stacks can help to avoid wasting stacks and running low by the last Skill.
This idea is good where applicable but not always realistic. For example, against very big enemies, their hitbox can block you from picking up Crystallize shards entirely. Enemies can also move so far away from existing shards that it is no longer reasonable nor possible to pick them up. On top of this, Crystallize shard spawn locations are random; to fully utilize this strategy, you need to adapt fast to pick up new shards without altering rotations, e.g. by utilizing dashes you would already do at a baseline like in Navia’s combos. This is less relevant in teams with high Crystallize shard generation as you can delay the pickups by one Skill and not have it matter much. Additionally, for some reason, there is a brief delay after creating a Crystallize shard, during which it cannot be picked up.
Because Navia’s Hold Skill draws in nearby Crystallize shards rather than instantly absorbing them, shards that are near the edge of the Skill’s pull range will not be absorbed for the cast Skill if it is held very briefly. This can be utilized to pull in nearby shards for the current Skill and further shards for the next, if Navia is already at high but not capped Shrapnel stacks). Given the precise circumstances needed to fully make use of this technique, it is rather niche, but still worth mentioning if you wish to fully maximize Navia’s potential.
As discussed in the Combos section, N3D N2 can provide an additional Crystallize shard, which can make it the best option for a team with low shard generation. If you are very skilled, you can also alter the other combos to circumvent Crystallize’s global ICD of 1s. As mentioned previously however, the gain from this is minimal.
Lunar Crystallize:
When Columbina or Zibai is present, Lunar-Crystallize replaces Hydro Crystallize. This reaction does not have a global cooldown and does not create a Crystallize shard, which removes the shield and its resistance to interruption as well. Instead, it summons 3 constructs that deal damage for every 3 Lunar-Crystallize reactions triggered. Navia directly gains 1 Crystal Shrapnel stack when the reaction occurs, up to once per second. This removes the need for Crystallize management and encourages Navia to always tap her Skill when aiming is not required.
Because Lunar-Crystallize does not have a global cooldown, both Crystallize and Lunar-Crystallize can be triggered in one instance of Geo application, most notably on an Electro-Charged or Lunar-Charged aura. This results in 2 Crystal Shrapnel stacks for Navia: 1 from the shard created by Electro Crystallize and 1 directly from Lunar-Crystallize. This aids Geo units who lack off-field application, such as Xilonen.
Note that any effect relying on the regular Crystallize shard or shield has been updated to work with Lunar-Crystallize too. For more detailed information about the Lunar-Crystallize reaction, refer to the Lunar Reaction Guide.
Skill Cooldown
This section will talk about how to optimally play around Navia’s Skill cooldown and best utilize its property of having two charges.
Shorter Rotations:
As already mentioned in the FAQ, Navia’s Skill having two charges with a 9s cooldown each enables her to run rotations that are too short in theory. If both her Skill uses were tied to one cooldown of 18s, trying to run a 17s rotation would cause Navia’s Skill to have 1s of downtime every rotation beyond the first. However, by having each Skill cast at different times in the rotation, this downtime can be delayed. This is because the cooldown for her Skill will start ticking down when the first Skill is used already, effectively buying time for the second. With a delay of Δskill seconds between the two Skill uses and a rotation that is Δrot seconds shorter than 18s, you end up with a total of ΔskillΔrot + 1 (rounded down) rotations — with perfect execution, in practice it will often be more — before running into cooldown issues.
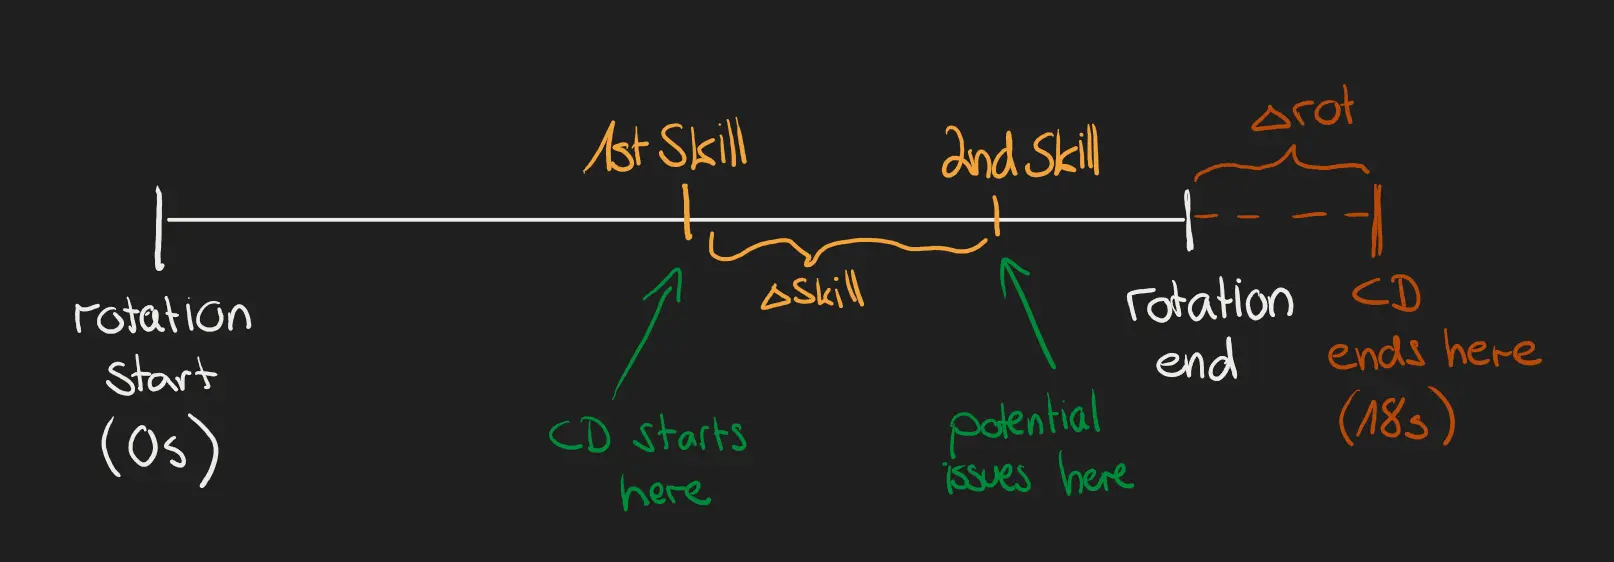
Example: If the rotation length is 17s (Δrot = 1s) and the time between Skill uses is 6s (Δskill = 6s), this leaves us with 6s1s + 1 = 7 total rotations, which will last a total of 7 × 17s = 119s. This is enough for a full Stygian Onslaught chamber (and that’s without funneling)!
Since these shorter rotations do eventually run into cooldown issues, it is important to funnel properly for combat scenarios that start with insufficient Energy (like Stygian Onslaught). Using one of Navia’s Skills before cycling through her teammates’ abilities will more often than not net you the needed Energy as well as allowing your Skills to be off cooldown for your first rotation, ensuring the maximum amount of possible rotations. Note that depending on the exact team and enemy, forgoing Navia’s Burst entirely in the first rotation can be the optimal solution.
Longer Rotations:
Meanwhile, for rotations longer than 18s, the opposite will happen, where another charge will build up over time. For example, 21s rotations are able to utilize a third Skill every third rotation. This, however, is not the only time to use a third Skill: if an enemy is weak enough to the point that Navia’s Skill will kill them, extending your rotation to fire a third Skill and ending the fight early is better than having to set up an entire rotation again. The same goes for an enemy’s vulnerability window e.g. after breaking their shield when they are stunned. Maximizing Navia’s damage output during these windows can elevate her performance from theory to practice quite a lot.
Sacrificial Greatsword:
Somewhat counterintuitively, Sacrificial Greatsword limits the usage of these strategies as you are now reliant on the extra Skill use for damage. Trading another weapon's offensive capabilities for an extra Skill use means that without said Skill use, you are simply losing stats. The inability to access these strategies also means losing out on one of Navia’s greatest strengths — that being she can adapt her rotations to a high extent in order to abuse enemy attack patterns or immunity/vulnerability windows. This is what lets her outperform her raw sheet DPS in practice. Even with the additional Skill use, Sacrificial Greatsword is usually outperformed by craftable options for sustained damage.
Navia Calcs
Constellations
DPS Increases reference Navia’s personal damage.
Assumptions:
R1 Verdict
4pc Nighttime
ATK/Geo/CRIT
Navia - Furina - Yelan/Bennett - Xilonen | Navia - Chiori - Fischl - Bennett
You can find calcs here: Navia Calcs
 Constellation 1 | A Lady's Rules for Keeping a Courteous Distance
Constellation Description
Each charge of Crystal Shrapnel consumed when Navia uses Ceremonial Crystalshot will restore 3 Energy to her and decrease the CD of As the Sunlit Sky's Singing Salute by 1s. Up to 9 Energy can be gained this way, and the CD of "As the Sunlit Sky's Singing Salute" can be decreased by up to 3s.
This Constellation effectively lowers Navia’s Energy cost from 60 to 42, which, in turn, drastically lowers her ER requirements. However, the Energy isn't always valuable, especially in teams that already have low ER requirements for Navia, like those with efficient batteries or multiple Favonius procs. The second part of the Constellation is useless and isn’t utilized in any typical teams, because their rotation lengths and Energy generation do not accommodate more than one Burst per rotation. Shorter rotations will run into Skill cooldown issues, as further explained in the Skill Cooldown section.
| DPS Increase: 0–12% (Note: This scales better with higher ER requirements) |
 Constellation 2 | The President's Pursuit of Victory
Constellation Description
Each charge of Crystal Shrapnel consumed will increase the CRIT Rate of this Ceremonial Crystalshot instance by 12%. CRIT Rate can be increased by up to 36% in this way.In addition, when Ceremonial Crystalshot hits an opponent, one Cannon Fire Support shot from As the Sunlit Sky's Singing Salute will strike near the location of the hit. Up to one instance of Cannon Fire Support can be triggered each time Ceremonial Crystalshot is used, and DMG dealt by said Cannon Fire Support this way is considered Elemental Burst DMG.
This Constellation effectively increases Navia’s Skill CRIT Rate by 36%. Even though this only benefits her Skill, her optimal CRIT Rate goes from 100% to 64%. This Constellation also makes her Skill the majority of her damage instead of it only being around half. The extra Burst hit is nice to have, especially if Navia is not able to access her Burst; the extra Cannon Fire Support will then always generate a Shrapnel stack. Such a scenario can occur due to the lack of Energy generation from a construct breaking, in first rotations without Energy (Stygian Onslaught) or just via gameplay mistakes. For rotations with 3 Skills or those that use Navia’s Burst early, this can also lead to an extra Shrapnel stack, although this isn’t that impactful.
| DPS Increase from previous Constellation: 16–18% | DPS Increase from C0: 16–30% |
 Constellation 3 | Businesswoman's Broad Vision
Constellation Description
Increases the Level of Ceremonial Crystalshot by 3.
Maximum upgrade level is 15.
Three extra levels to Navia’s main damage source are greatly appreciated.
| DPS Increase from previous Constellation: 11–12% | DPS Increase from C0: 28–44% |
 Constellation 4 | The Oathsworn Never Capitulate
Constellation Description
When As the Sunlit Sky's Singing Salute hits an opponent, that opponent's Geo RES will be decreased by 20% for 8s.
A solid damage increase, especially against high RES enemies and with invested Geo teammates with personal damage (namely Chiori and Albedo with a Hexerei teammate).
| DPS Increase from previous Constellation: 8–9% | DPS Increase from C0: 38–58% |
 Constellation 5 | Negotiator's Resolute Negotiations
Constellation Description
Increases the Level of As the Sunlit Sky's Singing Salute by 3.
Maximum upgrade level is 15.
Since Navia’s Burst is only a fraction of her damage, this Constellation isn’t too noteworthy.
| DPS Increase from previous Constellation: ~3% | DPS Increase from C0: 42–62% |
 Constellation 6 | The Flexible Finesse of the Spina's President
Constellation Description
If more than 3 charges of Crystal Shrapnel are consumed when using Ceremonial Crystalshot, each charge consumed beyond the first 3 increases the CRIT DMG of that Ceremonial Crystalshot by 45%, and any charges consumed beyond the first 3 are returned to Navia.
A powerful Constellation; it provides Navia’s Skill with up to 135% CRIT DMG. On top of that, it reduces the amount of Shrapnel stacks Navia consumes on Skill cast by up to 3, making Crystallize shard management trivial. All Skills after the first one should have max stacks.
| DPS Increase from previous Constellation: 30–33% | DPS Increase from C0: 84–110% |
Early Investments
Since Navia’s own Constellations can be somewhat underwhelming compared to newer Constellations, it raises the question of what to pull for first when aiming to maximize Navia’s potential. This section will have a look at that, assuming you have already obtained Xilonen and Verdict (or a comparable weapon — more info here).
Assumptions:
R1 Verdict
4pc Nighttime
ATK/Geo/CRIT
Navia - Xilonen - Furina - Bennett
You can find calcs here: Navia Calcs
This team is used as it maximizes Navia’s personal damage. Other teams (namely those with Mavuika, Chiori, or Yelan) may have different priorities for overall team performance.
The table below showcases the difference in performance for investment opportunities:
| Constellations | Navia DPS % of full C0 | Team DPS % of full C0 |
| Full C0 | 100% | 100% |
| 1 total 5-star | ||
| C1 Furina | 109% | 110% |
| PPS | 108% | 108% |
| 2 total 5-stars | ||
| C1 Furina + PPS | 116% | 116% |
| C2 Navia | 115% | 112% |
| C2 Xilonen | 115% | 116% |
| C2 Furina | 111% | 119% |
| 3 total 5-stars | ||
| C3 Navia | 128% | 121% |
| C2 Navia + C1 Furina | 125% | 122% |
| C2 Navia + PPS | 125% | 121% |
| C1 Furina + C2 Xilonen | 124% | 127% |
| C2 Xilonen + PPS | 123% | 125% |
| C2 Furina + PPS | 118% | 126% |
| C3 Furina | 117% | 126% |
Navia’s own Constellations being somewhat underwhelming — at least compared to most modern Constellations — means supportive Constellations can pull ahead for overall team damage; they also have the benefit of being useful outside of Navia’s teams. Whether you wish to maximize Navia’s own potential over the benefit of flexibility is ultimately up to your own discretion.
Builds

ER Requirements
As discussed in the Talents section, Navia’s Elemental Burst is very important to her kit and incentivizes building ER to use it every rotation.
These numbers are approximate; ER requirements will vary depending on team and context. For a more accurate estimate of your ER requirements, use the Energy Recharge Calculator.
| Scenario | C0 ER Requirements | C1 ER Requirements |
| Xilonen, Geo Traveler, Ningguang (C2+) | 100–130% | 100–110% |
| Chiori, Kachina, Albedo, Zhongli, Ningguang (pre-C2) | 130–150% | 110–130% |
| Kachina (C2+) short rotations, Zhongli broken pillar | 155–180% (don’t build ER) | 135–150% |
Favonius weapons reduce Navia’s ER needs by approximately 10–30% per proc.
Note that Favonius weapons have already been assumed for the above values on Xilonen, Kachina, Zhongli, and, if no other viable users or a lack of Geo particles, Furina. Zhongli is assumed to miss 25% of pillar hits. You can find the full set of assumptions in the Navia ERC Mastersheet by Lesterberne.
Stat Priorities
 Sands |  Goblet |  Circlet |
| ATK% | Geo DMG% (or ATK%)* | CRIT |
*An ATK% Goblet is only viable/preferred in teams that have a lot of DMG% sources.
Substats: ER (until requirement) > CRIT > ATK%
If Navia's ER requirements are high, it is not worth using an ER Sands. Instead, it is better to practice the rotation, funneling, and construct placement to improve Energy generation, or even use a different Geo unit altogether. It is also possible to completely forgo ER on Navia and cast her Burst in rotations where it is available instead, although ensuring sufficient Shrapnel stacks for all of Navia’s Skills may take some practice to pull off consistently — refer to the Crystallize Management section for more info. While having a source of off-field Geo application makes this much easier, note that if a construct, like Zhongli's pillar, breaks, the Geo application it would normally provide is also lost. The Cannon Fire Support from Navia's C2 doubles as a source of Shrapnel stacks and Geo application in these situations, increasing both Navia's damage and ease of play significantly.
The CRIT Circlet should be picked in a way that maximizes your total amount of useful substats, while best maintaining a 1:2 ratio of CRIT Rate to CRIT DMG, as usual.
We recommend using Genshin Optimizer to compare your actual artifacts for more accurate results.
Gearing
Weapons
“My time with the Spina has taught me that carrying an unreliable weapon is worse than not carrying one at all.”
Hover over images for more information.
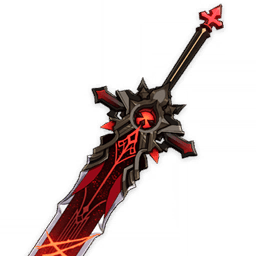
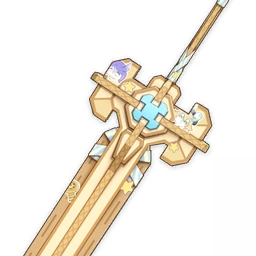
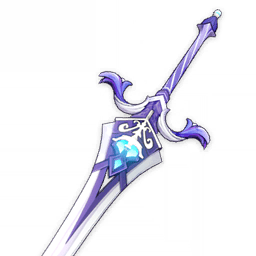
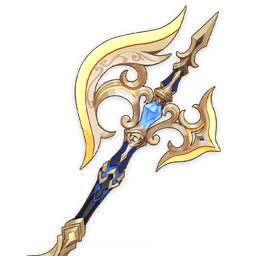 5★ Verdict | Navia’s signature weapon; it provides her with ATK% and Skill DMG Bonus. These buffs are not significant enough to let this weapon pull significantly ahead of other options unfortunately. It is an axe and does look cool though. |
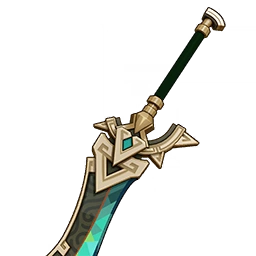
 5★ A Thousand Blazing Suns | A very strong option for Navia if she can maintain good uptime on the passive, which will depend on the exact team, rotation, and execution. With high uptime on its passive, the buffs it provides Navia are powerful enough to make this weapon one of Navia’s best options. For this weapon's buff to apply to both of Navia's Skills, there is generally only around a 2–2.5s window for teammates to cast actions between Navia's Burst and her combo if you play perfectly. In practice, this means one swap is safe but two swaps become risky. |
5★ Beacon of the Reed Sea | Even though the second part of this weapon’s passive is useless for Navia, the CRIT Rate secondary stat as well as the ATK% buff from the first half is greatly appreciated, although the passive usually only affects the second Skill. |
 5★ Redhorn Stonethresher | This weapon functions mainly as a CRIT DMG stat stick. The passive converting DEF to Normal Attack damage isn’t really all that useful since Navia scales with ATK and her Normal Attacks are only part of her damage, but it is appreciated nonetheless. It is not worth building DEF for the passive. |
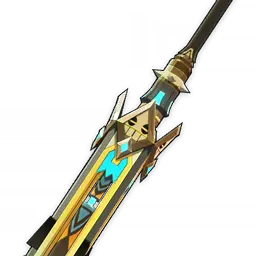
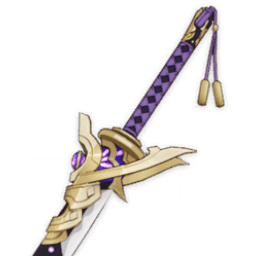
 4★ Serpent Spine | A very powerful option for Navia. Maintaining its stacks is important as they provide large buffs. This is doable as Navia’s actions during her field time are fairly flexible, so she can dodge as needed. Note that if you are running Navia without a shielder and struggle to dodge properly, this weapon becomes significantly worse. Refinements on this weapon are very powerful — at R5, it often competes with her best 5-star options. |
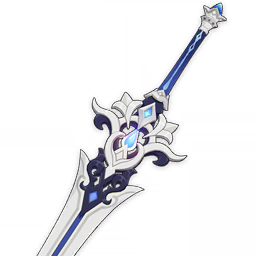
 5★ The Unforged | Navia’s synergy with Crystallize means that you often have a shield to benefit from the passive even without a dedicated shielder, elevating this weapon's performance with the high amount of ATK% it provides. |
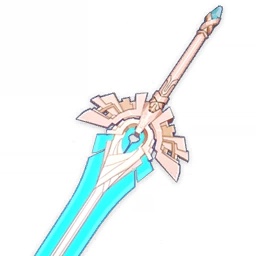
 5★ Fang of the Mountain King | A good, high Base ATK weapon for Navia. Her first Skill will generally not benefit from this weapon’s DMG% passive, while the second will get 2 stacks (the second one coming from the Surging Blade hit). |
 5★ Wolf’s Gravestone | The second part of the passive is not consistent and should not be relied upon. Still, this weapon is a good ATK stat stick. |
 4★ Talking Stick | Usable if you happen to already own a copy. Absolutely not worth getting for Navia specifically as Serpent Spine performs notably better. Talking Stick performs slightly better than craftable options in teams with Bennett since he can enable its passive. Refinements for this weapon also aren’t spectacular. |
 4★ Tidal Shadow | Navia’s best craftable option when its passive condition is fulfilled. However, keep in mind that Bennett alone is not sufficient to trigger this weapon's passive reliably, since he will not heal if Navia is above 70% HP. With Furina, she will drain Navia’s HP below 70%, allowing Bennett to heal. This weapon is not worth using if the team’s rotation requires alterations to fulfill its passive. |
 5★ Skyward Pride | Decent ER and Base ATK stat stick. Performs slightly better than Tidal Shadow with higher ER requirements. |
 4★ "Ultimate Overlord's Mega Magic Sword" | A good event option if you can make use of the ER (and helped the Melusines to maximize its passive). However, the ER is not always needed, especially if you have Xilonen, making this weapon less of a general option. |
 4★ Earth Shaker | A good option if its passive is enabled while Tidal Shadow’s passive isn’t. The passive requires a Pyro reaction to buff Skill damage. Given its duration of 8s and the nature of rotations with Bennett, it will get fulfilled naturally in teams that have a Pyro unit, although not all teams without an off-field Pyro applier will have full uptime on it. |
 4★ Blackcliff Slasher | A mediocre stat stick at best and definitely not worth the Starglitter. Its passive is not reliable and shouldn’t be relied upon. |
 4★ Prototype Archaic | A decent ATK stat stick, though usually worse than other accessible options. |
 4★ Sacrificial Greatsword | While getting a close-to-guaranteed third Skill may look tempting, this weapon's ER substat — that isn’t always useful — and lack of other offensive capabilities make it a lackluster option. Refer to the Skill Cooldown section for a more detailed analysis. Depending on the usage of this weapon, Navia’s ER requirement, and the team’s Crystallize shard generation, this weapon can perform from much worse to on par with other accessible options. Note that this is only in terms of sustained DPS — in practice, it will often perform worse. |
 4★ Katsuragikiri Nagamasa | Even in teams with high ER requirements, this weapon tends to overshoot them. It is better to go for a more offensively focused weapon. |
Weapon Comparison Tables:
Click the dropdowns below to view/hide content.
Low ER requirements
Assumptions:
Navia–Xilonen–Furina–Bennett
4pc Nighttime Whispers
ATK% | Geo% | CRIT Rate
2 Xilonen Skill rotation
You can find calcs here: Navia Calcs
| Weapon | % of UOMMS |
| A Thousand Blazing Suns R5 | 141% |
| Verdict R5 | 139% |
| Verdict R1 | 125% |
| A Thousand Blazing Suns R1 | 124% |
| Beacon of the Reed Sea R5 | 123% |
| Redhorn Stonethresher R5 | 120% |
| Serpent Spine R5 | 120% |
| Beacon of the Reed Sea R1 | 119% |
| The Unforged R5 | 118% |
| Redhorn Stonethresher R1 | 116% |
| The Unforged R5 (damage every 4–6s) | 116% |
| Serpent Spine R5 (damage every 4–6s) | 115% |
| Serpent Spine R1 | 114% |
| Fang of the Mountain King R5 | 113% |
| Wolf's Gravestone R5 | 113% |
| Fang of the Mountain King R1 | 111% |
| Serpent Spine R1 (damage every 4–6s) | 111% |
| The Unforged R1 | 111% |
| Talking Stick R5 | 110% |
| The Unforged R1 (damage every 4–6s) | 109% |
| Skyward Pride R5 | 109% |
| Wolf's Gravestone R1 | 108% |
| Talking Stick R1 | 106% |
| Tidal Shadow R5 | 104% |
| Skyward Pride R1 | 103% |
| Blackcliff Slasher R1–R5 | 101% |
| UOMMS R5 | 100% |
| Earth Shaker R5 | 99% |
| Tidal Shadow R1 | 99% |
| Prototype Archaic R5 | 98% |
| Lithic Blade R5 | 94% |
| Katsuragikiri Nagamasa R5 | 87% |
Low ER requirements, High DMG% buffs
Assumptions:
Navia–Xilonen–Furina–Yelan
4pc Nighttime Whispers
ATK% | ATK% or Geo% | CRIT Rate
2 Xilonen Skill rotation
You can find calcs here: Navia Calcs
| Weapon | % of UOMMS |
| Verdict R5 | 141% |
| A Thousand Blazing Suns R5 | 139% |
| The Unforged R5 | 126% |
| Verdict R1 | 126% |
| A Thousand Blazing Suns R1 | 123% |
| The Unforged R5 (damage every 4–6s) | 122% |
| Beacon of the Reed Sea R5 | 122% |
| Wolf's Gravestone R5 | 118% |
| Beacon of the Reed Sea R1 | 116% |
| The Unforged R1 | 116% |
| Serpent Spine R5 | 115% |
| Redhorn Stonethresher R5 | 115% |
| The Unforged (damage every 4–6s) | 115% |
| Fang of the Mountain King R5 | 113% |
| Wolf's Gravestone R1 | 111% |
| Fang of the Mountain King R1 | 111% |
| Serpent Spine R5 (damage every 4–6s) | 111% |
| Redhorn Stonethresher R1 | 110% |
| Skyward Pride R5 | 110% |
| Serpent Spine R1 | 109% |
| Tidal Shadow R5 | 107% |
| Serpent Spine R1 (damage every 4–6s) | 106% |
| Skyward Pride R1 | 102% |
| Lithic Blade R5 (1 stack) | 101% |
| UOMMS R5 | 100% |
| Tidal Shadow R1 | 100% |
| Talking Stick R1–R5 | 98% |
| Prototype Archaic R5 | 96% |
| Blackcliff Slasher R1–R5 | 95% |
| Katsuragikiri Nagamasa R5 | 82% |
Medium ER requirements
Assumptions:
Navia–Xilonen–Fischl–Bennett
4pc Nighttime Whispers
ATK% | Geo% | CRIT Rate
1 Xilonen Skill rotation
You can find calcs here: Navia Calcs
| Weapon | % of UOMMS |
| Verdict R5 | 135% |
| Verdict R1 | 121% |
| Serpent Spine R5 | 119% |
| A Thousand Blazing Suns R5 | 118% |
| Beacon of the Reed Sea R5 | 118% |
| The Unforged R5 | 118% |
| Redhorn Stonethresher R5 | 117% |
| Beacon of the Reed Sea R1 | 114% |
| Redhorn Stonethresher R1 | 112% |
| A Thousand Blazing Suns R1 | 111% |
| The Unforged R5 (damage every 4–6s) | 111% |
| Serpent Spine R5 (damage every 4–6s) | 111% |
| Serpent Spine R1 | 111% |
| Fang of the Mountain King R5 | 110% |
| Wolf's Gravestone R5 | 110% |
| Skyward Pride R5 | 109% |
| The Unforged R1 | 109% |
| Fang of the Mountain King R1 | 108% |
| Talking Stick R5 | 107% |
| Serpent Spine R1 (damage every 4–6s) | 106% |
| Wolf's Gravestone R1 | 105% |
| The Unforged R1 (damage every 4–6s) | 104% |
| Skyward Pride R1 | 102% |
| Talking Stick R1 | 102% |
| UOMMS R5 | 100% |
| Tidal Shadow R5 (passive active) | 98% |
| Earth Shaker R5 | 97% |
| Blackcliff Slasher R1–R5 | 97% |
| Prototype Archaic R5 | 94% |
| Lithic Blade R5 | 92% |
| Tidal Shadow R5 (no passive) | 92% |
| Katsuragikiri Nagamasa R5 | 88% |
High ER requirements
Assumptions:
Navia–Chiori–Fischl–Bennett
4pc Nighttime Whispers
ATK% | Geo% | CRIT Rate
You can find calcs here: Navia Calcs
| Weapon | % of UOMMS |
| Verdict R5 | 129% |
| A Thousand Blazing Suns R5 | 119% |
| Verdict R1 | 115% |
| Skyward Pride R5 | 113% |
| Serpent Spine R5 | 112% |
| Beacon of the Reed Sea R5 | 111% |
| The Unforged R5 | 111% |
| Redhorn Stonethresher R5 | 110% |
| A Thousand Blazing Suns R1 | 108% |
| Beacon of the Reed Sea R1 | 107% |
| Serpent Spine R5 (damage every 4–6s) | 107% |
| Redhorn Stonethresher R1 | 106% |
| Skyward Pride R1 | 104% |
| Serpent Spine R1 | 104% |
| The Unforged R5 (damage every 4–6s) | 104% |
| The Unforged R1 | 101% |
| Wolf's Gravestone R5 | 101% |
| Fang of the Mountain King R5 | 100% |
| UOMMS R5 | 100% |
| Talking Stick R5 | 99% |
| Serpent Spine R1 (damage every 4–6s) | 99% |
| Wolf's Gravestone R1 | 98% |
| Fang of the Mountain King R1 | 98% |
| The Unforged R1 (damage every 4–6s) | 97% |
| Talking Stick R1 | 95% |
| Earth Shaker R5 | 92% |
| Blackcliff Slasher R1-R5 | 91% |
| Katsuragikiri Nagamasa R5 | 88% |
| Prototype Archaic R5 | 88% |
| Lithic Blade R5 | 86% |
| Tidal Shadow R5 (no passive) | 85% |
Artifacts
Assumptions:
On-field DPS:
Navia–Xilonen–Furina–Bennett/Yelan/Xianyun
Navia–Zhongli–Xiangling–Bennett
Quickswap DPS:
Navia–Noelle–Furina–Yelan
ATK% | Geo% | CRIT
UOMMS R5 and Verdict R1
DPS% ranges indicates the performance across different teams with two weapons
Quickswap DPS result compares only 4pc Nighttime and Golden Troupe for brevity
You can find calcs here: Navia Calcs
Hover over images for more information.
| Artifact | Navia DPS % of 4pc Nighttime | Notes |
4pc Marechaussee Hunter | 104 - 98% | In teams with Furina, this set performs similarly to Navia’s signature set, albeit somewhat inconsistent as you usually only get 1 to 2 stacks on your first Skill. Because of this, if you’re playing a quickswap team that spaces her Skill uses far enough apart for the stacks to expire, this set becomes drastically worse. Without Furina, this set does next to nothing and should not be used. This set also loses some value and becomes harder to build around with Navia’s C2, which provides another 36% CRIT Rate for her Skill. Note also that only having a Marechaussee Hunter set means Navia is completely dependent on having Furina in her teams, even when she is not inherently dependent on Furina at all. |
4pc Nighttime in the Whispering Woods | 100% | Navia’s signature set and a very strong option. Against aggressive enemies, you may lose the second part of the 4pc effect; however, even with reduced uptime on the full effect, it is still a competitive option. This issue can be alleviated with better Crystallize shard generation or better dodging and positioning. Note that you will always have the 4pc effect if you hold your Skill, as it draws in existing Crystallize shards to refresh the buff. |
4pc Golden Troupe | 92 - 89% (On-Field) 96 - 95% (Quickswap) | This set’s effect will linger for 2s after the character takes the field, making the full 4pc effect attainable for Navia. While the massive 70% Skill DMG Bonus may look appealing, Navia’s Skill is only a part of her damage and this set does nothing for her Burst and Normal Attacks. It is best to swap out of her before using her second Skill to regain the full 4pc effect. This means that in quickswap teams, where she swaps out after one Skill naturally and won't rely on her Normal Attacks as much, this set gains a lot of value. Even then, it is outperformed by her other options. |
2pc ATK%/Skill% + 2pc Geo DMG%/ATK% | 92 - 84% | Viable placeholders while farming for another set or even as a permanent set if you do not want to farm for a different set and are willing to accept the damage loss. |
4pc Archaic Petra | 86 - 83% | Navia can hold 4pc Archaic Petra in teams where she fills a supportive role (like in Neuvillette teams). However, this doesn’t make great use of Navia’s kit and won’t be covered further in this guide. The 4pc effect does nothing for Navia’s personal damage and should not be used in her usual teams. |
Synergies
“I really wanna go traveling! I don't mind where we go, as long as I have my friends with me, hehe.”
Contrary to other hypercarry-esque units, Navia’s team building process is extremely flexible as long as the units can fulfill certain requirements. As a Geo unit, Navia has access to Geo Resonance, which provides 15% DMG Bonus to the on-field character and 20% Geo RES Shred, a very powerful buff for Navia. In addition to forming Geo Resonance, a second Geo unit can generate Geo particles for Navia, making them extremely valuable.
Since Navia’s gameplay revolves around her Skill, which obtains significant buffs via collecting Crystallize shards, a source of off-field PHEC application is nearly mandatory. This application does not need to be high due to Crystallize’s global ICD of 1s.
Note: Pairing Hydro and Cryo application is not advised as Geo application on a Frozen aura will trigger Shatter, not Crystallize (and against bosses, there will be no aura to begin with anyway). This can be circumvented by using one character with more frequent off-field application. Such application creates an underlying aura, which can be used for Crystallize; if you wish to learn more about this interaction, check out Simultaneous Reaction Priorities | KQM TCL.
Geo Units
| ★ Xilonen | Xilonen is a near perfect support for Navia, providing 40% Geo DMG Bonus with 4pc Scroll, up to 36% RES Shred with her Skill at C0, and healing to generate Fanfare for Furina. Her only drawback is her lack of off-field Geo application for additional Crystallize shard generation, but Navia’s Burst does a good job of this on its own. The low cooldown on her Skill and multiple hits during her Skill state make her an excellent Favonius holder, especially if double Skill rotations are used, which reduces Navia’s ER requirements to (nearly) zero. Such rotations are enabled by Navia’s flexible field time, which allows her to swap off to enable another Xilonen Skill. In order for Xilonen to maximize her battery capabilities, she needs to swap out quickly after her E N2; otherwise, Xilonen herself will catch the particles, as they are generated on her initial E cast hitting the enemy. Furthermore, Xilonen only gets better with investment, as her signature, C2 and C4 all increase the team's potential (and her C3, albeit to a lesser extent). |
| ★ Kachina | Kachina is Navia’s best F2P Geo teammate, obtainable for free during Natlan’s Archon Quest. She can trigger the full 40% DMG Bonus from the 4pc Scroll, hold Favonius Lance, and apply Geo from off-field to increase Crystallize shard generation. Her Turbo Twirly also cannot be destroyed, unlike Zhongli’s pillar or Albedo’s flower (without a Hexerei teammate), which leads to a noticeable quality of life increase. Her biggest drawback is her Skill’s 20s cooldown, forcing longer rotations. She can utilize her C2 to run shorter rotations; however, since C2 doesn't give her Turbo Twirly a full Nightsoul bar, this will come at the cost of noticeably higher ER requirements on Navia. Otherwise, the C2 can be used to gain Turbo Twirly uptime, resulting in higher Energy generation. |
(★ with 2 Hexenzirkel) Albedo | Albedo’s entire utility in Navia’s teams can be boiled down to his Skill, as it is the source of his Energy generation, damage and Geo application. Albedo’s field time is extremely low, since he only has to place his Skill and swap out, which takes around 1s. This allows Navia to either extend her combo or run shorter rotations. Unfortunately, Albedo’s Skill is also a Geo construct, which makes it prone to breaking, thus forcing you to swap back into him and re-deploy it when it does. His Skill has good range, which can make it easier to position it properly. Hexenzirkel: Running another Hexerei character (namely Fischl or Durin) alongside Albedo tremendously increases his damage output as well as his quality of life — he no longer loses his off-field presence when his flower is destroyed. He also provides the entire team with a small DMG% buff (this is increased for Hexerei characters), scaling with his DEF. |
(★ when 2 Dolls) Chiori | Chiori is, by design, a character who is supposed to be used alongside other Geo units. However, because of her Skill and A4, a vast majority of her damage is locked behind having a Geo construct in the team, which isn’t the norm for Navia outside of Lunar-Crystallize. Despite this seemingly large drawback, Chiori is still a good option for Navia and is very reliable in terms of damage, Geo application, and Energy generation, as her dolls have good range and are not breakable constructs. All her issues with Navia can be mitigated by her C1 or by the presence of Lunar-Crystallize, which allows her to summon two dolls in Navia teams. |
Zhongli | Zhongli provides Universal RES Shred and one of the strongest shields in the game. Having a shield is especially nice when using Serpent Spine on Navia, as it can help maintain stacks in case you cannot dodge all incoming attacks. As Zhongli’s Geo application and Energy generation is tied to his pillar, which is a Geo construct, you will lose those utilities when the pillar breaks or the enemy moves too far away. If you absolutely need Zhongli’s shield for a fight that you can not guarantee his construct surviving or hitting the enemy, it is better to forgo ER entirely on Navia and just use her Burst when available, as described in the Stat Priorities section. |
Geo MC | A nice F2P option. C1 provides a solid 10% CRIT Rate buff for units inside GMC’s Burst (regardless of the construct’s state), which lasts for 20s at C6. If two Skills are done in a rotation, then GMC is a very good battery for Navia. Playing GMC ideally requires usage of their Short Hold Skill, which can take some practice to perform reliably. If played with Furina or Fischl, their summons might get blocked by GMC’s meteorites, which is something that needs to be considered. Specifically in teams with very short rotations like Bennett + Fischl, GMC is the best accessible battery option as they can still funnel two Skills worth of particles to Navia. |
| Illuga | Illuga is primarily designed to buff direct Lunar-Crystallize damage, not regular Geo damage. While he does have buffs to regular Geo damage in his kit, they are fairly underwhelming, granting a negligible quill effect and 5% CRIT Rate and 10% CRIT DMG to Geo damage. At C6, he can grant Geo characters on the team an additional 5% CRIT Rate and 20% CRIT DMG, which is nice, but not extraordinary. Note that Illuga himself cannot enable Lunar-Crystallize. |
Ningguang | Ningguang can be built in two different ways depending on the team. In teams that run shorter rotations such as Bennett + Fischl, she can opt to run TTDS with 4pc Scroll just to battery Navia and provide TTDS buff every other rotation. Other teams require more nuance as Ningguang’s optimal build will depend on the team’s investment and the player’s own capabilities. If the rotation allows for it, she can be built as a DPS with CRIT and ATK. She can also use Navia’s BiS set, Nighttime Whispers in the Echoing Woods, if you have managed to farm two sets. Passing through Ningguang’s Jade Screen provides a small Geo DMG% buff via her A4 Passive. Ningguang’s particle generation occurs when the Jade Screen’s creation hits an enemy, so even if it breaks, you will only lose out on the aforementioned buff. Keep in mind that, while her C2 can grant her an additional Skill use, her particle generation is on a 6s ICD regardless. This means that, in order to maximize Ningguang's battery capabilities, she will have to take the field a second time. |
Yun Jin | While Yun Jin seems like a good option to use for Navia because of her short Skill cooldown and her ability to buff Normal Attacks, she is not as good as she may seem. Yun Jin has very high Energy costs and relatively low Energy generation even with two Skills. Her Normal Attack buff is welcomed by Navia, but Navia’s Normal Attacks only make up ~30% of her total damage output, which makes Yun Jin not very suitable for her. |
Gorou | Gorou is a slightly unconventional Geo unit for Navia considering his primary use case is buffing DEF-scaling Geo units in Mono Geo teams. Despite this, he still provides 20% Geo CRIT DMG (in a team with two Geo units) at C6. Gorou’s biggest drawback lies in his poor Energy generation and 20s cooldown on his Burst. Going for more Geo characters to fully utilize his C6’s Geo CRIT DMG buff and Skill’s Geo DMG% buff can be viable if the third Geo unit can make good use of these buffs (namely a vertically invested Chiori), but is not advised overall. |
Pyro Units
★ Bennett | Bennett is one of Navia’s best non-Geo teammates, consolidating the role of PHEC flex, healer, and buffer all in one. As mentioned in the FAQ, his massive Flat ATK buff is really good for Navia’s personal damage. The fact that he limits you to a circle can be annoying, but it doesn’t affect Navia as much since her Skill has ranged capabilities. Keep in mind that Bennett’s buff takes a moment to apply to your active character after swapping; make sure it is active when Navia’s Skill hits the opponent. If you want to tap her Skill, you can simply wait or do a Normal Attack beforehand to ensure she gets Bennett’s buff. Due to Bennett’s buff being incredibly potent, his presence tends to elevate weapons without a high Base ATK or ATK buffs. |
(★ with Xilonen) Mavuika | Mavuika is a strong option for Navia’s teams, albeit somewhat reliant on Xilonen. Without Xilonen, you would use Kachina to generate Fighting Spirit for Mavuika, though Kachina doesn’t do an amazing job of this if Mavuika isn’t C1 or higher. Nonetheless, when paired with Xilonen, Mavuika has strong personal damage as well as off-field application to enable Crystallize and a DMG% buff from her A4, all of which make her a strong option. Mavuika’s offensive and supportive capabilities can be further improved with her Constellations, namely her second one which provides DEF Shred. Navia can choose to reduce her field time to allow for more Mavuika field time, delegating her to a quickswap role. |
| ★ Durin | Durin’s White mode provides off-field damage and Pyro application as well as 20% Pyro and Geo RES Shred (as well as other Elements if they react with Pyro, save for Hydro and Cryo) for 6s when Pyro Crystallize is triggered. Given Durin’s rather slow rate of Pyro application, the uptime on his RES Shred is not guaranteed with other non-Pyro off-field sources of Elemental application such as Furina’s. Durin’s Dark mode focuses more on his personal damage, especially when able to trigger Vaporize or Melt. This is also a viable option that forgoes buffs for Navia in order to increase his personal damage. Note that if Pyro Crystallize is not reliable or even possible, Navia loses very little to nothing. Hexenzirkel: When paired alongside another Hexerei character (namely Albedo or Fischl), Durin’s White mode RES Shred is increased to 35% and his personal damage is further enhanced. Similarly, his Dark mode’s damaging capabilities are further enhanced. |
Xiangling | Xiangling can provide off-field damage and Pyro application with her Burst to help enable Crystallize for Navia. Having Bennett in the team is almost mandatory because he alleviates a lot of Xiangling’s weak points, such as poor Energy generation and somewhat low ATK. However, Xiangling will extend Navia’s rotations to 20s or more, leaving downtime which can be awkward to fill if Navia’s third Skill isn’t available. |
Pyro MC | The Pyro Traveler can provide off-field Pyro application, hold 4pc TotM, as well as provide a miniscule DMG% buff from their C1. Since Navia does not enter the Nightsoul’s Blessing state, she can only make use of the first 6%. |
Electro Units
★ Fischl | Fischl is a prime example of an optimal teammate for Navia. She has good off-field damage and Elemental application, good Energy generation, low field time, and can snapshot external ATK buffs that Navia teams might run such as Bennett, 4pc TotM, or 4pc NO. Importantly, alternating her Skill and Burst allows for much shorter rotations, down to 16-17s if performed optimally. Her only real drawback is that she does not directly buff Navia and her damage and Elemental application is mostly single-target. Hexenzirkel: When paired alongside another Hexerei character (namely Albedo or Durin), Fischl gains access to ATK% buffs for both herself and Navia — provided a Pyro character is present to enable the Overload reaction. |
★ Ineffa | While Ineffa doesn’t provide any buffs to Navia herself, she can make up for it with her own personal damage, provided she is paired with an off-field Hydro applier. Note that someone with limited application like Mona is a suboptimal pairing for Ineffa as limited application will cause Lunar-Charged uptime to suffer. On top of her personal damage, she provides a shield for sustain and access to the Lunar-Charged reaction. |
| Iansan | Since Navia herself does not move much during her field time, she needs her teammates to stack Iansan’s Nightsoul points for her second Skill use. The only reasonable pairing is with Mavuika, as she can use her Burst after Navia’s first combo to re-stack Iansan’s buff. Even if the buff decays during Navia’s field time, getting her Skills fully buffed is already very valuable on its own. Note that Iansan herself cannot trigger Crystallize as she isn’t Geo and as such, cannot hold 4pc Scroll to buff Navia. |
| Ororon | Ororon can provide some Energy restoration via his A4 Passive, as well as a solid ATK% buff with his C6. He can also hold Favonius and 4pc Scroll to buff another PHEC damage dealer if available. Note that he cannot trigger 4pc Scroll for Navia as Crystallize can only be triggered by a Geo unit. Ororon also cannot access the full 40% DMG buff from the 4pc effect without a Hydro or another Natlan character in the team. |
Yae | Yae isn’t very synergistic with Navia considering her Energy requirements and high field time, but if used with Fischl as a Double Electro core, these issues can be alleviated. |
Beidou | Beidou can fill the role of off-field application and damage. However, she does not do a great job of this for multiple reasons. The first is that she needs another Electro unit (namely Fischl) to battery her expensive Burst. On top of that, her Burst has a long 20s cooldown, forcing longer rotations. Additionally, her personal damage falls off a cliff in single-target scenarios, as she loses access to her Burst's ability to chain lightning between multiple enemies. |
Cryo Units
Cryo Resonance | Pairing any two Cryo units (whilst maintaining a source of off-field Cryo application for Crystallize stack generation) will provide access to Cryo Resonance, granting the whole team a 15% CRIT Rate buff. Note that with low Cryo application. this may not have full uptime, but because of Crystallize’s global ICD limiting the amount of effective Geo application, this is not very impactful. |
Escoffier | Escoffier is a good option for your off-field applier and damage dealer. If run with Bennett, she can forgo building ER entirely and just focus on building purely offensive stats, provided she isn’t on her signature weapon. Her Hydro and Cryo RES Shred will reach 10% at most (5% if she is the sole Cryo unit), but her strong damaging capabilities, application and short cooldowns still make her a strong option. |
Skirk | While Navia’s teams don’t make the best use of Skirk herself, she is a strong option as a Burst DPS. As Cryo Crystallize generates Void Rifts for Skirk, pairing her alongside an off-field Cryo DPS lets Skirk swap in, hold her Skill, and throw out her Burst for a powerful nuke. In teams without Cryo off-field application, Skirk will have to hold her Skill twice per rotation to obtain enough Serpent’s Subtlety to use her Burst. |
Shenhe | Despite Navia not being a Cryo unit, Shenhe can still be used alongside an off-field Cryo damage dealer like Escoffier or Rosaria to provide them with her buffs, as well as give a small Skill and Burst DMG Bonus to Navia when Shenhe uses her Tap Skill. It is not advisable to use Shenhe without a second Cryo unit. |
Rosaria | Rosaria can be a decent alternative when paired with Bennett or with another Cryo unit to provide Navia with a slight CRIT Rate buff. Rosaria’s value falls off significantly if Navia is C2 as she already has an abundant amount of CRIT Rate buffs. |
Kaeya | Kaeya can fill the role of off-field Cryo application and damage, although he doesn’t do this better than other options. His Burst’s short range requires you to stay close to the enemy for consistent application. This can be both good and bad as his damage and application isn’t tied to a fixed circle, so if enemies move away, you can move after them without losing either. |
Hydro Units
★ Furina | Furina is one of the best flex slots for Navia considering how much she offers to the team. She provides a teamwide common DMG% buff granted that a healer is in the team. Gearwise, Furina can hold 4pc TotM for 100% uptime on the 4pc buff (as well as appreciate the 2pc HP% buff) and Favonius to lower the team's ER requirements. Furina’s biggest caveat is the 20s cooldown on her Skill, which does not align with most of Navia’s other popular teammates. However, even with this drawback, Furina is still an excellent choice. Note that she is a prime choice even if you do not have or want to give her a 4pc TotM set. |
| ★ Columbina | Columbina provides Navia with a source of off-field damage, Hydro application, and potentially supportive gear such as TTDS and 4pc TotM, depending on the exact team. She also enables and buffs the Lunar-Crystallize and Lunar-Charged reactions (as well as Lunar-Bloom, but Navia does not make use of this), which provide their own non-negligible damage. The effects of Lunar-Crystallize are discussed in more depth in the Crystallize Management section. |
(★ in Double Hydro) Yelan | Yelan provides a ramping DMG% buff to Navia through her A4, as well as off-field application and considerable damage through her Burst when paired with another Hydro. While still viable if used as the sole Hydro, her damage drops quite a bit as she loses out on Hydro Resonance and, more importantly, much needed Energy generation. Additionally, she may want to cast two Skills to both alleviate her ER requirements and allow her (and the rest of her team) to focus on more offensive stats. |
Sigewinne | Sigewinne can be quite good in Navia’s teams when paired with off-field Skill damage dealers (namely Chiori and Furina). She condenses offensive buffs for these characters, as well as healing (and Hydro Resonance) for Furina. This means she scales well with the off-fielders’ investment. |
Mona | Considering Navia doesn’t need much off-field PHEC application, Mona can fulfill the role of a flex slot because of the DMG% buff from her Omen and — if she can meet ER requirements with it — the ability to hold TTDS. It is important to note that TTDS may only activate every other rotation because of its 20s cooldown. Hexenzirkel: With two Hexerei characters, Mona can extend her Omen’s duration via Normal and Charged Attacks. This maximizes the uptime of her DMG% buff (and, with C4, her 15% CRIT Rate buff) on affected enemies, which is now a consistent factor in gearing Navia and her teammates. The C4 buff is also enhanced to provide Hexerei characters with an additional 15% CRIT DMG. |
Kokomi | While Kokomi does not provide any significant off-field damage, she does provide healing for Furina and is able to hold TTDS, which allows forgoing Bennett. The 20s CD of TTDS is not an issue in that case because of Furina's identical cooldown. She can also use her Burst to refresh the jellyfish’s duration as well as fill downtime with her own Normal Attacks, which will also generate more Fanfare. |
Xingqiu | Xingqiu can fill the role of off-field Hydro application and damage. He also brings some defensive utility, although this alone isn’t enough of a reason to bring him, as there are better options like Bennett. He is held back by his notably long cooldowns and potentially high ER requirements, especially if he is the sole Hydro character. |
| Aino | Aino does not provide much outside of Hydro application in terms of raw combat. However, alongside another Moonsign character, she can enable Ascendant Gleam, which can be crucial in fights against Wild Hunt enemies. |
Anemo Units
★ Xianyun | Although Xianyun is an Anemo unit, she can enable Navia to play Plunge teams while providing buffs for Plunging Attacks. Even though Navia’s A4 Passive incentivizes running two PHEC units, using another Geo unit alongside Navia is still recommended. Xianyun is one of, if not the, best alternative to Bennett if you wish to keep the spotlight on Navia. Additionally, focusing on Plunges enables the use of Fruitful Hook, which is a powerful option at high refinement rank, performing similarly to R5 Tidal Shadow at R1. However, it does not outperform Navia’s top options, even at R5, as a big portion of her damage still lies outside of her Plunging Attacks. |
Dendro Units
| Emilie | Emilie provides off-field damage and pseudo application by maintaining a Burning aura alongside another Pyro unit, which the Geo units in the team can utilize to generate Crystallize shards. Bennett can be that Pyro unit despite not having any off-field Pyro application, although he should take the field to ensure Burning uptime by using his Skill again. Emilie sacrifices one of Navia’s A4 stacks, as she isn’t a PHEC unit. |
On-Fielders
Raiden Shogun | Raiden’s short Burst duration paired with her Energy generation makes this pairing synergistic. This also makes Sara a strong buffing option as she can give her Flat ATK buff to both Raiden and Navia, as well as her C6 buff to Raiden. This team tends to fall short of more traditional Navia teams, but it is still a fine pairing. |
Noelle | Pairing Noelle with Navia sacrifices Navia’s potential to elevate Noelle’s damage, as Noelle doesn’t possess relevant particle generation or buffs. However, it is still an option, especially if you wish to have both of them share the spotlight. |
| Other On-Fielders | On-fielders like Zibai, Arlecchino, Neuvillette, Clorinde, etc. have no synergy with Navia but have short or flexible field times to let Navia fill a quickswap role in their teams. Note that shorter Navia field time means lower Crystallize shard generation for her Skills and such teams are neither Navia’s nor said on-fielder’s best teams. Nonetheless, they are still viable. |
Example Teams
Bennett Teams
Note: Any mention of tE or hE follows the same nuance as discussed in the Talents section; the terms given here are recommendations based on how Crystallize shard generation will usually play out in the given team.
Most Geo slots are fairly flexible. If one is not (e.g. Xilonen in Mavuika teams), this will be mentioned explicitly for that team. Representations of specific Geo units do not necessarily mean they are the best options.
This is not a comprehensive list of teams. The inclusion or exclusion of any given team does not necessarily reflect its power level. Which team is best in any given scenario will heavily depend on the options available to you and the content ahead of you.

Xilonen Variant:
One of Navia’s most popular teams as it maximizes her own personal damage and is a very powerful option overall. The main drawback of this team is that all three units are heavily contested, so it may make setting up other teams quite difficult. Xilonen’s Burst aids in stacking Fanfare despite Bennett already being a healer.
Rotation
Xilonen Q > Furina ED Q > Xilonen E N2 > Navia Q > Bennett EQ > Navia tE Combo > Xilonen E N2 > Navia hE Combo (hE N1)1
1 If available
Rotation Video
Ningguang Variant:
This team enables Ningguang as a damage dealer alongside Navia, while providing supportive value through Energy and Ningguang’s A4 Passive. Furina’s long cooldown allows Ningguang to comfortably fill time with her Burst and Charged Attack (further enhanced at C6). On top of this, a longer rotation lets Ningguang space her Skill uses apart long enough to get around her 6s particle ICD, elevating her potential as a battery.
Rotation
Furina ED Q > Navia Q > Bennett EQ > Ningguang E > Navia D1 hE N3D N1 > Ningguang Q ED C > Navia tE N3 (hE)2 > Bennett E
1 Dash through Ningguang’s Jade Screen if present
2 If available
Rotation Video

Bennett Variant:
This setup trades some of Navia’s damage for Mavuika’s. This team nearly requires Xilonen to charge Mavuika’s Burst. While Kachina can technically generate Fighting Spirit, she doesn’t do it nearly as effectively, which leads to a noticeable dropoff in performance.
Rotation
Mavuika tE > Navia Q > Bennett EQ > Xilonen E N2 > Navia hE Combo > Mavuika Q > Xilonen E N2 > Navia hE Combo
Rotation Video
Iansan Variant:
An alternative to Bennett in the team above is Iansan; throughout the rotation, her buff ticks down during Navia’s combo and is refreshed from Mavuika’s Burst. This leads to both of Navia’s Skills getting Iansan’s full buff on top of Mavuika’s own Burst receiving all the same buffs as Navia. In this team, replacing Xilonen with Kachina poses less of a problem, since Iansan can hold Favonius to bridge the Energy generation gap between Xilonen and Kachina, and both Iansan and Kachina help fill Mavuika’s Burst.
Rotation
Mavuika tE > Xilonen E N2 > Navia Q > Iansan E N11 Q > Navia hE Combo > Xilonen E N2 > Mavuika Q > Navia hE Combo
1 If Iansan is not C2 or higher
Rotation Video

Pairing Albedo with Fischl or Durin enables them to make use of the Hexenzirkel buffs given to teams with two Hexerei characters. As these teams will have high ER requirements on Navia and — with the Hexerei buffs given to Albedo — a guaranteed source of off-field Geo application, it is viable to use Navia’s Burst when available and forgo building ER entirely. Note that, even with off-field Geo application, Crystallize management can be tricky, so it may require some practice.
Rotation (Fischl)
Navia Q > Bennett EQ > Fischl N1 Q/E > Albedo E > Navia hE N3D N2 > Bennett E > Navia hE N3D N2
Rotation Video
Rotation (Durin)
Durin 2[E] Q > Albedo E > Navia Q > Bennett EQ > Navia tE Combo > Bennett E > Navia hE
Rotation Video

Using Fischl enables short, 16-17s rotations, as you aren’t locked behind any 20s cooldowns. Keeping the rotations short incentivizes using Geo characters with equally short cooldowns and Navia’s N3D N2 combo as it is faster than the alternatives.
GMC having access to two Skill uses here makes them an excellent battery.
Rotation (GMC)
Navia Q > Bennett EQ > Fischl N1 Q/E > GMC Q shE > Navia hE N3D N2 > Bennett E > GMC shE > Navia hE N1
Rotation Video
Rotation (Zhongli)
Zhongli hED N11 > Navia Q > Bennett EQ > Fischl N1 Q/E > Navia tE N3D N2 > Bennett E > (Zhonglie tE N1)2 > Navia hE N3D N2
1 To proc Favonius
2 If Navia Bursting when available - refer to Zhongli's details for more info
Rotation Video

The Kachina variation is one of Navia's most accessible teams as both Xiangling and Kachina are given for free, and Bennett is available in the Starglitter shop for 2 months every year. A solid baseline that will clear comfortably if executed properly. Proper funneling is important here as Xiangling’s ER requirements will quickly get out of hand otherwise.
Rotation (Kachina)
(Bennett E)1 > Kachina E N1 > Navia Q > Bennett Q E > Xiangling Q ED > Navia tE Combo > Kachina Q3/Bennett E > Navia hE Combo (hE)2 > Bennett E > Xiangling N24
1 First rotation only
2 If available
3 If Kachina is C2+
4 Catch Bennett particles
Rotation Video
Rotation (Chiori)
Navia Q > Bennett Q E > Xiangling Q ED > Chiori 2[E] > Navia tE Combo > Bennett E > Navia hE Combo (hE)1 > Bennett E > Xiangling N22
1 If available
2 Catch Bennett particles
Rotation Video

Emilie sustains a Burning aura for her personal damage, which acts as a Pyro aura that Navia and Zhongli can trigger Crystallize on. Bennett uses his Skill between Navia’s to refresh the Burning aura as well as generate Energy. Note that Burning can damage your on-fielder upon contact, making Serpent Spine somewhat unreliable without Zhongli. Since Bennett does not have any off-field Pyro application, this setup is also fragile against enemies that can apply self-auras (that are not Pyro or Dendro), or cleanse themselves.
Rotation
(Emilie E > Bennett E)1 > Zhongli hED N12 > Navia Q > Bennett EQ > Emilie Q/E > Navia tE Combo > Bennett E > (Zhongli tE N12)3 > Navia hE Combo
1 First rotation only
2 To proc Favonius
3 If Navia Bursting when available - refer to Zhongli's details for more info
Rotation Video
Bennett-less Teams

Ineffa Variant:
Ineffa is an incredibly synergistic option due to the effect of stacking Lunar-Crystallize with regular Crystallize, as discussed in the Crystallize Management section, on top of her shield and Columbina already buffing Lunar-Charged. Navia can also hold the artifact set “Night of the Sky’s Unveiling,” slightly lowering her Talent damage but gaining Lunar-Crystallize damage.
Rotation
Ineffa E (Q)1 > Columbina E (Q)1 > Xilonen E N2 > Navia Q tE Combo > Xilonen E N2 > Navia tE Combo
1 If available
Rotation Video
Furina Variant:
Furina and Columbina alleviate each other’s ER requirements, allowing Furina to build for more personal damage and Columbina to comfortably hold TTDS and 4pc TotM. Lunar-Crystallize contributes meaningful damage.
Rotation
Xilonen Q > Furina ED Q > Xilonen E N2 > Navia Q > Columbina E Q > Navia tE Combo > Xilonen E N2 > Navia tE Combo (tE)1
1 If available
Rotation Video

A great option for any content that promotes Ascendant Gleam, such as the Wild Hunt enemies. This team focuses on Lunar-Crystallize, which acts as a construct to enable Chiori’s second doll even at C0. Illuga’s C2 and C6 are both greatly appreciated, although not a hard requirement. Navia can hold the artifact set “Night of the Sky’s Unveiling” here, in the event that such a set has already been obtained. Due to the lack of Crystallize shields and any other form of sustain, Columbina can prefer running Prototype Amber, which additionally helps her meet ER requirements as solo Hydro.
Rotation (Albedo)
(Albedo E)1 > Columbina E (Q)2 > Albedo E > Illuga Q E > Navia Q tE Combo > (Albedo Q)2 > Navia tE Combo
1 First rotation only; skip Albedo’s following E that rotation
2 If available
Rotation Video
Rotation (Chiori)
Columbina E (Q)1 > Chiori 2[E] > Illuga Q E > Navia Q tE Combo > (Chiori Q)1 > Navia tE Combo
1 If available
Rotation Video

These teams lower Navia’s personal damage in exchange for more team damage. Xilonen is not directly replaceable here as she both heals for Furina and generates Fighting Spirit for Mavuika. These teams will often prefer an ATK% Goblet for Navia, so check the Genshin Optimizer.
Yelan Variant:
In Yelan’s case, she and Furina can output extremely high, albeit single-target, damage, due to Xilonen’s and Furina’s buffs, Hydro Resonance and increased Hydro particle generation. On top of this, the ramping DMG Bonus Yelan provides to Navia through her A4 Passive is also significant. This team scales very well with Yelan’s investment.
Rotation
(Furina ED)1 > Xilonen E N1 Q N1 > Furina Q (ED)2 > Navia Q > Yelan Q N1 E N1 > Xilonen E N2 > Navia tE Combo hE Combo > Yelan N1 E N2 > (Navia N1 hE)3
1 First rotation
2 Ongoing rotations
3 If available
Rotation Video
Mavuika Variant:
Mavuika in this slot brings her personal damage as well as her A4 buff. Her damage being AoE means this team will perform the same against multiple enemies (relative to Navia’s own AoE limitations). Note that this is still a Navia team, NOT a Mavuika team: as you can see in the rotation listed below, Mavuika swaps in, nukes with her Burst, sets up her Skill to get Vapes from off-field, and leaves again.
Rotation
Xilonen Q > Furina ED Q > Xilonen E N2 > Navia Q > Mavuika Q C E > Navia tE Combo > Xilonen E N2 > Navia hE Combo (hE N2)1
1 If available
Rotation Video

Kokomi Variant:
This team forgoes Bennett in favor of Kokomi, who can buff Navia with TTDS as well as provide Hydro Resonance and Energy generation for Furina to elevate her personal damage. Kokomi on-fields with her Burst to fill downtime and deal some damage, as well as generate additional Fanfare for Furina. Note that TTDS is not much of a drop in Kokomi’s personal damage as she appreciates the HP% secondary stat.
Rotation
Furina ED Q > Navia Q > Chiori 2[E] > Kokomi ED N1 > Navia hE Combo > Kokomi Q N3D N3 > Navia hE Combo (hE)1
1 If available
Rotation Video
Sigewinne Variant:
Sigewinne trades Kokomi’s buff to Navia for buffs to the other off-fielders from her Elemental Skill instead.
Rotation
Navia Q > Furina ED Q > Sigewinne N11 E > Chiori 2[E] > Navia tE Combo hE Combo > Chiori (Q)2 > Navia (hE Combo)3
1 To proc Favonius
2 If available
3 If available, otherwise fill downtime with Normal Attacks
Rotation Video

Pairing two Cryo teammates provides Cryo Resonance. Cryo options tend to not focus on buffing Navia and instead provide their own damage. In the case of Shenhe, she provides buffs to the other Cryo unit. Both Rosaria and Shenhe still provide some buffs to Navia via their A4 Passives.
Rotation (Rosaria)
(Xilonen Q)1 > Escoffier E(Q) > Xilonen E N2 > Navia Q > Rosaria EQ > Navia tE Combo > Xilonen E N2 > Navia hE Combo
1 Can be used here if Escoffier’s Burst is unavailable
Rotation Video
Rotation (Shenhe)
Escoffier EQ > Xilonen E N2 > Navia Q > Shenhe Q tE > Navia tE Combo > Xilonen E N2 > Navia hE Combo > Shenhe tE N21 > (Navia hE)2
1 To proc Favonius
2 If available
Rotation Video

Ineffa Variant:
Ineffa brings her own damage rather than buffs for Navia as well as a shield. She benefits from Xilonen’s RES Shred but not much else, since Lunar-Charged damage is not affected by DMG% buffs. Still, her damage is quite powerful.
Rotation
Ineffa E (Q)1 > Xilonen Q > Furina ED Q > Xilonen E N2 > Navia Q hE Combo > Xilonen E N2 > Navia hE Combo (hE)1
1 If available
Rotation Video
Fischl Variant:
Fischl provides her own damage, which is further enhanced by both Furina and Xilonen’s DMG% buffs, as well as Xilonen’s RES Shred.
Rotation
(Fischl E)1 > Xilonen Q > Furina ED Q > Xilonen E N2 > Navia Q > Fischl Q/E > Navia tE Combo > Xilonen E N2 > Navia hE Combo (hE)2
1 First rotation only if starting with full Energy
2 If available
Rotation Video

Xilonen Variant:
Both Xilonen’s RES Shred and healing do not work in this team, as her requirement of two PHEC teammates is not met. However, her ability to hold 4pc Scroll and the vast amount of Energy she provides still make her extremely valuable in this team. This team scales really well with Xilonen’s C2: not only does she gain her regular C2 buffs, but her Geo RES Shred also takes effect.
Rotation
Furina ED Q > Xilonen E N2 > Navia Q > Xianyun EPQ > Navia hE Plunge Combo > Xilonen E N2 > Navia hE Plunge Combo (hE)1
1 If available
Rotation Video
Albedo Variant:
Albedo’s flower provides Energy, personal damage, and aids in Crystallize shard generation. This rotation accommodates two Skill uses, which can help a lot in scenarios where his flower tends to break. To aid with Energy requirements, Furina takes the field to proc Favonius sword between Navia’s Skills. If Albedo’s flower does not break, this may not be necessary depending on your builds. Check the Energy Recharge Calculator for more accurate results.
Rotation
Navia Q > Albedo E > Furina ED Q > Xianyun EPQ > Navia hE Plunge Combo > Albedo E > Furina N2D2 > Navia hE Plunge Combo (hE)1
1 If available
2 To proc Favonius
Rotation Video
Quickswap Damage Dealer

Raiden can battery everyone’s Bursts and deal significant personal damage, while Navia can utilize Raiden’s fairly long downtime. Even though Navia cannot benefit from Sara’s C6, Sara can still provide Navia with a Flat ATK buff, which proves to be quite valuable. Using Sara’s Skill and Aimed Shot can prove to be trickier than expected as you’re locked into somewhat lengthy animations without any resistance to interruption — unless Xilonen is C1 or higher. This isn’t generally a big issue, but worth a disclaimer still. Note that this team’s Crystallize shard generation is limited, so it may require more careful Crystallize Management.
Rotation
(Raiden E)1 > Navia (tE)1Q > Xilonen EQ N2 > Sara E Q > Navia tE N3 hE > Sara C > Raiden Q N4E N3CD N4
1 First rotation only
Rotation Video

This pairing is more beneficial for Noelle than it is for Navia. Nonetheless, it is a fine team option if you want to focus on multiple units’ on-field capabilities. Noelle generates Crystallize shards while she is on-field, as well as drive Yelan and heal to generate Fanfare. Noelle’s Burst not disappearing if she is swapped out is immensely useful here as it allows for a second Yelan Skill and better Crystallize distribution for Navia’s Skills.
Rotation
Furina ED Q > Navia Q > Yelan Q N1 E N1 > Navia hE N1 > Noelle E N1 Q N3D N3 > Navia tE N1 > Yelan E N2 > Noelle N3 > (Navia hE)1
1 If available
Rotation Video
Credits
Writing: rezmir, sew, cynematic
Calculations: rezmir, lesterberne
Editing: idkanonymized, pulsar79., hans_sprungfeld, luwunae
TC Contributors: rezmir, sew, caxia5, lesterberne, hans_sprungfeld, jack5mikemotown, cosmic_wanderer_
Media Contributors: rezmir, lesterberne, idkanonymized, brukin, BreadCat, jack5mikemotown, fiszu
Transcribers: luxeby, chasing_haze
References
Navia Calcs - rezmir
Navia ERC Mastersheet - lesterberne