Updated for Version Luna I

Aino is the first 4★ Hydro Claymore character in Genshin Impact, and she applies off-field Hydro while also increasing the team’s Moonsign Level. Learn about Aino’s best builds, best weapons, best artifacts, and best teams in this quick guide.
Note that the information given may change if new discoveries are made. More extensive testing is in progress.
Join our Discord to participate in the theorycrafting process.
Table of Contents
Infographic
Credits to: plumetra, acerbus114, and KQM Staff
Character Overview
Pros
- Has off-field AoE Hydro application
- Is freely available through the Nod-Krai Archon Quest
- Increases the team’s Moonsign Level, thus enabling certain gear and characters such as Flins
- Ai know
Cons
- Does not apply as much Hydro as the top Hydro enablers, such as Xingqiu and Yelan
- Poor personal damage outside of Lunar-Charged or Bloom teams
- Ainoway
Playstyles
Off-Field Enabler
Aino uses her Elemental Burst to apply off-field Hydro, enabling reactions and doing some reaction damage in certain teams.
Talents
Talent Priority
In teams where Aino can trigger Lunar-Charged or Bloom (in Nilou Bloom), she would appreciate high character levels to maximize the reaction damage. However, this remains a low priority for most Lunar-Charged teams’ performance.
Burst >> Skill
Aino is mainly played as a support whose Talent damage contributes little towards the team DPS, so leveling her Talents can be skipped. Aino’s main source of damage comes from Transformative Reactions and her Elemental Burst having EM scaling from her A4 Passive, and this further disincentivizes leveling her Talents, which have ATK scalings.
Talent Overview
 Normal Attack | Bish-Bash-Bosh Repair
Talent Description
Normal Attack
Performs up to 3 consecutive strikes.
Charged Attack
Drains Stamina over time to perform continuous spinning attacks against all nearby opponents.
At the end of the sequence, performs a more powerful slash.
Plunging Attack
Plunges from mid-air to strike the ground below, damaging opponents along the path and dealing AoE DMG upon impact.
Negligible Physical attacks that are not used for damage.
 Elemental Skill | Musecatcher
Talent Description
Aino throws a Musecatcher forward, dealing Hydro DMG and dragging her along behind it. When the dragging stops, Aino deals AoE Hydro DMG to nearby opponents.
Holding the Skill will cause it to behave differently.
Hold
Enter Aiming Mode to adjust the Musecatcher’s throwing direction.
Aino grabs an opponent and drags herself towards it, dealing damage upon grabbing and upon making contact with the target. This allows her to close the distance between herself and enemies. The Hold Skill allows Aino to manually aim the movement of this hook-and-pull action.
 Elemental Burst | Precision Hydronic Cooler
Talent Description
Aino deploys a custom water-spraying device, the Cool Your Jets Ducky to establish a Focused Hydronic Cooling Zone.
While active, the Cool Your Jets Ducky will periodically fire water balls at nearby opponents, dealing Hydro DMG.
Aino summons a device that periodically attacks and applies Hydro to nearby enemies from off-field. This is Aino’s main source of Hydro application.
 Ascension 1 Passive | Modular Efficiency Protocol
Talent Description
Aino will be granted the corresponding buff effects based on the party’s Moonsign.
Moonsign: Ascendant Gleam: Her Elemental Burst Precision Hydronic Cooler is enhanced: The Cool Your Jets Ducky will fire water balls more frequently, and the water balls will deal AoE Hydro DMG over a larger area of effect.
When Aino’s team is Moonsign Level 2 (Ascendant Gleam), her Burst’s attacks are more frequent and have a bigger AoE. This passive makes Aino a more effective Hydro applier for teams with another Nod-Krai unit.
 Ascension 4 Passive | Structured Power Booster
Talent Description
Aino’s Elemental Burst DMG is increased by 50% of her Elemental Mastery.
Aino’s Burst damage increases based on her EM. This is an Additive Base DMG buff. It further encourages EM builds on Aino in teams where she deals reaction damage.
 Moonsign Benediction Passive | Force Limit Analysis
Talent Description
When Aino is in the party, the party’s Moonsign will increase by 1 level.
Aino increases the team’s Moonsign Level by 1. This allows her to use 4pc Silken Moon’s Serenade and enable 4pc Night of the Sky’s Unveiling for the team, as well as the Moonsign Level–related effects of Flins and Lauma’s kits.
Constellations
 Constellation 1 | The Theory of Ash—Field Equilibrium
Constellation Description
After Aino uses her Elemental Skill Musecatcher or her Elemental Burst Precision Hydronic Cooler, her Elemental Mastery will be increased by 80. The Elemental Mastery of other nearby active party members will be increased by 80 for 15s.
The Elemental Mastery-increasing effects of this Constellation do not stack.
A simple 80 EM buff to Aino and the active character for 15s after Aino uses her Skill or Burst.
 Constellation 2 | The Principle of Transference in Gear Differentials
Constellation Description
If Aino is off-field while the Focused Hydronic Cooling Zone of her Elemental Burst Precision Hydronic Cooler is active, when your active party member hits a nearby opponent with an attack, the Cool Your Jets Ducky will fire an additional water ball at that opponent, dealing AoE Hydro DMG equal to 25% of Aino’s ATK and 100% of her Elemental Mastery. This DMG is considered Elemental Burst DMG. This effect can be triggered once every 5s.
When Aino is off-field, her Burst deals a coordinated attack when the active character hits the enemy. This coordinated attack can be triggered at most three times per Aino’s Burst.
 Constellation 3 | Cake and the Art of Mechanism Repair
Constellation Description
Increases the Level of Precision Hydronic Cooler by 3.
Maximum upgrade level is 15.
Aino either does not build for damage, or builds EM for her reaction damage, so a +3 Burst level that only increases the ATK scaling is quite pitiful.
 Constellation 4 | Butter and Cats and the Law of Energy Supply
Constellation Description
When the Elemental Skill Musecatcher hits an opponent, it will restore 10 Elemental Energy for Aino. Energy can be restored to her in this manner once every 10s.
Aino’s C4 greatly decreases her ER requirements, which makes building her even easier.
 Constellation 5 | Perpetual Turbine of Metal and Light
Constellation Description
Increases the Level of Musecatcher by 3.
Maximum upgrade level is 15.
An even more unremarkable Constellation than C3.
 Constellation 6 | The Burden of Creative Genius
Constellation Description
For the next 15s after using the Elemental Burst Precision Hydronic Cooler, DMG from nearby active characters’ Electro-Charged, Bloom, Lunar-Charged, and Lunar-Bloom reactions is increased by 15%.
Moonsign: Ascendant Gleam: DMG from the aforementioned reactions will be further increased by 20%.
For 15s after Aino uses her Burst, she gives the team reaction buffs based on the team’s Moonsign:
- At Moonsign Level 1 (when Aino is the only Nod-Krai character in the team), Aino increases the team’s Electro-Charged, Lunar-Charged, Bloom, and Lunar-Bloom DMG Bonus by 15%, although her teams cannot deal Lunar-Charged or Lunar-Bloom without Ineffa, Flins, or Lauma.
- At Moonsign Level 2, Aino increases the team’s Electro-Charged, Lunar-Charged, Bloom, and Lunar-Bloom DMG Bonus by 35%.
Overall this is a decent Constellation to have, especially for Flins and Lauma.
Artifacts
ER Requirements
Calcs for ER requirements can be found here (last updated for Version “Luna I”).
| 1 Skill per Burst | C0 | C4 |
| Baseline | 190–250%+ | 150–215% |
| Favonius Greatsword | 155–205% | 125–165% |
| Flame-Forged Insight | 100–140% | 100% |
Use the Energy Recharge Calculator to determine exact requirements for your team and rotation. For more details on how Favonius weapons will affect your team, please use Ac1d’s Favonius Mastersheet.
Artifact Stats
 Sands |  Goblet* |  Circlet* |
| ER / EM | EM / Hydro DMG% | EM / CRIT |
Stat Priority: ER (until requirement) > CRIT Rate (Favonius) > EM ≥ CRIT > ATK%
*Aino’s damage is often neglected in her teams, so prioritize reaching ER requirements and having enough CRIT Rate to proc Favonius over using the correct main stats.
For personal damage, Aino builds EM if she triggers Bloom, or both EM and CRIT if she deals Lunar-Charged damage. If Aino does not trigger reactions, CRIT and ATK% are better for her Burst, but the damage is often too miniscule to be worth building for.
Artifact Sets
 4pc Silken Moon’s Serenade (SMS) | As a Nod-Krai character, Aino can use 4pc SMS for its teamwide EM buff with full uptime. When Aino is the only Nod-Krai character, 4pc SMS gives 60 EM, and this buff doubles with one extra Nod-Krai character. Additionally, 4pc SMS gives 10% Lunar Reaction DMG Bonus teamwide. This buff is regarded as “Gleaming Moon: Devotion” and does not change regardless of the team’s Moonsign, despite the confusing wording. Aino often holds 4pc SMS to also benefit from its 2pc ER effect. However, other teammates (usually support units) can also hold it instead, especially when their ER requirements are harder to reach. |
 4pc Instructor | An alternative to 4pc SMS when another character is already holding it, although 4pc Instructor wants Aino to trigger a reaction while she is on-field right before swapping to the dedicated on-fielder for maximum buff uptime. |
 4pc Noblesse Oblige (NO) | A buffing set for teams that do not use EM buffs well. |
 4pc Scroll of the Hero of Cinder City (Scroll) | 4pc Scroll gives similar buff value to 4pc NO, although it is more useful with non-ATK-scaling characters who like DMG Bonus. |
 4pc Deepwood Memories (Deepwood) | Aino’s Burst constantly hits enemies, which makes her a decent 4pc Deepwood holder for Dendro teams. However, most often these teams have Aino on 4pc SMS instead. |
 4pc Gilded Dreams (GD) / 4pc Flower of Paradise Lost (FoPL) | Two sets that focus on Aino’s reaction damage instead of team buffs. This is not recommended as Aino usually represents a small portion of team damage. 4pc FoPL is only viable in Nilou Bloom teams. |
Weapons
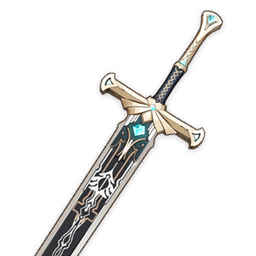 4★ Favonius Greatsword | Best option for general use. The weapon covers most if not all of Aino’s Energy needs, and the additional particles help her teammates considerably. Aino can use a few Normal Attacks during her field time to trigger the Favonius passive more reliably. |
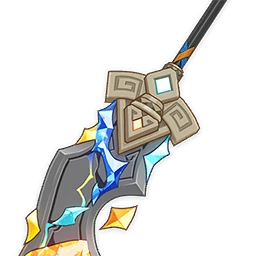
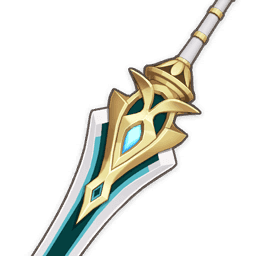 4★ Makhaira Aquamarine | Makhaira Aquamarine provides EM to Aino and a Flat ATK buff to the entire team based on her EM. This Claymore can be preferred over Favonius Greatsword if the team is not Energy-hungry and benefits from the Flat ATK buff (for example, some Flins Lunar-Charged and Arlecchino Overvape teams). |
 4★ Forest Regalia | An ER-secondary weapon with a passive that creates a Leaf on the ground when Aino triggers Bloom. This Leaf can be picked up by any teammate, giving them up to 120 EM (at R5). However, picking up the Leaf may be more difficult than it sounds due to various reasons, such as enemies with a large hitbox blocking the character or dazzling visual effects hindering the player’s navigation. |
 4★ Sacrificial Greatsword | Sacrificial Greatsword is usually less flexible than Favonius Greatsword. Nevertheless, a highly refined Sacrificial can be used to battery a Hydro teammate with Aino’s double Skill cast. |
 4★ Flame-Forged Insight | This event-limited weapon is one of the best 4-star options for Aino’s reaction damage: it provides huge amounts of EM and Flat Energy, two things Aino cares most about. |
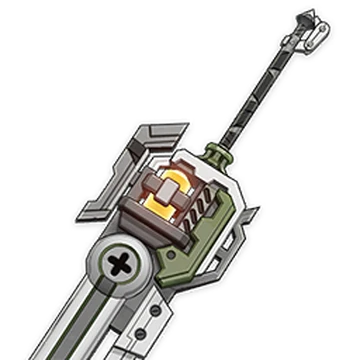 4★ Master Key | Similarly to Flame-Forged Insight, Master Key offers EM and ER to Aino. However, the EM provided by this weapon is slightly smaller, and the ER secondary stat is not as impactful as the other Claymore’s Flat Energy. Still, it is a craftable, so players who have missed the 5.8 event can get it. |
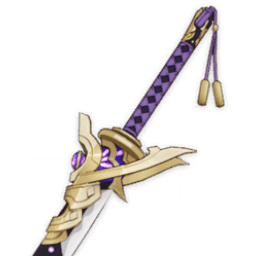 4★ Katsuragikiri Nagamasa | Katsuragikiri helps Aino meet her ER requirements comfortably with its ER secondary stat and Flat Energy refund passive. It is a viable option for those who have had this Claymore refined and do not wish to spend more billets on Master Key. |
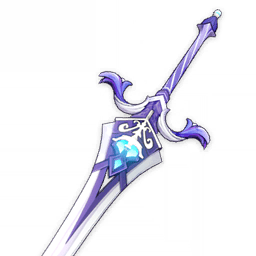
 5★ CRIT Claymores / 4★ Serpent Spine | While these Claymores increase Aino’s personal damage greatly, it is better instead to use them on other Claymore DPS units. |
Teams
Rotation Notation
- N = Normal Attack
- C = Charged Attack
- A = Aimed Shot
- P = Plunging Attack
- E = Elemental Skill
- tE = Tap Skill
- hE = Hold Skill
- Q = Elemental Burst
- D = dash (cancel)
- J = jump (cancel)
- W = walk (cancel)
- > = switch character
- ( ) = “these actions are optional; please refer to the notes below”
- [ ] = “repeat these actions the specified number of times”
Teambuilding
- Aino is used as Hydro applier in her teams.
- She increases the team’s Moonsign Level; activates 4pc Silken Moon’s Serenade (SMS), 4pc Night of the Sky’s Unveiling (NotSU), and the effects of other gear; and unlocks the Moonsign: Ascendant Gleam effects of Lauma and Flins’s kits.
- A second Nod-Krai unit is preferred to enable Moonsign: Ascendant Gleam, which can increase Aino’s Hydro application rate and AoE.
Lunar-Charged

Aino’s off-field Hydro application enables the reaction Lunar-Charged for Flins’s and Ineffa’s damage. Aino also raises the Moonsign Level by 1; together with Flins or Ineffa, Aino can activate Moonsign: Ascendant Gleam. This makes 4pc SMS (usually on Aino) provide 120 EM and 4pc NotSU give the holder 30% CRIT Rate. As a result, Aino can be one of the best Hydro units for Lunar-Charged teams while also being free.
Notable Teammates
 Flins | As Flins’s kit demands Moonsign: Ascendant Gleam to be viable, Aino is one of his two best teammates as of Version “Luna I,” alongside Ineffa. Besides the effects of Ascendant Gleam and buffs from Constellations (C1 and C6), Aino also has a short-cooldown Hydro application via her Burst, which synergizes well with Flins’s short rotation preference. |
 Ineffa | Ineffa appreciates the 120 EM buff and 10% Lunar Reaction DMG Bonus from 4pc SMS that Aino or another member can equip in a Moonsign Level 2 team. |
Electro
Flins teams often have an off-field Electro damage dealer / buffer to help with his ER requirements, whereas Ineffa teams can use a dedicated on-field Electro DPS.


Hydro
The second Hydro unit on a team is often there for their personal damage output, but Flins teams tend not to use them over a second Electro character.


Anemo
Anemo characters bring Electro / Hydro RES Shred from 4pc Virdescent Venerer and their own utility, such as grouping, stat buffing, or survivability. Some of them can deal good Swirl or Lunar-Charged damage (via AoE Swirl or Anemo Absorption) and can act as the team’s driver for units such as Xingqiu, Yelan, or Beidou.


Flex
In a pure Lunar-Charged team, the flex slot is usually taken by an Anemo support unit (see above); however, other characters whose Element does not interfere with the Electro–Hydro double aura can still be useful.


Example Teams
This is not a comprehensive list of teams. The inclusion or exclusion of any given team does not necessarily reflect its power level.

A typical Flins Lunar-Charged team. While Ineffa already activates Moonsign: Ascendant Gleam for Flins, Aino is still one of the best Hydro units to use thanks to her short cooldown and EM and Lunar-Charged DMG Bonus from C1 and C6, respectively. Without Ineffa, Aino is almost mandatory for Flins’s Lunar-Charged teams, and Kuki Shinobu can be used as an Electro battery and healer instead.
Sample Rotation (Ineffa)
Ineffa E (Q)¹ > Aino EQ > Sucrose ED (Q)¹ > Flins combo
¹Burst when available
Sample Rotation (Shinobu)
Aino EQ > Shinobu E (Q)¹ > Sucrose ED > Flins combo
¹Burst when available

A quickswap team that does not have any dedicated on-fielder, allowing players to freely reposition and refresh abilities at will to adapt to the opponents’ actions. The sample rotation provided below is a fixed rotation that players can use as a pointer.
Sample Rotation
Ineffa E/Q > Aino EQ > Fischl N1 E/Q > Heizou N1 Q N4C E N4C

Another Aino–Ineffa team that has a stronger Lunar-Charged damage focus thanks to Ifa’s A1 Reaction DMG Bonus buff. Aino allows the team to run shorter rotations compared to Xingqiu or Furina.
Sample Rotation
Ineffa E (Q)¹ > Aino EQ > Ororon EQ > Ifa E N13 (Q)¹ (P)
¹Burst when available

Ayato acts as an on-field DPS in this team, dealing both Hydro and Lunar-Charged damage. Together, Aino and Ineffa increase Moonsign Level to Ascendant Gleam, which allows Ayato to use 4pc NotSU, a good set for both his personal and team damage.
Sample Rotation
(Ayato Q)¹ > Ineffa E/Q > Xilonen E(Q)² N2 > Aino Q E > Ayato E N15
¹Burst when available
²Use when healing is needed
Overvape

With the help of the Lunar-Charged reaction, Aino’s Hydro application is just enough to enable Vaporize for some Pyro damage dealers with very slow Elemental application, such as Arlecchino or Yoimiya. While there is still some risk of losing Vape, Aino has some advantages over other Hydro units, including a considerable amount of buffs (her C1 and the full effect of 4pc SMS), the ability to enable 4pc NotSU for every character, and short cooldowns for shorter rotations, which can increase DPS.
Notable Teammates
 Ineffa | As Aino’s Hydro application is increased with Moonsign Level 2, and Lunar-Charged consumes less Hydro aura over time compared to Electro-Charged, Ineffa is almost mandatory for this archetype. This does not even account for the added effect of Moonsign Level 2 on 4pc SMS and 4pc NotSU. |
Pyro DPS
Any Pyro DPS units with relatively slow application can utilize Aino’s Hydro application for Vaporize, and Ineffa’s Electro application for Overloaded. They also benefit from the large 120 EM buff from Aino’s 4pc SMS and have the ability to use 4pc NotSU on themselves thanks to Moonsign: Ascendant Gleam and Lunar-Charged.


Flex
The flex option is oftentimes a buffer to increase the damage dealt by the Pyro DPS. Bennett is most notable for his immense ATK buff.
A second Hydro guarantees Vape consistency, allowing Pyro DPS units that have faster application to be played in the team.


Example Teams
This is not a comprehensive list of teams. The inclusion or exclusion of any given team does not necessarily reflect its power level.

With every teammate providing buffs or enabling reactions for Yoimiya, she can deal formidable damage while also having a comfy shield to execute her full combo uninterrupted. 4pc NotSU is Yoimiya’s best set in this team.
Sample Rotation
Ineffa E (Q)¹ > Bennett EQ > Aino EQ > Yoimiya E 3[N5D]
¹Burst when available

A good Overvape team that does not require Bennett for Chasca. Aino is one of the rare off-field Hydro appliers that Chasca can play with. Chevreuse’s C6 is crucial for its 60% Pyro and Electro DMG Bonus buff for Chasca. However, a non-C6 Chevreuse can still provide some value with an up to 40% ATK buff to Ineffa.
Sample Rotation
Ineffa E (Q)¹ > Aino EQ > Chevreuse Q 3[hE] > Chasca combo
¹Burst when available
Hyperbloom and Burgeon

While not having enough Hydro application to enable Hyperbloom / Burgeon herself, Aino can still increase the Dendro Core generation when used with a primary Hydro applier. She also provides buffs through 4pc SMS with good uptime.
Notable Teammates
Dendro
Strong Dendro application is incentivized to generate as many Dendro Cores as possible.
★ Lauma | Lauma teams lose more than they gain when using Aino. While Lauma’s personal damage increases with Aino, the nerf in Bloom-related reaction damage is more impactful to team DPS. This pairing is only recommended if Lauma is at high Constellation. Note that Lauma only makes the team trigger Lunar-Bloom reactions. The damage from Dendro Cores rupturing / Hyperbloom / Burgeon is still normal Bloom / Hyperbloom / Burgeon damage. Check out the Lauma Quick Guide for more information. |


Hydro
A second Hydro applier helps the team’s Core production. They also deal personal damage.


Electro
Electro characters with sustained application to trigger Hyperbloom. Either on-field or off-field Hyperbloom triggers can be used.


Pyro
Pyro characters with sustain application to trigger Burgeon. Because Burgeon deals self-damage to the active character, having a unit that provides survivability is important. Thoma can somewhat fulfill this role.


Example Teams
This is not a comprehensive list of teams. The inclusion or exclusion of any given team does not necessarily reflect its power level.

Sample Rotation
Baizhu EQ > Xingqiu Q N2 > Raiden E N1 > Aino EQ N1 > Baizhu 2[N3D] E N3 > Xingqiu ED N2 > Baizhu N3D > Aino E > Baizhu N3D N3

Sample Rotation
Nahida E (Q) > Aino EQ > Thoma Q E N2¹ > Barbara (E) N2C/N3C spam for 5s > Aino E > Barbara N2C/N3C spam for 7s
¹For Kitain Cross Spear
Freeze

Aino’s off-field AoE Hydro application can be used to enable Freeze for a Cryo DPS. Her Hydro application rate is fast enough to keep enemies with normal Freeze resistance in the Frozen state, and it is slow enough to not mess up Cryo Swirl / Crystallize setups against unfreezeable enemies.
Notable Teammates
Cryo
Cryo damage dealers use Aino to trigger Freeze. A Double Cryo core (or Triple with Escoffier) is most common.
 ★ Escoffier | Escoffier encourages a full Cryo / Hydro team setup for her RES Shred value. She is arguably the best character for Freeze teams. |


Anemo
If Escoffier is not used, an Anemo support for 4pc VV RES Shred and their own utility (healing, shield, grouping, etc.) is often picked.


Flex
Other than Cryo and Anemo characters, some supports from different Elements, such as Xilonen, can be used. Some Hydro units can be used too, but they often devalue Aino’s contribution.
★ Xilonen | Xilonen shreds Cryo and Hydro RES with her Elemental Skill, and provides up to 40% DMG Bonus from 4pc Scroll. Her healing is a nice touch to her utility. |
Example Teams
This is not a comprehensive list of teams. The inclusion or exclusion of any given team does not necessarily reflect its power level.

Aino is a F2P Hydro applier for Skirk teams, enabling Freeze uptime in multi-target scenarios with her slight AoE. However, Aino remains a poor option for Skirk as she lacks any relevant buffs that Skirk wants.
Sample Rotation
Escoffier E(Q)¹ > Aino EQ > Dahlia EQ > Skirk tE NA spam with Burst
¹Use if healing is needed

An accessible and comfy Freeze team for new players, although its performance is quite lacking for more difficult combat content.
Sample Rotation
Aino EQ > Rosaria EQ > Kaeya EQ > Lan Yan 2[E] (Q)¹ > Rosaria E > Kaeya E > Lan Yan 2[N3D]
¹Burst when available
Flex

Aino can still be used as a flex pick in other team archetypes that appreciate or do not mind her off-field Hydro Burst. Even though she is rarely an optimal selection for these teams, her selling point is her availability and the EM buffs with good uptime from her C1 and 4pc SMS.
Example Teams
This is not a comprehensive list of teams. The inclusion or exclusion of any given team does not necessarily reflect its power level.

Aino raises the team’s Moonsign to Ascendant Gleam, so Lauma’s Lunar-Bloom damage will gain additional CRIT stats from her A1 Passive and the team can fully benefit from 4pc Silken Moon’s Serenade, but the normal Bloom reactions will lose their ability to crit. Coupled with Aino’s rather slow Hydro application, this Nilou–Lauma team usually deals more damage with a non–Nod-Krai Hydro unit with faster application like Xingqiu instead. As such, Aino is only recommended if Lauma’s personal damage is the utmost priority, or when Ascendant Gleam is desired to deal with certain enemies (the Wild Hunt).
Aino builds full EM for Bloom damage in this team.
Sample Rotation
Lauma hE1 > Nilou (Q) E N2 E > Aino EQ > Kirara Q shE > Lauma Q N3 hE 2[N3] > Aino E > Kirara shE > Lauma 2[N3]
¹Use Lauma tE on the first rotation.

Aino can be used in this Arlecchino Vape team to provide 80 EM from her C1 and 60 EM from 4pc SMS. Aino’s random targeting can enable some Vaporize for Arlecchino in AoE, although this is not reliable.
Sample Rotation
Arlecchino E > Yelan EQ N1 > Bennett EQ N1 > Aino EQ N1 > Arlecchino C 5[N3D] N3

Despite hardly being an optimal option in this team, Aino can still bring some EM from her Constellation and artifact set to buff Mizuki’s Swirl damage.
Sample Rotation
Aino E > Furina ED Q > Mizuki Q > Ororon EQ > Aino Q E > Mizuki N1 E Floating state
Credits
Writers: acerbus114
Contributors: lesterberne, pjeljr, lostguide
Team images made with the KQM portrait generator.