Updated for Version 5.8
Ayaka is a 5★ Cryo Sword character in Genshin Impact who elegantly slices through enemies with her powerful Elemental Burst and Cryo-infused attacks. Learn about Ayaka’s best builds, best weapons, best artifacts, and best teams in this quick guide.
Note that the information given may change if new discoveries are made. More extensive testing is in progress.
Table of Contents
New Content
 Escoffier | Escoffier is a very powerful Cryo character who consolidates multiple roles with her high off-field damage, RES Shred, and healing. |
 Skirk | Skirk is a unique Cryo Sword damage dealer who can use her abilities as an on-field Normal Attack Cryo DPS unit or as a quickswap Burst damage dealer. |
 Azurelight | A powerful 5-star stat stick; Ayaka can situationally activate its extremely powerful passive in specific setups. |
 Finale of the Deep Galleries | Not to be confused with Finale of the Deep, this artifact set’s Elemental Burst DMG% is not snapshottable, which makes it non-functional with Ayaka. |
Infographic

Credits to irokei, pjeljr, angtahimik, cote, auraolis and KQM Staff
Character Overview
Pros
- Has on-demand, on-field Cryo application through her Alternate Sprint and Cryo Infusion.
- Her free-to-play weapons perform close to 5-star alternatives and not far behind her signature.
- Can flexibly fill downtime with her Cryo-infused Normal and Charged Attacks or swap to her teammates and activate their respective abilities.
- Has good options for vertical investment into herself and her team.
Cons
- Loses a majority of her personal damage if her Elemental Burst misses.
- Requires good Energy management and funneling to fund her Elemental Burst.
- Relatively inflexible team compositions.
- Her best artifact set options have conditionals which can make her tricky to build.
- Her Alternate Sprint and Charged Attack can feel clunky to use.
Playstyles
On-field Cryo DPS
Ayaka uses her Elemental Burst as her main source of damage. She fills rotation time with her Cryo-infused Normal and Charged Attacks or her teammates’ Skills to fund Ayaka’s Elemental Burst.
Ayaka can spend a variable amount of time on-field. She swaps off-field to refresh her teammates’ Skills so they can redeploy their buffs and generate particles.
Quickswap Cryo DPS
Ayaka spends less time on-field as a quickswap Cryo DPS unit. She uses her Skill to generate Cryo Particles for herself, and her Burst deals the vast majority of her damage.
Talents
Level Talent Priority
On-Field Cryo DPS
Burst > Normal Attack > Skill
Quickswap Cryo DPS
Burst > Skill > Normal Attack
Ayaka’s Elemental Burst represents most of her damage in all of her teams and should be prioritized. Ayaka usually fills rotation time with her Cryo-infused Normal Attacks, so they should be leveled as well. If she’s played exclusively in quickswap teams, her Elemental Skill takes priority over her Normal Attacks.
While leveling Ayaka to Level 90 is a pretty minor damage increase relative to the cost, it is eventually worthwhile once your teams start running out of things to improve.
Talent Overview
 Normal Attack | Kamisato Art: Kabuki
Talent Description
Normal Attack
Performs up to 5 rapid strikes.
Charged Attack
Consumes a certain amount of Stamina to unleash a flurry of sword ki.
Plunging Attack
Plunges from mid-air to strike the ground below, damaging enemies along the path and dealing AoE DMG upon impact.
Ayaka’s Normal Attack is a graceful 5-hit combo, with the fourth attack being a multi-hit. Her Charged Attack is a fast multi-hit attack with decent AoE. Ayaka’s optimal strings are explained below in the Combo section.
 Elemental Skill | Kamisato Art: Hyouka
Talent Description
Summons blooming ice to launch nearby opponents, dealing AoE Cryo DMG.
“Clouds shroud the moonlit night. Longing descends like a fog, filling the one detained with wanderlust.”
Ayaka’s Skill deals Cryo damage around her and generates 4-5 particles upon hitting an enemy. Its 10s cooldown means Ayaka uses her Skill twice per rotation to fund her Elemental Burst. Her Skill can be canceled by dashing, as seen in her Combo section.
 Elemental Burst | Kamisato Art: Soumetsu
Talent Description
Summons forth a snowstorm with flawless poise, unleashing a Frostflake Seki no To that moves forward continuously.
Frostflake Seki no To
• A storm of whirling icy winds that slashes repeatedly at every enemy it touches, dealing Cryo DMG.
• The snowstorm explodes after its duration ends, dealing AoE Cryo DMG.
“The blizzard veils the heron’s thoughts, pity heavy in its heart.”
Ayaka’s Elemental Burst is her main source of damage. It deals 20 instances of AoE Cryo damage, with the final hit being slightly stronger.
It is key to ensure that all instances of damage land. Freeze uptime is a very effective strategy against Freezable enemies, as it guarantees her Burst hits. However, with adequate skill and game knowledge, it is possible to ensure most of her Burst hits connect even when Freeze isn’t available, such as in between enemy attacks, where enemies don’t move as much.
 Ascension 1 Passive | Amatsumi Kunitsumi Sanctification
Talent Description
After using Kamisato Art: Hyouka, Kamisato Ayaka’s Normal and Charged Attacks deal 30% increased DMG for 6s.
A decent DMG% buff to her Normal and Charged Attacks after using her Skill.
 Ascension 4 Passive | Kanten Senmyou Blessing
Talent Description
When the Cryo application at the end of Kamisato Art: Senho hits an opponent, Kamisato Ayaka gains the following effects:
- Restores 10 Stamina.
- Gains 18% Cryo DMG Bonus for 10s.
A pretty relevant buff to Ayaka’s Cryo DMG. Most of her combos include dashes for animation cancels and her Cryo Infusion. The on-hit Stamina refund also means Ayaka’s combos are fairly stamina-efficient.
 Alternate Sprint | Kamisato Art: Senho
Talent Description
Alternate Sprint
Ayaka consumes Stamina and cloaks herself in a frozen fog that moves with her.
In Senho form, she moves swiftly upon water.
When she reappears, the following effects occur:
- Ayaka unleashes frigid energy to apply Cryo on nearby opponents.
- Coldness condenses around Ayaka’s blade, infusing her attacks with Cryo for a brief period.
“Feathers fleeting wet / the white heron treads water / a sight without flaw”
Ayaka’s Alternate Sprint grants her 5s of Cryo Infusion. Its relatively short uptime means Ayaka should dash regularly to regain her Infusion. This ability is often used at the beginning of a rotation to apply Cryo in order to activate her teammates’ effects like 4pc Viridescent Venener.
Note that her Cryo Infusion can be overridden by other character’s abilities like Bennett’s C6 Pyro Infusion.
Constellations
 Constellation 1 | Snowswept Sakura
Constellation Description
When Kamisato Ayaka’s Normal or Charged Attacks deal Cryo DMG to opponents, it has a 50% chance of decreasing the CD of Kamisato Art: Hyouka by 0.3s. This effect can occur once every 0.1s.
Ayaka’s first Constellation can reduce her Elemental Skill cooldown, which can make her gameplay more forgiving in case you execute her combo slowly (i.e., you can use her Skill sooner to make up for lost damage). Ultimately, this Constellation is underwhelming since it doesn’t let Ayaka use her Skill more frequently per rotation.
 Constellation 2 | Blizzard Blade Seki no To
Constellation Description
When casting Kamisato Art: Soumetsu, unleashes 2 smaller additional Frostflake Seki no To, each dealing 20% of the original storm’s DMG.
At C2, Ayaka’s Elemental Burst generates 2 weaker snowstorms. This Constellation adds a significant amount of additional Cryo application and damage against bosses or large enemies. However, the 2 smaller storms may not hit smaller or mobile enemies. Overall, this is a fairly good Constellation in certain matchups.
 Constellation 3 | Frostbloom Kamifubuki
Constellation Description
Increases the Level of Kamisato Art: Soumetsu by 3.
Maximum upgrade level is 15.
A straightforward increase to Ayaka’s Burst Talent level. Since Ayaka’s Burst is a large proportion of her total damage, this Constellation is a great increase to her damage.
 Constellation 4 | Ebb and Flow
Constellation Description
Opponents damaged by Kamisato Art: Soumetsu’s Frostflake Seki no To will have their DEF decreased by 30% for 6s.
At C4, Ayaka’s Burst reduces enemies’ DEF by 30% for 6s, which makes this her most impactful Constellation. It heavily improves her team’s damage output and can allow her to be used as a support in certain team compositions.
 Constellation 5 | Blossom Cloud Irutsuki
Constellation Description
Increases the Level of Kamisato Art: Hyouka by 3.
Maximum upgrade level is 15.
A direct increase to Ayaka’s Elemental skill Talent level. Since her Skill doesn’t represent a big part of her total damage, this Constellation is unremarkable.
 Constellation 6 | Dance of Suigetsu
Constellation Description
Kamisato Ayaka gains Usurahi Butou every 10s, increasing her Charged Attack DMG by 298%. This buff will be cleared 0.5s after Ayaka’s Charged ATK hits an opponent, after which the timer for this ability will restart.
A powerful front-loaded buff to Ayaka’s Charged Attack DMG. It is a decent Constellation, but it lacks the utility and raw damage output of her C2 and C4.
Combos
Combo Notation
- N = Normal Attack
- C = Charged Attack
- A = Aimed Shot
- P = Plunging Attack
- E = Elemental Skill
- tE = Tap Skill
- hE = Hold Skill
- Q = Elemental Burst
- D = dash (cancel)
- J = jump (cancel)
- W = walk (cancel)
- > = switch character
- ( ) = these actions are optional; please refer to the notes below
- [ ] = repeat these actions the specified number of times
| ED (N1) Q | Ayaka’s default and fastest combo lets her prefunnel her Burst. When holding Mistsplitter Reforged, she should use a Cryo-infused Normal Attack before her Burst. |
| DE (N1) Q | This combo is usually performed if Ayaka’s Skill is still on cooldown when she takes the field. |
| N2C | Ayaka’s recommended Normal and Charged Attack combo is used primarily to fill rotation time and deal damage. |
| N1C | A slightly faster, albeit more stamina intensive sequence compared to N2C. N1C is a situational alternative to N2C if the enemy moves or you missplay her full combo. |
| N3C | Ayaka should incorporate a third Normal Attack when paired with characters who have on-attack effects, like Yelan or Xingqiu. This is especially true if their additional damage or application is needed. |
Ayaka’s Normal and Charged Attack combo of choice isn’t as important in practice as it varies depending on the enemy’s position, especially if it repositions or becomes unfrozen. Also, in case the enemy is not close to being defeated, her full combo may need to be cut short to avoid delaying her teammates’ abilities as to not compromise the team’s Energy economy and Ayaka’s DPS.
Artifacts
ER Requirements
Calcs for ER requirements can be found here (last updated for Version 5.6). At least one Favonius proc is assumed per team.
| Baseline | 1 Additional Fav Proc | |
| Triple Cryo | 130-140% | 120-130% |
| Double Cryo | 130-150% | 120-140% |
Use the Energy Recharge Calculator to determine exact requirements for your team and rotation. For more details on how Favonius weapons will affect your team, please use Ac1d’s Favonius Mastersheet.
Artifact Stats
 Sands |  Goblet |  Circlet |
| ATK% | Cryo DMG Bonus > ATK% | CRIT > ATK% |
Stat Priority: ER (until requirement) > CRIT > ATK%
An ATK% Goblet can be better than a Cryo DMG Bonus Goblet if it has better substats and Ayaka already receives a high amount of DMG% buffs (e.g. from Furina or Mona). When paired with Shenhe, a Cryo DMG Bonus Goblet is always stronger assuming similar substats.
Ultimately, we recommend using Genshin Optimizer to more accurately determine your ideal build.
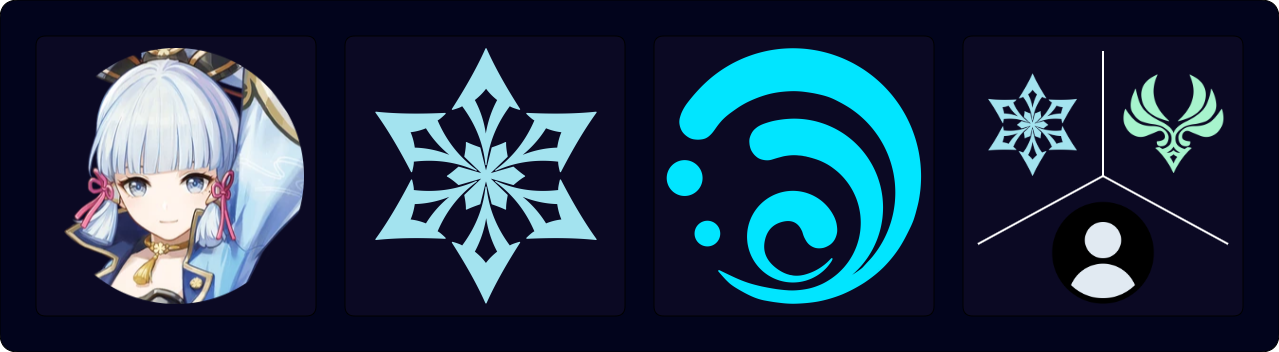
Artifact Sets
 4pc Blizzard Strayer (BS) | 4pc Blizzard Strayer is Ayaka’s best set on paper because of its powerful statline. However, its performance is unreliable and highly variable as it requires enemies to have a Cryo or Freeze aura. Some enemies cannot have Cryo or Freeze auras due to their being Bosses or having innate Elemental auras. Nonetheless, 4pc BS is still the ideal option in Mono Cryo teams. |
 4pc Marechaussee Hunter (MH) | 4pc Marechaussee Hunter is Ayaka’s recommended artifact set for most content when Furina is on the team. While the 4pc effect cannot stack while Ayaka is off-field, it can fully stack before her Elemental Burst snapshots her stats if Furina and a healer are present. This results in a powerful 36% CRIT Rate and 15% Normal and Charged Attack DMG buff, regardless of enemy content. |
 2pc Mixed Sets | 2pc Bonuses: Cryo DMG Bonus, ATK%, ER These sets can be viable placeholders while farming the aforementioned sets. Notably, 2pc sets can be strong on weapons with high CRIT Rate, such as Primordial Jade Cutter. |
Weapons
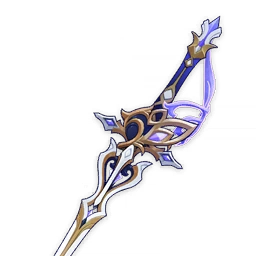
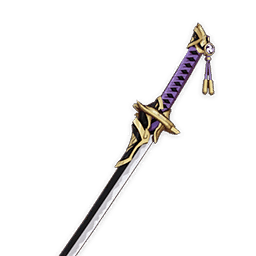
 5★ Mistsplitter Reforged | Ayaka’s signature weapon is also her Best-in-Slot. She can fully utilize its passive since she can pre-stack its Elemental DMG Bonus right before using her Burst. Mistsplitter’s high Base ATK scales well with ATK% buffs like TTDS or 4pc Tenacity of the Millelith. In order to fully stack its passive in a rotation, Ayaka must perform an infused Normal Attack before her Elemental Burst, e.g., ED N1 Q. |
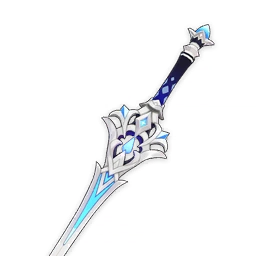
5★ Azurelight | Azurelight is a powerful option, assuming certain conditions are met. To fully activate its passive, Ayaka must use her Elemental Skill and have 0 Energy. Ayaka’s Burst can snapshot the passive’s stat buffs if she quickly executes her ED Q combo, i.e., her Burst can snapshot before catching the Cryo Particles from her Skill. However, if the execution of the combo is too slow, Ayaka will catch the Cryo Particles from her Skill and gain Energy prior to her Burst snapshotting, resulting in a DPS loss. Furthermore, Ayaka can still catch particles from enemies or teammate abilities (notably Furina) while on-field, thereby deactivating the passive. Nonetheless, Azurelight is still a strong stat stick even if its passive cannot be fully utilized due to player ability or circumstantial Energy generation. |
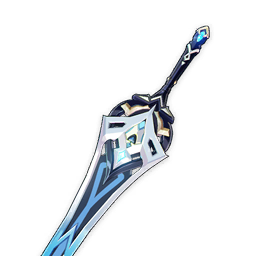
 5★ Absolution | Absolution is a very potent stat stick that offers High Base ATK and 64.4% CRIT DMG. Its conditional passive goes unused. |
 5★ CRIT Stat Sticks | Uraku Misugiri, Light of Foliar Incision, Haran Geppaku Futsu, Primordial Jade Cutter These 5-star CRIT stat sticks are better than 4-star options but worse than the aforementioned 5-star options, even with their passives. Primordial Jade Cutter and Haran Geppaku Futsu have high CRIT Rate stats, which can make it difficult to build around Cryo Resonance and Ayaka’s high CRIT Rate artifact sets. |
 4★ Finale of the Deep | Finale of the Deep is Ayaka’s strongest free-to-play weapon. A healer must be on the team to clear the Bond of Life from its passive. Without a healer, it’s still marginally better than Amenoma Kageuchi at lower ER requirements. |
 4★ Wolf-Fang | Wolf-Fang is a strong option at R5 where it is competitive with the 5-star CRIT stat sticks mentioned earlier. Its Elemental Burst CRIT Rate buff does not snapshot, which is great since it requires Burst hits to ramp up. However, its high CRIT Rate stats can make it difficult to build around. |
 4★ Amenoma Kageuchi | Amenoma Kageuchi is an inferior craftable weapon to Finale of the Deep. While its Flat Energy restoration is great, its low Base ATK and lower overall stats synergize worse with ATK% buffs. Still, it can be used if Ayaka is otherwise unable to meet her ER requirements. Additionally, it looks great with her original outfit. |
Teams
Rotation Notation
- N = Normal Attack
- C = Charged Attack
- A = Aimed Shot
- P = Plunging Attack
- E = Elemental Skill
- tE = Tap Skill
- hE = Hold Skill
- Q = Elemental Burst
- D = dash (cancel)
- J = jump (cancel)
- W = walk (cancel)
- > = switch character
- ( ) = these actions are optional; please refer to the notes below
- [ ] = repeat these actions the specified number of times
Teambuilding
- Since a large part of Ayaka’s total damage comes from her Elemental Burst, characters who can generate Energy while providing other offensive or defensive attributes are ideal.
- Ayaka’s Elemental Burst and Charged Attacks have fairly good AoE, so Anemo groupers and Hydro characters (in Freeze teams) can be very powerful in AoE scenarios.
Freeze
Freeze is Ayaka’s preferred team archetype in most scenarios. A Hydro character is required to trigger Frozen, which keeps enemies locked in place and maximizes the total hits of her Elemental Burst. A second Cryo character and a Cryo/Anemo/Flex character should provide offensive buffs and solid particle generation.
Notable Teammates
Escoffier | Escoffier offers a colossal 55% Cryo and Hydro RES Shred when playing a team composed exclusively of Hydro and Cryo characters. Additionally, her high single-target damage alleviates Ayaka’s reliance on her Burst to defeat enemies. Lastly, Escoffier’s healing makes her a superb Furina-enabler and lets Ayaka fulfill Finale of the Deep’s condition. Her C1 and R1 Symphonist of Scents are considerably good vertical investments for Ayaka’s total team damage. |
 Furina | Furina provides constant off-field Hydro application to keep regular enemies fully Frozen, but on her own she is not enough for Freeze-resistant enemies. Through her Burst, she provides a powerful DMG% buff and enables 4pc MH for Ayaka. Also, Furina can hold support sets like 4pc Tenacity of the Millelith. Note that Furina’s DMG% Bonus cannot snapshot, so it is not terribly detrimental to use Ayaka’s Elemental Burst when Fanfare is low. |
 Shenhe | Shenhe provides a Skill and Burst DMG% buff, a Cryo DMG% buff, Cryo RES Shred, and her Icy Quill’s buff. Her Icy Quill buffs instances of Cryo damage from each teammate separately, so Shenhe has great synergy with Ayaka when paired with another Cryo damage dealer. Typically, Shenhe performs 2 casts of her Tap Skill. |
Xilonen | Xilonen provides RES Shred via her Elemental Skill and a DMG% buff through 4pc Scroll. Her healing, while locked to the active character, enables further synergy with Furina. Since all of her relevant attacks are Geo, they can Shatter Frozen opponents and disrupt Freeze uptime. |
 Kazuha | Kazuha provides a grouping via his Elemental Skill, a DMG% buff through his A4 Passive, and can shred enemy Cryo RES with 4pc Viridescent Venerer. His Plunging Attack can Shatter Frozen opponents, so it should be used with caution or skipped entirely if off-field Hydro application is low. |
Cryo
Cryo teammates enable Cryo Resonance and reduce Ayaka’s ER requirements. Preferred teammates bring buffs, healing, or high personal damage.


Hydro
Hydro teammates with frequent application are ideal since they prevent enemies from being knocked away by Ayaka’s Burst while Frozen. Hydro Catalyst characters commonly use TTDS and other support gear like 4pc Tenacity or 4pc Scroll.


Example Teams
This is not a comprehensive list of teams. The inclusion or exclusion of any given team does not necessarily reflect its power level.
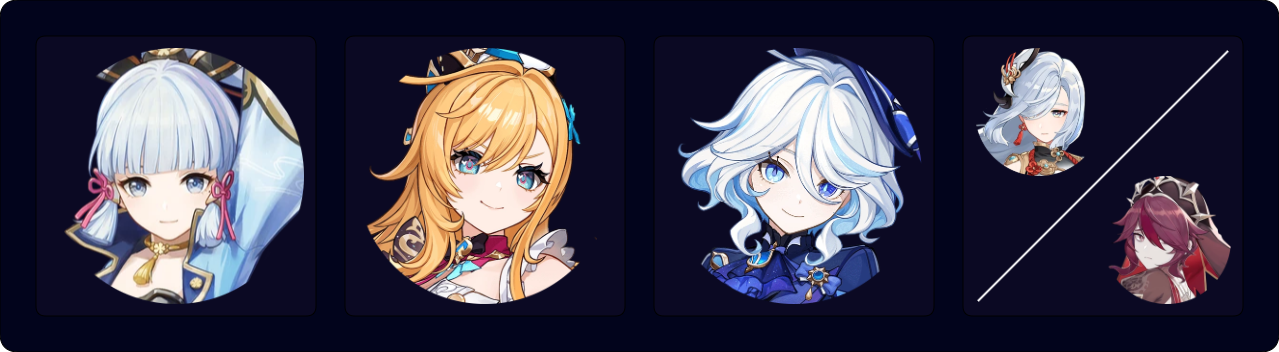
Ayaka’s Freeze team with Furina and Escoffier. Shenhe or Rosaria are third Cryo options to reduce ER requirements and provide additional buffs. Furina enables 4pc MH on Ayaka, and Escoffier’s healing stacks Furina’s Fanfare quickly. Shenhe offers plentiful buffs to Ayaka and Escoffier, and to a lesser extent Furina, while Rosaria has decent personal damage and a minor CRIT Rate buff. Both Shenhe and Rosaria can hold 4pc Noblesse Oblige to provide an ATK% buff.
This team lacks grouping, and Escoffier/Furina’s mainly single-target damage can result in subpar AoE performance. Nevertheless, this team is extremely well-suited against Bosses.
Sample Rotation (Shenhe)
Furina ED Q > Escoffier EQ > Shenhe Q tE > Ayaka ED (N1)¹ Q N1CD 2[N2C] > Shenhe N2² tE > Ayaka ED N1C
¹If Ayaka uses Mistsplitter.
²To trigger Favonius Polearm.
Sample Rotation (Rosaria)
Furina ED Q > Escoffier EQ > Rosaria Q E > Ayaka ED (N1)1 Q N1CD 2[N2C] > Rosaria E > Ayaka ED N1C
¹If Ayaka uses Mistsplitter.
Kazuha provides crowd control while Kokomi or Mona provide buffs and off-field Hydro application to maintain Freeze. Kazuha should skip his Plunging Attack with Mona due to her limited Hydro application; he can skip it with Kokomi to keep enemies Frozen. If healing is needed, Mona can equip Prototype Amber. Kokomi has higher uptime on her Hydro application and heals but she offers weaker offensive buffs compared to Mona.
Sample Rotation (Kokomi)
(Ayaka D)¹ > Kazuha tEPQ > Shenhe tEQ > Kokomi E > Ayaka ED (N1)2 Q N2C > Kazuha tEP > Shenhe tE N1 > (Kokomi Q)3 > Ayaka D 2[N2C] ED N2C
¹First rotation only to apply Cryo.
²If Ayaka uses Mistsplitter.
3Kokomi’s Burst is optional, it can be used to refresh her Skill’s duration, at the cost of doing one less N2C on Ayaka.
Sample Rotation (Mona)
(Ayaka D)¹ > Kazuha tEPQ > Shenhe tEQ > Mona Q E > Ayaka ED (N1)2 Q N2C > Kazuha tE3 > Shenhe tE N1 > Ayaka D 2[N2C] ED N2C
¹First rotation only applies to apply Cryo.
2If Ayaka uses Mistsplitter.
3Skip Kazuha’s plunge to prevent Shatter.

Ayaka’s Freeze team using Escoffier and 2 off-field Hydro characters. Yelan is a strong off-field Hydro damage dealer who also provides a decent DMG% buff to the active character. Mona’s Omen buff can be extended against Frozen enemies, making her a decent option against Freezable enemies.
Due to Mona’s poor particle generation, it is recommended to use a Favonius weapon on her or Escoffier.
Sample Rotation (Yelan)
Furina ED Q > Escoffier EQ > Yelan Q N1 E N1 > Ayaka ED N1 Q N3CD 2[N2C] > Yelan N1 E N1¹ > Ayaka ED N1C
Sample Rotation (Mona)
Furina ED Q > Escoffier EQ > Mona E Q > Ayaka ED (N1)1 Q N2CD N2C > (Escoffier N2/Mona N2)2 > N2C ED N1C
¹If Ayaka uses Mistsplitter.
2To trigger Favonius passive.

Xilonen can act as a powerful buffer and healer to stack Furina’s Fanfare buff.
Sample Rotation (Shenhe)
Xilonen Q > Furina ED Q > Shenhe tEQ > Xilonen E N2 > Ayaka ED (N1)1 Q N2CD N2C > Shenhe N1 tE > Xilonen E N2 > Ayaka D N2C ED N2C
¹If Ayaka uses Mistsplitter.
Sample Rotation (Rosaria)
Xilonen Q > Furina ED Q > Rosaria EQ > Xilonen E N2 > Ayaka ED (N1)1 Q N2CD N2C > Rosaria E > Xilonen E N2 > Ayaka D N2C ED N2C
¹If Ayaka uses Mistsplitter.
Charlotte’s teamwide healing from her Elemental Burst makes her a decent enabler for Furina’s Fanfare.
Sample Rotation (Lynette)
Furina ED Q > Ayaka D N2C E N1C > Lynette tE1Q > Charlotte Q tE > Ayaka D N1C Q ED N2C > Lynette E N1 > Ayaka D N2C
1If Lynette is C4; otherwise, perform a Normal Attack instead.
Sample Rotation (Kazuha)
Furina ED Q > Kazuha Q > Ayaka ED N1C > Kazuha tEP > Charlotte Q tE > Ayaka D N1C Q ED N2C > Kazuha tEP > Ayaka D N1C

Skirk can use her Elemental Burst to quickly deal massive amounts of damage in a quickswap playstyle. She should use her Elemental Burst and immediately swap to Ayaka in order to funnel her particle generation, as she doesn’t require Energy.
Sample Rotation
Furina ED N1 > Escoffier (N3)¹ EQ > Skirk hE > Ayaka D N2C > Furina Q > Skirk Q > Ayaka ED (N1) Q N2C > Escoffier N1 E > Ayaka D N2C N2CD N2C > Skirk hEQ > Ayaka D E N2C
¹Add N3 second rotation onward to fill time for Escoffier’s Skill cooldown.
Mono Cryo

Mono Cryo teams can be a viable alternative to traditional Freeze teams when facing enemies who cannot be Frozen or who have an innate Hydro aura. They can also be worthwhile if you have lackluster Hydro teammate options.
Example Teams

All party members can benefit from Shenhe’s Icy Quill effect. Ganyu provides AoE Cryo damage and a Cryo DMG buff through her Elemental Burst and she can use her Charged Attacks to lend additional damage and Cryo application.
Sample Rotation
Escoffier EQ > Shenhe tEQ > Ganyu EQ C > Ayaka ED (N1)1 Q N1 > Shenhe tE N1 > Ganyu CE > Ayaka D N2C ED N1C
¹If Ayaka uses Mistsplitter.

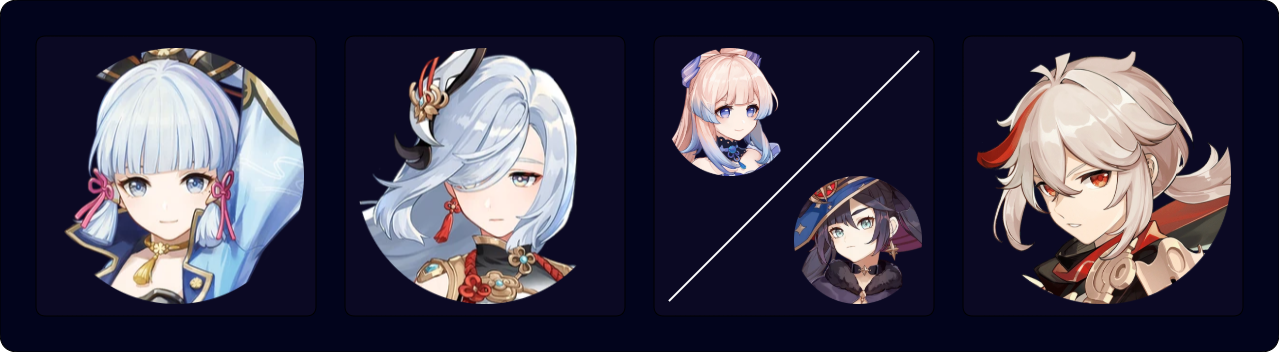
A Mono Cryo team featuring Bennett and Kazuha. Ayaka’s Burst can snapshot Bennett’s high Flat ATK buff.
Sample Rotation
Ayaka ED N1C > Kazuha tEPQ > Shenhe tEQ > Bennett Q E > Ayaka ED (N1)1 Q > Kazuha tEP > Shenhe N1 tE > Ayaka D 2[N2C]
¹If Ayaka uses Mistsplitter.
Chiori deals substantial off-field Geo damage, while Xilonen buffs Ayaka and Chiori through 4pc Scroll and her RES Shred. Shenhe offers her Skill and Burst DMG% to Ayaka and Chiori, while her Icy Quill effect benefits Ayaka. Chiori’s unique Elemental Skill will swap to the next character according to the team’s character order. For this rotation, ensure she swaps to Ayaka.
Sample Rotation
(Xilonen Q)¹ > Shenhe tE Q > Xilonen E N2 > Chiori 2[E] > Ayaka ED (N1)2 Q N1C > Shenhe N1 tE > Xilonen E N2 > Ayaka D N2C ED N2C > Chiori Q
¹Optional, if Ayaka is equipped with Finale of the Deep or wants healing.
2If Ayaka is using Mistsplitter.
Credits
pjeljr, jamie9248, caramielle., caxia5, rezmir, caxia5, lostguide, irokei, auraolis
Team images made with the KQM portrait generator.