Updated for Version “Luna IV”
Columbina is a 5-star Hydro Catalyst character in Genshin Impact who applies Hydro from off-field while enabling and buffing all Lunar Reactions. Learn about Columbina’s best builds, best weapons, best artifacts, and best teams in this quick guide.
Note that the information given may change if new discoveries are made. More extensive testing is in progress.
Join our Discord to participate in the theorycrafting process.
Table of Contents
Infographic
Off-Field DPS
Credits to: euphorysm, acerbus114 and KQM Staff
On-Field DPS
Credits to: euphorysm, acerbus114 and KQM Staff
Rotations
Credits to: euphorysm, acerbus114 and KQM Staff
Character Overview
Pros
- Enables and significantly buffs Lunar-Charged, Lunar-Bloom, and Lunar-Crystallize.
- Provides decent Hydro application with good AoE and uptime.
- Deals great personal damage in her Lunar Reaction teams.
- Increases the team’s Moonsign Level.
Cons
- Has high ER requirements in most teams.
- Severely limited functionality in cases where Lunar Reactions cannot be reliably triggered, e.g. against enemies with certain innate auras.
- Nefer is a better on-fielder in Lunar-Bloom teams.
Playstyles
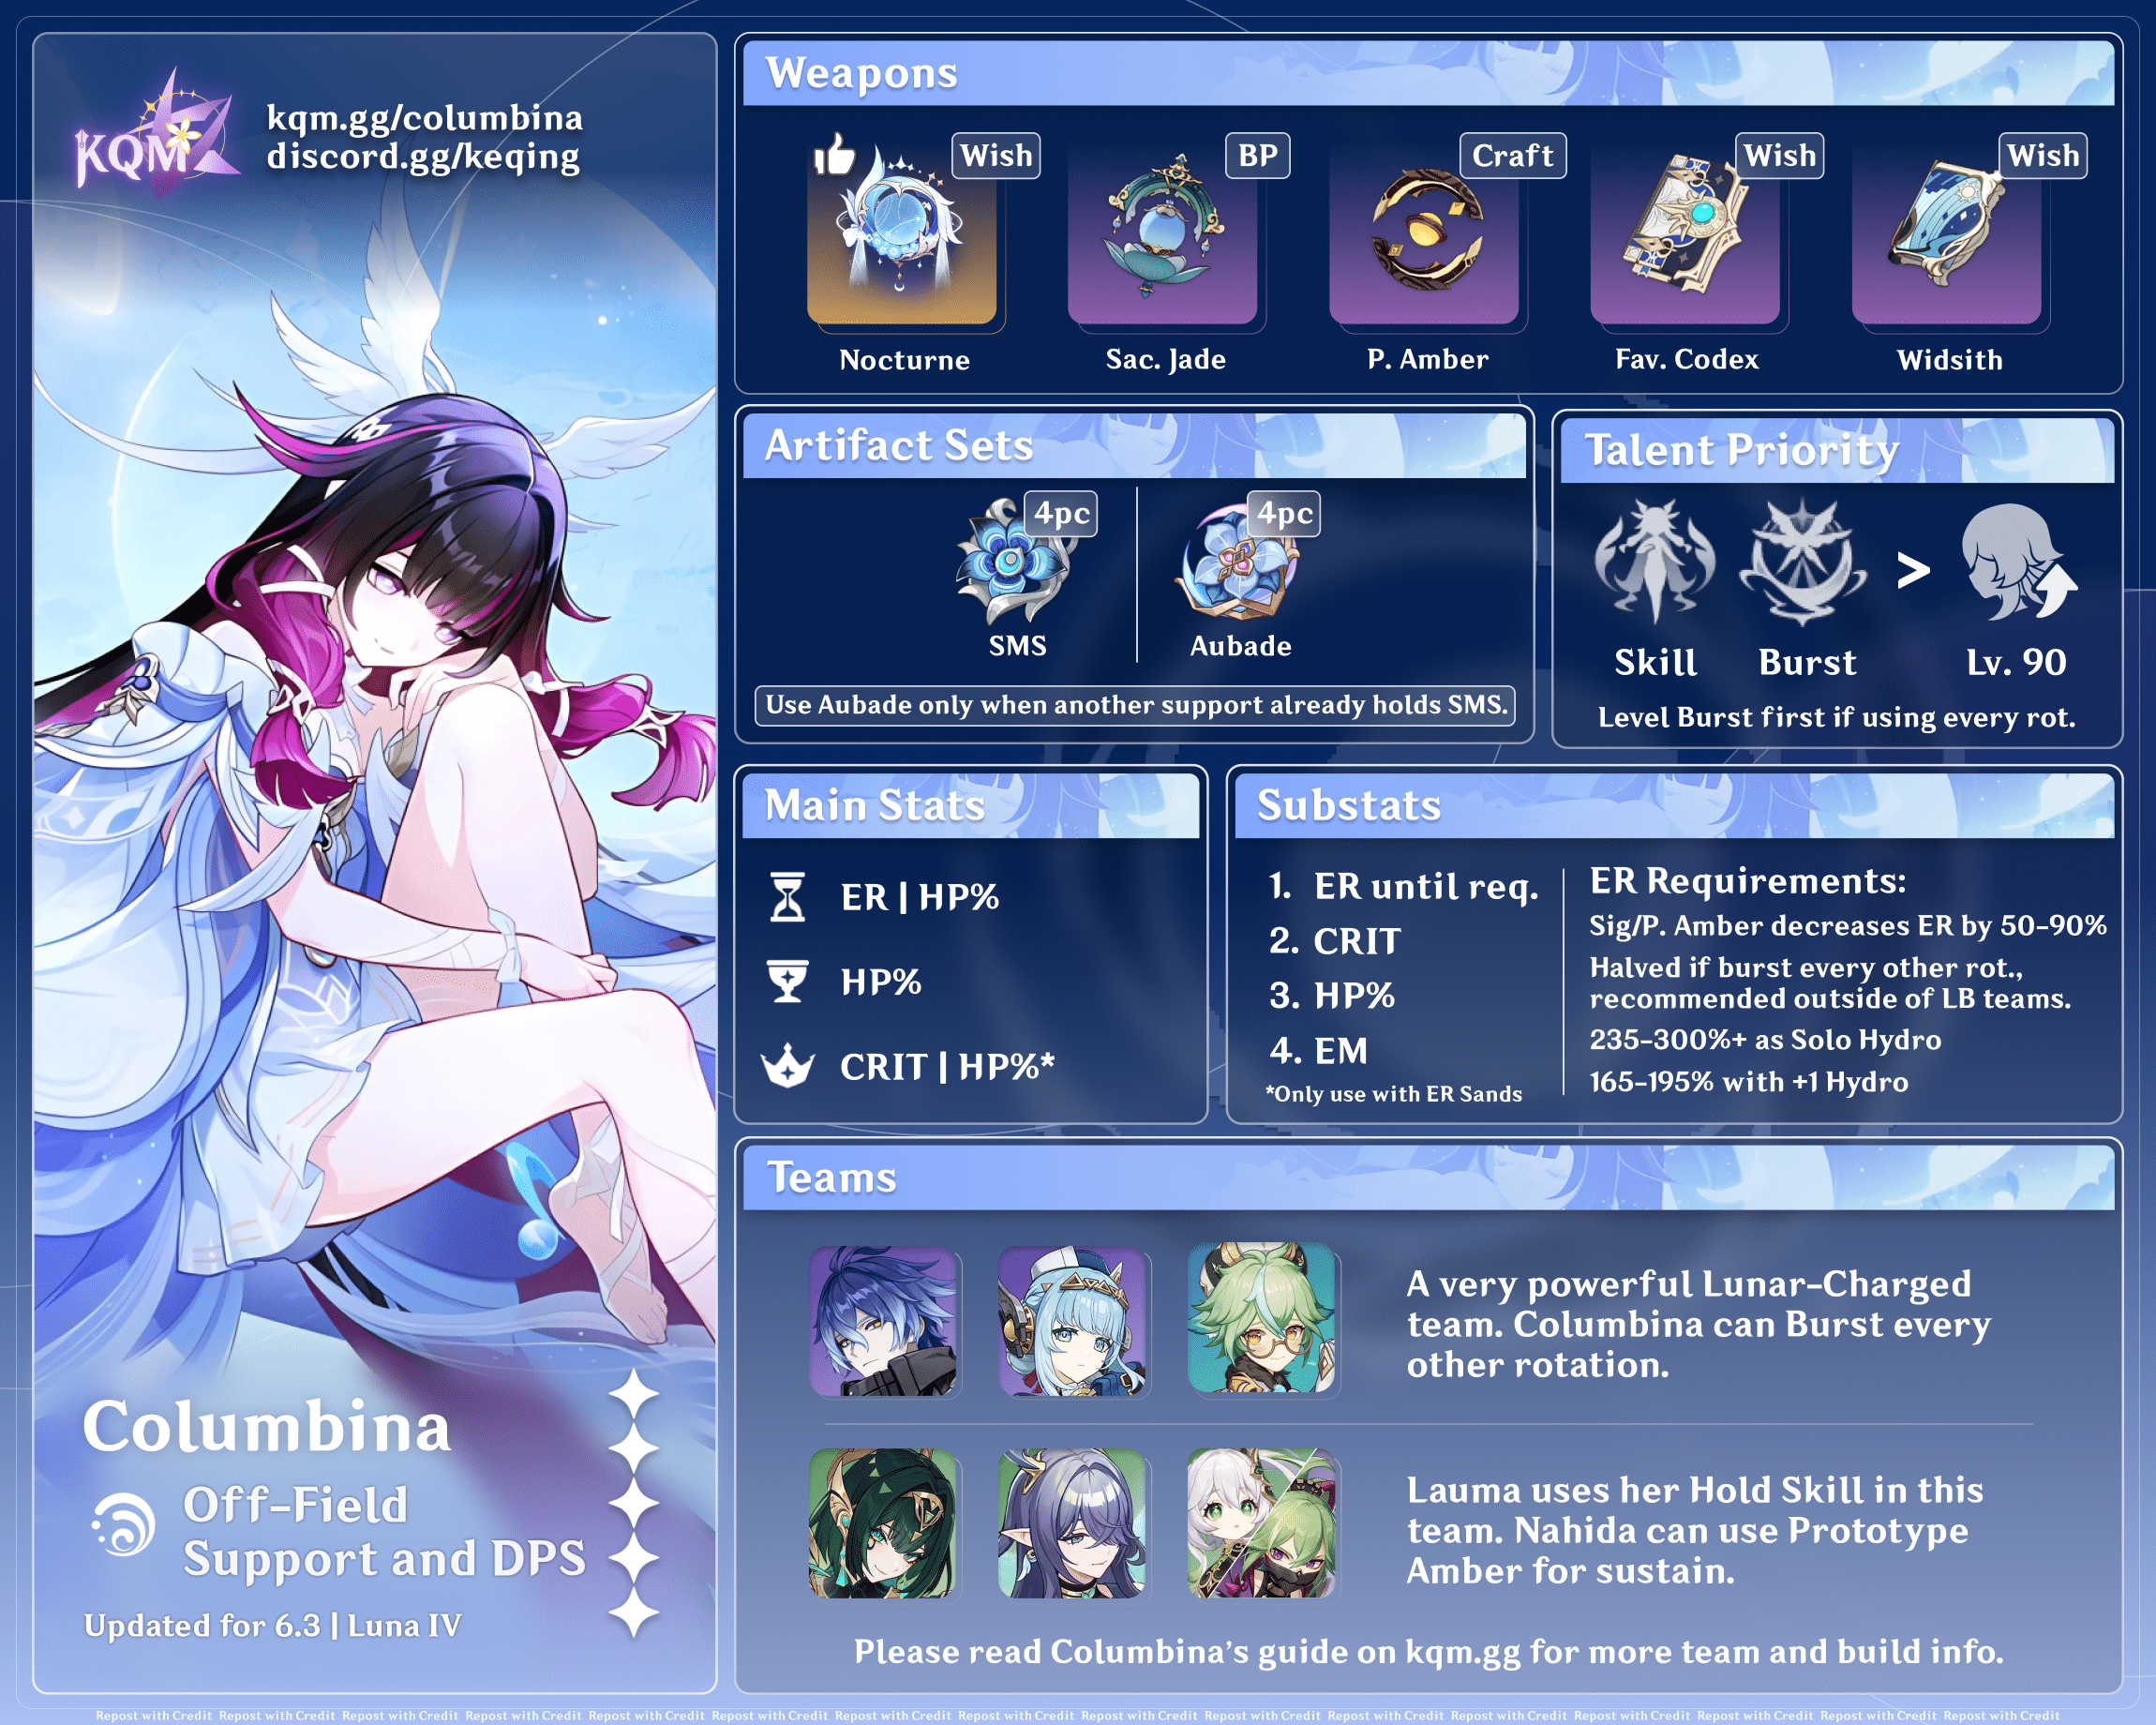
Off-Field Support and DPS
Columbina uses her Skill to provide Hydro application and deal Lunar Reaction damage from off-field. Her Burst increases the DMG Bonus of all Lunar Reactions and further enhances their effects.
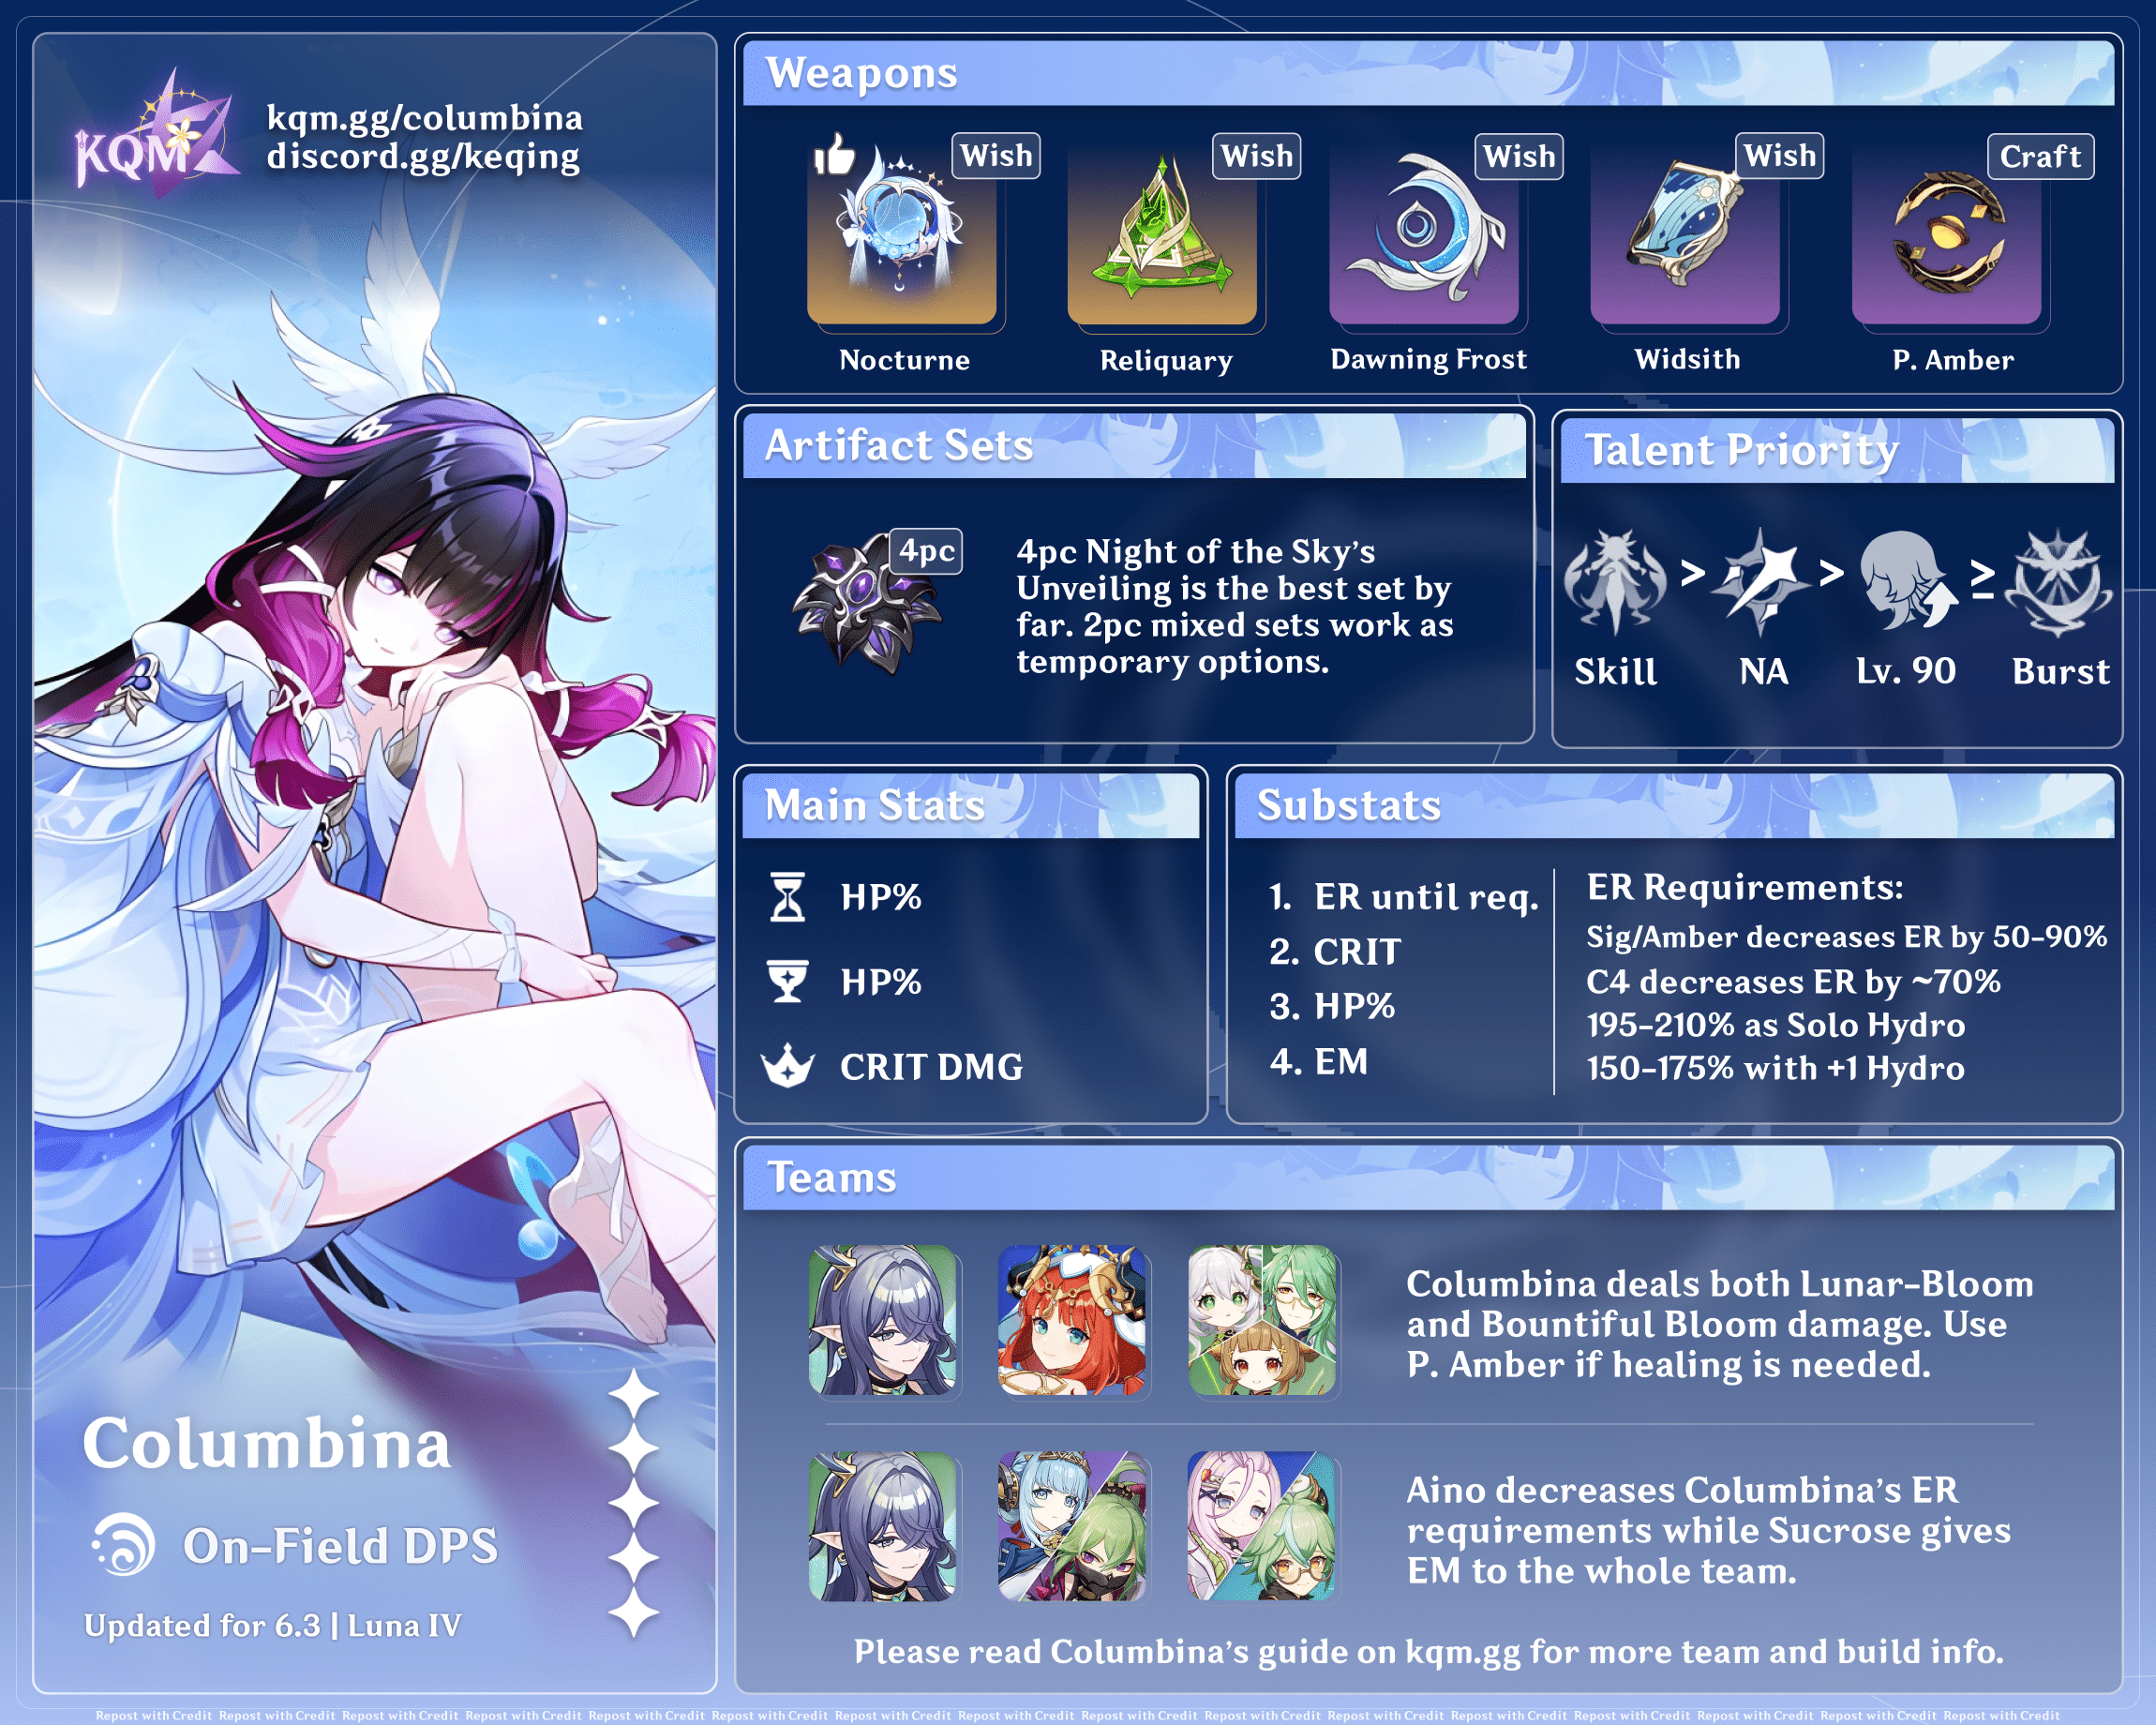
On-Field Lunar-Bloom DPS
In addition to what Columbina offers in her off-field playstyle, she can stay on-field to deal more Lunar-Bloom damage via her special Charged Attacks.
Lunar Reactions
Columbina can deal direct Lunar Reaction damage (Lunar-Charged (LC), Lunar-Bloom (LB), and Lunar-Crystallize (LCrys)) from her Skill’s Gravity Interference and special Charged Attacks (as opposed to regular Lunar Reaction damage that comes from the reactions themselves). For the purposes of this guide, direct Lunar Reaction damage refers to that which originates from her Talents, while all other uses of “Lunar Reaction damage” should be assumed to refer to the damage resulting from said reactions.
For more information on Lunar Reactions, check out this Lunar Reaction guide.
Talents
Level and Talent Priority
Off-Field: Skill, Burst > Character Level
On-Field: Skill > Normal Attack > Character Level ≥ Burst
In teams where Columbina uses her Burst every rotation to support her teammates, levelling it tends to yield better results than raising her Skill. However, she wants to prioritize her Skill if her Burst is not used every rotation, or when her Burst’s buffs are not impactful for the team. In addition, as an HP-scaling character who also deals regular Lunar Reaction damage, Columbina benefits from being at a higher level.
In LB teams where Columbina is an on-field DPS, levelling her Normal Attack Talent is also important to maximize her damage output.
Talent Overview
 Normal Attack | Moondew Cascade
Talent Description
Normal Attack
Summons Moonlit Tides, performing up to 3 attacks that deal Hydro DMG.
Charged Attack
Consumes a certain amount of Stamina to deal AoE Hydro DMG after a short casting time.
If you have at least 1 Verdant Dew, Columbina’s Charged Attacks will be replaced with the special Charged Attack Moondew Cleanse, which will not consume Stamina: Consume 1 Verdant Dew to deal 3 instances of AoE Dendro DMG to opponents in front. This DMG is considered Lunar-Bloom DMG.
Plunging Attack
Plunges towards the ground from mid-air, damaging all opponents in her path. Deals AoE Hydro DMG upon impact with the ground.
As a Catalyst user, Columbina can apply Hydro at will with her Normal and Charged Attacks. However, these attacks are mostly unused in her off-field playstyle.
In Columbina’s on-field playstyle, she can consume Verdant Dew or Moonridge Dew to replace her usual Charged Attack with a special one called Moondew Cleanse, which deals three instances of direct LB damage and does not consume any Stamina. Moondew Cleanse makes up a large proportion of Columbina’s personal damage in this playstyle.
 Elemental Skill | Eternal Tides
Talent Description
Awaken Moonbound Tides, dealing AoE Hydro DMG and summoning Gravity Ripple.
Gravity Ripple will follow the active character on the field, while continuously dealing AoE Hydro DMG to surrounding opponents. While Gravity Ripple is on the field, and nearby party members trigger Lunar reactions or inflict Lunar Reaction DMG, Columbina will accrue a special Gravity. Once Gravity is accumulated to its limit, different types of damage will be dealt to enemies based on the type of Lunar Reaction that has accumulated the most Gravity for Columbina.
Moonsign: Ascendant Gleam: Gravity Ripple inflicts AoE Hydro DMG over a wider area.
Columbina’s Hydro application and personal damage mostly come from her Elemental Skill. Using Columbina’s Skill summons a field that follows the active character and attacks nearby enemies every 2s. While this field is active, whenever a Lunar Reaction is triggered or Lunar Reaction damage is dealt, Columbina gathers 20 Gravity over 2s. Once her Gravity accumulation reaches 60, she consumes it to perform a Gravity Interference attack based on the most frequent Lunar Reaction. This is Columbina’s main source of personal damage in her off-field playstyle, and its adaptive nature allows Columbina to benefit from all teams’ specific Lunar Reaction buffs.
In Ascendant Gleam teams, Columbina’s field is widened, which increases its Hydro application and damage range.
 Elemental Burst | Moonlit Melancholy
Talent Description
Hills and tides unite under the silver light of a pristine new moon. Temporarily transforms the surrounding terrain into Lunar Domain, dealing AoE Hydro DMG.
Columbina’s Elemental Burst transforms the surrounding terrain into Lunar Domain, which increases the Lunar Reaction DMG Bonus of all nearby party members. It also enables Columbina’s A4 Passive, which provides notable and unique effects to each Lunar Reaction triggered.
However, despite all of these effects, Columbina’s ER requirements are often too high to justify tanking her damage in order to use her Burst every rotation. Forcing Columbina to Burst every rotation is only recommended when her ER requirements are not too high or her personal damage is not as important as the Burst’s buffs, e.g. in Lauma–Nefer teams.
 Ascension 1 Passive | Lunacy’s Lure
Talent Description
When triggering Gravity Interference, Columbina gains the Lunacy effect, increasing her CRIT Rate by 5% for 10s. This effect can be stacked up to 3 times.
Through this passive, Columbina can easily gain up to 15% CRIT Rate, which is a significant stat buff. Whenever a stack is gained or refreshed, the duration of each stack is set back to 10s, allowing Columbina to keep full uptime.
 Ascension 4 Passive | Law of the New Moon
Talent Description
When characters within the Lunar Domain trigger Lunar reactions, they will gain the following effects respectively:
- Lunar-Charged: When the Thundercloud performs lightning strike(s) against a valid target, it has a 33% chance to perform an additional lightning strike.
- Lunar-Bloom: When triggering Lunar-Bloom reactions, the party gains a special Moonridge Dew. Up to 3 Moonridge Dews can be gained every 18s.
- Lunar-Crystallize: When Moondrift Harmony is triggered, every Moondrift has a 33% chance to inflict an extra attack.
Lunar Reactions within the Lunar Domain from Columbina’s Burst gain these effects:
- LC: Thunderclouds have a 33% chance of dealing an additional LC damage instance.
This effectively increases the team’s LC reaction damage by 33%.
- LB: When LB is triggered, the team gains one stack of Moonridge Dew. Moonridge Dews behave identically to Verdant Dews, and both can be used interchangeably. The team can gain up to 3 Moonridge Dews every 18s, independent of Verdant Dew generation, meaning one team can have up to 3 Verdant Dew and 3 Moonridge Dew at the same time. Once the team has run out of Verdant Dew, Moonridge Dews can be consumed instead to power the same effects.
Essentially, this allows the team to stack 6 Dews at one time instead of just 3, benefitting LB characters such as Nefer or Lauma.
- LCrys: Each Moondrift’s attack has a 33% chance of dealing an additional LCrys damage instance.
Similar to the effect for LC, this passive raises the output of all LCrys reaction damage by 33%.
 Moonsign Benediction Passive | Moonlight, Lent Unto You
Talent Description
When a party member triggers an Electro-Charged/Bloom/Hydro-Crystallize reaction, it will be converted into a Lunar-Charged/Lunar-Bloom/Lunar-Crystallize reaction. Lunar Reaction DMG inflicted by party members gain a Base DMG increase based on Columbina’s Max HP. For every 1,000 points of Max HP, the Base DMG of Lunar reactions is increased by 0.2%, up to a maximum of 7%.
Additionally, when Columbina is in the party, the party’s Moonsign will increase by 1 level.
Like other Moonsign characters, Columbina increases the team’s Moonsign Level by 1.
She also converts Electro-Charged to LC, Bloom into LB, and Hydro Crystallize into LCrys when she is in the team. This allows players to play multiple Lunar Reaction team archetypes when only pulling Columbina.
Additionally, Columbina increases the Base DMG of Lunar Reaction dealt by the whole team based on her HP, with a maximum of 7% Base DMG Bonus at 35,000 HP. This Lunar Reaction Base DMG Bonus stacks additively with similar buffs from other Moonsign characters’ Moonsign Benediction passives.
Constellations
Note: Elevation is a Base DMG Multiplier separate from other Base DMG Multipliers in the damage calculation. Each of Columbina’s Constellations gives an Elevation buff. These are additive with each other and other characters’ Elevation buffs (e.g. Flins’s C6, Nefer’s C6).
 Constellation 1 | Radiance Over Blossoms and Peaks
Constellation Description
Unleashing her Elemental Skill Eternal Tides will immediately trigger an effect equivalent to the effect of Gravity Interference. This effect can be triggered once every 15s.
Moonsign: Ascendant Gleam
When Gravity Interference is triggered, if the Lunar reaction type that has accumulated the most Gravity for Columbina is:
- Lunar-Charged: Current active character will recover 6 Energy.
- Lunar-Bloom: Active character’s interruption resistance will be increased for 8s.
- Lunar-Crystallize: Summons aRainsea Shield. The Rainsea Shield’s DMG absorption is based on 12% of Columbina’s Max HP, and it will absorb Hydro DMG with 250% effectiveness for 8s.
All nearby party members’ Lunar Reaction DMG is elevated by 1.5%.
Casting Columbina’s Skill immediately causes a Gravity Interference attack to be performed, dealing similar damage and triggering similar effects.
At Ascendant Gleam, Gravity Interference gives a differing effect based on its Lunar Reaction type:
- LC: The current active character gains 6 Energy. Using Columbina’s Skill immediately triggers a Gravity Interference attack, thus giving Columbina an instant Energy refund in LC teams.
- LB: Active characters gain interruption resistance for 8s.
- LCrys: Generates a shield lasting 8s that scales with Columbina’s HP and has increased effectiveness against Hydro damage.
Additionally, all nearby party members’ Lunar Reaction DMG is elevated by 1.5%.
This Constellation’s impact on team performance depends on Columbina’s Gravity Interference type. While the LC Flat Energy effect can be useful for some characters, the other two effects are mostly for survival and comfort. The immediate Gravity Interference attack and Lunar Reaction DMG Elevation of this Constellation are also not especially impactful.
 Constellation 2 | Not in Lone Splendor
Constellation Description
Rate of accumulating Gravity increases by 34%.
When Gravity Interference is triggered, Columbina will receive the Lunar Brilliance effect, which increases her Max HP by 40% for 8s.
Moonsign: Ascendant Gleam:
When Lunar Brilliance is active, if, during the current trigger of Gravity Interference, the Lunar reaction type that has accumulated the most Gravity for Columbina is:
- Lunar-Charged: The party’s current active character gains ATK equal to 1% of Columbina’s Max HP.
- Lunar-Bloom: Elemental Mastery of the party’s current active character increases. Increase in Elemental Mastery is equal to 0.35% of Columbina’s Max HP.
- Lunar-Crystallize: DEF of the party’s current active character increases. Increase in DEF is equal to 1% of Columbina’s Max HP.
All nearby party members’ Lunar Reaction DMG is elevated by 7%.
Columbina’s Gravity accumulation rate is increased by 34%, which decreases the interval between each Gravity Interference attack from 6s to around 4.5s.
When Gravity Interference is triggered, Columbina gains a 40% HP buff for 8s. She can easily maintain full uptime on this buff in most teams. Additionally, when the team is in Ascendant Gleam, the active character gains a stat buff based on Columbina’s Max HP and the Gravity Interference type: ATK for LC, EM for LB, and DEF for LCrys. This stat buff has no limit, so increasing Columbina’s HP to maximize the buff can be optimal in some teams.
Additionally, all nearby party members’ Lunar Reaction DMG is elevated by 7%.
Overall, this is Columbina’s best Constellation before C6 for both personal and team performance. It is a good stopping point before her C6.
 Constellation 3 | Dreamlike Glow Across Tranquil Waters
Constellation Description
Increases the Level of Elemental Skill Eternal Tides by 3.
Maximum upgrade level is 15.
All nearby party members’ Lunar Reaction DMG is elevated by 1.5%.
This Constellation gives additional Talent levels to her Skill, which is her main source of damage.
Additionally, all nearby party members’ Lunar Reaction DMG is elevated by 1.5%.
 Constellation 4 | Cloudveiled Ridges in Floral Mists
Constellation Description
When Gravity Interference is triggered, 4 Elemental Energy will be restored to Columbina;
Additionally, if the Lunar reaction type that accumulates the most Gravity for Columbina is Lunar-Charged, Lunar-Bloom, or Lunar-Crystallize, the Lunar Reaction DMG dealt by this instance of Gravity Interference is increased by 12.5%/2.5%/12.5% of Columbina’s Max HP respectively. This effect can be triggered at most once every 15s.
All nearby party members’ Lunar Reaction DMG is elevated by 1.5%.
Columbina gains 4 Energy every time Gravity Interference is triggered. This alleviates her ER requirements greatly, allowing her to build more offensive stats for personal damage and a larger C2 buff. Furthermore, once every 15s, Columbina’s Gravity Interference will deal increased damage based on her HP, thus improving her damage frontloading capability.
Additionally, all nearby party members’ Lunar Reaction DMG is elevated by 1.5%.
 Constellation 5 | Silence Tending One Lone Song
Constellation Description
Increases the Level of Elemental Burst Moonlit Melancholy by 3.
Maximum upgrade level is 15.
All nearby party members’ Lunar Reaction DMG is elevated by 1.5%.
This Constellation gives additional Talent levels to her Burst, which slightly increases the Lunar Reaction DMG Bonus of the whole team.
Additionally, all nearby party members’ Lunar Reaction DMG is elevated by 1.5%.
 Constellation 6 | Through Darkness Led by Moonlight
Constellation Description
For 8s after characters in the Lunar Domain trigger a Lunar reaction, based on the elements involved in the reaction, the CRIT DMG of the corresponding Elemental DMG is increased by 80%. The CRIT DMG-increasing effects for the same Elemental Type do not stack.
All nearby party members’ Lunar Reaction DMG is elevated by 7%.
When a Lunar reaction is triggered within Columbina’s Burst, all damage of the corresponding Elements (Hydro and Electro/Dendro/Geo) receives an 80% CRIT DMG buff for 8s. This effect does not stack.
Additionally, all nearby party members’ Lunar Reaction DMG is elevated by 7%.
This is Columbina’s best Constellation, greatly enhancing her Lunar Reaction teams’ performance.
C1 vs. R1
Generally, Columbina’s R1 yields a higher personal damage increase than her C1. However, if Columbina has her second-best weapon (R5 Sacrificial Jade for off-field, and R1 Reliquary of Truth for on-field), C1 becomes better instead. Additionally, players can get Columbina’s C1 as a stepping stone towards her C2, a more impactful Constellation. Nonetheless, it is not recommended to go for either R1 or C1 over Constellations or signature weapon for the team’s main DPS.
Combos
Combo Notation
- N = Normal Attack
- C = Charged Attack
- A = Aimed Shot
- P = Plunging Attack
- hP = High Plunge
- lP = Low Plunge
- E = Elemental Skill
- tE = Tap Skill
- hE = Hold Skill
- Q = Elemental Burst
- D = dash (cancel)
- J = jump (cancel)
- W = walk (cancel)
- > = switch character
- ( ) = these actions are optional; please refer to the notes below
- [ ] = repeat these actions the specified number of times
| E Q | For Columbina’s off-field playstyle, her simple input only involves casting Skill, Burst and then leaving the field. |
| CD | Columbina’s Charged Attack can be cancelled by a dash to skip its lengthy animation. The dash should be performed right after Columbina raises her right hand to perform the Charged Attack. Additionally, Columbina can cancel the Charged Attack animation by swapping out with the exact same timing as her dash cancel. Without Verdant/Moonridge Dews, Columbina’s Charged Attack consumes 50 Stamina, which is too costly to perform multiple times consecutively. |
| N3D | Columbina’s easy-to-use Normal Attack combo to drive off-field teammates’ abilities. |
Artifacts
ER Requirements
Calcs for ER requirements can be found here (last updated for Version Luna IV).
Assumptions:
- Favonius proc on each feasible teammate. (Columbina’s ER requirements can be lowered by 10–30% for each additional teammate Favonius proc.)
- 4-star characters are assumed at C6, 5-star characters are assumed at C0 for their Energy effects.
Off-Field
| Burst every rotation | Baseline | Prototype Amber / Nocturne’s Curtain Call | Favonius Codex |
| Solo Hydro | 235–300%+ | 165–245% | 190–240% |
| Double Hydro | 165–195% | 115–150% | 140–165% |
On-Field
| Burst every rotation | Baseline | Prototype Amber / Nocturne’s Curtain Call |
| Solo Hydro | 195–210% | 135–160% |
| Double Hydro | 150–175% | 105–150% |
Columbina has around 115–140% ER requirements when pairing with Raiden or Neuvillette.
Columbina’s C1 reduces her ER requirements by ~15–25% if she can trigger the C1 effect with Lunar-Charged Interference.
Columbina’s C4 reduces her ER requirements by 65% to upwards 100%+ depending on her requirements before C4.
Bursting every other rotation halves her ER requirements. This is almost always optimal for team DPS if Columbina’s ER requirements are too high ER or she does not use an Energy weapon.
Use the Energy Recharge Calculator to determine exact requirements for your team and rotation. For more details on how Favonius weapons will affect your team, please use Ac1d’s Favonius Mastersheet.
Artifact Stats
 Sands |  Goblet |  Circlet |
| ER | HP% | HP% | CRIT or HP% |
Stat Priority: (ER until requirement) > CRIT = HP% > EM > Flat HP
Use ER Sands if Columbina’s ER requirements are high and she uses her Burst every rotation.
HP% main stats perform well on Columbina, increasing direct damage from her Talents and easily capping her Moonsign Passive’s buff. While HP% | HP% | CRIT is often the best choice of main stats, HP% Circlets can be a competitive choice when Columbina uses ER Sands. However, a Triple HP% main stat build is never recommended.
*In teams with minimal or no EM buffs, EM can become equal to or slightly better than HP% for Columbina. However, with more EM or Lunar Reaction DMG Bonus buffs, HP% quickly regains its higher ranking due to the scarcity of HP% buffs. Hydro Goblets can also occasionally become competitive if Lunar Reactions are not triggered as much, and buffs for normal Hydro damage are more ubiquitous than those for Lunar Reaction damage.
We recommend using Genshin Optimizer to compare your actual artifacts.
Artifact Sets
 4pc Silken Moon’s Serenade (SMS) | Columbina should hold this set if her teammates are better suited to other damage or buffing sets. The 2pc effect of SMS helps Columbina meet her ER requirements. |
 4pc Aubade of Morningstar and Moon (Aubade) | In Ascendant Gleam teams, 4pc Aubade is Columbina’s best set for personal damage from off-field thanks to the large 60% Lunar Reaction DMG buff. Columbina usually uses 4pc SMS for team DPS, but 4pc Aubade can be used instead if there is a better holder of 4pc SMS (normally another support unit). |
 4pc Night of the Sky’s Unveiling (NotSU) | This is Columbina’s best set for her on-field playstyle, or in teams where she can swap in frequently. However, its CRIT Rate buff can be hard to build around because of her innate CRIT Rate stats from Character Ascension and A1 Passive. |
 2pc Mixed Sets 4pc Gilded Dreams (GD) 4pc Flower of Paradise Lost (FoPL) | 2pc Bonuses: ER, HP%, EM Serviceable options when 4pc Aubade and 4pc SMS are not available. 4pc FoPL and 4pc GD are only slightly better than a 2pc+2pc combination. Note that 4pc FoPL only works in LB teams, and 4pc GD does not work in LCrys teams. |
 4pc Tenacity of the Millelith (TotM) | A support option on Columbina when SMS is already taken and the personal damage gain from using 4pc Aubade is lower priority than buffing the main damage dealer(s) of the team. |
 4pc Deepwood Memories (Deepwood) | This set is situationally useful in Dendro teams; however, it is often better off being carried by more suitable teammates, i.e. Dendro characters or characters who deal less damage than Columbina. |
Weapons
Note: If Columbina uses her Burst every other rotation or has low ER requirements, weapons that primarily provide Energy such as Favonius Codex or Prototype Amber will lose out to weapons with more offensive stats.
Off-field
 5★ Nocturne’s Curtain Call | Nocturne’s Curtain Call is Columbina’s signature and BiS weapon in both playstyles. Its Energy passive greatly helps Columbina to meet her high ER requirements. Its HP% and CRIT DMG stats also boost her personal damage by a significant amount. |
 4★ Sacrificial Jade | This is the general second-best weapon for Columbina’s off-field damage, thanks to its valuable CRIT Rate, HP% and EM stats. Holding Sacrificial Jade can make meeting ER requirements impractical in some teams. As such, Columbina tends to Burst every other rotation with this Catalyst. |
 Other 5★ Catalysts | Reliquary of Truth, Surf’s Up, Tome of the Eternal Flow, Nightweaver’s Looking Glass, A Thousand Floating Dreams, Kagura’s Verity These weapons perform decently on Columbina, especially when her ER requirements are low. However, for Columbina’s off-field support playstyle, these 5-star Catalysts perform just slightly better or equal to her 4-star options, making them not worth pulling for. |
 4★ Prototype Amber | Prototype Amber provides HP% secondary stat, a passive that refunds Energy and gives teamwide healing whenever Columbina uses her Burst, which is very useful in teams with no dedicated sustain units. |
 4★ Favonius Codex | Together with Prototype Amber, Favonius Codex is one of Columbina’s top weapon choices for general use. Its particle passive greatly helps the Energy needs of not only Columbina, but also her teammates. |
 4★ The Widsith | The Widsith is Columbina’s best accessible 4-star weapon when her ER requirements are low. While the ATK% buff is useless, Columbina can use the other 2 buffs as well as the CRIT DMG secondary stat. |
 4★ Ash-Graven Drinking Horn | This event-limited Catalyst has a similar but more consistent output than Widsith. It should be only used when Columbina’s ER requirements are low. |
 3★ Thrilling Tales of Dragon Slayers (TTDS) | This Catalyst should only be considered when buffing ATK-scaling DPS units yields higher team DPS since Columbina has grievous personal performance with it. |
On-field Lunar-Bloom DPS
5★ Nocturne’s Curtain Call | Nocturne’s Curtain Call is Columbina’s signature and BiS weapon in both playstyles. Its Energy passive greatly helps Columbina meet her high ER requirements. Its HP% and CRIT DMG stats also boost her personal damage by a significant amount. |
 5★ Reliquary of Truth | Reliquary of Truth is the second-best option for Columbina’s on-field LB playstyle due to its abundance of valuable stats. It does not perform as well when she is off-field since its CRIT DMG passive has a short duration and can only be triggered from on-field. |
 5★ Surf’s Up, Tome of Eternal Flow | These weapons are solid stat sticks for Columbina, especially when her ER requirements are low. |
 5★ Nightweaver’s Looking Glass, A Thousand Floating Dreams | While these weapons deal much lower damage compared to their 5-star rivals, they provide Reaction DMG% or EM buffs that can be valuable for the team. Nightweaver’s is a much better Catalyst than Thousand Floating Dreams, which sometimes ranks below Prototype Amber for personal damage. |
 4★ Dawning Frost | R1 Dawning Frost provides a similar damage profile to R5 Widsith or R5 Blackmarrow Lantern. However, it gets better and becomes the best 4-star option at higher refinements, with R5 performing only slightly behind R1 Surf’s Up and Tome. |
 4★ Blackmarrow Lantern | One of Columbina’s best F2P choices for her on-field LB playstyle. Note that the weapon requires Ascendant Gleam to fully unlock its passive. |
4★ Ash-Graven Drinking Horn | This event-limited Catalyst performs similarly to Blackmarrow Lantern while not costing any Billets to make. |
4★ The Widsith | R5 Widsith slightly outperforms R5 Blackmarrow Lantern for average DPS. However, it is inconsistent due to its RNG buffs (one of which, ATK%, is useless to Columbina) and spotty uptime. |
4★ Prototype Amber | Prototype Amber provides an HP% secondary stat and a passive that refunds Energy and gives teamwide healing whenever Columbina uses her Burst, which is very useful in teams with no dedicated sustain units. For Columbina’s performance, it deals similar damage to R5 Blackmarrow Lantern when her ER requirements are fairly high, and becomes worse at lower ER requirements. |
4★ Sacrificial Jade | Due to the CRIT Rate overcap problem with Columbina’s innately high CRIT Rate stats and 4pc NotSU, Sacrificial Jade is a much weaker Catalyst for this playstyle. However, its passive at high refinements is so good that even an CRIT Rate overcapping build can still perform decently, competing with R1 Dawning Frost. |
4★ Favonius Codex | While Favonius Codex is bad for Columbina’s personal damage output, its teamwide Energy effect can make it preferable when Columbina’s damage contribution is not high compared to her teammates. |
Teams
Rotation Notation
- N = Normal Attack
- C = Charged Attack
- A = Aimed Shot
- P = Plunging Attack
- E = Elemental Skill
- tE = Tap Skill
- hE = Hold Skill
- Q = Elemental Burst
- D = dash (cancel)
- J = jump (cancel)
- W = walk (cancel)
- > = switch character
- ( ) = these actions are optional; please refer to the notes below
- [ ] = repeat these actions the specified number of times
Teambuilding
- Columbina is best used in Lunar Reaction teams. She enables, buffs and provides Hydro application for all Lunar Reactions from off-field.
- She prefers Ascendant Gleam for better Elemental Application’s AoE, for Moonsign’s Team Bonus, and for the ability to use 4pc Aubade.
- Columbina’s on-field playstyle requires a Dendro character for LB, with Lauma being the most notable.
While Lunar Reactions are Columbina’s most obvious teambuilding consideration, she still offers useful utility such as long-lasting Hydro application and the ability to carry supportive Catalysts (e.g. TTDS, Prototype Amber). This allows her to be utilized in other non–Lunar-Reaction team archetypes that will not be elaborated on in this guide.
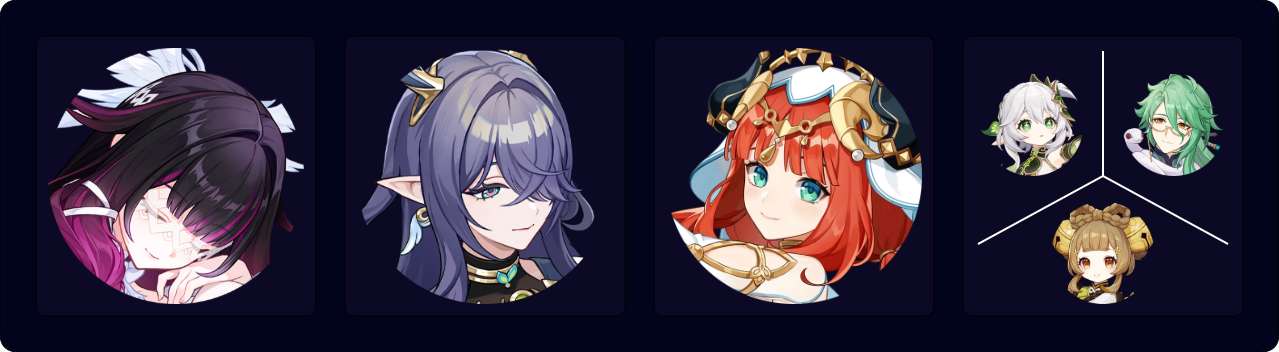
Lunar-Charged
LC teams mostly revolve around Ineffa or Flins since they deal direct LC damage and therefore benefit the most from LC buffs. However, other characters can still form a LC team with Columbina, albeit with less effective results.
In LC teams, DPS characters should prioritize CRIT stats as they increase both their Talent and LC reaction damage. Because of the way LC damage contribution works when a reaction is triggered by multiple characters, building for LC damage on your supports is rarely worth the Resin if their LC damage does not become the highest or second highest in the team.
Notable Teammates
Moonsign Characters
Pairing Columbina with other Moonsign characters enables Ascendant Gleam, which fully unlocks the kits of some Moonsign characters (including Columbina), and activates the full effects of Moonsign-related gear (Nod-Krai artifact sets, Nod-Krai weapons, etc.). Columbina’s Moonsign Benediction Passive stacks additively with the same passives of other 5-star LC characters (Ineffa and Flins), thus buffing the entire team’s LC Base DMG Bonus.
 Ineffa | Ineffa is arguably the best off-field damage dealer in LC teams, owing to her strong personal damage and good shield uptime. She pairs well with Columbina to form a flexible and powerful LC core. Between Columbina and Ineffa, the latter should hold 4pc Aubade while the former carries 4pc SMS, since Ineffa’s damage output is usually higher and therefore more important to buff. |
 Flins | Columbina is the best Hydro support for Flins thanks to her full-uptime Hydro application and significant LC buffs. The best Flins team also uses Ineffa, with both of them benefitting from Columbina’s buffs and creating an extremely powerful LC trio. |
Aino | Aino can be used as an F2P Ascendant Gleam partner for Columbina. She provides additional Hydro application for the team, helps Columbina with her ER requirements, and offers appreciable buffs from her C1 and C6. |
Jahoda | Jahoda is a 4-star character who can be used to activate Ascendant Gleam in Columbina teams. She provides good healing, a decent 100 EM buff, and uses 4pc VV to shred enemy RES. Jahoda can also apply off-field Hydro and Electro and, at C6, give 5% CRIT Rate and 40% CRIT DMG to Moonsign characters. However, these perks are locked behind her Skill, which requires some field time to charge. |
Electro
Other Electro damage dealers, both on-field and off-field, can be used instead of Flins and/or Ineffa. Electro sustain options such as Kuki can also be valuable when Ineffa is not around. Some buffers such as Sara or Iansan can also be considered.


 C6 Sara | As the CRIT DMG buff of Sara’s C6 can affect LC damage, she is a potent buffer in quickswap LC teams where she can frequently use her abilities to maintain the buff uptime of her C6 on her teammates, including Columbina. |
Iansan | While Iansan is a support with good Flat ATK buff, she is only recommended for Varesa (since she can keep up Iansan’s uptime with her Plunge playstyle) and Flins (he can utilize dashes in his combos). |
Hydro
Hydro teammates provide the features of their kits while generating Hydro particles for Columbina. This gives her lower ER requirements and frees up more artifact slots to build for offensive stats.


Anemo
Anemo characters give Electro and Hydro RES Shred debuffs from 4pc Viridescent Venerer. They also provide other utility such as grouping, stat buffing, or survivability. Some of them also deal good Swirl damage and contribute to the team’s LC damage via AoE Swirl or Elemental Absorption. Notably, Anemo units with innate or infused Anemo attacks — e.g. Sucrose, Ifa, and C6 Lynette — can drive characters such as Xingqiu, Yelan, and Beidou well.
 ★ Sucrose | Sucrose is LC teams’ best Anemo buffer with her teamwide EM share. She can act as the on-field unit for the team, triggering Swirl and LC (through Swirl’s AoE application and her Burst’s Elemental Absorption) for extra damage. |
 Ifa | Ifa gives the whole team a good LC DMG Bonus buff based on the amount of Nightsoul points the team possesses. Ororon and Iansan are highly synergistic with Ifa for this purpose. Ifa’s CRIT builds remain viable in AoE scenarios since his LC damage can crit. |
    Kazuha / Lynette / Venti / Sayu | Anemo units with Elemental Absorption who can trigger LC even in single-target scenarios. They also provide a range of utility, from Kazuha’s DMG Bonus and Lynette’s ATK% buffs, to Venti’s powerful grouping and Sayu’s decent teamwide healing (while rolling in her Skill state). |
Chasca | Chasca converts her bullets into the Elements of her teammates. She is often used in an Overvape team and acts as a multi-Element DPS who simultaneously deals Electro, Hydro, and Pyro damage while triggering Lunar-Charged, Vaporize, and Overloaded reactions. |


Flex
In an LC team, the flex option is usually occupied by an Anemo unit for their 4pc VV RES Shred. Nevertheless, some units whose Elements do not interfere with the Electro–Hydro Double aura can be useful. Additionally, a Pyro DPS can use the Double aura to deal both Vaporize and Overloaded damage.
Xilonen | Xilonen has a RES Shred debuff with great uptime via her Skill, the ability to activate the full effect of 4pc Scroll, and great single-target healing to top it off. However, it can be tricky for her to trigger both Electro and Hydro Crystallize for the 4pc Scroll set effect. As such, Xilonen can use 4pc Instructor or 4pc Noblesse Oblige to buff the whole team instead, especially when LC damage is the team’s focus (e.g., Ineffa or Flins teams) since it does not benefit from Scroll’s DMG% buff. |
Zhongli | Zhongli is a good sustain option with his sturdy and long-duration shield. He also gives decent offensive utility in the form of Universal RES Shred. |
 Bennett | While Bennett does not shred enemy RES, he gives healing and a massive Flat ATK buff to the on-fielder without messing up the LC reaction too much. |
 Pyro DPS | Arlecchino, Hu Tao, Yoimiya, Lyney, Durin |
Example Teams
This is not a comprehensive list of teams. The inclusion or exclusion of any given team does not necessarily reflect its power level.

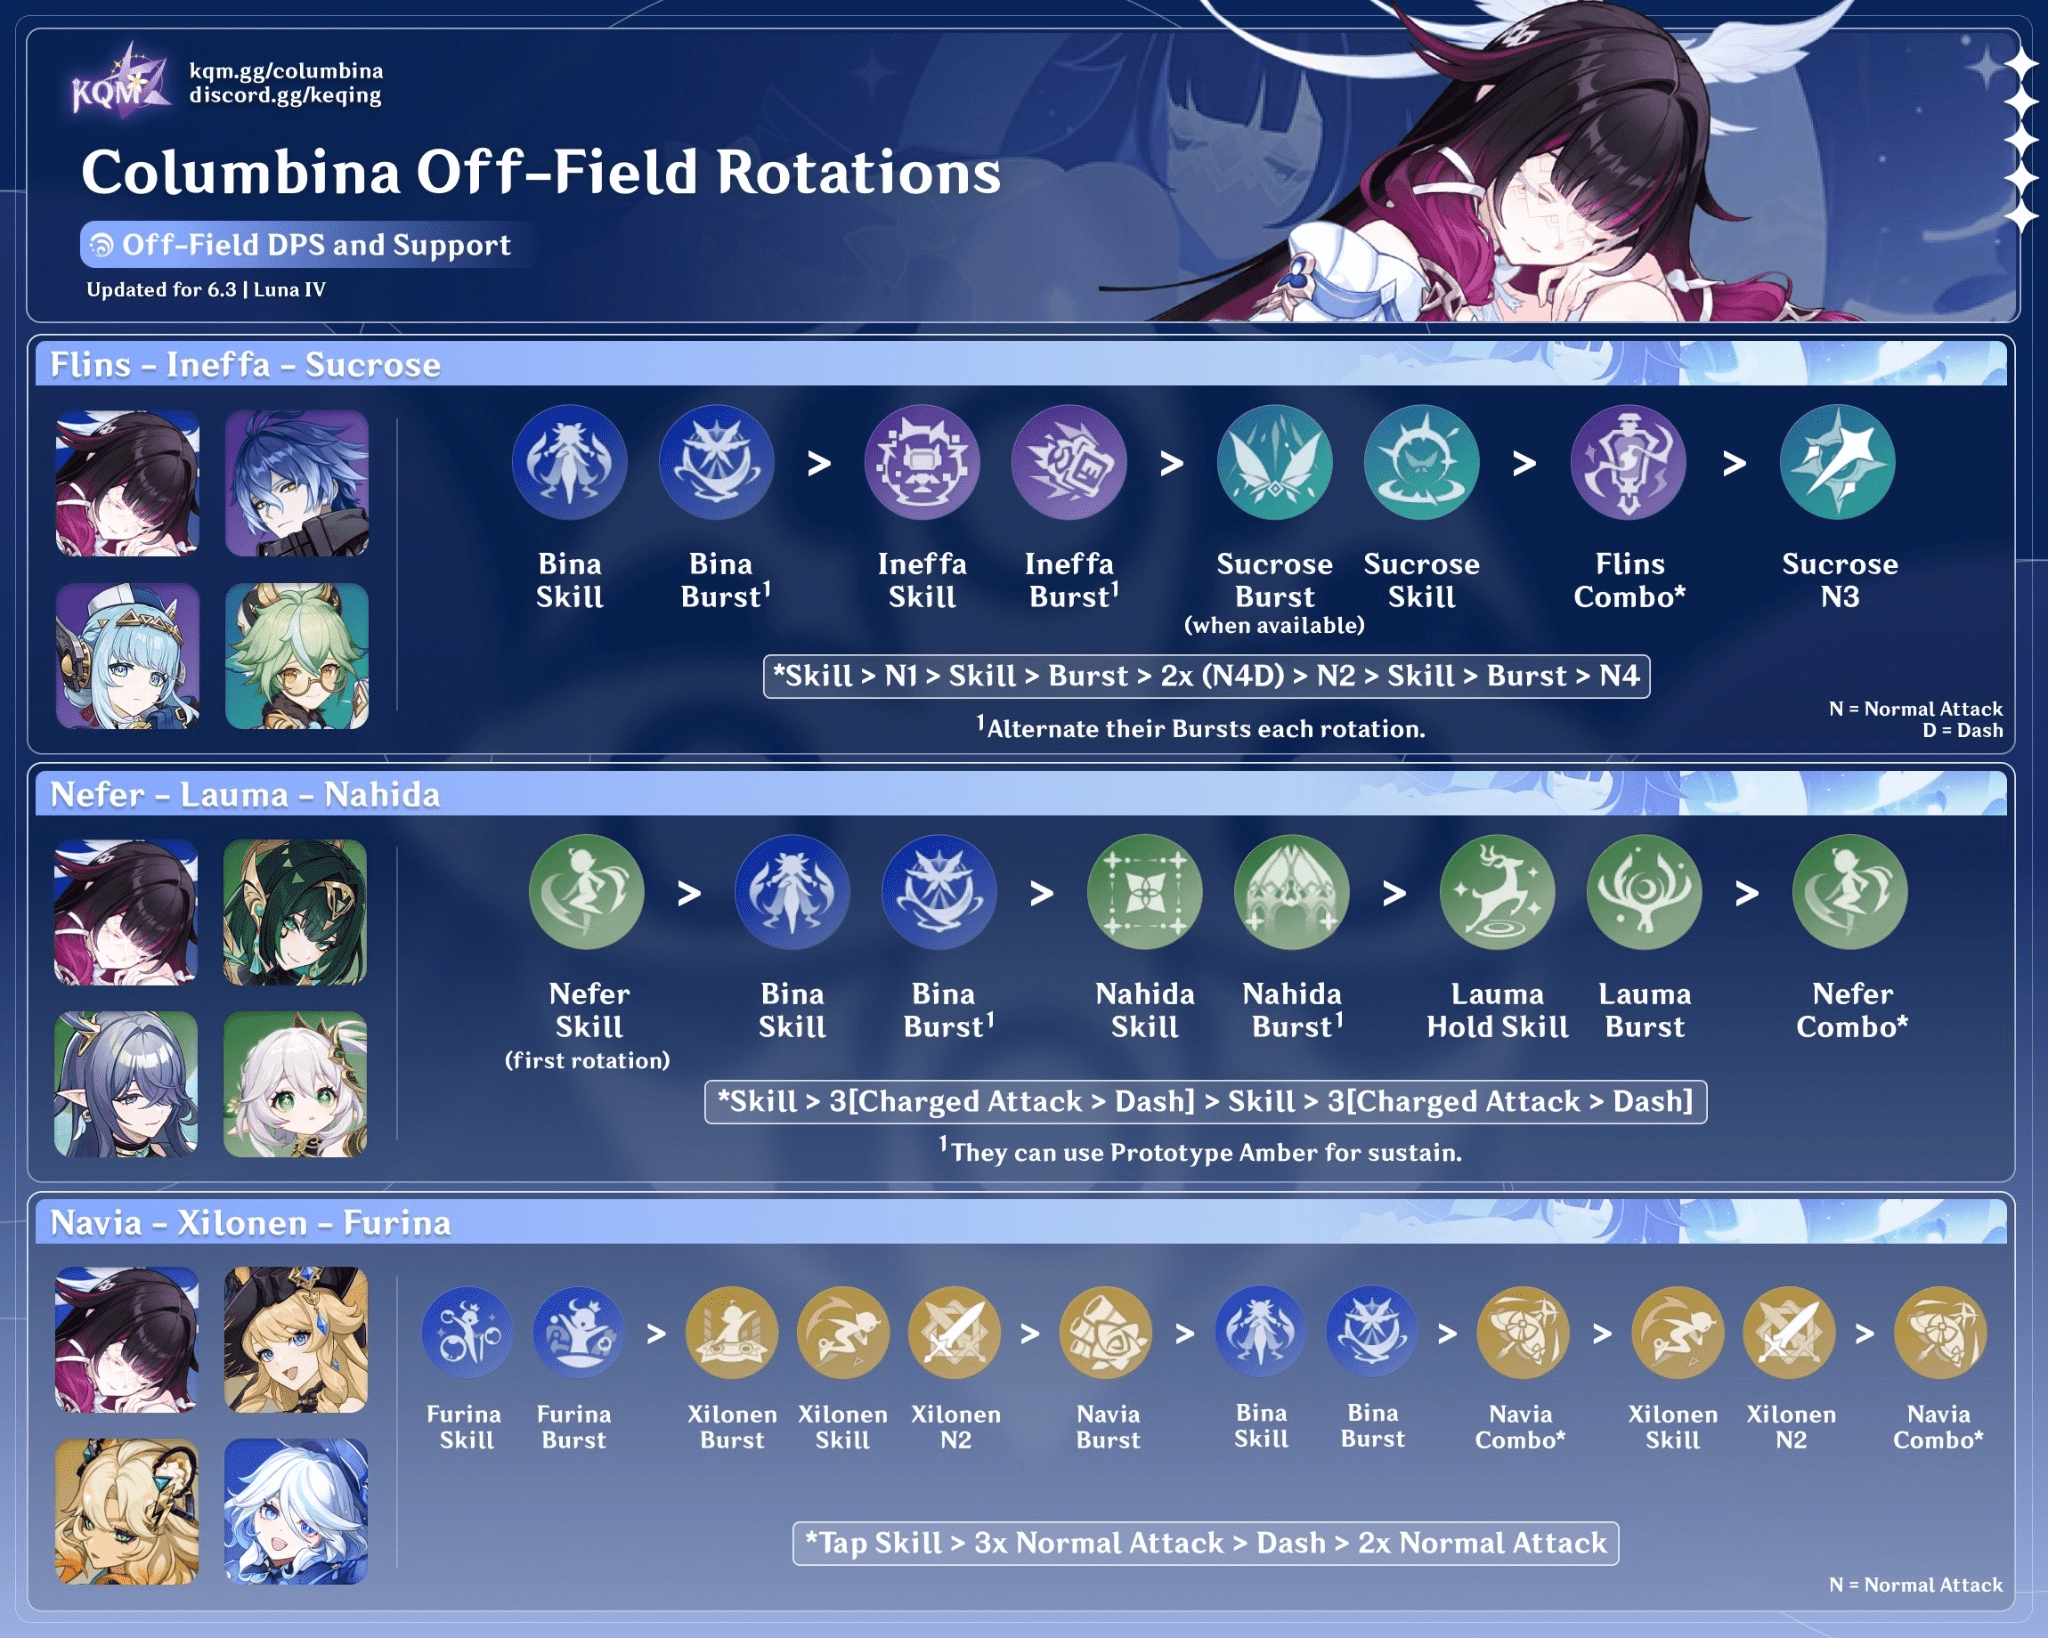
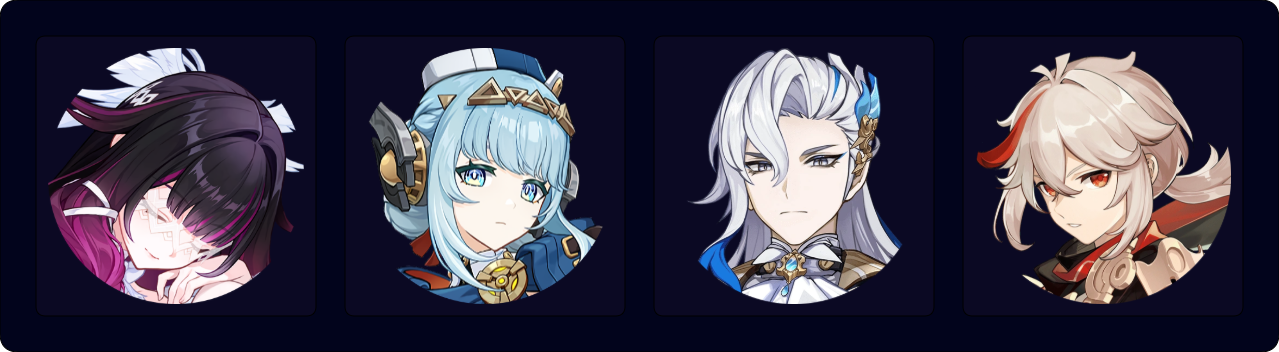
The standard Flins–Ineffa–Columbina team, featuring Sucrose as the best Anemo support. If Columbina and Ineffa use their Burst every other rotation, you should alternate them to keep the rotation length consistent. If they use their Bursts every rotation, Flins’s field time should be shortened by omitting the last few Normal Attacks.
Sample Rotation
Columbina E (Q)¹ > Ineffa E (Q)¹ > Sucrose ED (Q)¹ N1 > Flins combo > Sucrose N3
¹Burst when available.

In this Ineffa-less team, healing is provided by Xilonen when needed. Other units such as Jean, Sayu, or Lan Yan can also offer similar protection instead. If Columbina uses Prototype Amber, a support with more buffs such as Sucrose can also be used.
Sample Rotation
Columbina E (Q)¹ > Fischl E/Q > Xilonen E(Q)² N2 > Flins combo
¹Burst whenever available.
²Burst whenever healing is needed.

This is one of Raiden’s best teams for total team DPS thanks to the stellar off-field damage profile from Ineffa and Columbina. Raiden outshines other on-field Electro DPS units in this slot thanks to her Energy refund and good particle generation, allowing Columbina and Ineffa to Burst every rotation with much lower ER needs.
Sample Rotation
(Raiden E)¹ > Columbina E Q > Ineffa E Q > Sucrose ED Q N1 > Raiden Q combo E > Sucrose (E)² N4
¹First rotation only.
²Use every other rotation when Sucrose is C1+.
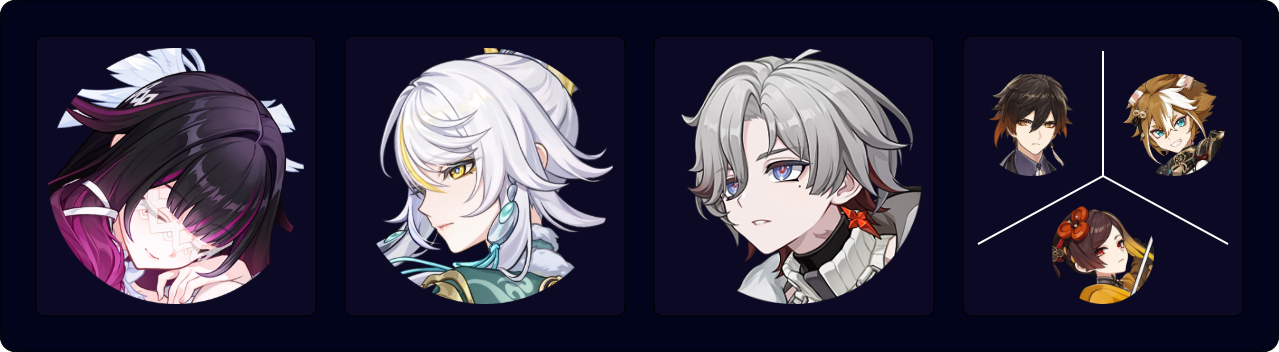
This Neuvillette team focuses less on his personal damage compared to the Furina variant to emphasize LC damage instead, both direct (from Columbina and Ineffa) and as a reaction.
If Ineffa chooses to Burst every rotation for full LC uptime, Kitain Cross Spear is a good option to use on her.
Sample Rotation
Neuvillette E > Columbina E Q > Ineffa E > Kazuha tEPQ > Neuvillette C Q E C > Ineffa Q¹ > Kazuha tEP > Neuvillette 2[C]
¹Can be used every other rotation.

In this Overvape–LC team, Hu Tao and Ineffa’s best artifact sets are 4pc NotSU and 4pc Aubade, respectively. 4pc SMS can be used on Columbina while Yelan holds 4pc EoSF, or it can be used on Yelan while Columbina uses 4pc Aubade.
Sample Rotation
Ineffa E (Q)¹ > Columbina E Q > Yelan Q N1-4² E N1 > Hu Tao combo > Yelan E N4
¹Burst whenever available.
²To wait for Skill to come off cooldown after the first rotation.

Jahoda enables Ascendant Gleam for the team, allowing Columbina to use either 4pc SMS or 4pc Aubade. This rotation below assumes Jahoda with 4pc VV, so her Skill and Burst are used separately to maintain the set’s uptime. If 4pc VV is not used, Jahoda should be on 4pc SMS or 4pc TotM instead.
Sample Rotation
Columbina E Q > Fischl E > Jahoda Q N1 > Durin 2[E]Q > Columbina 2[N2CD] N2C > Fischl N2 Q > Jahoda E N4 > Columbina N2CD N2C
Limited Roster Alternatives
These teams are meant for newer players whose limited roster prevents them from using the teams above; as such, the teams below result in lower damage output.

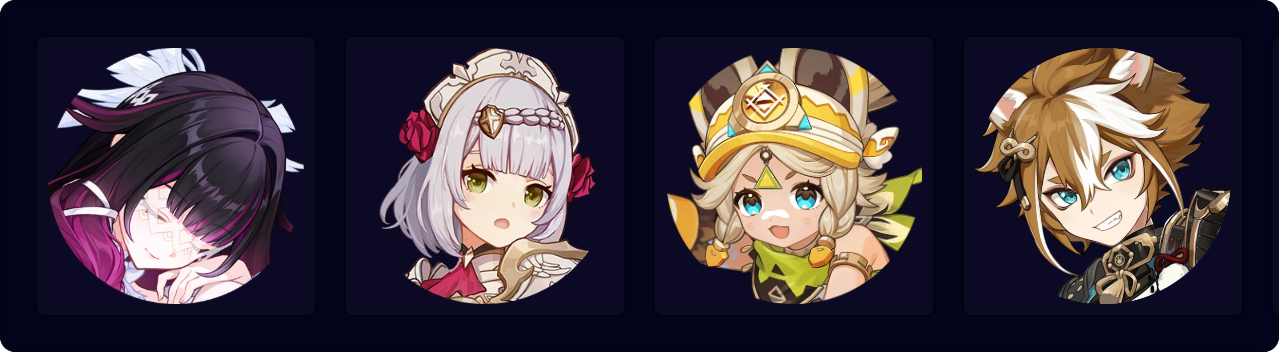
This is an accessible LC team with only 4-star teammates that can be easily obtained (Fischl via the Starglitter Shop, Aino through progressing the Archon Quest, and Lan Yan from the annual Lantern Rite’s Liyue 4-star selection). Prototype Amber is a good Columbina weapon that allows her to use Burst more frequently and heal back the HP loss if Lan Yan’s shield breaks.
Sample Rotation
Aino Q E > Columbina E (Q)¹ > Fischl N1 E/Q > Lan Yan 2[E] (Q)¹ N3D spam²
¹Burst whenever available.
²Until Aino’s Burst runs out, around 3s.
Lunar-Bloom

*Bloom Unit: Hyperbloom trigger, Burgeon trigger, Nilou, or Nefer
In LB teams, direct LB damage is dealt in addition to the reaction damage from triggering Bloom/Hyperbloom/Burgeon. LB teams gain a lot from Lauma’s various buffs, and teams with Lauma perform significantly ahead of the teams without.
Nefer is the best on-field DPS to use in a LB team, but her passive prevents Dendro Cores from dealing Bloom, Hyperbloom or Burgeon damage. Without Nefer, a Hyperbloom or Burgeon trigger (or Nilou) should be used to make the most out of the Dendro Cores. Columbina can also perform as the on-field DPS in these teams, utilizing Lauma’s great buffs to deal significant LB damage from Charged Attacks and her Skill’s Gravity Interference.
Notable Synergies
Moonsign Characters
Pairing Columbina with other Moonsign characters enables Ascendant Gleam, which fully unlocks the kits of some Moonsign characters, and activates the full effects of Moonsign-related gear (Nod-Krai artifact sets, Nod-Krai weapons, etc.). Columbina’s Moonsign Benediction Passive stacks additively with the same passives of other 5-star LB characters (Lauma and Nefer), thus buffing the entire team’s LB Base DMG Bonus.
 Lauma | With her significant buffs to Bloom-related Reactions, Lauma is the best Dendro support for both on-field and off-field Columbina LB teams. Columbina also has special synergy with Lauma in Nefer teams as Columbina’s extra Moonridge Dews allow Lauma to gain more Pale Hymn stacks. Columbina’s Gravity Interference damage benefits from these Pale Hymn stacks without eating into the Dews required for Nefer’s Charged Attacks. |
Nefer | Columbina is Nefer’s best Hydro support in her LB teams. Columbina buffs LB DMG Bonus and LB Base DMG Bonus while doing decent LB damage herself. Columbina’s Moonridge Dews also allow Nefer to use her full combo with dash cancels without having to wait for Verdant Dew to regenerate mid-way through. Nefer disables Dendro Cores from doing damage when she enters her Skill, thus making some of the Hyperbloom/Burgeon triggers merely sustain units in her teams. |
 Ineffa | With the right aura management, players can maintain good LC uptime while still producing a notable amount of Dendro Cores for Ineffa to trigger Hyperbloom. In these Hyperbloom teams, EM gains tremendous value on Ineffa as it improves both her Hyperbloom and LC damage. |
 Aino | Aino can be used as an F2P Ascendant Gleam partner for Columbina. She provides additional Hydro application for the team, helps Columbina with her ER requirements, and offers appreciable buffs from her C1 and C6. |
Jahoda | Jahoda can be considered at C6 for her CRIT buff and additional Hydro application from her absorbed Skill. Her major downside is that she takes significant field time to charge up her Skill, which is required for the buff and application. |
Dendro
Lauma is the most important teammate for Columbina LB teams due to her incomparable buffing capability. When Lauma is in the team, a second Dendro unit can be used to deal damage (Alhaitham in his Quickbloom playstyle, or Emilie in her Burgeon playstyle) or provide sustain (Baizhu, Yaoyao, Kirara) or additional buffs (Nahida). Without Lauma, Dendro units such as Dendro Traveler or Collei can also be utilized to generate Dendro Cores and Verdant Dew for Columbina.


Hyperbloom / Burgeon Triggers
These characters are used to deal Hyperbloom or Burgeon damage from the generated Dendro Cores. Among them, Ineffa is the most notable as she enables Ascendant Gleam for Columbina and deals occasional extra LC damage.
Off-Field Triggers


On-Field Triggers


Hydro
Hydro teammates can be used in the flex slot to provide the features of their kits while generating Hydro particles for Columbina. This gives her lower ER requirements and frees up more artifact slots to build for offensive stats. Some units provide additional Hydro application to create more Dendro Cores for the team.
Nilou | In a Nilou team, Columbina stays on-field to deal LB damage via her Charged Attack, and triggers Bountiful Cores from her Normal Attack and Elemental Skill for more damage. EM becomes more important than usual for Columbina as a result. |
 Furina | Because Furina’s DMG Bonus buff does nothing for LB and Dendro-Core–related damage, her value in Columbina’s LB teams is low. Nevertheless, she can still be played for personal damage and Hydro application as long as a healer is used. |
  Yelan Xingqiu | Yelan and Xingqiu deal damage and apply Hydro from off-field. However, their coordinated Burst attacks are triggered from doing Normal Attacks, which Columbina does not do as often in her on-field playstyle. |


Flex
Other characters of various Elements can be used in the flex slot so long their Elemental Application does not interrupt the LB reactions. They usually play the role of a healer, shielder, or buffer. 4pc Instructor or 4pc SMS should be used to buff reaction damage, or 4pc Deepwood if no one else already holds it.
Note that characters such as Shinobu and Ineffa are merely sustain units in Columbina–Nefer teams as Nefer prevents Dendro Cores from being used to trigger Hyperbloom.


Example Teams
This is not a comprehensive list of teams. The inclusion or exclusion of any given team does not necessarily reflect its power level.
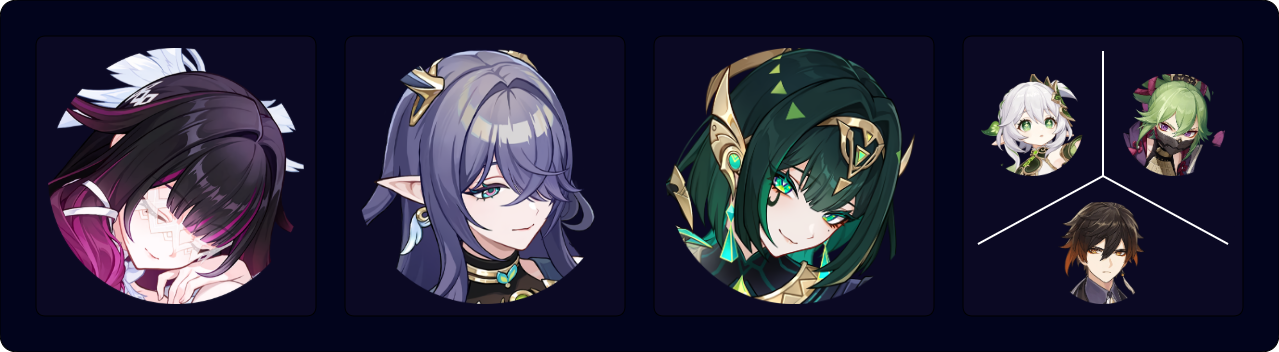
This is Nefer’s best-performing Hypercarry team. Bursting every rotation on Columbina is crucial, as the Moonridge Dews from her A4 are required to generate additional Pale Hymn stacks for Lauma’s Burst; otherwise, Columbina would consume the limited Pale Hymn stacks instead of Nefer, since Lauma cannot use the Hold version of her Skill.
Nahida is one of the best buffers for the last slot; however, this leaves the team sustainless. As such, Prototype Amber is an excellent weapon choice on Columbina, as it helps meet her ER requirements while also providing team-wide healing, making teams without a dedicated sustain unit much more comfortable to play. Nahida can also carry Prototype Amber herself if extra healing is needed.
In this team, Nahida can carry 4pc Deepwood, while either Lauma or Columbina should be on 4pc SMS, with the other holding a 2pc + 2pc set or 4pc Aubade. Shinobu and Zhongli, meanwhile, use 4pc Instructor while 4pc SMS and 4pc Deepwood can go on Lauma and Columbina (choose who holds which according to what pieces you have).
Sample Rotation (Nahida)
(Nefer N1)¹ > Columbina E Q > Nahida E Q > Lauma hE Q > Nefer E 3[CD] E 3[CD] (Q)²
¹First rotation only, for Verdant Dew stacking.
²Burst whenever available.
Sample Rotation (Shinobu)
(Nefer E)¹ > Columbina (N1)¹ Q E > Shinobu E > Lauma (N1)¹ hE Q > Nefer E 3[CD] > Shinobu Q/N3² > Nefer E 3[CD] (Q)³
¹First rotation only, for Verdant Dew stacking.
²To refresh Instructor uptime.
³Burst whenever available.
Sample Rotation (Zhongli)
(Nefer N1)¹ > Columbina (N1)¹ Q E > Zhongli hED > Lauma (N1)¹ hE Q > Nefer E 3[CD] E 3[CD] (Q)²
¹First rotation only, for Verdant Dew stacking.
²Burst whenever available.

A more accessible Columbina–Nefer team. Without Lauma, Columbina’s Burst is not as important to use, and she can Burst every other rotation in this team. However, Bursting every rotation with Prototype Amber is still helpful for the team’s survival.
Sample Rotation
Collei EQ > Aino Q E > Columbina Q (N1-3)¹ E > Nefer E 3[CD] E 3[CD] (Q)²
¹To wait for Columbina’s Skill cooldown.
²Burst whenever available.

With the right aura management, players can maintain good LC uptime while still producing a good amount of Hyperbloom for Ineffa. In these Hyperbloom teams, EM gains tremendous value on Ineffa as it improves both her Hyperbloom and LC damage. As maintaining Ineffa’s Birgitta is important for her reaction uptime, Bursting every rotation with Kitain Cross Spear is recommended.
Sample Rotation
(Lauma N1)¹ > Columbina E Q > Ineffa E > Lauma hE Q > Ayato E N15 Q > Ineffa Q > Lauma hE > Ayato E N10²
¹First rotation only.
²To shorten the rotation.
A Nilou LB team where Columbina deals both LB and Bountiful Bloom damage as an on-fielder. While EM becomes more valuable to her than normal, Columbina still wants to prioritize CRIT and HP stats to maximize her Lunar-Bloom damage. If Nahida is used, either her or Columbina or both of them can hold Prototype Amber for the team’s survivability.
Sample Rotation (Nahida)
Columbina E Q > Nahida E Q N1 > Nilou E N2 E > Lauma hE Q > Columbina 4[CD] C
Sample Rotation (Baizhu)
Nilou E N2 E > Columbina E Q > Baizhu N1 Q E > Lauma hE Q > Columbina 4[CD] C > Baizhu E
Sample Rotation (Yaoyao)
(Lauma N1)¹ > Nilou E N2 E > Columbina E Q > Yaoyao E > Lauma hE Q > Columbina 4[CD] C
¹First rotation only, for Verdant Dew stacking.

A simple yet effective on-field Columbina team. 4pc NotSU is Columbina’s best set in this team.
Sample Rotation
(Lauma N1)¹ > Columbina E Q > Lauma hE Q > Shinobu ED N1 > Aino Q E > Columbina CD spam²
¹First rotation only, for Verdant Dew stacking.
²Until her Skill is ready.
Limited Roster Alternatives
These teams are meant for newer players whose limited roster prevents them from using the teams above; as such, the teams below result in lower damage output.

This F2P team has decent performance from Shinobu’s Hyperbloom and Columbina’s direct LB damage.
Sample Rotation
Columbina E Q > Kuki ED > Collei EQ > Aino Q E > Columbina CD spam¹
¹Until her Skill is ready.
Lunar-Crystallize

The LCrys team archetype is new and revolves mostly around Zibai at present. Zibai prefers Illuga as the dedicated LCrys support, and together they prefer a Geo or Hydro teammate in the final slot.
With or without Zibai, LCrys allows Geo characters to proc reaction damage, compared to their normal Crystallize reaction which does no damage. Because LCrys does not have a global ICD of 1s like the normal Crystallize reaction, it can be triggered much more frequently, providing significant damage. This rewards Geo and Hydro characters who apply their Element at a fast and consistent rate.
In LCrys teams, characters should prioritize CRIT stats, as they increase both their Talent and LCrys reaction damage. Because of the way LCrys damage contribution works when a reaction is triggered by multiple characters, building for LCrys damage on your supports is rarely worth the Resin if their LCrys damage does not become the highest or second highest on the team.
Notable Synergies
Moonsign Characters
Pairing Columbina with other Moonsign characters enables Ascendant Gleam, which fully unlocks the kits of some Moonsign characters, and activates the full effects of Moonsign-related gear (Nod-Krai artifact sets, Nod-Krai weapons, etc.). Columbina’s Moonsign Benediction Passive stacks additively with the similar passives of other 5-star LCrys characters (i.e. Zibai), thus buffing the entire team’s LCrys Base DMG Bonus.
Zibai | Zibai and Columbina are the best LCrys DPS and the best Hydro enabler, respectively. Getting Columbina for Zibai is a greater upgrade for team DPS than getting Zibai’s signature weapon or her C1.Zibai prefers a team with Geo and Hydro characters only, especially with Illuga. |
Illuga | Illuga’s Burst gives Additive Base DMG Bonus to Geo damage and direct LCrys damage for on-field characters. While this does not benefit LCrys reaction damage or Columbina’s off-field damage, the buff for on-fielders is significant enough to make him a good support for these teams, especially for Zibai.Illuga can hold 4pc SMS when he is C2 and above, allowing Columbina to equip Aubade instead. |
Aino | Aino can be used as an F2P Ascendant Gleam partner for Columbina. She provides additional Hydro application for the team, helps Columbina with her ER requirements, and offers appreciable buffs from her C1 and C6. |
Jahoda | Jahoda can be considered at C6 for her CRIT buff and additional Hydro application from her absorbed Skill. Her major downside is that she takes too much field time to charge her Skill up for the buff and application. |
Ineffa | Because Lunar-Crystallize can still proc even with an Electro-Hydro double aura, Ineffa can be used as a powerful and flexible off-field damage dealer and sustain in Lunar-Crystallize. |
Geo
Zibai is the best Geo LCrys DPS whose kit requires this reaction to function. She uses off-field Geo teammates to activate Geo Resonance, trigger LCrys more frequently, provide buffs (with Illuga’s being the most noteworthy), and/or deal their own damage.
 ★ Zhongli | Zhongli is a strong sustain option thanks to his sturdy and long-duration shield. He also gives offensive utility in the form of Universal RES Shred. In addition, Zhongli’s Stone Stele can resonate with the three Moondrifts ( which count as Geo Constructs), increasing the number of AoE pulses. This increases not only Zhongli’s damage, but also his Geo application rate, increasing the number of LCrys reactions. Zhongli further synergizes with characters that create Geo Constructs for his Skill’s stele to resonate with: Geo Traveler, Ningguang, Kachina, Albedo, and Itto. |
 Geo Traveler | Geo Traveler generates the most Geo Constructs among the characters who have this ability. They can have a maximum of 2 meteorites from their Skill and 4 Geo walls from their Burst, with each Construct giving off one additional resonance pulse from its location. This is possible because the Traveler’s Burst walls and the LCrys Moondrifts do not count towards the limit of 3 maximum Geo Constructs. |
Xilonen | Xilonen is a strong buffer with her Geo and Hydro RES Shred, and can use 4pc Scroll or 4pc Instructor to further buff the team. However, she requires her C2 for her RES Shred to work from off-field, thus limiting her team options, as most LCrys teams prefer a Triple Geo setup. |


Hydro
Hydro teammates provide the features of their kits while generating Hydro particles for Columbina. This gives her lower ER requirements and frees up more artifact slots to build for offensive stats. Some also provide additional Hydro application to trigger LCrys more frequently.


Flex
The flex character of a LCrys team is usually a healer, shielder, or buffer. However, frequent Dendro, Anemo, Pyro, Electro*, or Cryo application can make it harder to trigger LCrys, as it can consume or replace the Hydro aura. As such, LCrys teams tend to use Geo and Hydro Elements only. However, characters of other elements can be viable depending on the team, as long as they don’t interfere too much with Hydro aura uptime.
*Electro and Hydro auras can coexist on enemies. When Geo is applied to such targets, if the Electro aura has been reduced to below 0.5U after the EC/LC aura consumption, both Electro Crystallize and LCrys can be triggered. Additionally, applying a second Geo application within 1s from the first will guarantee a Lunar-Crystallize reaction even when the Electro aura still persists. These interactions allow for good LCrys uptime so long as Electro application is not faster than the rate of EC/LC ticks. Check out the Lunar Reaction guide for more information.


Example Teams
This is not a comprehensive list of teams. The inclusion or exclusion of any given team does not necessarily reflect its power level
The standard Triple Geo team for Zibai. While Zhongli, Gorou, and Chiori provide similar damage output, Zhongli is the recommended option for general use because of his tanky shield. However, players can still get some defensive utility through Columbina’s Prototype Amber or her C1.
It is recommended to build as much DEF on Zhongli and Gorou as possible. They should also use 4pc Instructor to buff the team. Chiori, however, should stick with her usual DPS build.
Sample Rotation (Zhongli)
Columbina E (Q)¹ > Illuga EQ > Zhongli hED > Zibai combo
¹Burst whenever available.
Sample Rotation (Gorou)
Columbina E (Q)¹ > Illuga EQ > Gorou (Q²) E > Zibai combo
¹Burst whenever available.
²Burst every other rotation.
Sample Rotation (Chiori)
Columbina E (Q)¹ > Illuga EQ > Chiori (Q)¹ 2[E] > Zibai combo
¹Burst whenever available.

Despite losing a dedicated buffer for Navia, this is still a strong team thanks to the added damage from Columbina and LCrys reactions. Additionally, LCrys is a major QoL improvement for Navia, as she no longer has to chase after Crystallize Shards to gain her Crystal Shrapnel stacks. Navia still uses her usual ATK build, with EM becoming mildly useful instead of completely useless as before.
Sample Rotation
Xilonen Q > Furina ED Q > Xilonen E N2 > Navia Q > Columbina E Q > Navia tE N3D N2 > Xilonen E N2 > Navia tE N3D N2 (tE)¹
¹Use when available.

In this team, Ningguang deals sizable damage with the buffs from Illuga as her various, fast-hitting Normal and Charged Attacks quickly consume his Burst stacks. Thanks to the Moondrifts, Chiori can summon her second doll and contribute good off-field damage. Kachina can be used if Chiori is not available; she buffs Ningguang further with 4pc Scroll while still dealing solid damage on her own.
Sample Rotation
Columbina E (Q)¹ > Illuga EQ > Chiori 2[E] > Ningguang N1 ED N1C Q C > (Chiori Q)¹ > Ningguang ED 2[N2C]
¹Burst whenever available.

This team has the old-school “Microwave” core with the touch of modernity from Lunar-Crystallize. While each Moondrift resonates with other Geo Constructs, the three of them do not contribute to the construct limit of 3. However, constructs from all teammates should be fully generated and not break upon cast, so as to avoid breaking the wrong construct when hitting the 3 construct limit. Mistakes can usually be rectified by using Zhongli’s Tap Skill, preferably in place of his Hold Skill if shielding is not required for one rotation. Rotations are much more generous with Zhongli’s C1 and C2.
Sample Rotation
Columbina E Q > Albedo E N1 > Zhongli hED Q > Traveler hEQ > Albedo Q E N1 > Traveler hE > Zhongli tE
Limited Roster Alternatives
These teams are meant for newer players whose limited roster prevents them from using the teams above; as such, the teams below result in lower damage output.
Thanks to Noelle’s shield and healing, this team is very comfortable to play. Favonius weapons should be used on the supports to decrease Noelle’s ER requirements.
Sample Rotation
Gorou EQ > Kachina E > Columbina E (Q)¹ > Noelle E Q N3D N3 > Kachina Q > Gorou E > Noelle 3[N3D] N2
¹Burst whenever available.
Credits
Writer(s): acerbus114
Contributors: madeofseaglass (Marvel), idkanonymized, caramielle., rezmir, voidrev, pjeljr
Team images made with the KQM portrait generator.