Updated for Version “Luna II”

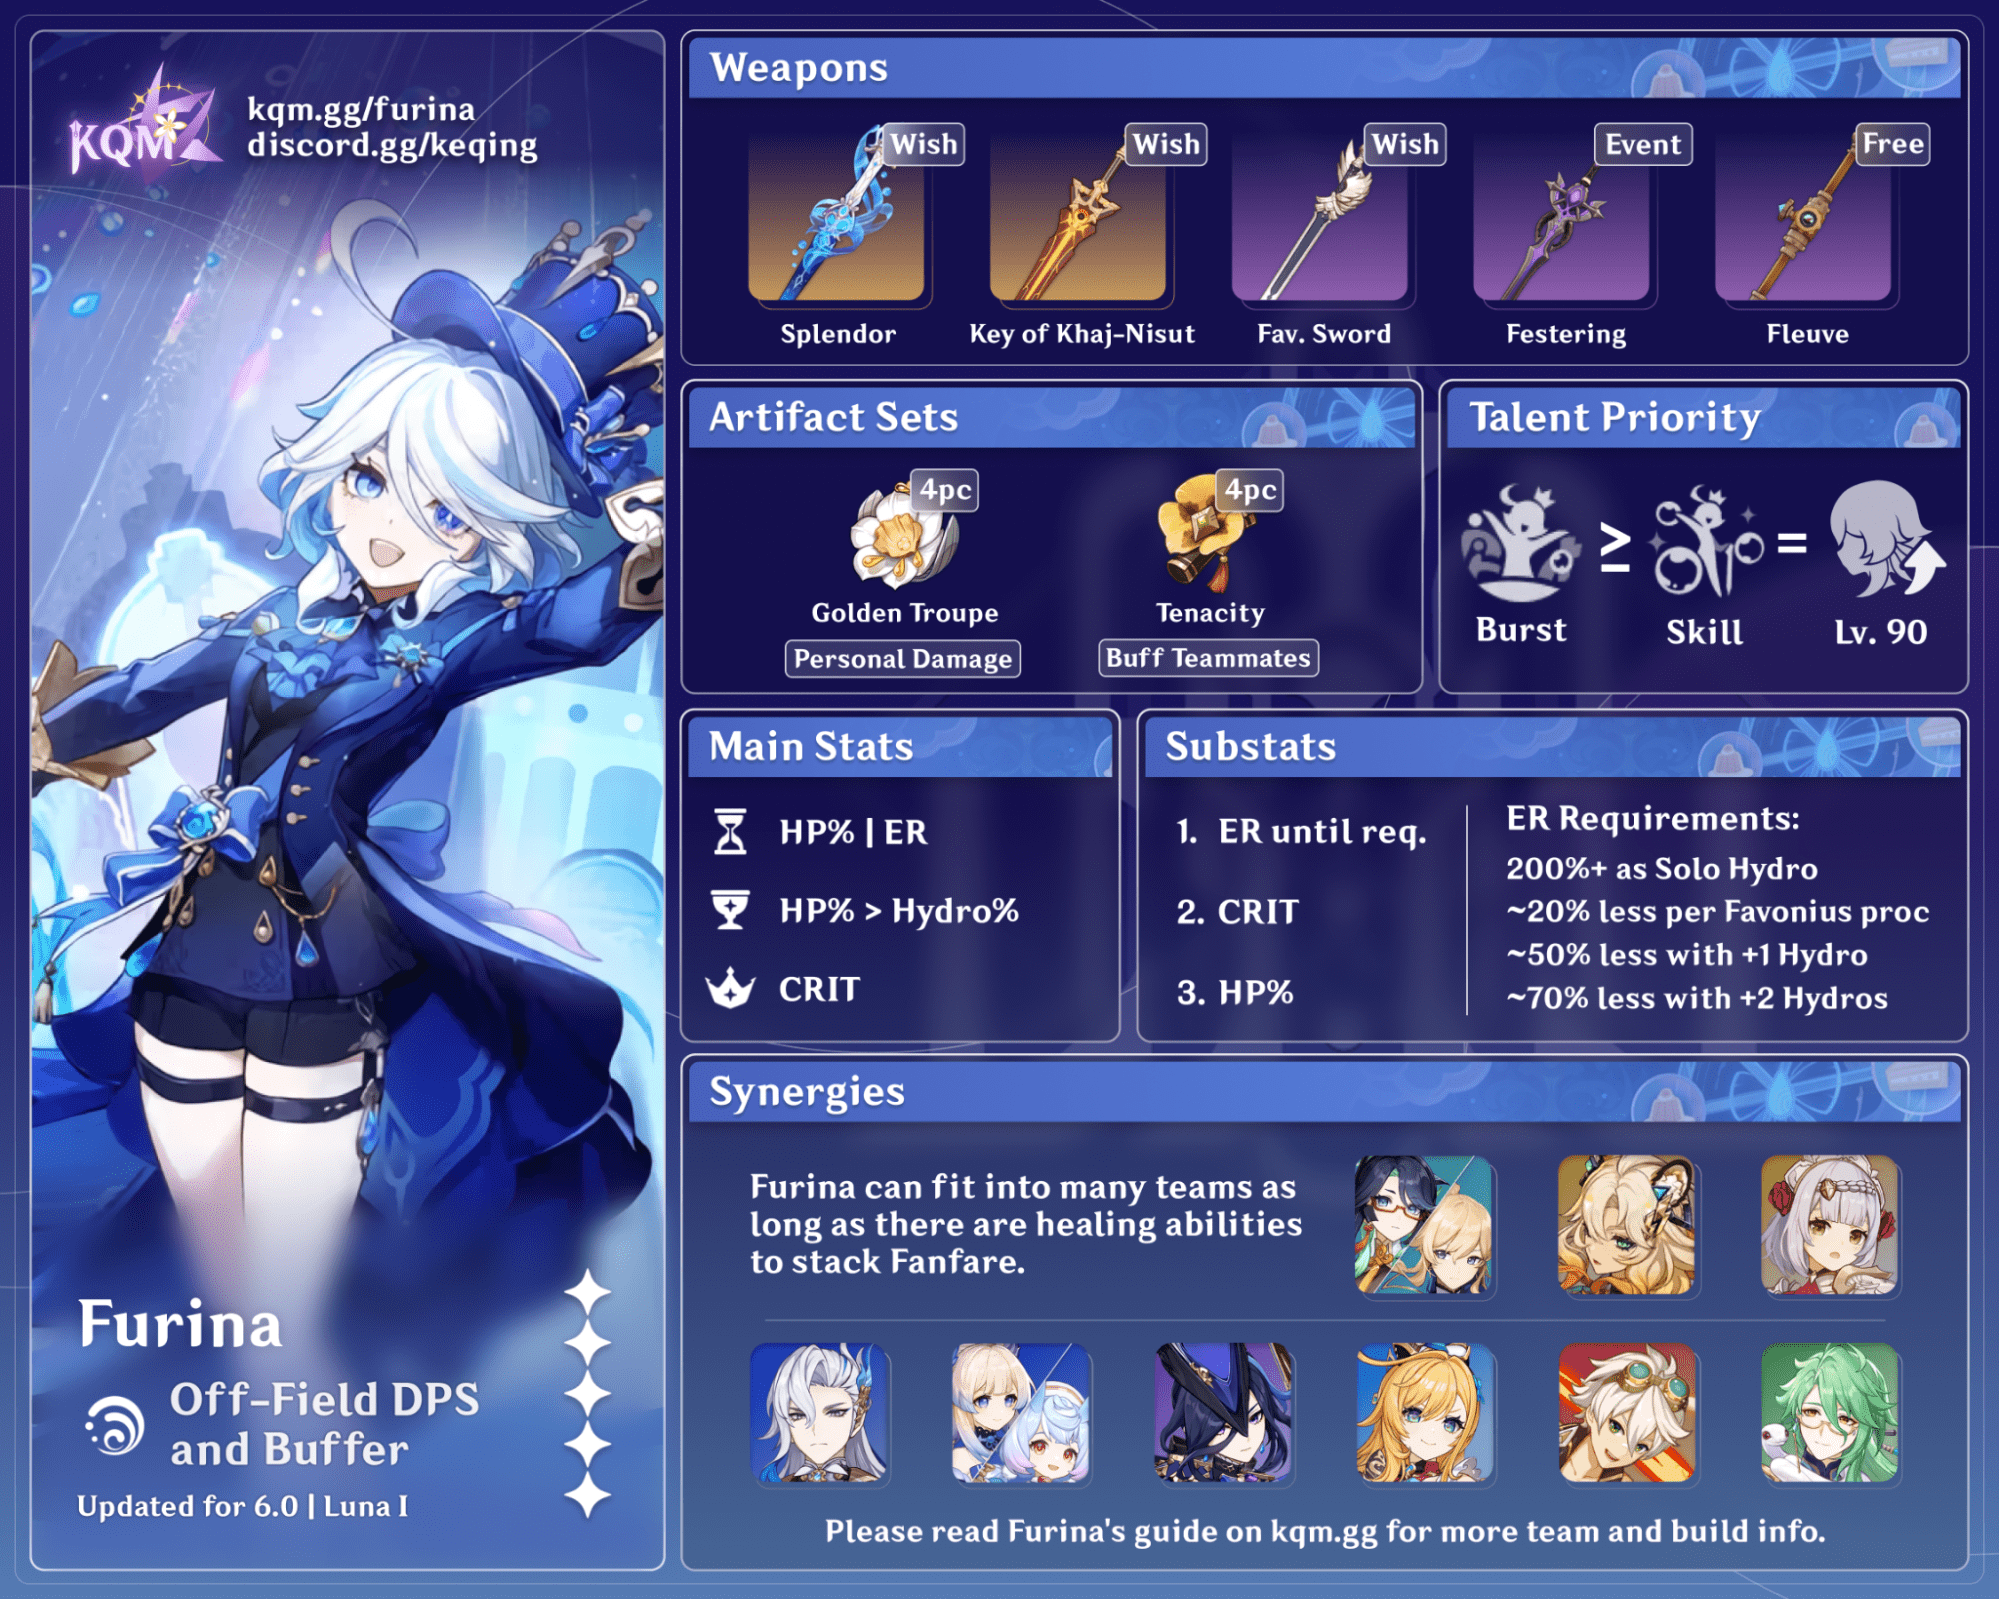
Furina is a 5-star Hydro Sword character in Genshin Impact who brings strong off-field damage, teamwide buffs, and unique team HP manipulation mechanics. The Hydro Archon steals the spotlight even as an off-field support, with her teams built around her kit. Learn about Furina’s best builds, best weapons, best artifacts, and best teams in this quick guide.
Note that the information given may change if new discoveries are made. More extensive testing is in progress.
Join our Discord to participate in the theorycrafting process. The full-length guide is available here.
Table of Contents
Infographic
Credits to: euphorysm, cote, haafr, caxia5, irokei, auraolis and KQM Staff
Character Overview
Playstyles
Off-Field DPS + Support
Furina’s Ousia-aligned Skill provides long-lasting off-field damage and Hydro application while draining her teammates’ HP. In return, her Burst gives a partywide buff that increases when team HP changes (i.e., draining or healing HP). Strong healing is needed to keep teammates above 50% HP in order to maintain the effectiveness of Furina’s kit over multiple rotations.
Talents
Level and Talent Priority
Since Furina’s Skill scales with her Max HP, it is highly recommended to bring her to Level 90.
Burst ≥ Skill = Lvl. 90
Furina’s Skill is the crux of her personal damage, while her Burst offers essential team buffs. You should level both, but her Burst is slightly more important. On the other hand, her Normal Attacks are not very significant and may be left unleveled. Even with Furina’s C6, most of her enhanced Normal Attacks’ damage scales independently of Talent levels.
Talent Overview
 Normal Attack | Soloist’s Solicitation
Talent Description
Normal Attack
Performs up to 4 consecutive strikes.
Charged Attack
Consumes a certain amount of Stamina to unleash a solo dance, dealing Physical DMG to nearby opponents and changing her Arkhe alignment. If Salon Members or Singer of Many Waters summoned by her Elemental Skill “Salon Solitaire” are present, their lineup will switch in response.
Arkhe: Seats Sacred and Secular
At intervals, when Furina’s Normal Attacks hit, a Spiritbreath Thorn or a Surging Blade will descend based on her current alignment, dealing Hydro DMG based on her current alignment.
When Furina takes the field, her starting Arkhe will be Ousia.
Plunging Attack
Plunges from mid-air to strike the ground below, damaging opponents along the path and dealing AoE DMG upon impact.
Furina’s Normal Attacks are very flamboyant but unremarkable in terms of damage. However, her Normal Attack Talent is useful in regards to Arkhe Alignments.
Furina can change Arkhe Alignment by using a Charged Attack. Her current Alignment is visually indicated on her character model. Her default state is Ousia, where she has shorter hair and darker clothing.
 Elemental Skill | Salon Solitaire
Talent Description
Invites the guests of the Salon Solitaire to come forth and abet in Furina’s performance. Will summon either the Salon Members or the Singer of Many Waters based on Furina’s current Arkhe alignment.
Ousia
Foaming bubbles like celebrants shall dance, dealing AoE Hydro DMG based on Furina’s Max HP and summoning 3 Salon Members: the Ball Octopus-shaped Gentilhomme Usher, the Bubbly Seahorse-shaped Surintendante Chevalmarin, and the Armored Crab-shaped Mademoiselle Crabaletta.
They will attack nearby opponents at intervals, prioritizing the target of the active character, dealing Hydro DMG based on Max HP.
When they attack, if character(s) with more than 50% HP are nearby, the Members will increase their current attack’s power based on the number of such characters, and consume said characters’ HP. If the characters who meet these requirements are 1/2/3/4 (or more), the Members’ attacks will deal 110%/120%/130%/140% of their original DMG.
Pneuma
Summons the Singer of Many Waters, who will heal nearby active character(s) based on Max HP at intervals.
The Salon Members and Singer of Many Waters share a duration, and when Furina uses her Charged Attack to change the guest type, the new guests will inherit the initial duration.
While the Salon Members and the Singer of Many Waters are on the field, Furina can move on the water’s surface.
Furina’s Skill functions differently depending on her current Alignment, spawning different entities known as Guests. Swapping between Alignments causes Furina to despawn any active Guests and spawn in entities of the other Alignment. Note that Guests do not snapshot buffs.
In the overworld, Furina can freely walk on water while her Guests are active. She can walk indefinitely since her Skill has 100% uptime.
Ousia
Furina’s Ousia Alignment is her recommended variant during combat. Her Ousia-aligned Skill deals one instance of Hydro damage and then summons 3 distinct Guests known as the Salon Members, who attack enemies even while Furina is off-field.
Salon Members have the following properties:
- They follow the active character.
- They attack enemies independently of one another, with the tendency to prioritize the active character’s current target.
- They function as turrets and do not coordinate with the active character’s attacks or abilities.
- They periodically apply Hydro and generate Hydro Particles while attacking.
- They each possess unique damage modifiers, attack rates, and internal cooldowns.
- Their attacks drain the HP of all teammates currently above 50% HP.
- Each teammate drained directly increases the Salon Members’ damage by 10% (up to 40%).
- Each Salon Member drains a different amount of HP per hit.
Pneuma
Furina’s Pneuma-aligned Skill summons a single Singer of Many Waters.
The Singer of Many Waters works as follows:
- It is stationary and stays where it spawns.
- It heals characters on-field at regular intervals within a very large range (similar to Nahida’s Burst).
- It does not deal damage, apply Hydro, nor generate Hydro particles.
Furina’s Pneuma-aligned Skill is only recommended for recovering HP outside of regular combat due to its low healing and lack of particle generation.
Furina’s Pneuma-aligned Skill is much more impactful in Co-Op, since it provides substantial healing to all party members simultaneously in a very large area and allows her to replace dedicated healers.
 Elemental Burst | Let the People Rejoice
Talent Description
Rouses the impulse to revel, creating a stage of foam that will deal AoE Hydro DMG based on Furina’s Max HP and cause nearby party members to enter the Universal Revelry state: During this time, when nearby party members’ HP increases or decreases, 1 Fanfare point will be granted to Furina for each percentage point of their Max HP by which their HP changes.
At the same time, Furina will increase the DMG dealt by and Incoming Healing Bonus of all nearby party members based on the amount of Fanfare she has.
When the duration ends, Furina’s Fanfare points will be cleared.
Furina’s Burst deals a single tick of Hydro damage and applies the Universal Revelry state to all party members for 18s. The duration of Universal Revelry is indicated by bubbles at the edge of the screen.
During Universal Revelry, Furina gains a Fanfare point when any characters in the team lose or recover HP. Each Fanfare point is the equivalent of 1% HP difference for each teammate, e.g., a teamwide 24% HP heal is equivalent to 96 Fanfare points. For every 25% breakpoint of the maximum Fanfare points accumulated, the screen will pulse. This occur at 75/150/225/300 stacks at C0 and 100/200/300/400 stacks at C1+.
Furina increases every party member’s DMG Bonus and Incoming Healing Bonus according to the amount of Fanfare accumulated. At C0, a maximum of 300 Fanfare can be accumulated, translating to a maximum buff of 75% DMG Bonus and 30% Incoming Healing Bonus at Talent Level 10. These buffs are dynamic and apply partywide. Note that Fanfare points are cleared when the Burst ends or is recast within the 18s Universal Revelry duration.
 Ascension 1 Passive | Endless Waltz
Talent Description
When the active character in your party receives healing, if the source of the healing is not Furina herself and the healing overflows, then Furina will heal a nearby party member for 2% of their Max HP once every 2s within the next 4s.
Furina heals every teammate for a total of 4% of their Max HP every time the active character is overhealed from sources other than Furina — this healing benefits from her Burst’s Incoming Healing Bonus.
This passive is not enough to counteract her Salon Members’ teamwide HP drain, but it can assist another healer in keeping the team above 50% HP.
 Ascension 4 Passive | Unheard Confession
Talent Description
Every 1,000 points of Furina’s Max HP can buff the different Arkhe-aligned Salon Solitaire in the following ways:
- Will increase Salon Member DMG dealt by 0.7%, up to a maximum of 28%.
- Will decrease active character healing interval of the Singer of Many Waters by 0.4%, up to a maximum of 16%.
Furina’s Guests receive additional benefits that scale with Furina’s Max HP.
- Salon Members’ attacks receive up to an additional 28% DMG Bonus.
- The Singer of Many Waters’ healing interval is reduced by up to 16%.
These buffs cap at 40,000 Max HP.
Constellations
Furina is already a strong and fully-functional character at C0. Her Constellations still provide noticeable improvements to her teamwide buffs and personal damage. Click here for Constellation DPS increases.
 Constellation 1 | Love Is a Rebellious Bird That None Can Tame
Constellation Description
When using Let the People Rejoice, Furina will gain 150 Fanfare.
Additionally, Furina’s Fanfare limit is increased by 100.
Furina’s C1 increases her Fanfare limit by 100 points and immediately gives her 150 points on Burst cast. This Constellation increases both the floor and ceiling of her Burst’s buff, and increases the effectiveness of teams without strong partywide healing.
 Constellation 2 | A Woman Adapts Like Duckweed in Water
Constellation Description
While Let the People Rejoice lasts, Furina’s Fanfare gain from increases or decreases in nearby characters’ HP is increased by 250%. Each point of Fanfare above the limit will increase Furina’s Max HP by 0.35%. Her maximum Max HP increase is 140%.
Furina’s C2 more than triples the amount of Fanfare points generated, which leads to increased uptime on maximum buffs.
With this Constellation, some of Furina’s teams can generate more than 400 Fanfare points (the cap for buffs). Fanfare points obtained beyond the cap increase Furina’s Max HP, which in turn increases her personal damage output from her Ousia-aligned Skill.
 Constellation 3 | My Secret Is Hidden Within Me, No One Will Know My Name
Constellation Description
Increases the Level of Let the People Rejoice by 3.
Maximum upgrade level is 15.
Three additional levels on her Burst lead to even stronger team buffs, which results in higher team damage output.
 Constellation 4 | They Know Not Life, Who Dwelt in the Netherworld Not!
Constellation Description
When the Salon Members from Salon Solitaire hit an opponent, or the Singer of Many Waters restores HP to the active character, Furina will restore 4 Energy. This effect triggers once every 5s.
Furina’s C4 greatly reduces the need to build Energy Recharge since she regenerates 16–20 Energy in 20–25s rotations. This allows her to use a non-ER weapon and an HP% Sands, which lets you invest more heavily into offensive stats.
 Constellation 5 | His Name I Now Know, It Is…!
Constellation Description
Increases the Level of Salon Solitaire by 3.
Maximum upgrade level is 15.
Three additional levels on her Skill, increasing her personal damage output.
 Constellation 6 | Hear Me — Let Us Raise the Chalice of Love!
Constellation Description
When using Salon Solitaire, Furina gains “Center of Attention” for 10s.
Throughout the duration, Furina’s Normal Attacks, Charged Attacks, and Plunging Attacks are converted into Hydro DMG which cannot be overridden by any other elemental infusion. DMG is also increased by an amount equivalent to 18% of Furina’s max HP.
Throughout the duration, Furina’s Normal Attacks (not including Arkhe: Seats Sacred and Secular Attacks), Charged Attacks, and the impact of Plunging Attacks will cause different effects up to every 0.1s after hitting opponents depending on her current Arkhe alignment:
Arkhe: Ousia
Every 1s, all nearby characters in the party will be healed by 4% of Furina’s max HP, for a duration of 2.9s. Triggering this effect again will extend its duration.
Arkhe: Pneuma
This Normal Attack (not including Arkhe: Seats Sacred and Secular Attacks), Charged Attack, or Plunging Attack ground impact DMG will be further increased by an amount equivalent to 25% of Furina’s max HP. When any of the attacks mentioned previously hit an opponent, all nearby characters in the party will consume 1% of their current HP.
During the duration of each instance of “Center of Attention,” the above effects can be triggered up to 6 times. “Center of Attention” will end when its effects have triggered 6 times or when the duration expires.
This Constellation provides good front-loaded damage and/or partywide healing, while also allowing Furina to have a brief on-field presence.
On Skill cast, Furina’s Normal, Charged, and Plunging Attacks receive a Hydro Infusion and HP scaling for up to 6 hits or 10s; these effects persist even if Furina swaps out. Furina’s current Arkhe Alignment will provide other benefits from her Normal Attacks and can still be switched freely by performing a Charged Attack.
Her C6 Alignment essentially has the opposite effect of her corresponding Skill:
- Ousia Alignment causes her attacks to heal party members on-hit.
- Pneuma Alignment further increases her attacks’ damage but also reduces team HP every hit.
HP Management
Effective use of Furina’s kit lies in careful manipulation of the team’s HP since both her Burst and Skill are empowered by team HP fluctuations.
Healing is very valuable for Furina. Without a healer, the entire team will drop to 50% HP and be unable to gain Fanfare points or buff the Salon Members. Additionally, having every teammate at 50% HP reduces their survivability.
Some teams, such as Neuvillette or Clorinde teams, can make full use of Furina’s kit without a dedicated healer. However, most teams should bring a dedicated healer.
Artifacts
ER Requirements
Furina’s Burst is an essential part of her kit and should be used every rotation, except for some specific teams mentioned later.
| Solo Hydro | 200%+ |
| Double Hydro (1 Teammate Skill) | 180–210% |
| Double Hydro (2 Teammate Skills) | 150–170% |
| Double Hydro (Neuvillette) | 130–150% |
| Triple Hydro | 130–140% |
Each Favonius weapon proc lowers her ER requirements by approximately 20-30%.
Furina’s Skill generates particles over time rather than on cast; coupled with her predominantly off-field usage, her ER requirements are considerable especially if she is the only Hydro character in the team. Factors such as Favonius weapon procs, additional Hydro teammate Skill uses, and Raiden’s Burst can noticeably decrease her ER requirements.
Teams with Neuvillette generally use longer rotations, allowing more particles to be generated per rotation and reducing Furina’s ER requirements.
Use the Energy Recharge Calculator to determine exact requirements for your team and rotation.
Artifact Stats
 Sands |  Goblet |  Circlet |
| HP% or ER% | HP% > Hydro DMG Bonus | CRIT Rate or CRIT DMG |
Stat Priority: ER (until requirement) > CRIT DMG = CRIT Rate > HP%
Furina’s ER needs should be met to cast her Burst every rotation (except in a few specific teams). An ER Sands is viable at high ER requirements, especially if she is using a non-ER weapon.
Before C2, an HP% Goblet is preferred for most builds due to her A4 Passive and the abundance of DMG% buff she already receives, though a Hydro DMG% Goblet can still be used.
Note that in teams where Furina’s Burst is not used, she should ignore ER and instead focus on her offensive stats.
Artifact Sets
Click here for in-depth artifact comparisons.
 4pc Golden Troupe (GT) | 4pc Golden Troupe is by far Furina’s best set for her personal damage since the vast majority of her damage comes from her Ousia-aligned Skill’s Salon Members. An HP% Goblet is generally recommended when using this set. Farm this set to maximize Furina’s damage. |
 4pc Tenacity of the Millelith (TotM) | 4pc Tenacity of the Millelith effectively provides a permanent 20% ATK buff; however, it does greatly decrease Furina’s damage output. This set is recommended in teams where Furina’s damage share is already low. |
  4pc Scroll of the Hero of Cinder City / 4pc Silken Moon’s Serenade (SMS) | 4pc Scroll or 4pc SMS may be used in teams where Furina’s damage share is low and her teammates don’t benefit from 4pc TotM’s ATK% buff. 4pc SMS’s EM buff requires at least one Nod-Krai teammate and maximizes with at least two. |
 2pc Mixed Sets | 2pc Bonuses: HP%, ER%, Hydro DMG%, Skill DMG% 2pc mixed sets are not competitive with Furina’s best sets and should only be used as placeholders while farming for other options. |
 4pc Marechaussee Hunter (MH) | 4pc Marechaussee Hunter is a decent option with Furina’s C6 unlocked. Since 4pc MH’s stacks do not stack nor refresh when off-field, C6 Furina may not always prefer this set if she swaps off-field after using her enhanced Normal Attacks. |
Weapons
Energy Recharge weapons perform comparatively better at higher ER requirements (e.g., 160%+).
Click here for weapon DPS comparisons.
 Splendor of Tranquil Waters | Furina’s signature weapon gives her many stats that maximize her personal damage (provided her ER requirements are met). However, her personal DPS increase may not be that impactful compared to the benefits provided by Favonius Sword or Key of Khaj-Nisut. |
 Uraku Misugiri | If Furina’s ER requirements are already met, she can make good use of Chiori’s signature weapon due to its high CRIT DMG stat and Skill DMG% passive. Its performance improves in teams with Geo units who can deal Geo damage, notably Xilonen or Navia. |
 Primordial Jade Cutter | Primordial Jade Cutter is the next best option after her signature weapon and Uraku in terms of personal damage, granting a hefty amount of CRIT Rate and some HP%. |
 Key of Khaj-Nisut | Key of Khaj-Nisut packs a huge amount of HP%, which is still highly beneficial for her personal damage. It also provides a large partywide EM buff thanks to Furina’s high Max HP, which can make it a strong (if not the best) option for team damage in archetypes such as Vaporize and Lunar-Charged. |
 Freedom Sworn | Freedom Sworn is a great high-investment weapon for Furina in teams with ATK-scaling, Normal or Charged Attack damage dealers who don’t care for EM. Its passive activates after Furina triggers 2 reactions, which can be from off-field. |
 Favonius Sword | Favonius Sword is the ever-reliable solution to meet team ER requirements. However, it greatly decreases Furina’s typically high personal damage output, which makes it undesirable in teams where Furina would otherwise deal a notable amount of damage. Good in teams that have exceedingly high ER requirements for Furina. |
 Serenity’s Call | Serenity’s Call is a very notable option for Furina’s damage. It is exceptionally good when the team has Moonsign: Ascendant Gleam, Furina has high ER requirements, and her personal damage is important. It performs similarly to Festering Desire without its passive, but surpasses it with the full passive from Ascendant Gleam. |
 Festering Desire | Festering Desire is a strong option for players who acquired it all the way back in Version 1.2. Its combination of Skill buffs and ER make it quite formidable on Furina. |
 Fleuve Cendre Ferryman | Fleuve Cendre Ferryman is a solid option for Furina and is essentially a lesser version of Festering Desire. It can be acquired for free through Fontaine’s Fishing Association. |
 CRIT Swords | Light of Foliar Incision / Haran Geppaku Futsu / Mistsplitter Reforged / Azurelight / Absolution / Wolf-Fang CRIT stat sticks can be useful on Furina even if she cannot make full use of their passives. They perform best at lower ER requirements. |
 Harbinger of Dawn | A cheap CRIT stat stick if you do not have the above options and are not willing to fish. Harbinger of Dawn’s passive can only be maintained with high, continuous teamwide healing, such as with Kokomi’s Burst. With its passive up, it becomes comparable to Ferryman. |
Teams
Rotation Notation
- N = Normal Attack
- C = Charged Attack
- P = Plunging Attack
- E = Elemental Skill
- tE = Tap Skill
- hE = Hold Skill
- Q = Elemental Burst
- D = dash (cancel)
- J = jump (cancel)
- W = walk (cancel)
- > = switch character
- ( ) = these actions are optional; please refer to the notes below
- [ ] = repeat these actions the specified number of times
Teambuilding
- Teams with Furina should have at least one consistent source of healing for one or more party members to gain Fanfare points over multiple rotations or fights.
- Teamwide healers are recommended since they stack Fanfare most efficiently.
- While single-ally healers do not stack Fanfare as efficiently as teamwide healers, their other utility makes them perform better. For example, Bennett grants his Flat ATK buff and Kuki triggers Hyperbloom.
- Self-sustaining on-fielders like Neuvillette or Clorinde can stack Fanfare by themselves without need for a healer.
- Units with built-in HP manipulation, such as Lynette, Lyney, or Gaming, can synergize well with Furina to gain more Fanfare points within a shorter period.
- The consistent HP drain from Furina’s Salon Members allows any on-field DPS to make full use of 4pc Marechaussee Hunter, which will often be their best or one of their best sets.
Furina’s off-field Hydro application enables reactions like Vaporize or Electro-Charged. However, her lower rate of Hydro application compared to that of other off-field characters like Xingqiu and Yelan prevents her from solely enabling Vaporize for characters like Yoimiya and Hu Tao.
Notable Teammates


Teamwide Off-Field Healers
These healers can heal the entire party in an instant. Some units also provide prolonged healing to the on-field character to trigger Furina’s A1 Passive more frequently. They typically do not deal much damage and should use equipment that improves their healing or provides other team benefits.
 Escoffier | Escoffier gives 55% Hydro and Cryo RES Shred in teams with only Hydro and Cryo teammates. Her Burst initially heals teamwide, then periodically heals the active character. Her strong off-field Cryo damage and RES Shred make her one of Furina’s best teammates. Focus on maximizing her personal damage, as her healing is usually enough with a damage build. |
   Anemo VV Healers | Xianyun, Jean, and Sayu grant healing and trigger 4pc VV’s RES Shred. Xianyun enables and buffs Plunging Attacks, Sayu deals decent off-field Swirl damage when built with EM, and Jean provides stronger initial healing. |
    Baizhu, Sigewinne, Mika, Charlotte | All these characters offer team healing and utility. Baizhu adds interruption resistance and Dendro-related reaction buffs. Sigewinne boosts off-field Skill DMG. Mika buffs Attack SPD and Physical DMG, while Charlotte provides a buff from TTDS buff. |
 Prototype Amber | Prototype Amber’s healing alone cannot counter Furina’s HP drain, but it lets any Catalyst user heal. Its supplemental healing helps weaker teamwide healers or single-ally healers. |
Teamwide On-Field Healers
These healers provide sustained party healing but require significant field time; they also often have some single-ally healing. Their continuous healing is more likely to trigger Furina’s A1 Passive repeatedly. Healers that deal good personal damage notably benefit from both buffs granted by Furina’s Burst.
 Kokomi | Kokomi can act as an on-field Hydro applier and damage dealer in Mono Hydro, Freeze, and Bloom-based teams. |
 Noelle | Noelle deals on-field damage while healing. Her Burst does not expire when swapped out, allowing for highly flexible rotations. She can use 4pc Archaic Petra for team buffs or 4pc Marechaussee Hunter for personal damage. Her poor particle generation necessitates Favonius Greatsword or Geo teammates. |
    Yaoyao, Barbara, C6 Dori, Qiqi | Yaoyao and Barbara apply Dendro and Hydro to drive Bloom-based teams. Qiqi is generally weak due to subpar damage, Cryo application, particle generation, and utility. |
Single-Ally Off-Field Healers
These units can only heal the on-field character, making it difficult or even impossible to restore the entire team’s HP. This problem can be alleviated somewhat in teams that allow frequent swapping to distribute healing.
Healers that bring other strong benefits such as Bennett’s ATK buff or Kuki’s ability to trigger Hyperbloom remain strong options even if they don’t have ideal synergy with Furina, or they may be added to teams that already have partywide healers.
 Bennett | Bennett’s strong Flat ATK buff compensates for low Fanfare gain. A healing build improves his ability to trigger Furina’s A1 Passive, as his healing only happens below 70% HP. |
Xilonen | Xilonen provides Pyro/Hydro/Electro/Cryo/Geo RES Shred via her Skill and DMG% buffs from 4pc Scroll. These buffs, alongside her Burst’s strong healing, make her an excellent generalist healer for Furina’s teams. |
 Kuki Shinobu | Shinobu’s healing offsets Furina’s HP drain even with EM builds, letting her frequently trigger Furina’s A1 Passive. She also enables Quicken and Hyperbloom, excelling in Dendro teams. |
Dori | Prior to C6, Dori heals and generates Energy only for the active characterAt C6, she can use her Electro-infused attacks as an on-field DPS to heal the entire team. |
 Other Single-Ally Healers | Most other single-ally healers lack utility and can’t sustain Furina’s HP drain even with frequent swaps. |
Hydro
Hydro units synergize with Furina by enabling Hydro Resonance and decreasing each other’s ER requirements. They can also supplement Furina’s somewhat erratic Hydro application.
 Neuvillette | Neuvillette’s self-healing and HP drain build Fanfare without a healer. Furina’s buffs and particle generation outweigh Neuvillette’s lost A1 Passive stack (at C0). |
  Yelan, Xingqiu Yelan, Xingqiu | Both Yelan and Xingqiu provide off-field Hydro damage and application. Xingqiu adds Hydro RES Shred at C2, damage reduction, and decent interruption resistance, while Yelan offers higher personal damage and a ramping DMG% buff to the active character. |
 Nilou | Nilou’s passives empower Bloom teams, and Furina’s Hydro helps generate Dendro Cores. However, Furina’s DMG% buff doesn’t affect Bloom DMG, reducing her overall value. |
| Other Hydro Damage Dealers | Many other Hydro damage dealers also see Furina as one of their best teammates, especially in Freeze teams with Escoffier. Mualani can use Furina to a decent extent; however, this usually requires Burning (enabled by a Dendro teammate) or multiple sources of off-field Pyro application, which limits teambuilding. |
Anemo
Anemo supports provide 4pc Viridescent Venerer RES Shred and other utilities like grouping and buffing. Meanwhile, Furina buffs Anemo damage dealers through her Burst’s DMG Bonus.
 Xiao | Xiao appreciates Furina’s long-lasting buffs. Xianyun is the best healer with Xiao for her Plunging Attack buffs and Anemo particle generation. |
 Wanderer | Wanderer greatly appreciates Furina’s damage and buffing. Although Wanderer teams usually run Bennett, Furina opens up the option of using Mika, C4 Jean, Sigewinne, and Escoffier due to their stronger Fanfare generation and other utility. |
Mizuki | Mizuki is an on-field healer who specializes in Swirls. However, she only heals the active character when their HP drops below 70%, which can limit Fanfare generation and prevent Furina’s A1 Passive from triggering. Nevertheless, Furina is still one of Mizuki’s best off-field Hydro teammates, since Mizuki cannot Normal Attack in her Dreamdrifter state to proc Xingqiu’s or Yelan’s coordinated attacks. |
 Ifa | Ifa is an on-field healer who buffs Swirl, Electro-Charged, and Lunar-Charged reactions. His healing cannot offset Furina’s HP drain, but he can team up with another healer such as Sayu or Bennett. |
Chasca | Chasca converts her special Charged Attacks to her teammate’s Elements; with a Pyro teammate and Furina, Chasca can Vaporize her Pyro bullets. Additionally, Furina’s DMG% buff boosts all of Chasca’s bullets regardless of their Element. |
     Anemo Supports: Kazuha, Sucrose, Lynette, Lan Yan, Venti, Heizou | These Anemo supports provide various buffs and utility through their kit and should hold 4pc VV for its RES Shred. |
Pyro
Pyro units act as Vaporize damage dealers in teams with Furina, with some units also being viable in Burgeon teams. However, Furina’s Hydro application can be inconsistent, so she often pairs up with another off-field Hydro applier. Alternatively, it is possible to instead maintain a Pyro aura to allow Furina to trigger Forward Vaporize, with the Pyro units focusing on non-Vaporize damage.
Pyro units tend to run with Bennett; while his single-ally healing isn’t ideal for Furina teams, his inherent synergy with many Pyro units often outweighs this issue. Furina does make using a teamwide healer in lieu of Bennett more viable, which can be helpful if Bennett is unavailable.
 Xiangling | Xiangling is a potent off-field damage dealer and Pyro applier. She can enable Furina to Vaporize, or, if Furina is paired with another Hydro applier, Xiangling can Vaporize her own damage. |
 Hu Tao | Furina can not enable Vaporize on her own for Hu Tao, so she should run a second Hydro teammate. Although using a healer makes Hu Tao lose her A4 Passive and Staff of Homa’s full passive, the increased Fanfare generation still nets a damage gain. |
 Gaming | Furina lets Gaming Vaporize his Plunging Attacks, while his HP fluctuations help stack additional Fanfare. |
 Yoimiya | Furina cannot enable Yoimiya to Vaporize all her attacks alone, but she is still a strong support for Yoimiya’s Vaporize, Vapemelt, and Overvape teams. |
 Lyney | Lyney’s HP manipulation allows him to contribute towards Fanfare. Furina allows Lyney to Vaporize much of his damage, compensating for the loss of his A4 Passive’s effects with her Burst’s DMG Bonus. Teams with other off-field Pyro appliers can maintain Pyro aura to take advantage of his A4, but may be tricky to play since they often lack resistance to interruption. |
 Klee | Klee’s on-field Pyro application enables Furina to Vaporize her Skill hits. |
Mavuika | Mavuika is an incredibly powerful DPS who benefits from Furina’s Fanfare. Because Mavuika has enormous frontload from her Burst and decent supportive capabilities with her A4 Passive and possibly 4pc Scroll, she also functions in “dual DPS” teams with characters like Chasca. |
Dendro
Dendro units enable Bloom-related reactions via their Dendro application, with Furina acting as an alternative to other Hydro appliers. Her Burst’s DMG% buff doesn’t affect Transformative Reactions such as Hyperbloom or Burgeon, but it is one of few buffs that apply to direct Dendro damage from Talents.
 Nahida | Nahida provides long-lasting, off-field Dendro application and can attack on-field for more application, making her an excellent choice for Bloom-based teams. Her personal damage is also impactful in Quickbloom teams. She can equip Prototype Amber to help stack Fanfare. |
  Alhaitham, Tighnari | Both Alhaitham and Tighnari appreciate Furina’s buffs in Quickbloom teams. Kuki Shinobu is great pick to heal and trigger Hyperbloom. |
 Lauma | Furina’s Universal DMG Bonus does not buff Lauma’s Direct Lunar-Bloom damage nor Bloom damage. Nevertheless, Furina’s off-field Hydro application makes her a relevant teammate for Lauma. If Lauma’s C1 is unlocked, she acquires solid single-ally healing and can help stack Furina’s Fanfare. |
 Kinich | Furina is a potent buffer for Kinich, though her Hydro application can occasionally remove Burning and disrupt combos. Furina should hold 4pc Deepwood Memories if no one else on the team can. |
Emilie | Emilie requires a consistent Burning aura on enemies to maximize her damage, so teambuilding is limited with Furina. |
  Dendro Traveler, Collei | Dendro Traveler and Collei serve as off-field Dendro appliers but have limited range, uptime, and high ER needs, which reduce their overall usefulness. |
 Nefer | Nefer can use Furina’s off-field Hydro application for consistent Verdant Dew generation. However, Furina’s buffs aren’t very impactful as a large share of Nefer’s damage is considered Lunar-Bloom DMG, but Furina can still hold support-oriented sets like 4pc Deepwood Memories or 4pc Instructor. Nefer prefers rotations shorter than 20s. So, Furina should either cast her Skill every other rotation or use an R4+ Sacrificial Sword. Furina skips her Burst in Nefer teams. |
Electro
Electro units provide good raw damage in most compositions and make use of Aggravate or Hyperbloom in Dendro teams. They also apply Electro to trigger reactions such as Electro Swirls, Electro-Charged, Overloaded, and Superconduct.
 Clorinde | Clorinde prefers Furina in her Electro-Charged teams for her personal damage and buffs. Clorinde can stack Furina’s Fanfare without a dedicated healer. |
Varesa | Varesa benefits from Furina’s buffs and usually relies on Xianyun for healing to stack Fanfare and buff her Plunges. |
 Raiden | Furina is a good option in Raiden’s on-field Electro DPS and off-field Hyperbloom DPS teams. |
 Cyno | Cyno excels in Quickbloom teams, where Furina’s long Skill and Burst uptime match his field time. These teams usually include Baizhu for healing. |
Iansan | Iansan can fully activate 4pc Scroll and provide strong ATK buffs through her Burst, which requires constant movement to maintain her Nightsoul points. Iansan’s healing is not enough to counter Furina’s HP drain, so a secondary healer is usually needed. |
Ororon | Ororon can fully activate 4pc Scroll and pairs well with Furina in Electro-Charged or Lunar-Charged teams. |
   Fischl, Yae, Lisa | Fischl and Yae provide off-field damage, while Lisa provides DEF Shred. Lisa and Yae can go on-field in Dendro teams. |
  Flins, Ineffa | Furina is a competitive teammate option for Flins and Ineffa thanks to her Hydro application and buff from 4pc TotM or 4pc SMS. Furina’s DMG% buff is not as impactful since a large portion of Flins’s and Ineffa’s damage is considered Lunar-Charged DMG. |
Cryo
Cryo units appreciate Furina’s off-field Hydro application, as it conveniently maintains Freeze with high uptime. Her high single-target damage can also help deal with tougher enemies.
 Wriothesley | Wriothesley helps generate Fanfare with his HP drain from his empowered Normal Attacks and self-heals from his A1 Passive. However, his self-healing cannot outpace Furina’s HP drain, so a strong healer is still needed to prevent his HP from dripping below 50%, which would disable his Skill’s Normal Attack enhancement. |
   Ayaka, Ganyu, Skirk | These Cryo DPS units benefit from Furina’s buffs and Hydro application. Escoffier is an excellent healer option. Against enemies that cannot be Frozen, 4pc Marechaussee Hunter is often a better option than 4pc Blizzard Strayer. |
  Eula, Freminet | Furina is a top pick for Eula and Freminet for her buffs and personal damage. Eula and Freminet deal a mix of Cryo and Physical damage, both of which are buffed by Furina’s DMG% buff. Furina’s Hydro application also enables Shatter, which buffs Freminet’s damage. |
Citlali | Citlali provides a shield, off-field Cryo application, 20% Hydro RES Shred, and 40% DMG Bonus through 4pc Scroll, making her a strong option for most Freeze teams. She can also hold TTDS. |
 Shenhe | Shenhe supports Cryo (and to an extent Physical) damage dealers with buffs, RES Shred, and her Icy Quill. |
Geo
Geo units can work as on-field DPS or as flex options by providing damage or utility to the team through 4pc Archaic Petra.
 Navia | In teams with Navia, Furina provides off-field Hydro application (that enables Crystallize) and strong damage buffs; however, she lengthens team rotations to at least 20s. |
 Itto | Itto can greatly benefit from Furina’s buffs when paired with Xilonen. Prior to C2, Xilonen requires a second PHEC character to enable her Geo RES Shred. |
 Zhongli | Zhongli’s shield is useful for interruption prone characters and offers some offensive value via Universal RES Shred, though his defensive utility is somewhat redundant with a healer on the team. |
  Albedo, Chiori | Albedo and Chiori deal strong off-field Geo damage via their Elemental Skills, which benefit from Furina’s DMG% buff. |
Hypercarry & Mono Element

Furina likes teams built around her, putting emphasis on having consistent healing. Apart from a suitable healer, the remaining two slots can be occupied by damage dealers or offensive supports. It is redundant to bring more than one healer unless they provide a strong alternate utility; shielders can still be useful for units prone to interruption but remain unideal.
Furina can work in a vast array of team archetypes, including those that don’t normally care about Hydro reactions — many teams benefit from her high off-field damage and partywide buffs so long as there is sufficient healing to gain Fanfare points every rotation. However, she isn’t necessarily an easy slot in many existing teams since she often effectively replaces two team slots in teams that don’t normally run a healer. She can also pose some survivability issues in teams with single-ally healers and often struggles to maintain Hydro aura on her own.
Example Teams
This is not a comprehensive list of teams. The inclusion or exclusion of any given team does not necessarily reflect its power level.

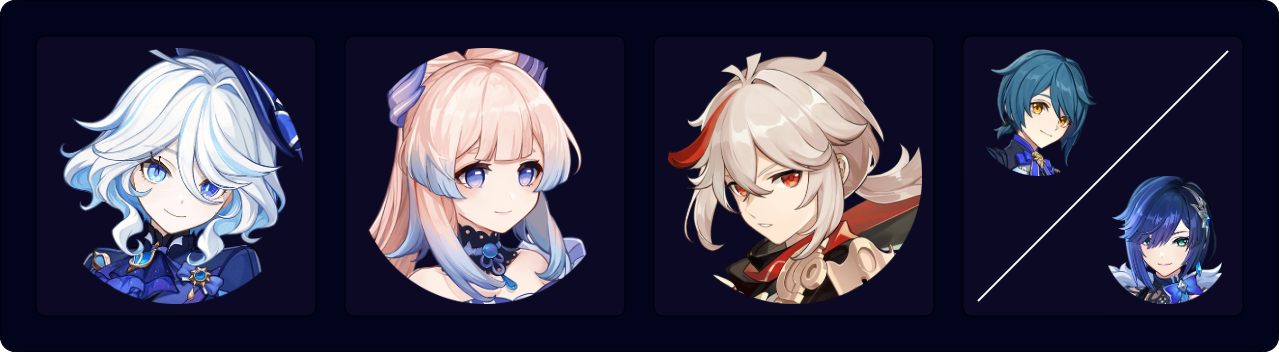
A Neuvillette team where Furina provides significant off-field damage and buffs and Kazuha grants additional buffs. This team can actually function without a healer since Neuvillette can already max out Fanfare points by himself, though a dedicated healer can still be used in the last slot for better survivability and frontloaded Fanfare points. While Neuvillette can only gain two of his A1 stacks at C0, Furina’s kit and Hydro Resonance more than make up for it damage-wise.
The remaining slot is very flexible and can be occupied by another buffer, healer, shielder, or off-field DPS.
Xilonen is a particularly powerful non-shielding option as she provides both strong buffs and single-ally healing. Pyro Traveler or Ororon can fully activate 4pc Scroll and provide DMG% or an Energy refund, respectively.
Shielders prevent C0 Neuvillette from being interrupted mid-Charged Attack. Zhongli is a notable pick who offers a strong shield and can buff both Hydro units through his Universal RES Shred and 4pc Archaic Petra buff; this also compensates for the damage lost from Salon Members being unable to drain multiple team members.
Sample Rotation (Xilonen)
Neuvillette E > Furina ED N1 > Xilonen EQ N2 > Kazuha tEPQ > Furina Q > Neuvillette C E C Q > Xilonen E N2 > Kazuha tEP > Neuvillette 2[C]
Sample Rotation (Zhongli)
Neuvillette E > Furina ED > Kazuha tEPQ > Zhongli hED1 > Furina Q > Neuvillette C E C Q > Kazuha tEP > Neuvillette 2[C]
¹Zhongli ideally picks up a Crystallize Shard to grant teamwide Hydro DMG Bonus via 4pc Archaic Petra.
Sample Rotation (Pyro Traveler)
Neuvillette E > Furina ED > Pyro Traveler hE Q > Kazuha tEPQ > Furina Q > Neuvillette C E C Q > Kazuha tEP > Neuvillette 2[C]
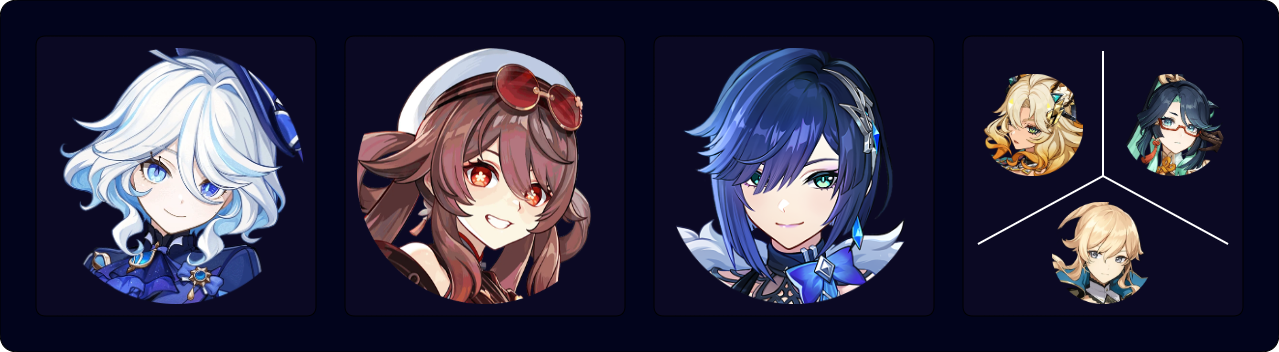
A Mono Hydro team that enables on-field Kokomi to deal considerable damage, while Xingqiu provides off-field damage and (at C2+) shreds enemy Hydro RES. The abundance of Hydro Particles lowers each Hydro unit’s ER requirements significantly. Xingqiu can be substituted with Yelan, who benefits more from Hydro Resonance and further buffs Kokomi.
Sample Rotation (Xingqiu)
Kokomi E > Kazuha tEP > Furina ED Q > Xingqiu ED Q N1 > Kazuha Q > Kokomi Q Combo
Sample Rotation (Yelan)
(Furina ED)1 > Kazuha tEP > Kokomi E > Furina (ED)1 Q > Yelan Q N1 E N1 > Kazuha Q > Kokomi Q Combo > Yelan E N2
¹Use Furina’s Skill at the start of the first rotation, on the second rotation onwards use it before her Burst.

This team provides plenty of damage buffs to Xiao, greatly increasing the team’s damage potential. Xiao’s teammates do not restrict him as their effects follow the active character (unlike Bennett or Jean), affording him more mobility. Xianyun should hold 4pc Noblesse Oblige instead of 4pc VV, as Xiao contributes much more damage than Furina.
Faruzan’s C6 is significant for both improving her buffing and drastically decreasing the entire team’s ER requirements. With Faruzan’s C6, Xianyun can hold TTDS for even more buffs to Xiao.
Sample Rotation
C0–C1 Faruzan
Furina ED Q > Xianyun EPQ > Faruzan E C Q > Xiao 2[E]Q combo
C2+ Faruzan
Faruzan (E C)¹Q > Furina ED Q > Xianyun EPQ > Xiao 2[E]Q combo
¹C6 Faruzan can skip performing her Skill and Charged Attack.

Furina’s Hydro application allows for Hydro Crystallize Shards to be generated, which empowers Navia’s Elemental Skill when collected. Navia also highly appreciates Furina’s DMG Bonus. While Bennett’s healing is mostly limited to Navia, he still generates Fanfare points while providing Navia a massive ATK buff.
Sample Rotation (Zhongli)
Zhongli hED N1 > Furina ED Q > Navia Q > Bennett EQ > Navia hE N3D N2 > Zhongli tE > Navia hE N3D N2
Sample Rotation (Xilonen)
Xilonen Q > Furina ED Q > Xilonen E N2 > Navia Q > Bennett EQ > Navia hE N3D N2 > Xilonen E N2 > Navia hE N3D N2

Sample Rotation
Furina ED Q > Gorou EQ > Albedo E > Noelle Q E 3[N3D] > Gorou E > Noelle N3D N3
This Triple Geo team enables Noelle and Albedo to deal substantial AoE damage, as they benefit from Geo Resonance, Furina’s Burst, and Gorou’s various buffs. Noelle’s flexible field time allows Gorou to use his Skill off cooldown to battery Noelle and lets Albedo reposition his Solar Isotoma if needed. Gorou should equip 4pc Exile and Favonius Warbow (along with a CRIT Rate Circlet) to drastically lower the team’s ER requirements. It is also possible to replace Albedo or Gorou with other flex units such as Fischl or Yelan.

Sample Rotation
Raiden E > Eula E > Furina ED Q > Mika Q hE > Eula tE Q N4 hE N4 > Raiden Q combo
Furina’s Burst lasts long enough to buff Eula’s whole field time and part of Raiden’s field time, notably including Raiden’s initial Burst hit.
Limited Roster Alternatives
These teams are meant for new players whose limited roster prevents them from using the teams above and will result in lower damage output.

This team tries to maximize Furina’s personal off-field damage with more accessible teammates. Barbara stacks Fanfare while Lynette uses 4pc VV to shred Hydro RES.
Sample Rotation
Furina ED N1 > Lynette E¹ Q > Xingqiu EDQ N1 > Furina Q > Barbara N1 Q N1 E² D > Lynette E N1 > Barbara 4[N4D] N3
¹Perform if Lynette is C4+; otherwise, Normal Attack.
²Use Barbara’s Skill when available.
Vaporize

Furina’s teamwide buff, personal damage, and off-field Hydro application make her an overall great character in a Vaporize team. Her Hydro application lets some Pyro characters Vaporize all of their Pyro damage with just her Skill’s application alone; however, characters with faster Pyro application require additional Hydro or Electro application.
Simultaneous Electro and Hydro auras can coexist on the enemy. Pyro reacts with the Electro aura before the Hydro aura, which consumes less Hydro. This lets the Pyro damage dealer trigger Vaporize and Overloaded at the same time (sometimes called Overvape).
Lastly, in teams with faster Pyro application from 2 Pyro appliers or Burning, Furina triggers Vaporize herself, amplifying her personal damage.
Example Teams
This is not a comprehensive list of teams. The inclusion or exclusion of any given team does not necessarily reflect its power level.
Furina and Yelan provide enough Hydro aura for Hu Tao to consistently trigger Vaporize. Consistent healing causes Hu Tao to remain above 50% HP; this prevents her from getting full value out of her A4 Passive and Staff of Homa, though Furina’s teamwide buff and off-field damage compensate for this.
Xilonen is a standout option thanks to her buffs to Pyro and Hydro damage via her Skill’sRES Shred and 4pc Scroll DMG% Bonus, buffing Hydro DMG%, which greatly increases team damage.
Jean and Xianyun’s teamwide healing can make this team more comfortable to play. Additionally, Xianyun enables Plunging Attacks, which lets Hu Tao perform less Stamina-intensive combos and have slightly stronger AoE damage. Yelan can also be replaced with Xingqiu, exchanging more offensive power for comfort.
Sample Rotation (Xilonen)
Xilonen Q > Furina ED Q /Q1 E N1 > Xilonen E N2 > Yelan Q N1 E N1 > Hu Tao combo > Yelan E N2 > Xilonen E N2
¹Use Furina’s Burst before her Skill if it is on cooldown.
Sample Rotation (Xianyun)
Furina ED Q > Yelan EQ N1 > Xianyun EPQ > Hu Tao E 5[N2CJP] > Xianyun N2
Sample Rotation (Jean)
Furina ED Q / Q1 E N1 > Yelan Q > Jean Q E > Yelan N2 E > Hu Tao E combo > Yelan E N2 > Jean E
1Use Furina’s Burst before her Skill if it is on cooldown.

This Vape team has no dedicated on-field unit, which allows each party member to swap in and receive substantial healing from Bennett’s Burst to counteract Furina’s party HP drain. This also gives Bennett more opportunities to funnel particles to Xiangling, greatly reducing her ER requirements.
Sample Rotation
Furina ED Q > Xingqiu Q N1 > Bennett N1 Q E > Xiangling N1 Q N1 E > Furina N2 > Bennett N1 E > Xingqiu N1 ED N2 > Bennett N1 E > Xiangling N2 > Bennett N1 E > Xiangling N2

Xiangling’s Pyro application enables Wriothesley and Furina to trigger Melt and Vaporize, particularly against bosses with bigger hitboxes. Wriothesley’s HP fluctuation helps stack Furina’s Fanfare, while Bennett provides his buffs to Xiangling and Wriothesley.
Sample Rotation
Furina ED Q > Bennett Q E > Xiangling Q ED > Wriothesley E combo Q > Bennett E > Xiangling N1

Furina’s off-field Hydro application lets Gaming Vaporize his Plunging Attacks. Bennett and Xianyun provide powerful buffs and healing.
Sample Rotation
Furina ED Q > Bennett EQ N11 > Xianyun N1 EPQ > Gaming combo > Bennett E > (Gaming N2)
1If Bennett is C6, perform a Normal Attack to improve Pyro Swirl consistency.
Freeze

Furina’s Hydro application maintains Freeze auras on enemies, provided they lack resistance or immunity to Freeze.Escoffier is an extremely strong support and healer for Freeze teams.
Example Teams
This is not a comprehensive list of teams. The inclusion or exclusion of any given team does not necessarily reflect its power level.

Skirk is an extremely powerful on-field Cryo damage dealer who exclusively plays in Freeze. Furina’s off-field application enables Void Rift generation, which maintains Skirk’s Cryo Conversion uptime. Escoffier provides a colossal 55% Hydro and Cryo RES Shred and sustains Furina’s Fanfare. Shenhe acts as a strong Cryo buffer, while Yelan and Xingqiu deal solid personal damage.
Sample Rotation (Shenhe, normal rotation)
Furina ED Q > Escoffier EQ > Shenhe hEQ > Skirk tE combo
Sample Rotation (Shenhe, split rotation)
Escoffier (N2D)1 E > Furina ED N1 > Shenhe tE > Furina Q > Escoffier Q N1 > Skirk hE Q > Shenhe Q hE > Escoffier N3 E > Skirk tE Combo
1Add N2D second rotation onward if Escoffier’S Skill is on cooldown.
Sample Rotation (Yelan)
Furina ED Q > Escoffier EQ > Yelan EQ N1 > Skirk tE combo
Sample Rotation (Xingqiu)
Furina ED Q > Escoffier EQ > Xingqiu ED Q N1 > Skirk tE combo
Charlotte acts as a Cryo teamwide healer to stack Furina’s Fanfare.
Sample Rotation (Lynette)
Furina ED Q > Ayaka D N2C E N1C > Lynette tE1Q > Charlotte Q tE > Ayaka D N1C Q ED N2C > Lynette E N1 > Ayaka D N2C
1If Lynette is C4; otherwise perform a Normal Attack instead.
Sample Rotation (Kazuha)
Furina ED Q > Kazuha Q > Ayaka ED N1C > Kazuha tEP > Charlotte Q tE > Ayaka D N1C Q ED N2C > Kazuha tEP > Ayaka D N1C

Ganyu can take advantage of Furina’s buffs while performing ranged Charged Attacks, while Furina and Escoffier deal off-field damage.
Sample Rotation (Shenhe)
Ganyu E > Furina ED N1 Q > Escoffier EQ > Shenhe tEQ > Ganyu C EQ 2[C] > Shenhe tE N3 > Ganyu C
Electro-Charged
Furina’s buff does not affect the Electro-Charged or Lunar-Charged reactions, but her Burst is still used in some of these teams to increase the team’s direct Elemental damage. Her persistent off-field Hydro application enables some notable teammates like Ineffa and Ororon.
Example Teams
This is not a comprehensive list of teams. The inclusion or exclusion of any given team does not necessarily reflect its power level.
Xilonen should equip 4pc Archaic Petra and try to pick up the Electro Shards, and Ororon should equip 4pc Scroll. Furina’s Burst increases Clorinde’s self-healing while buffing the team’s damage.
Sample Rotation (Xilonen)
Furina ED N1 Q > Ororon EQ > Xilonen E N2D > Clorinde E combo Q > Xilonen Q > Ororon EQ > Xilonen E N2D > Clorinde E combo
Sample Rotation (Kazuha)
Furina ED N1 Q > Ororon EQ > Kazuha tEPQ > Clorinde E combo > Kazuha tEP > Clorinde Q > Kazuha Q > Ororon EQ > Kazuha tEP > Clorinde E combo

Ifa acts as an on-field teamwide healer and buffer for Ineffa’s damage while dealing solid personal damage. Iansan is an exceptional teammate here: she helps stack Ifa’s A1 Passive to increase the team’s Swirl and Lunar-Charged damage while providing additional minor healing that helps generate Fanfare.
Sample Rotation
Ineffa E(Q)1 > Furina ED N1 Q > Iansan E N1 Q > Ifa E combo
1Use Burst when available.

Flins and Ineffa mainly deal direct Lunar-Charged damage, so Furina doesn’t need to use her Burst in their teams. Thanks to her Skill’s 30s duration, she can cast it every other rotation.
Sample Rotation
(Furina ED N1)1 > Ineffa E(Q)2 > Sucrose ED(Q)2 > Flins E combo
1Use Skill every other rotation
2Use Burst when available
Quickbloom

Furina has a low rate of Hydro application and cannot directly buff Hyperbloom DMG, so she is primarily used in Quickbloom teams with increased Quicken aura uptime that benefits Dendro and Electro DPS units.
Example Teams
This is not a comprehensive list of teams. The inclusion or exclusion of any given team does not necessarily reflect its power level.

Cyno can trigger Aggravate more often in a Quickbloom team, since Quicken has higher uptime with slower Hydro application sources such as Furina’s Salon Members. Note that Cyno’s ER requirements are quite high, as he is the sole Electro unit.
Sample Rotation
Furina ED Q > Nahida EQ > Baizhu N1 EQ > Cyno EQ N1 E 6[N4E]1
1Cyno must equip 4pc Thundering Fury to use this combo.

In this Quickbloom team, Furina’s relatively slow Hydro application increases Quicken uptime, which allows Alhaitham to trigger more Spreads.
Sample Rotation (Simple)
Furina ED > Nahida E Q > Furina Q > Shinobu E > Alhaitham Q 2[N3D] N2 E 2[N3D] N1C 4[N3D]
Sample Rotation (Advanced)
Shinobu E > Nahida E Q > Furina ED Q > Alhaitham hEP N2C N3C > Shinobu Q E > Alhaitham Q N3D N3C 5[N3D]
Credits
nikatosaurus, leifa, irokei, polomo, casdela, Terrapin, raikh, artesians, itslin, chasing_haze, haafr, baloopy, dusted wind, pjeljr, acerbus114, caxia5, EUPHORYSM, caramielle, auraolis
Team images made with the KQM portrait generator.