Updated for Version “Luna II”
Nefer is a 5★ Dendro Catalyst character in Genshin Impact who performs special Charged Attacks in her Shadow Dance state to deal immense Lunar-Bloom damage. Learn about Nefer’s best builds, best weapons, best artifacts, and best teams in this quick guide.
Note that the information given may change if new discoveries are made. More extensive testing is in progress.
Join our Discord to participate in the theorycrafting process.
Table of Contents
Infographic
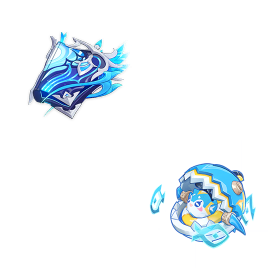
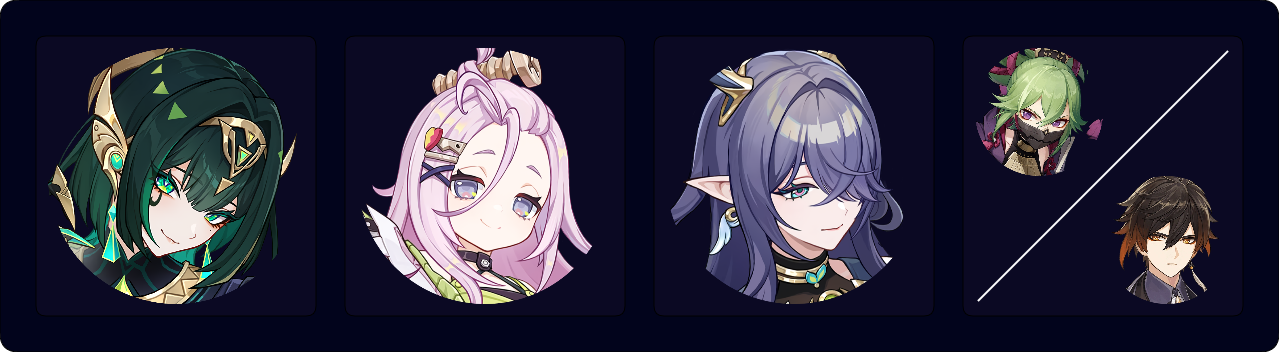
Credits to: plumetra and KQM Staff
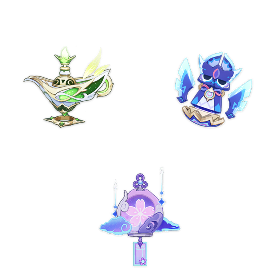
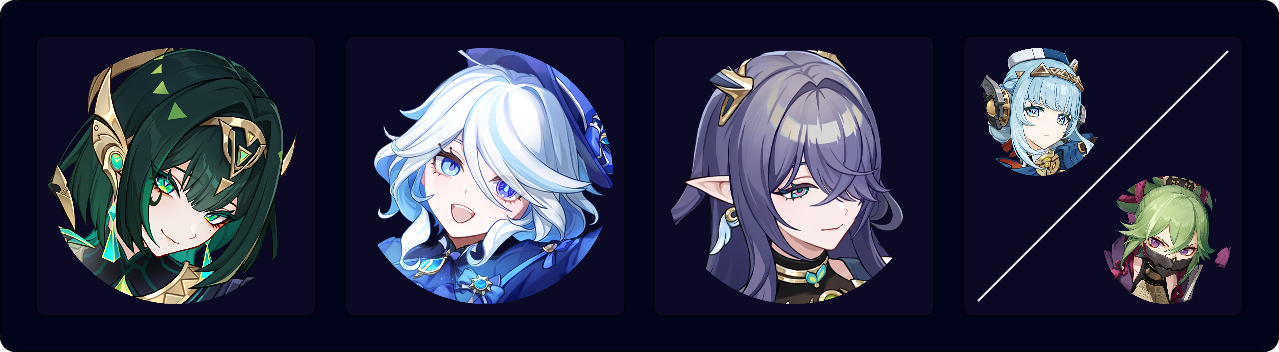
Credits to: euphorysm, plumetra, and KQM Staff
Character Overview
Pros
- Simple gameplay.
- Good vertical investment options.
- Frequent dashing during her combo provides long i-frames and can eliminate the need for a healer or shielder.
- Nefer gonna let you down.
Cons
- Significantly lower damage output without Lauma.
- Severely limited functionality against enemies with innate Pyro aura as she relies on triggering Lunar-Bloom.
- Reliance on Moonsign: Ascendant Gleam for her best-in-slot artifact set and A1 Passive, severely gutting her damage as the sole Nod-Krai unit on the team.
Playstyles
On-Field DPS
Nefer enters her special Shadow Dance state via her Elemental Skill and uses her special Charged Attacks to deal Dendro and Lunar-Bloom damage. Nefer is almost always played as a Lunar-Bloom DPS (which requires a Nod-Krai teammate). However, when Nefer is the sole Nod-Krai unit, she can be played in a typical Hyperbloom, Burgeon, or Bloom team. Since Aino is freely accessible, this is rarely relevant and will therefore not be expanded upon in this quick guide.
Nefer’s Shadow Dance state ends when she swaps out, so her teammates should use their abilities prior to her taking the field. It is also ideal to generate Verdant Dews with a Dendro teammate before she takes the field.
Talents
Talent Priority
Skill > Burst
Nefer’s Skill comprises the majority of her damage, so its Talent Level is the most important. Lunar-Bloom, which comprises the vast majority of Nefer’s damage, scales solely with EM and is unaffected by the enemy’s DEF multiplier; Lunar-Bloom does not scale with character level (unlike Bloom). However, you should still level Nefer to 80/90 to access higher Talent Levels and her A6’s CRIT DMG stat. Nefer’s Burst can be used when using dash cancel combos. More details on this in the Combos section.
Talent Overview
 Normal Attack | Striking Serpent
Talent Description
Normal Attack
Performs up to 4 kicks that deal Dendro DMG with the ferocity and grace of a striking serpent.
Charged Attack
Nefer enters the Slither state, consuming Stamina to move rapidly forward for up to 2.5s. When the skill button is released, the duration ends, or Stamina runs out, Nefer will exit the Slither state and consume a certain amount of additional Stamina to deal Dendro DMG to opponents. When in the Shadow Dance state, additional Stamina consumption is decreased.
Additionally, unleashing the Elemental Skill Senet Strategy: Dance of a Thousand Nights or sprinting while Nefer is in the Slither state will not cause her to exit the state.
Plunging Attack
Calling upon the might of Dendro, Nefer plunges towards the ground from mid-air, damaging all opponents in her path and dealing AoE Dendro DMG upon impact with the ground.
Nefer’s Normal Attacks deal negligible damage and are only used to proc Yelan’s (or Xingqiu’s) coordinated attacks.
 Elemental Skill | Senet Strategy: Dance of a Thousand Nights
Talent Description
A dance that dissolved dynasties, as chilling as a winter’s night on the great sea of sand, yet lingering with the tenderness of moonlit gauze. Nefer charges forward, dealing AoE Dendro DMG and entering the Shadow Dance state.
While in the Shadow Dance state, if you have at least 1 Verdant Dew, Nefer’s Charged Attacks will be replaced with the special Charged Attack Phantasm Performance, which will not consume Stamina. When in the Shadow Dance state, Nefer’s resistance to interruption is increased.
Has 2 initial usages.
“The world is a game in which the pieces remain hidden behind a veil. To avoid falling into a trap, one must collect every piece of information one can. This is the meaning of secrets.”
Nefer’s Elemental Skill is the core of her kit. Nefer enters the Shadow Dance state and, if at least 1 Verdant Dew is available, her Charged Attack is replaced with a special Charged Attack, Phantasm Performance. Nefer can perform 3 of these special Charged Attacks in a single Shadow Dance state (6 special Charged Attacks in a full rotation).
Nefer’s special Charged Attack consumes 1 Verdant Dew and consists of 5 consecutive hits, 2 by Nefer and 3 by her shade. The damage dealt by the shade is considered Lunar-Bloom DMG and comprises the vast majority of Nefer’s damage.
For further information on Verdant Dew, please read the corresponding section in Lauma’s Quick Guide.
Nefer’s Skill has 2 charges, each with a 9s cooldown. If the team’s rotation is 18s or longer, Nefer can consistently use her Skill twice per rotation. If the rotation is shorter than 18s, this is only sustainable for approximately 4 rotations, which should be more than enough to clear most game content.
 Elemental Burst | Sacred Vow: True Eye’s Phantasm
Talent Description
Grant “revelation” to the mysteries of the false through Thoth’s true sight, dealing AoE Dendro DMG to opponents ahead. When unleashed, Nefer will consume all Veils of Falsehood to increase the DMG dealt by the current Elemental Burst.
The blessings of the Ibis King proclaimed by the singers of the burning sands are, in truth, more akin to dire curses.
Nefer’s Burst deals 2 hits of Dendro damage that is not considered Lunar-Bloom DMG, resulting in subpar damage. However, her Burst can be used situationally to buy time for Verdant Dew to be generated, notably when performing dash cancels in her combo. Read more about this in the Combos section.
 Ascension 1 Passive | A Wager of Moonlight
Talent Description
Nefer will be granted the corresponding buff effects based on the party’s Moonsign.
Moonsign: Ascendant Gleam: When she unleashes her Elemental Skill Senet Strategy: Dance of a Thousand Nights, any Dendro Cores on the field will be converted to Seeds of Deceit, and any Lunar-Bloom reactions triggered by nearby characters in the following 15s that would create Dendro Cores or Bountiful Cores will instead create Seeds of Deceit. Seeds of Deceit cannot trigger Hyperbloom or Burgeon reactions and will not burst.
When Nefer unleashes a Charged Attack or Phantasm Performance, she can absorb Seeds of Deceit within a certain range, gaining 1 stack of Veil of Falsehood for every seed absorbed. When this effect reaches 3 stacks, or when the third stack’s duration is refreshed, Nefer’s Elemental Mastery will be increased by 100 for 8s.
With Moonsign: Ascendant Gleam, this unique passive transforms Dendro Cores (including Nilou’s Bountiful Cores) into Seeds of Deceit that Nefer can consume with her Charged Attack or special Charged Attack. When Nefer consumes a Seed of Deceit, she gains a Veil of Falsehood stack (maximum 3), which grants an 8% Base DMG Multiplier to Nefer’s special Charged Attacks. Additionally, 3 Veil of Falsehood stacks grant Nefer an additional 100 EM. In an ideal rotation, Nefer gains 3 Veil of Falsehood stacks with her first special Charged Attack, granting her a 24% Base DMG Multiplier and 100 EM throughout her field time.
Note that this passive is only active when Nefer is played alongside another Nod-Krai character. When Nefer is the sole Nod-Krai unit, she can be played in a typical Hyperbloom, Burgeon, or Bloom team. However, since Aino is freely accessible, this is rarely relevant and will therefore not be expanded upon in this quick guide.
 Ascension 4 Passive | Daughter of the Dust and Sand
Talent Description
When Nefer is in the Shadow Dance state, for 5s after a party member triggers a Lunar-Bloom reaction, Nefer’s Slither state will provide additional Verdant Dew. Every 100 points of Nefer’s Elemental Mastery beyond 500 will strengthen this additional provision effect by 10%. The maximum increase that can be achieved this way is 50%.
This passive is largely irrelevant outside of overworld combat as entering the Slither state takes too long. Additionally, most teams should already generate enough Verdant Dew for Nefer to comfortably perform 6 special Charged Attacks per rotation.
 Moonsign Benediction Passive | Moonsign Benediction: Dusklit Eaves
Talent Description
When a party member triggers a Bloom reaction, it will be converted into the Lunar-Bloom reaction, with every point of Elemental Mastery that Nefer has increasing Lunar-Bloom’s Base DMG by 0.0175%, up to a maximum of 14%.
Additionally, when Nefer is in the party, the party’s Moonsign will increase by 1 level.
Nefer shares the same Moonsign Benediction passive as Lauma, increasing Lunar-Bloom’s Base DMG by up to 14% based on her Elemental Mastery. This requires 800 EM on Nefer to max out, which is easily achievable considering Nefer’s 100 Base EM. If Nefer and Lauma are on the same team, their passives stack additively.
Constellations
 Constellation 1 | Planning Breeds Success
Talent Description
The Base DMG for Lunar-Bloom reactions caused by Nefer’s Phantasm Performance is increased by 60% of her Elemental Mastery. This effect is also boosted by Veil of Falsehood.
Nefer’s C1 is a straightforward multiplier increase to her special Charged Attacks, resulting in a good damage increase.
 Constellation 2 | Observation Feeds Strategy
Talent Description
Enhances the effects of the Ascension Talent A Wager of Moonlight: Extends Veil of Falsehood’s duration by 5s, and increases its stack limit to 5, as well as causing Phantasm Performance to deal up to 140% of its original DMG. When Nefer unleashes her Elemental Skill, she will instantly gain 2 stacks of Veil of Falsehood. Additionally, when Veil of Falsehood gains 5 stacks, or when the fifth stack’s duration is refreshed, Nefer’s Elemental Mastery will be increased by 200 for 8s instead.
You must first unlock the Ascension Talent “A Wager of Moonlight.”
This Constellation increases Nefer’s A1 Passive’s maximum Base DMG Multiplier to 40% and provides an additional 100 EM at 3 Veil of Falsehood stacks. This is another solid damage increase.
 Constellation 3 | Deceit Cloaks the Truth
Talent Description
Increases the Level of Senet Strategy: Dance of a Thousand Nights by 3.
Maximum upgrade level is 15.
Additional levels to Nefer’s Skill are appreciated as it is the vast majority of her damage.
 Constellation 4 | Delusion Ensnares Reason
Talent Description
When Nefer is on the field and in the Shadow Dance state, you will gain Verdant Dew 25% faster.
Additionally, while Nefer is in the Shadow Dance state, nearby opponents will have their Dendro RES decreased by 20%. This effect will be removed when Nefer exits the Shadow Dance state or after she strays a certain distance away from the opponents for 4.5s.
This Constellation’s Verdant Dew generation speed increase enables more comfortable dash cancels, and its Dendro RES Shred is only a decent increase when considering the Dendro RES Shred already from 4pc Deepwood Memories and Lauma’s Skill.
 Constellation 5 | Opportunity Hides in the Margins
Talent Description
Increases the Level of Sacred Vow: True Eye’s Phantasm by 3.
Maximum upgrade level is 15.
A boost to Nefer’s Burst in scenarios where it is used (e.g., dash cancel combos).
 Constellation 6 | Victory Flows from the Turning of Tides
Talent Description
When Nefer unleashes Phantasm Performance, the second stage of DMG dealt by herself will be converted to deal AoE Dendro DMG equal to 85% of her Elemental Mastery. Additionally, when the attacks from Phantasm Performance end, an extra instance of AoE Dendro DMG equal to 120% of Nefer’s Elemental Mastery will be dealt. All of the aforementioned DMG is considered Lunar-Bloom DMG dealt by Phantasm Performance.
Moonsign: Ascendant Gleam
Nefer’s Lunar-Bloom DMG is elevated by 15%.
Nefer’s final Constellation is very strong. It converts the second hit of Nefer’s special Charged Attack into Lunar-Bloom, adds an additional hit of Lunar-Bloom damage after her special Charged Attack ends, and elevates Nefer’s Lunar-Bloom DMG by 15%. Elevation is a Base DMG Multiplier separate from other Base DMG Multipliers in the damage calculation. In other words, each instance of Nefer’s Lunar-Bloom damage is multiplied by 1.15.
Combos
Combo Notation
- N = Normal Attack
- C = Charged Attack
- E = Elemental Skill
- Q = Elemental Burst
- D = dash (cancel)
- > = switch character
- [ ] = repeat these actions the specified number of times
- ( ) = these actions are optional; please refer to the notes below
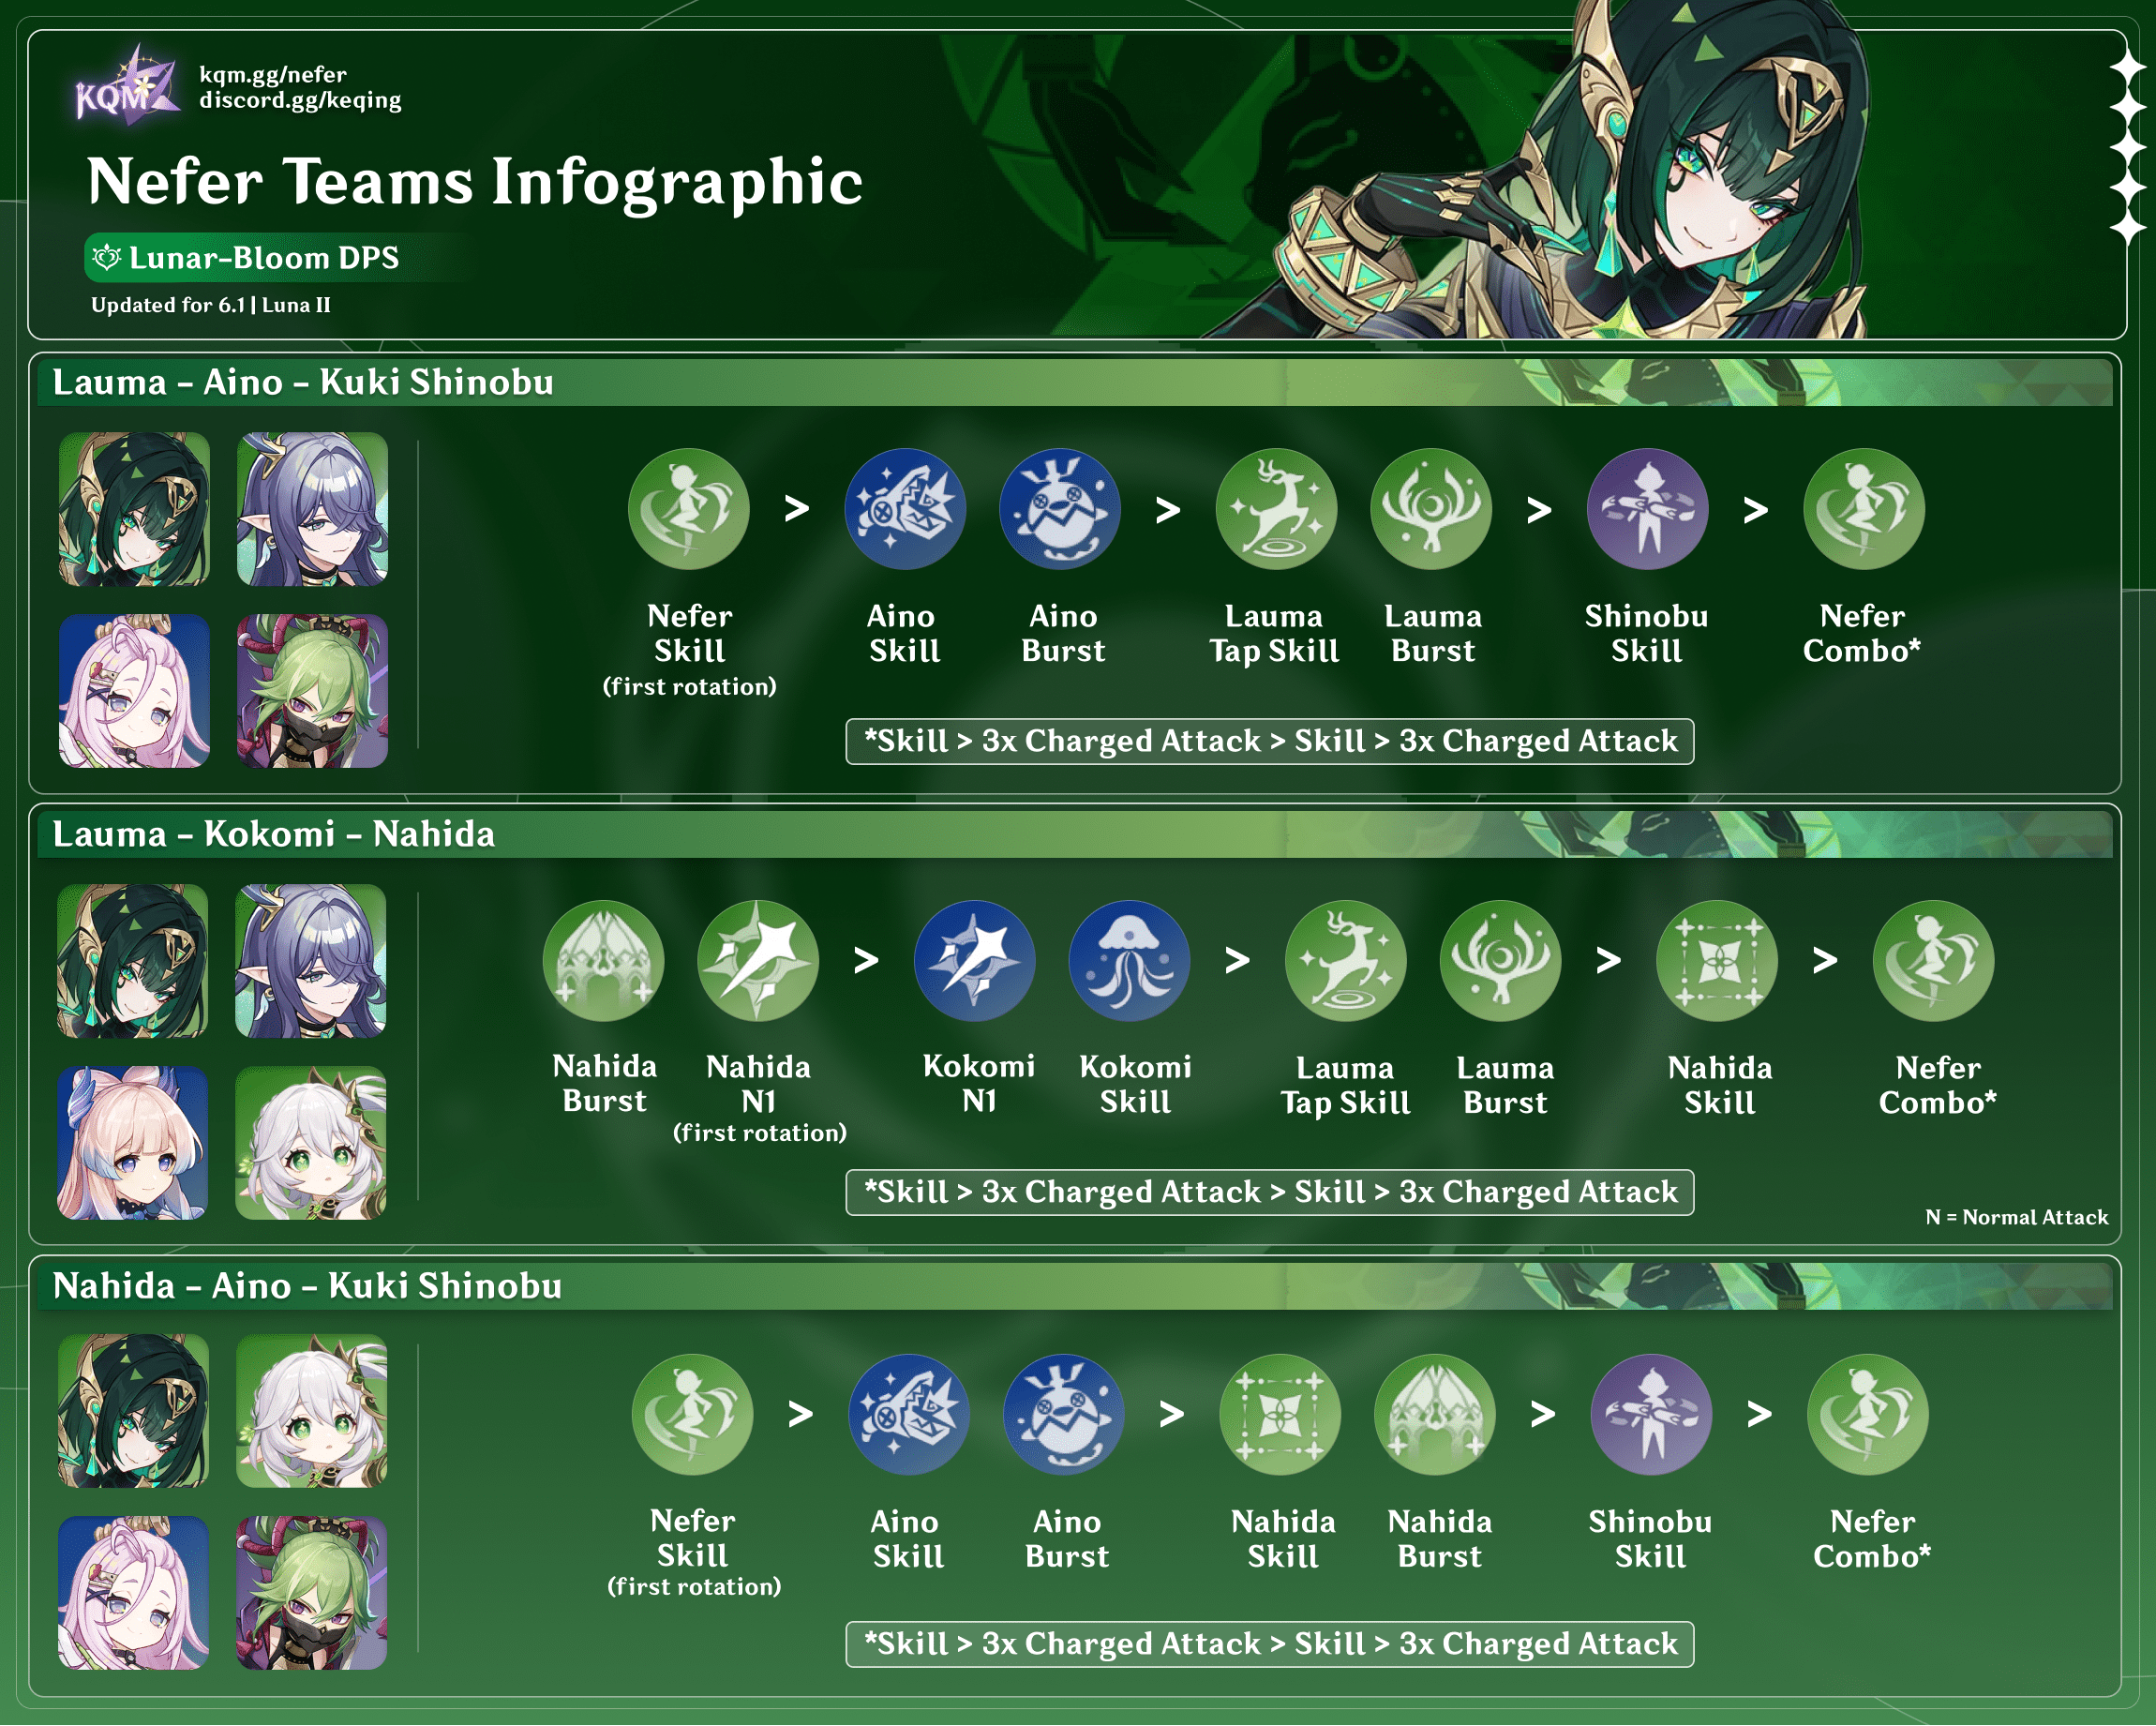
| • E 3[CD] E CD CQ CD • E 3[CD] > Swap > E 3[CD] | Dash Cancel Combos (Preferred) Nefer can dash cancel her special Charged Attacks for faster rotations and increased survivability via i-frames. However, there are usually insufficient Verdant Dew for her second Skill cast. You can bide enough time for Verdant Dew in one of two ways: Use her Burst in the middle of her second Skill state. Swap to a teammate who can refresh their abilities or 4pc set effects. Alternating between using Nefer’s Burst and swapping to a teammate is also an option in some teams. Dash cancels prevent the second hit of Nefer’s Charged Attack from happening, which is inconsequential as its damage is negligible. However, at C6, this second hit is converted to Lunar-Bloom DMG, so dash cancelling may not be optimal. |
| • E 3[C] E 3[C] | No Dash Combo This combo has stable Verdant Dew generation since the lack of dashes extends its duration. However, this also results in lower DPS prior to C6. |
Artifacts
ER Requirements
Calcs for ER requirements can be found here (last updated for Version Luna II).
| Burst Every Other Rotation | |
| Double or Triple Dendro | 100% |
| Solo Dendro | 105% |
Nefer’s Burst can fill downtime for Verdant Dew generation when performing dash cancel combos.
Use the Energy Recharge Calculator to determine exact requirements for your team and rotation. For more details on how Favonius weapons will affect your team, please use Ac1d’s Favonius Mastersheet.
Artifact Stats
 Sands |  Goblet |  Circlet |
| EM | EM | CRIT > EM |
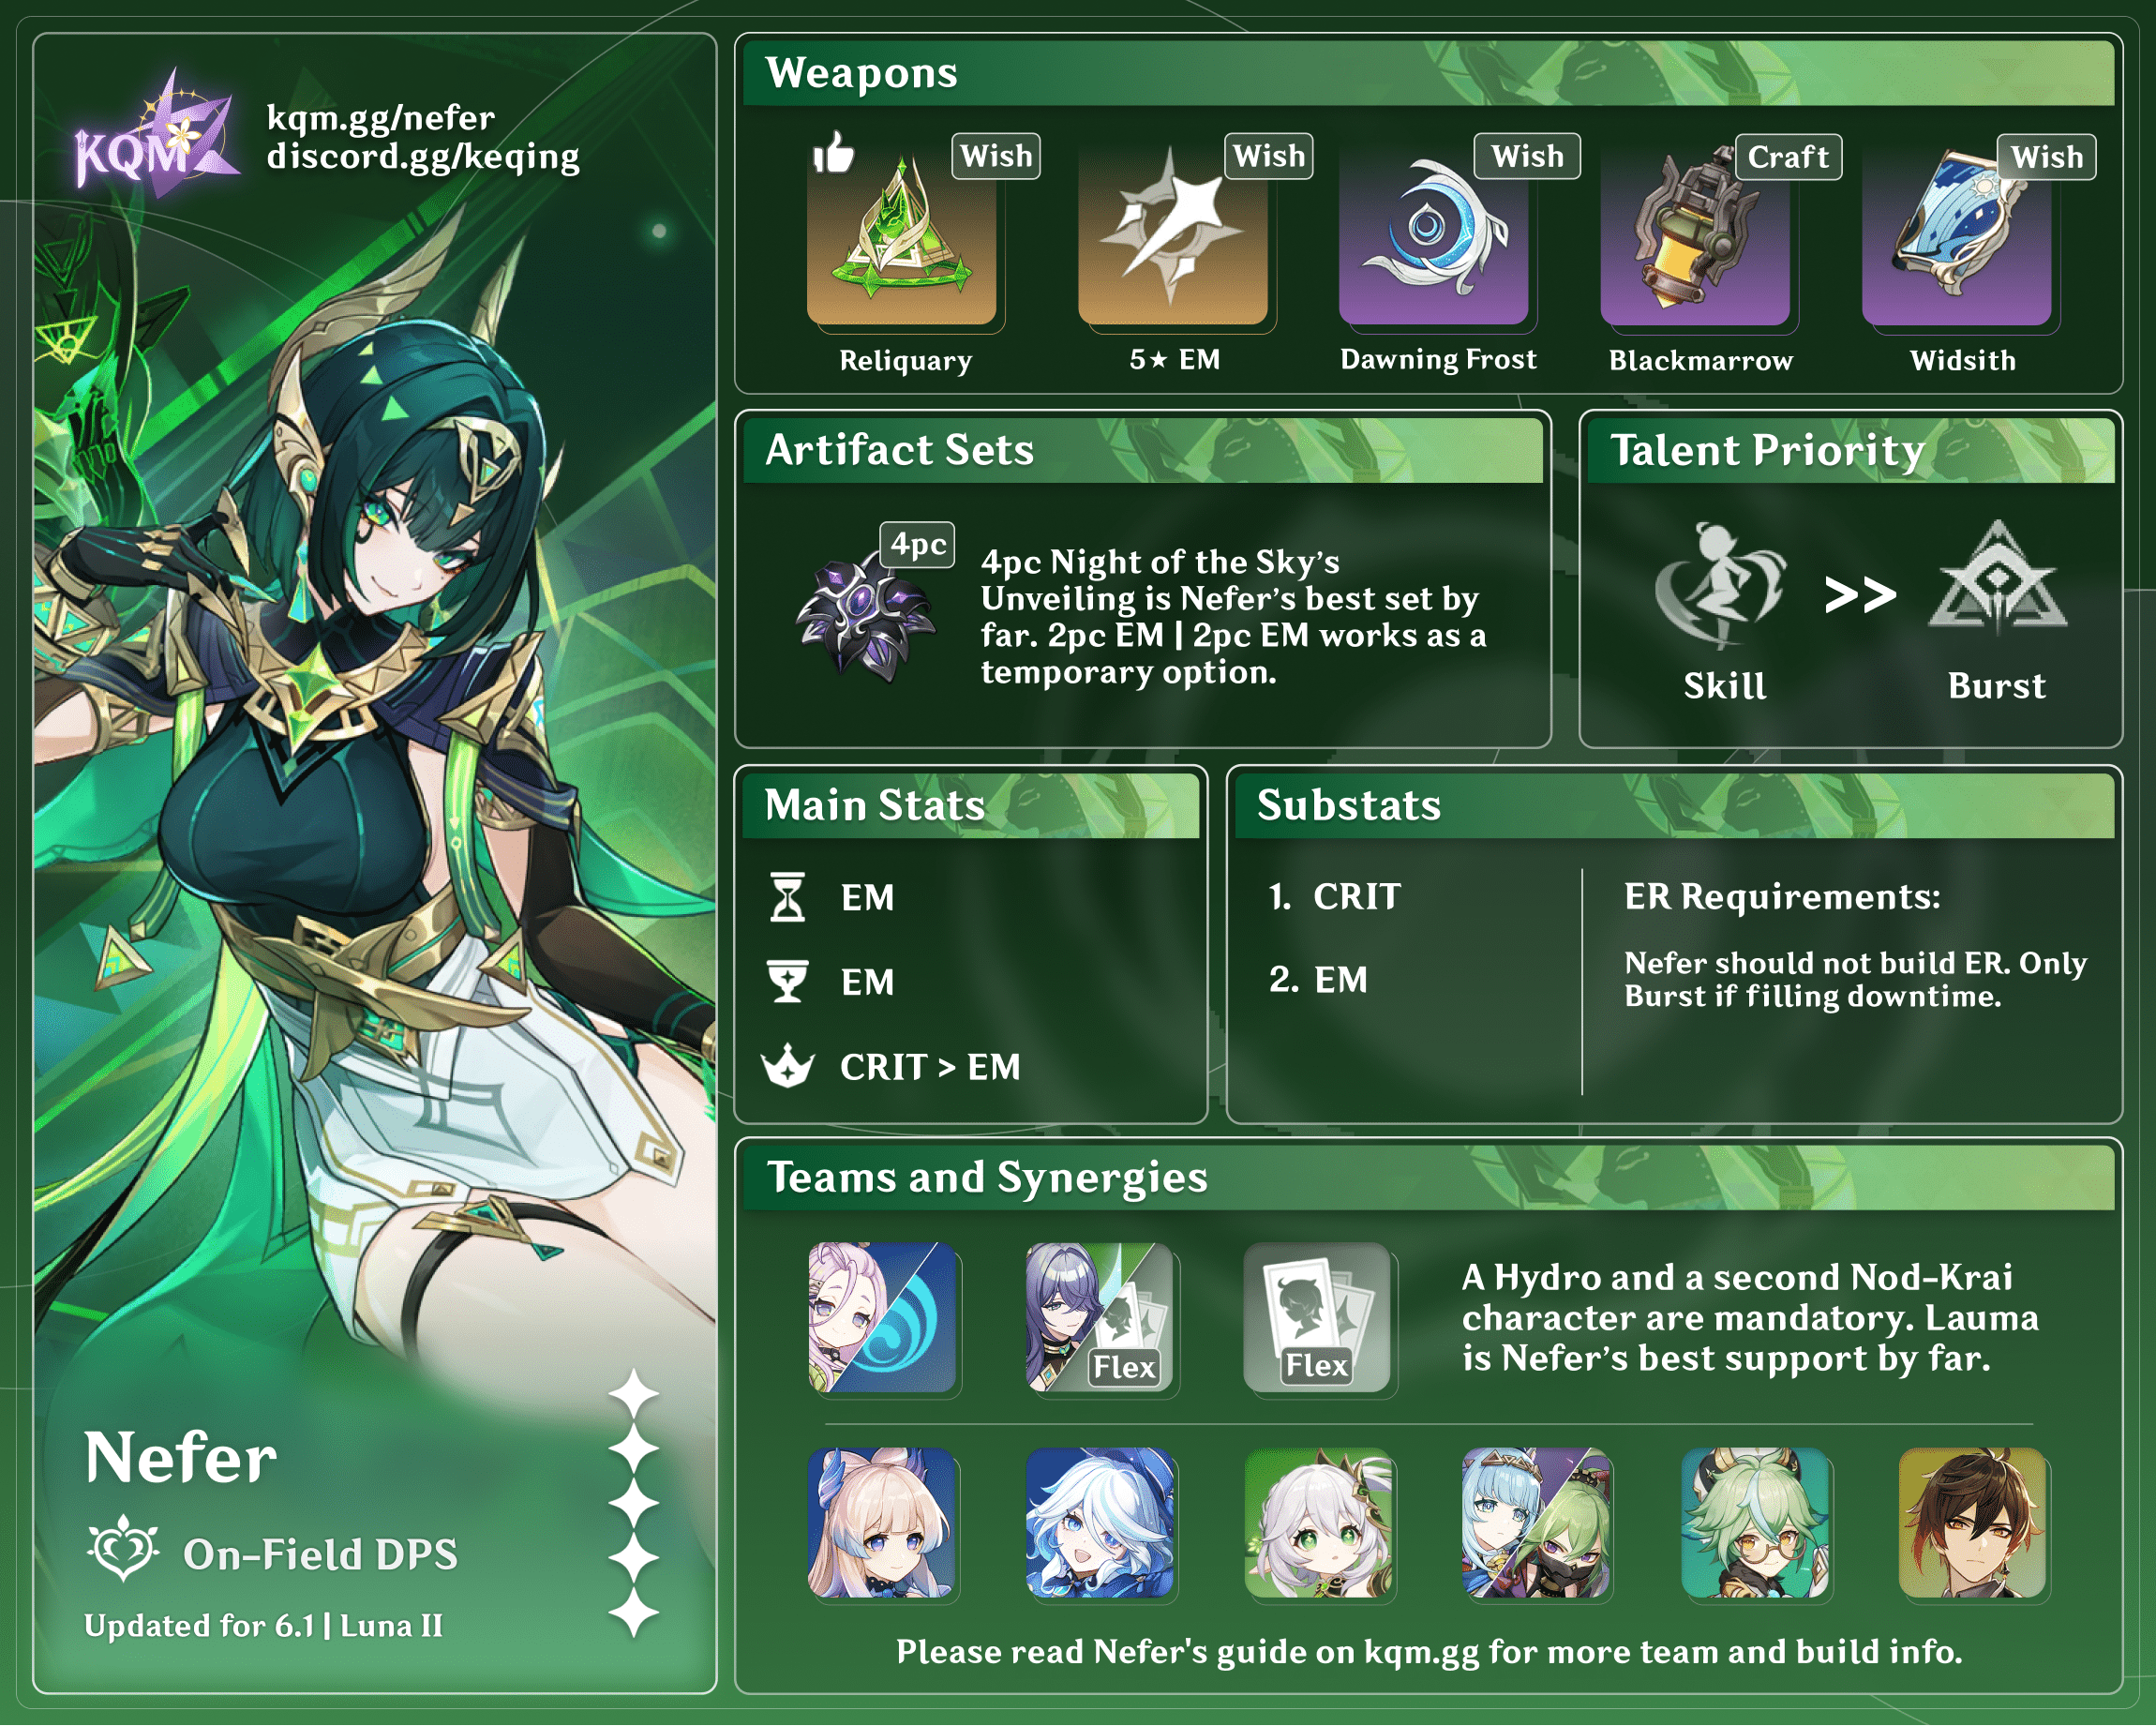
Stat Priority: ER until requirement > CRIT > EM
As mentioned in the Combos section, Nefer’s Burst can bide time for Verdant Dew to generate. However, trading CRIT and EM substats for ER ones is not always optimal; consult Genshin Optimizer to compare your actual artifacts.
When Nefer holds her signature weapon, Reliquary of Truth, an EM Circlet can be better than a CRIT Circlet if it has better substats.
Unless using a weapon that provides CRIT DMG, a CRIT DMG Circlet is typically better than a CRIT Rate one since 4pc Night of the Sky’s Unveiling and Lauma give Nefer a combined 40% CRIT Rate.
Artifact Sets
 4pc Night of the Sky’s Unveiling (NotSU) | Nefer’s best-in-slot set by a significant margin. With Moonsign: Ascendant Gleam, it provides unmatched stat bonuses: 30% CRIT Rate, 10% Lunar-Bloom DMG Bonus, and 80 EM. |
 4pc Gilded Dreams, 2pc EM + 2pc EM | Although much worse, these EM stat sticks can be used as transitionary sets while farming for 4pc NotSU. |
Weapons
 5★ Reliquary of Truth | Nefer’s signature weapon and best-in-slot provides 124.2% CRIT DMG, 8% CRIT Rate, and 120 EM. Its high CRIT stats make an EM Circlet competitive. When compared to R5 Blackmarrow Lantern, Nefer’s signature weapon is a similar damage increase to C1. |
 5★ Nightweaver’s Looking Glass | Lauma’s signature weapon stands out as Nefer’s second-best weapon, thanks to its EM stats and Lunar-Bloom DMG Bonus. Unless you own Nefer’s signature weapon, it can be better to equip this weapon on Nefer instead and use Etherlight on Lauma to meet her ER requirements. |
 5★ Surf’s Up, Tome of the Eternal Flow | Although these weapons’ passives do not benefit Nefer at all, their high CRIT DMG secondary stat makes them perform slightly better than the options below. |
 4★ Dawning Frost | Dawning Frost is a banner-exclusive weapon. It performs slightly better than Blackmarrow Lantern at R1 but scales well with refinements, typically being Nefer’s third-best weapon at R5. Though having R5 Dawning Frost without pulling at least R1 Reliquary of Truth is unlikely. |
 4★ Blackmarrow Lantern | Blackmarrow Lantern is Nefer’s baseline free-to-play option. It provides a decent amount of EM and Lunar-Bloom DMG Bonus. |
 4★ The Widsith | The Widsith’s passive is random and has a long 30s cooldown, so it only activates every other rotation. Since only its EM buff benefits Nefer, its value is inconsistent. Nevertheless, even with average RNG, R5 Widsith performs similarly to R5 Blackmarrow Lantern across multiple rotations; with good RNG, it can match R5 Dawning Frost. Additionally, when its EM buff is active, it can perform better than R1 Reliquary of Truth, making it best-in-slot for speedrunning scenarios with sufficient resets. |
 5★ A Thousand Floating Dreams, Starcaller’s Watch, Sunny Morning Sleep-In | These EM stat sticks all perform similarly to Blackmarrow Lantern. Use them if you have them and don’t want to spend billets on Blackmarrow Lantern. |
Teams
Combo Notation
- N = Normal Attack
- C = Charged Attack
- A = Aimed Shot
- P = Plunging Attack
- E = Elemental Skill
- tE = Tap Skill
- hE = Hold Skill
- Q = Elemental Burst
- D = dash (cancel)
- J = jump (cancel)
- W = walk (cancel)
- > = switch character
- ( ) = these actions are optional; please refer to the notes below
- [ ] = repeat these actions the specified number of times
Lunar-Bloom DPS

A Hydro unit is mandatory to enable Lunar-Bloom and provide Nefer with Verdant Dews and Veil of Falsehood stacks. A second Dendro is also ideal to start generating Verdant Dews before Nefer’s field time in order to use Nefer’s special Charged Attacks right away. The flex slot is ideally a character who provides relevant buffs and defensive utility if the Hydro and Dendro character do not. One teammate should hold 4pc Deepwood Memories.
A second Nod-Krai character (ideally Lauma) is strongly recommended to activate Moonsign: Ascendant Gleam, which enables Nefer’s A1 Passive, 4pc NotSU’s full set effect, and up to 36% Lunar-Bloom DMG Bonus from a non–Nod-Krai character.
Notable Teammates
Nefer’s most recommended teammates are marked with a star (★). However, characters without a star are also decent options.
 ★ Lauma | Lauma is an outstanding support for Nefer. She provides a plethora of buffs which include Dendro RES Shred, Lunar-Bloom CRIT Rate and CRIT DMG, a Lunar-Bloom Base DMG Bonus, and a Lunar-Bloom Additive DMG Bonus. All of these buffs significantly boost Nefer’s damage potential. Teams without Lauma are a substantial downgrade to Nefer’s performance. Lauma’s C2 and her signature weapon are also decent investment options for Nefer. Additionally, her C1 can allow play without a dedicated healer, which may open up the slot for a better buffer. Nefer’s special Charged Attacks require at least 1 Verdant Dew to perform, so Lauma cannot use her Hold Skill. The loss of her Hold Skill’s additional Pale Hymn stacks is of no concern, since Nefer deals exactly 18 Lunar-Bloom DMG hits against only 1 enemy in her typical combo (unless she is C6). |
Hydro
A Hydro unit is mandatory in Nefer’s teams to generate Verdant Dews, which enable Nefer’s special Charged Attacks.
★ Aino | Aino is generally the most recommended Hydro option. She is freely accessible through the Nod-Krai Archon Quest. Aino provides consistent off-field Hydro application at C0 and decent buffs to Nefer at C1 and C6. Her C2 can also make Verdant Dew generation more consistent. She is extremely easy to build as she only needs enough ER to use her Burst every rotation. Aino increases the team’s Moonsign Level, which is relevant if Lauma is not on the team. |
 Kokomi | Kokomi consolidates healing and off-field Hydro application. Her 20s Skill cooldown is slightly longer than Nefer’s desired rotation length, which Kokomi can circumvent by holding R5 Sacrificial Fragments. |
Nilou | Although Nefer’s A1 Passive conflicts with Nilou’s Bountiful Core generation, Nilou can still be used for her off-field Hydro application. Notably, Nilou’s C1 extends the duration of her Hydro application, while her C2 provides 35% Dendro RES Shred. |
 Furina | Furina is a decent option for Nefer thanks to her consistent off-field Hydro application and decent personal damage that does not require Normal Attacks. Furina forces a 20s rotation due to her Skill cooldown, though this can be circumvented by running R5 Sacrificial Sword or a “desync” rotation where Furina’s Skill Cast is delayed in subsequent rotations. More rotation testing with Furina is in progress. Note that the DMG Bonus from Furina’s Burst does not benefit Nefer’s Lunar-Bloom damage, so Furina can safely skip her Burst with minimal damage loss. Furina’s Salon Members drain the team’s HP down to half, which can be risky without a healer. |
 Xingqiu | Xingqiu offers off-field Hydro application, damage reduction, and interruption resistance. However, he comes with the caveat of having a 21s cooldown on both his Skill and Burst, further extending the rotation. Xingqiu can circumvent his cooldown issue by using R5 Sacrificial Sword to maintain uptime on his orbital Rain Swords. However, relying on the Rain Swords for Hydro application is precarious, as too many hits from enemies can break them (unless his Burst is active). In optimal gameplay, Nefer does not weave Normal Attacks to trigger Xingqiu’s rain sword attacks. His Burst is basically used to ensure that his orbital Rain Swords stay active even through hits. |
 Yelan | Yelan does not provide much beyond her Hydro application and personal damage. Her A4 Passive’s ramping DMG Bonus does not affect Nefer’s Lunar-Bloom damage. Additionally, her off-field Hydro application relies on Nefer weaving Normal Attacks in between her special Charged Attacks, which extends the rotation. |
Dendro
If Lauma is not available, one of the following Dendro units should be used to generate Verdant Dews prior to Nefer taking the field. Baizhu, Kirara, and Yaoyao also provide sustain. Nahida can use Prototype Amber to provide sustain as well.


Flex
These units provide sustain and buffs through their kit, 4pc artifact set effect, and weapon passive. 4pc Instructor or 4pc SMS should be used to buff Nefer’s EM, or 4pc Deepwood if no one else already holds it.


Example Teams
This is not a comprehensive list of teams. The inclusion or exclusion of any given team does not necessarily reflect its power level.
With Shinobu on the team, you should start the first rotation with Nefer’s Skill to preemptively convert Dendro Cores to Seeds of Deceit, which prevents Shinobu’s Skill from removing them via Hyperbloom.

This team has a high damage ceiling but is fragile due to the lack of sustain. Lauma’s C1 alleviates this issue and makes this a more recommended team. When employing dash cancels in Nefer’s combo, this team becomes much less vulnerable since Nefer spends most of her time in i-frames.

R5 Sacrificial Fragments on Kokomi is strongly recommended to shorten her Skill cooldown and enable consistent Hydro application through rotations.
Furina provides consistent off-field Hydro application while Ineffa or Kuki provide sustain. Furina does not use her Burst as her DMG Bonus buff does not benefit Nefer’s Lunar-Bloom damage. Ineffa should Burst every rotation for her A4 Passive’s EM buff.
This Lauma-less team is a substantial downgrade from the aforementioned teams, but it can nonetheless clear most content just fine.
Limited Roster Alternatives
These teams are meant for new players whose limited roster prevents them from using the teams above and will result in lower damage output.
Credits
Writer(s): plumetra
Contributors: acerbus114, ren718.exe, irokei, pjeljr, auraolis
Team images made with the KQM portrait generator.