
Updated for Version 7.1

Sandrone is a 5-star Cryo Claymore character in Genshin Impact who primarily deals Stellar-Conduct damage while on-field. Learn about Sandrone’s best builds, best weapons, best artifacts, and best teams in this quick guide.
Note that the information given may change if new discoveries are made. More extensive testing is in progress.
Join our Discord to check on and participate in the theorycrafting process.
Table of Contents
New Content (7.0-7.1)
 Vodyanitsa | Vodyanitsa is a good teammate for Sandrone thanks to her interruption resistance, Cryo RES Shred, and gear buffs from TTDS and 4pc TotM. |
 Odette | Odette is Sandrone’s premium Cryo off-field support and DPS teammate. She deals high personal damage and can buff the team with 4pc Heart of the Furnace and her Stellar Jubilee Passive. Odette works in Stellar-Conduct or Stellar Swirl teams. |
 Alyosha | Alyosha is a decent support in Stellar-Conduct teams and becomes significantly better at C2 and C6. He provides consistent off-field Electro application, single-ally healing, Stellar-Conduct DMG% and ATK% buffs, and can hold 4pc support sets. Alyosha only buffs and heals the on-fielder, which can limit his synergy with Sandrone’s off-field DPS teammates like Odette and Yae Miko. |
 Cryo Traveler | Cryo Traveler can be a quickswap teammate in Sandrone’s Stellar-Conduct teams and an off-field DPS unit in Sandrone’s Stellar Swirl teams. |
 4pc Heart of the Furnace | 4pc Heart of the Furnace is the default support set for Stellar-Conduct and Stellar Swirl teams. One of Sandrone’s teammates should always hold this set. If Sandrone acts as a quickswap Stellar reaction enabler for an on-field DPS unit like Cyno, Wriothesley, or Mizuki, she can opt to hold this set. |
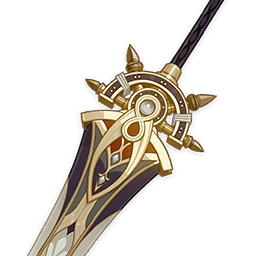 4★ Forged by the Golden Melody | Forged by the Golden Melody is a Battle Pass–exclusive Claymore released in Version 7.0. At R1, it performs comparably to R5 Tidal Shadow in teams with a healer. At higher refinements, it is Sandrone’s definitive best-in-slot 4-star Claymore option. This Claymore’s performance relies on consistent Electro aura uptime to maintain its passive effects. In teams with low Electro aura uptime, it performs on par with Sandrone’s other 4-star options. |
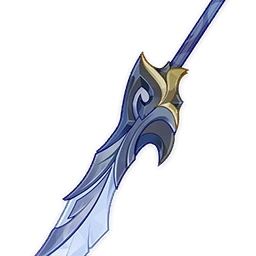 4★ Blade of Atonement | Blade of Atonement is a craftable Claymore released in Version 7.0. At R5, it is Sandrone’s second-best weapon option as long as she triggers Stellar-Conduct. This is most easily achieved with 2 Electro appliers on the team or establishing an Electro Aura immediately before Sandrone takes the field (e.g. with Alyosha or Beidou). If an Electro aura cannot be established to trigger Blade of Atonement’s passive, then Tidal Shadow or Mailed Flower are better options. |
 Stellar Swirl | In Version 7.0, Stellar Swirl was added to the game. Sandrone enables Stellar Swirl and deals direct Stellar Swirl damage as she does Stellar-Conduct. Her Talent and Constellation descriptions changed from only “Stellar-Conduct” to “Stellar Glimmer” to include Stellar Swirl. If both reactions are present in the team, Sandrone will always prioritize Stellar-Conduct. |
Infographic
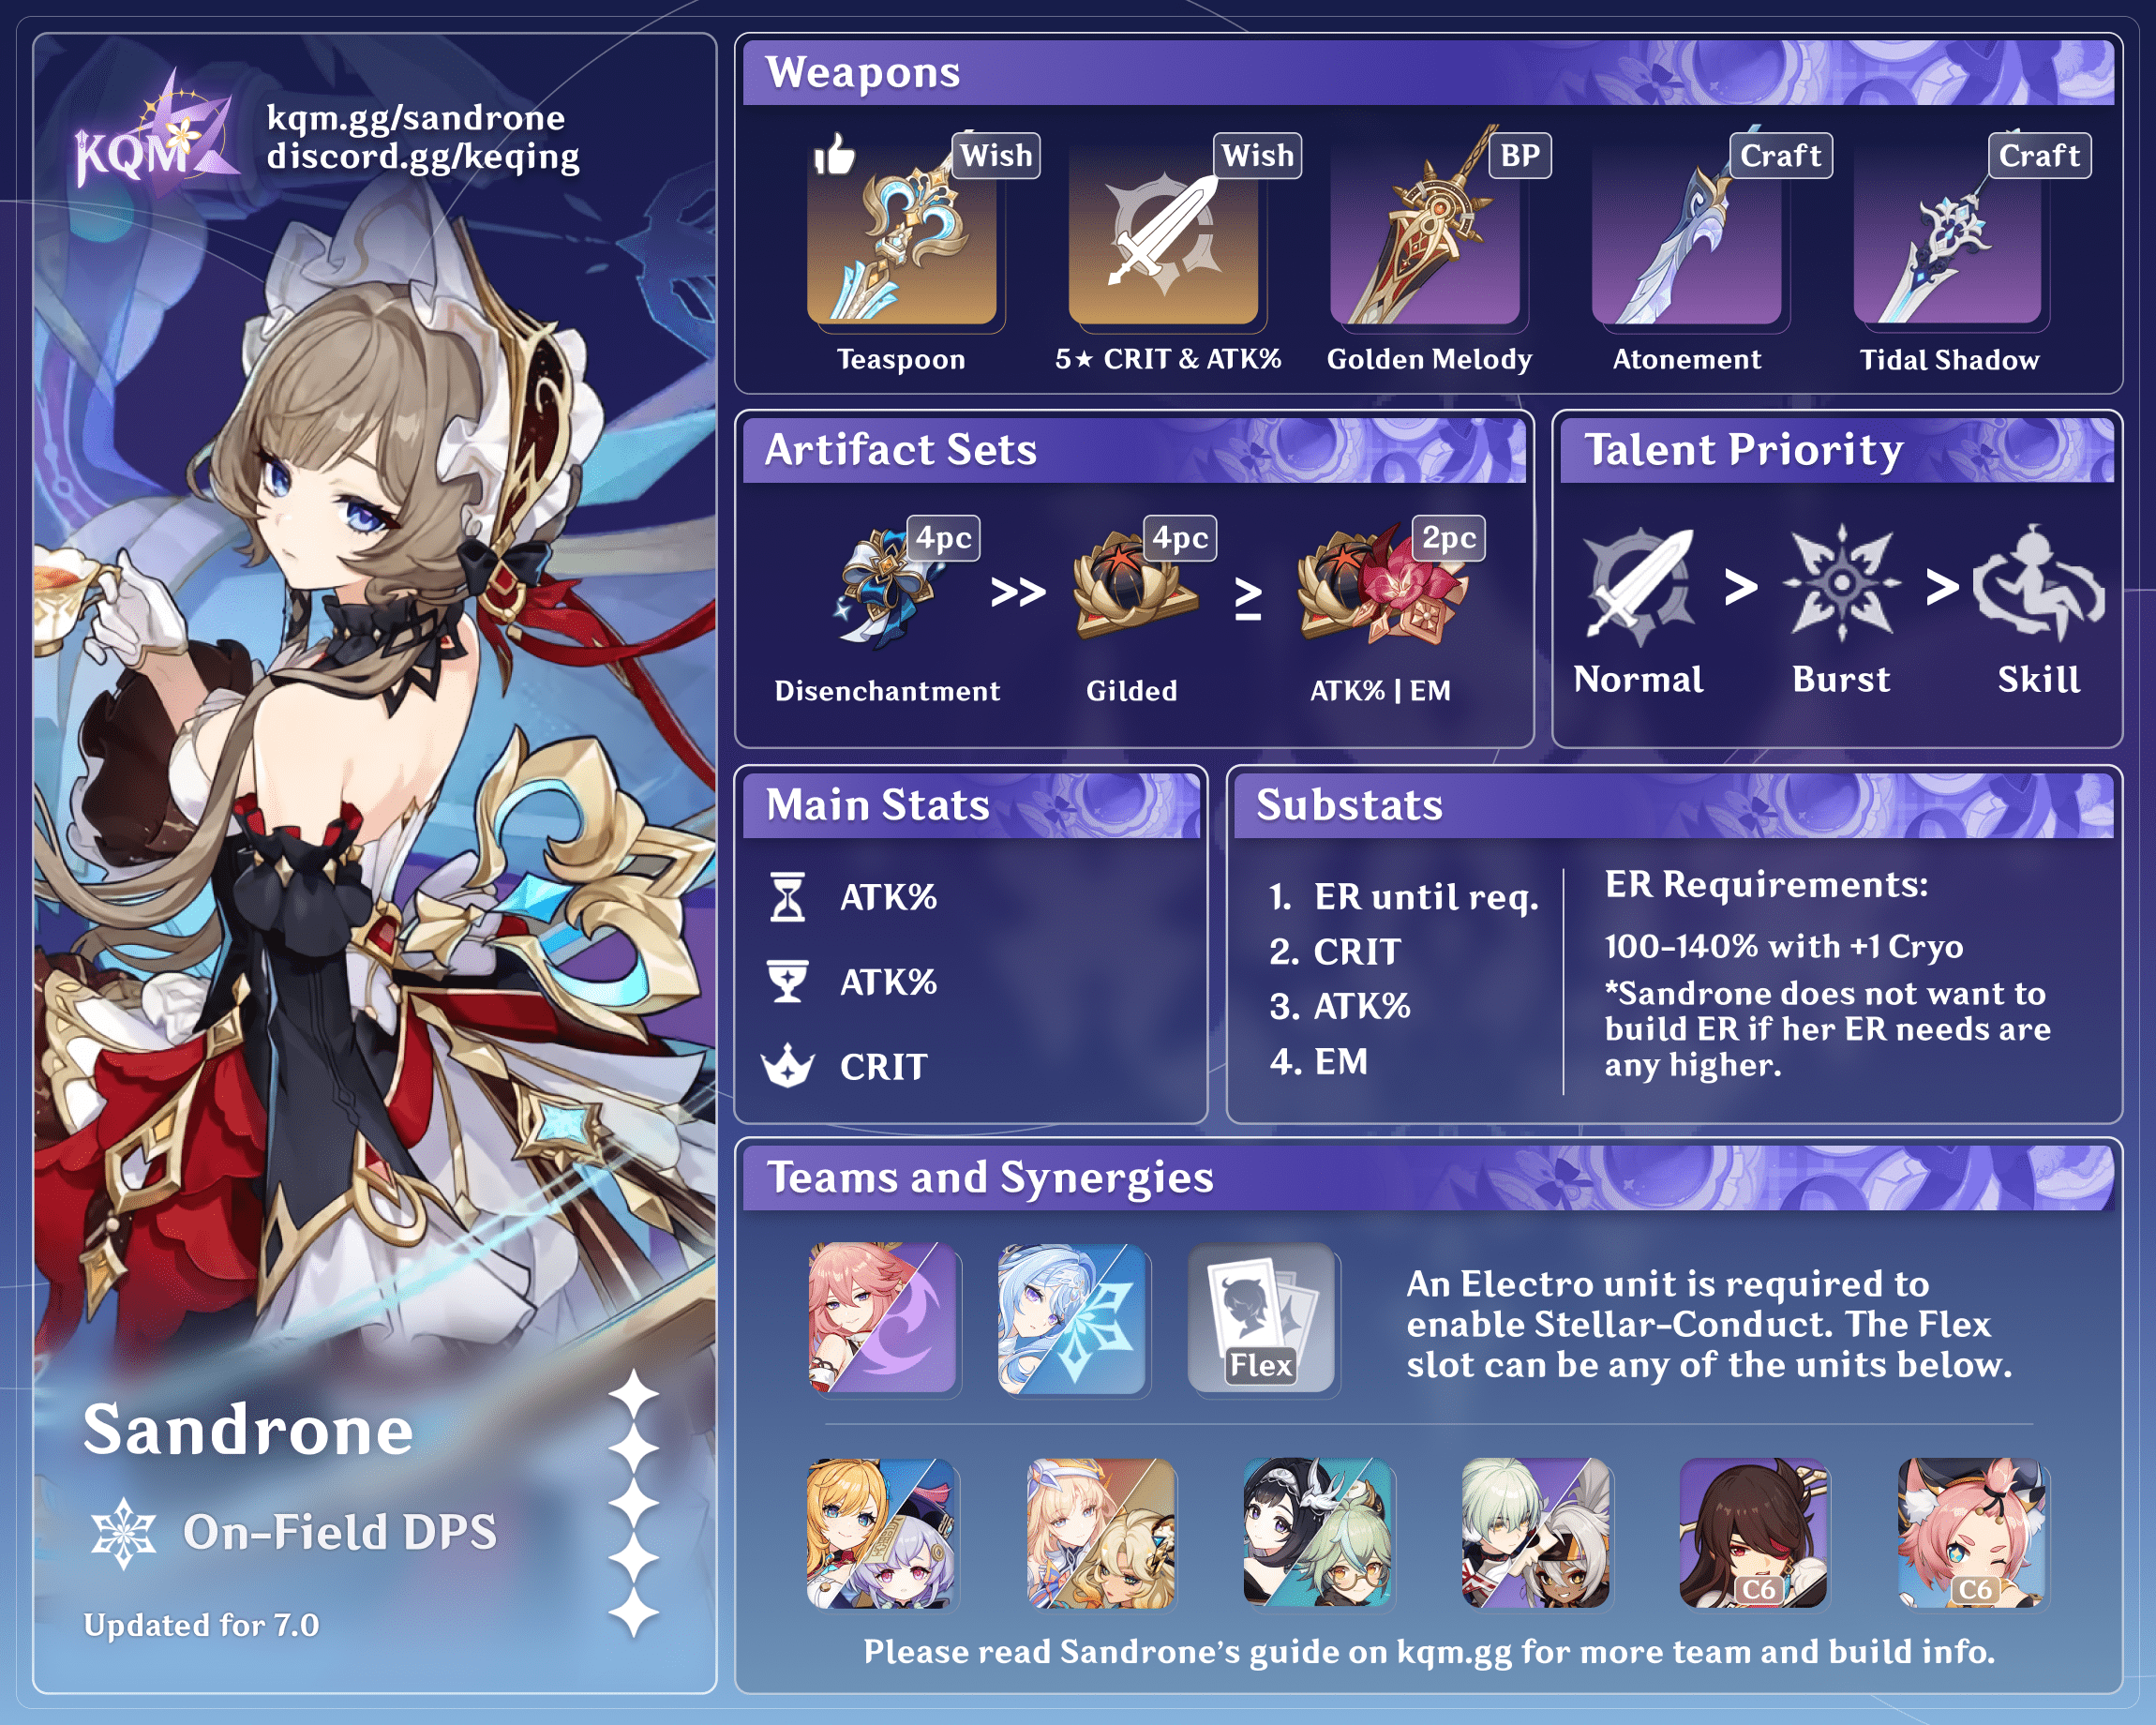
Credits to: cegewinne, haafr, and KQM Staff
Character Overview
Pros
- Simple gameplay between her combos and team rotations.
- Simple builds with freely available competitive 4-star Claymores.
- Simply delightful tea parties.
Cons
- Heavy reliance on 5-star characters to reach her competitive potential.
- Limited gameplay optimization beyond Skill cancels.
Playstyles
On-Field Stellar-Conduct DPS
Sandrone primarily plays as an on-field Stellar-Conduct DPS unit. While she has flexible field time thanks to her Skill cooldown, she usually takes the field for around 10–13s after her teammates cast their abilities.
Quickswap Stellar-Conduct Enabler
Since Sandrone enables the Stellar-Conduct reaction with her Stellar Jubilee Passive, she can enable on-field Stellar-Conduct DPS units like Wriothesley, Cyno, or Cryo Traveler. However, she has little synergy with these characters beyond this, so such teams will not be examined in this Quick Guide.
On-Field Stellar Swirl DPS
Stellar Swirl teams with Sandrone tend to perform worse than her Stellar-Conduct teams with Yae Miko. Although she can enable Stellar Swirl with her Stellar Jubilee Passive, as of Version 7.0, Odette and Cryo Traveler are the only off-field DPS units with kits catered to Stellar Swirl. As such, these teams will not be looked at in-depth.
Talents
Level and Talent Priority
Normal Attack > Burst > Skill
A majority of Sandrone’s personal damage stems from her Charged Attack, so she prioritizes Normal Attack Talent levels. Sandrone can ascend to Lv. 80/90 and focus on her Talent Levels and artifacts before reaching Lv 90.
Talent Overview
 Normal Attack | Formule Phenomenale: Self-Evident Proposition
Talent Description
Normal Attack
Generates threads that control her weapon using formulae, performing up to 3 consecutive strikes.
Charged Attack
Summons the Facilitatrice Automatisee Generaliste Interactive et Omnitache, or “Fagio,” and switches it to Decoding mode: Unleashes a sweeping fire attack on enemies in front, as well as periodically fires condensed beams, dealing AoE Cryo DMG.
Radiance: Stellar Glimmer: The condensed beams will instead deal AoE Cryo DMG that is considered the corresponding Stellar Glimmer DMG.
While in Decoding mode, Fagio’s Decoding Power will continuously increase. Firing condensed beams will also further increase its Decoding Power.
When Fagio’s Decoding Power reaches the maximum of 100 points, it switches to Power Overdrive mode, in which it fires at opponents with longer intervals, dealing Cryo DMG. It will be unable to switch to Decoding mode at this time.
When not in Decoding mode, Fagio’s Decoding Power gradually decreases. When Sandrone is off-field, she will focus on maintaining Fagio, causing its Decoding Power to decrease at 300% the original rate.
Fagio exits Power Overdrive mode when its Decoding Power has decreased to under 50.
Plunging Attack
Plunges from midair to strike the ground below, dealing DMG to opponents along their path and causing AoE DMG on landing.
Sandrone’s Charged Attacks comprise the majority of her personal damage. Her Normal and Plunging Attacks are never used.
Charged Attacks & Fagio
Sandrone’s Charged Attack does the following:
- It summons Fagio.
- Fagio starts out in Decoding mode.
- While in Decoding mode, Fagio fires a beam that deals continuous AoE Cryo damage with instances of greater “condensed” damage. The condensed damage is considered direct Stellar Glimmer DMG.
- While firing the beam, Fagio gains stacks of Decoding Power.
- At 100 stacks of Decoding Power, Fagio switches to Power Overdrive mode.
- While in Power Overdrive mode, Fagio gradually loses Decoding Power and fires a weakened beam that deals periodic Cryo damage. Fagio cannot re-enter Decoding mode while in Power Overdrive mode.
- Fagio exits Power Overdrive mode below 50 stacks of Decoding Power.
- Sandrone can “repair” Fagio more quickly while she is off-field.
While this seems complicated on paper, the actual gameplay is quite simple since Sandrone’s Skill resets Fagio’s state off cooldown.
 Elemental Skill | Formule Phenomenale: Differential Analysis
Talent Description
With her impeccable, ladylike poise, Sandrone boards the Tea Party Tactical Assault Hovermech and hovers forward for 6s. During this time, Sandrone can control the travel direction of the craft. Pressing Sprint consumes 10 Stamina and launches her into an elegant high-speed hover mode, in which she will move even faster at the cost of 15 Stamina per second.
When Sandrone starts hovering, if there are opponents nearby, she will also summon a Prismatic Resonance Cannon and fire 2 Prism Shots at any opponents who have yet to cool down, dealing Cryo DMG.
Radiance: Stellar Glimmer: The second Prism Shot will instead deal Cryo DMG that is considered the corresponding Stellar Glimmer reaction DMG.
When on the Tea Party Tactical Assault Hovermech, Sandrone will also elegantly and quietly repair Fagio, causing Decoding Power to swiftly decrease.
Sandrone’s Elemental Skill is primarily used to quickly repair Fagio when it enters Power Overdrive mode. It also deals 2 instances of Cryo damage, the second of which is considered direct Stellar Glimmer DMG.
Sandrone’s Charged Attack beam or Elemental Skill share Elemental Particle ICD. She can generate 1 Cryo Particle every 2.5s upon hitting an enemy.
 Elemental Burst | Formule Phenomenale: Q.E.D.
Talent Description
In line with established ladylike behavior, Sandrone summons a large number of Prismatic Resonance Cannons for a frontal bombardment before firing on her foes with a Convective Inhibition Ray, dealing AoE Cryo DMG.
Radiance: Stellar Glimmer: The Convective Inhibition Ray instead deals AoE Cryo DMG that is considered the corresponding Stellar Glimmer reaction DMG.
Sandrone’s Elemental Burst deals a nice bit of AoE Cryo damage; its final hit is considered direct Stellar Glimmer DMG. Sandrone can cast her Burst in between her Charged Attacks. If she uses her Burst at the end of her field time and especially if she swaps off immediately after casting, she can lose her teammates’ buffs.
 Ascension 1 Passive | Eternal Speculation Engine
Talent Description
Radiance: Stellar Glimmer: When using the Elemental Skill Formule Phenomenale: Differential Analysis, if Fagio’s Decoding Power is greater than 50, the second Prism Shot fired by Fagio at nearby opponents will deal 400% of its original DMG as Fagio’s Decoding Power is decreased.
Additionally, for every 10 points of Decoding Power Fagio loses, it gains 1 stack of Refined Tactics for 60s (max 10 stacks). When Sandrone uses the Elemental Burst Formule Phenomenale: Q.E.D. while in the Radiance: Stellar-Conduct state, all stacks of Refined Tactics are cleared, causing the Convective Inhibition Ray to deal 100% + (number of stacks cleared) × 10% of its original DMG.
While in the Radiance: Stellar-Conduct or Radiance: Stellar Swirl state, Sandrone’s A1 Passive buffs her Elemental Skill’s Stellar Glimmer damage and her Elemental Burst’s overall damage. In practice, you do not need to worry about Sandrone’s A1 Passive if you use her Burst immediately after her Skill.
 Ascension 4 Passive | A Lady’s Code of Conduct
Talent Description
Increases Sandrone’s Elemental Mastery based on her ATK. Every 100 ATK will increase her Elemental Mastery by 8. The maximum increase she can gain this way is 160.
Sandrone’s A4 Passive grants a nice buff to her ATK based on her EM (maximum of 160 EM at 2000 ATK). Despite this, you should still prioritize ATK% stats when building her as the A4 buff converts EM less efficiently than ATK itself.
 Stellar Jubilee | Light of Rationalisme
Talent Description
Sandrone will enter the Radiance: Stellar Conduct state when she is inside a Polestar Field, or the Radiance: Stellar Swirl state for 8s after a nearby party member triggers a Stellar Swirl reaction.
When a party member triggers a Superconduct or Cryo Swirl reaction, it becomes a Stellar-Conduct or Stellar Swirl reaction instead, and the Base DMG of the aforementioned reaction is also increased by 0.7% for every 100 points of Sandrone’s ATK. A maximum increase of 14% can be obtained in this way.
Sandrone’s Stellar Jubilee Passive enables Stellar-Conduct and Stellar Swirl. It also increases Base Stellar Glimmer DMG, scaling with her total ATK.
Constellations
Sandrone’s Constellations provide fairly modest DPS increases through C4. Her C5 is negligible while her C6 is her most impactful Constellation, more than doubling her personal damage compared to C0.
 Constellation 1 | Morrow After the Golden Dusk
Constellation Description
When in Decoding mode, Fagio’s Decoding Power increases at a 50% lower rate, and all party members deal 30% increased Stellar Glimmer reaction DMG.
Sandrone’s C1 grants a Stellar Glimmer DMG Bonus to the party and causes Fagio’s Charged Attacks to fire for more time before reaching 100 Decoding Power stacks. As such, Sandrone typically only fires 2 Charged Attacks per field at C1+.
 Constellation 2 | An Heiress Gazed Into the Looking-Glass
Constellation Description
Radiance: Stellar Glimmer: Increases CRIT DMG from Charged Attack condensed beams by 40%. Also, each time a beam is fired, CRIT DMG dealt by all condensed beams fired during this Decoding mode period will be further increased by 20%. Max 3 stacks.
Sandrone’s C2 provides a nice CRIT DMG buff to Fagio’s “condensed” beams. Each successive condensed beam during a single Charged Attack gains an additional CRIT DMG buff. At C6, Fagio’s Charged Attack’s final beam benefits from the net accumulated CRIT DMG stacks.
 Constellation 3 | Refuse the Wake of Dusk, the Moonlit Yoke
Constellation Description
Increases the Level of Formule Phenomenale: Self-Evident Proposition by 3.
Maximum upgrade level is 15.
A solid buff to Sandrone’s Normal Attack Talent, buffing her Charged Attack.
 Constellation 4 | In Knowledge Lies the World’s True Ground
Constellation Description
When Sandrone deals Stellar-Conduct or Stellar Swirl DMG to an opponent, she will also summon an extra Prismatic Resonance Cannon to fire off a coordinated attack which deals Cryo DMG at 125% or 187.5% of her ATK, respectively. This DMG is considered the corresponding Stellar Glimmer reaction DMG, and the effect can occur once every 4s.
Sandrone’s C4 allows her to deal additional Stellar Glimmer damage every 4s. This is a good buff to her personal damage.
 Constellation 5 | Of All Beside, She Takes No Part
Constellation Description
Increases the Level of Formule Phenomenale: Q.E.D. by 3.
Maximum upgrade level is 15.
A negligible buff to Sandrone’s Elemental Burst.
 Constellation 6 | Narcissus Wakes, Her Eyes Upon the Dawn
Constellation Description
When Fagio fires a condensed beam for the third time while in Decoding mode, the beam becomes a more powerful Condensed Cluster Beam that fires continuously. This beam will deal up to 4 additional instances of AoE Cryo DMG at 100% of Sandrone’s ATK on top of any subsequent original beam fired.
Radiance: Stellar Glimmer: The Condensed Cluster Beam will instead deal 4 additional instances of AoE Cryo DMG. The DMG dealt with this attack, which is considered the corresponding Stellar Glimmer reaction DMG, is equal to:
Radiance: Stellar-Conduct: 80% of Sandrone’s ATK.
Radiance: Stellar Swirl: 120% of Sandrone’s ATK.
Additionally, all Stellar Glimmer reaction DMG dealt by Sandrone is elevated by 20%.
Sandrone’s C6 grants a dramatic increase to her personal damage. After firing 3 typical “condensed” beams, Fagio’s beam deals 4 additional instances of damage that are considered Stellar Glimmer damage while Sandrone is in a Polestar Field. Moreover, this C6 elevates all of Sandrone’s Stellar Glimmer DMG by 20%.
C1 vs R1
Sandrone benefits more from obtaining premium 5-star teammates than obtaining her R1 or C1. As such, you should prioritize obtaining units like Odette or Yae Miko before considering Sandrone’s personal investment.
If you lack 5-star Claymores better than Tidal Shadow, obtaining R1 A Teaspoon of Transcendence results in higher team DPS than obtaining Sandrone’s C1. If you already have a 5-star option or play Sandrone as a quickswap Stellar-Conduct enabler, then Sandrone’s C1 is a better option.
Combos
Combo Notation
- N = Normal Attack
- C = Charged Attack
- A = Aimed Shot
- P = Plunging Attack
- E = Elemental Skill
- tE = Tap Skill
- hE = Hold Skill
- Q = Elemental Burst
- D = dash (cancel)
- J = jump (cancel)
- W = walk (cancel)
- > = switch character
- ( ) = these actions are optional; please refer to the notes below
- [ ] = repeat these actions the specified number of times
Note that Sandrone’s combos may change as new combos are tested. More extensive testing is in progress.
| 3[C E] (Q) | This is Sandrone’s default on-field combo at C0. Sandrone can cast her Burst in between her Charged Attacks. If she uses her Burst at the end of her field time and especially if she swaps off immediately after casting, she can lose her teammates’ buffs. |
| 2[C E] (Q) | This is Sandrone’s default on-field combo at C1+. With Sandrone’s C1, Fagio’s Charged Attack can fire for a longer duration. As such, Sandrone typically only fits 2 Charged Attacks per field time. |
Skill Cancels
Sandrone can cancel her Skill to shorten her field time. This results in shorter rotations and small but worthwhile DPS gains. With either Skill cancel, there is a timing window that can be neither too early nor too late. If you cancel too early, Fagio cannot fully repair and the following Charged Attack’s beam will not fully fire. If you cancel too late, then you extend the rotation and lose DPS. It takes some practice to get the feel for, but it is fairly easy to execute consistently.
Please note that Sandrone is still completely playable and viable without Skill cancels if you do not wish to perform them.
| EN0 C | Sandrone can cancel her Skill animation with a Normal Attack (N1). This Normal Attack can in turn be quickly cancelled with her Charged Attack. As such, the Normal Attack does not finish nor deal damage, hence N0. |
| ED C | Sandrone can also cancel her Skill by dashing. The timing for this is similar to the N0 cancel, but it does require some Stamina consumption. |
Artifacts
ER Requirements
Calcs for ER requirements can be found here (last updated for Version 6.7).
Assumptions:
- Safe particle RNG and default enemy particles are assumed.
- 20s rotations are assumed.
- These teammates always hold Favonius: Beidou, Charlotte, Diona, Escoffier, Kuki Shinobu, Qiqi, Xilonen.
- If any of the aforementioned teammates do not hold Favonius or consistently trigger its passive, Sandrone’s ER requirement increases by 10–20%.
| Teammates | Burst Every Rotation | Burst Every Other |
| +1 Cryo | 130–165% | 100% |
| +2 Cryo or +2 Electro | 120–140% | 100% |
If Sandrone’s ER requirements are greater than 140%, it is typically a DPS loss to fully invest in ER, and she should instead focus on other stats. If this is the case, do not build ER and use her Burst when available.
Use the Energy Recharge Calculator to determine exact requirements for your team and rotation. For more details on how Favonius weapons will affect your team, please use Ac1d’s Favonius Mastersheet.
Artifact Stats
 Sands |  Goblet |  Circlet |
| ATK% | ATK% | CRIT |
Stat Priority: (ER until requirement) > CRIT > ATK% > EM
Sandrone’s primary source of damage stems from direct Stellar-Conduct damage, which scales with ATK, CRIT, and EM. The scaling with ATK is better than with EM, so ATK% should be prioritized. Moreover, Cryo DMG Bonus does not affect Stellar-Conduct damage, so ATK% Goblets are preferred.
Artifact Sets
Hover over artifact images for more information.
 4pc Disenchantment in Deep Shadows (DDS) | As an on-field Stellar-Conduct DPS Unit, 4pc DDS is Sandrone’s best artifact set by far. |
 4pc Gilded Dreams (GD) | 4pc GD is a good back-up option since Stellar-Conduct scales with ATK% and EM. If you don’t have 4pc DDS artifact pieces ready, then 4pc GD is the next-best set. |
 2pc ATK% or EM | 2pc ATK% + 2pc ATK% or 2pc EM artifact set combinations are fine options if neither 4pc DDS nor 4pc GD are available. 4pc A Day Carved From Rising Winds technically provides greater ATK% than 2pc ATK% + 2pc ATK% combinations, but you shouldn’t try to force the set if it has worse overall stats. |
Weapons
Hover over weapon images for more information.
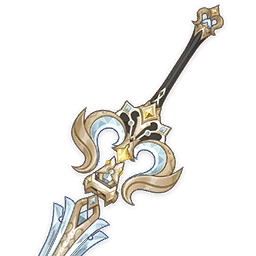 5★ A Teaspoon of Transcendence | A Teaspoon of Transcendence is Sandrone’s best-in-slot Claymore. Its high Base ATK and passive buffs are tailor-made for Sandrone. |
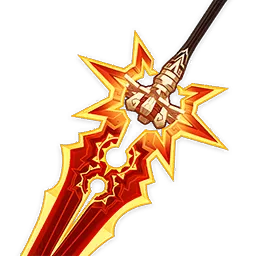 5★ A Thousand Blazing Suns | A Thousand Blazing Suns is Sandrone’s second-best option thanks to its plethora of stats. Sandrone should start her field time with her Elemental Skill (which can be quickly canceled by a Normal Attack or Dash). |
 Other 5★ Claymores | Wolf’s Gravestone, Redhorn Stonethresher, Verdict, Beacon of the Reed Sea, The Unforged These 5-star Claymores all perform better than R5 Tidal Shadow in any team. Beacon of the Reed Sea becomes competitive with A Thousand Blazing Suns if Sandrone takes damage. The Unforged also becomes more competitive with a shielder (e.g. C6 Diona, C6 Beidou, or Nicole). |
4★ Forged by the Golden Melody | Forged by the Golden Melody is a Battle Pass–exclusive Claymore released in Version 7.0. At R1, it performs comparably to R5 Tidal Shadow in teams with a healer. At higher refinements, it is Sandrone’s definitive best-in-slot 4-star Claymore option. This Claymore’s performance relies on consistent Electro aura uptime to maintain its passive effects. In teams with low Electro aura uptime, it performs on par with Sandrone’s other 4-star options. |
4★ Blade of Atonement | Blade of Atonement is a craftable Claymore released in Version 7.0. At R5, it is Sandrone’s second-best weapon option as long as she triggers Stellar-Conduct. This is most easily achieved with 2 Electro appliers on the team or establishing an Electro Aura immediately before Sandrone takes the field (e.g. with Alyosha or Beidou). If an Electro aura cannot be established to trigger Blade of Atonement’s passive, then Tidal Shadow or Mailed Flower are better options. |
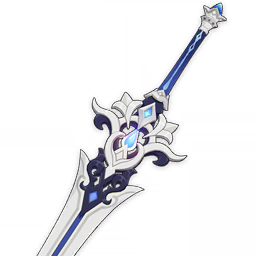 4★ Tidal Shadow | R5 Tidal Shadow is Sandrone’s best 4-star option in teams with a healer (e.g. Qiqi, Diona, or Escoffier). Even without a healer on the team, it is still one of the stronger 4-star Claymores available. Tidal Shadow is a free, accessible option whose blueprint is obtainable in Fontaine. |
 4★ Mailed Flower | In teams with a healer, R5 Mailed Flower performs on par with R5 Tidal Shadow. In teams without a healer, R5 Mailed Flower performs better. Mailed Flower was only obtainable during the Flagship Event of Version 3.5. |
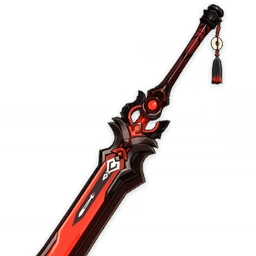 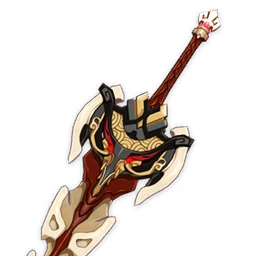 4★ Blackcliff Slasher, Serpent Spine | Blackcliff Slasher and Serpent Spine perform worse than R5 Tidal Shadow in teams with a healer. However, they are still good options if you lack billets to forge Tidal Shadow or the team lacks a healer. With Serpent Spine, Sandrone appreciates a shielder to avoid taking damage and losing stacks. |
Teams
Rotation Notation
- N = Normal Attack
- C = Charged Attack
- A = Aimed Shot
- P = Plunging Attack
- E = Elemental Skill
- tE = Tap Skill
- hE = Hold Skill
- Q = Elemental Burst
- D = dash (cancel)
- J = jump (cancel)
- W = walk (cancel)
- > = switch character
- ( ) = these actions are optional; please refer to the notes below
- [ ] = repeat these actions the specified number of times
On-Field Stellar-Conduct DPS

Sandrone’s typical team as an on-field Stellar-Conduct DPS unit consists of one Electro character, one other Cryo character, and a flex character who can be Electro, Cryo, or some type of buffer from another Element. An Electro teammate is required to enable Stellar-Conduct, while the second Cryo teammate increases her Stellar-Conduct damage thanks to their additional Cryo application and enabling of Cryo Resonance.
Please note that one of Sandrone’s teammates should hold 4pc Heart of the Furnace to maximize the team’s DPS.
Notable Teammates
Electro
An Electro teammate is required to enable Stellar-Conduct via their Electro application.
 Yae Miko ★ | Yae Miko is Sandrone’s best-in-slot Electro teammate thanks to her personal damage and buffs to Stellar-Conduct damage. She becomes even better at C1. Yae Miko does not typically use her Burst in teams with Sandrone. |
 Alyosha | Alyosha is a decent support in Stellar-Conduct teams and becomes significantly better at C2 and C6. He provides consistent off-field Electro application, single-ally healing, fair Stellar-Conduct DMG% and ATK% buffs, and can hold 4pc support sets. Alyosha only buffs and heals the on-fielder, which can limit his synergy with Sandrone’s off-field DPS teammates like Odette and Yae Miko. |
 C6 Beidou | Beidou provides solid buffs at C6 to Stellar-Conduct damage. Her Burst also applies many instances of Electro in multi-target scenarios. Beidou is not worth considering as a Stellar-Conduct support prior to C6. |




Cryo
A Cryo teammate enables Cryo Resonance and contributes to Sandrone’s Stellar-Conduct damage.
 Odette ★ | Odette is Sandrone’s premium Cryo off-field support and DPS teammate. She deals high personal damage and can buff the team with 4pc Heart of the Furnace and her Stellar Jubilee Passive. |
 Qiqi ★ | Qiqi is one of Sandrone’s best Cryo teammates thanks to her buffs to Stellar-Conduct. She typically holds 4pc TotM and Favonius Sword prior to C6. Her Revelation Buffs to her Constellation make C2+ Qiqi even better for Sandrone. At C6 specifically, Qiqi’s Stellar-Conduct buff scales with her ATK stat, so she should use her Burst and equip a Sword that offers high ATK stats. 4pc Noblesse also becomes a viable artifact set option, especially if another teammate can hold 4pc TotM. Depending on the team, there may be some rotation adjustments to accommodate Qiqi’s Burst. |
 C6 Diona | At C6, Diona grants 200 EM and a 40% DMG buff to Stellar-Conduct to characters within her Burst AoE, which makes her one of the few viable buffers available. Diona is not worth considering as a Stellar-Conduct support prior to C6. |
 Escoffier | Escoffier grants Cryo RES Shred, decent off-field damage, consistent Cryo application, and healing for Tidal Shadow if needed. While she does not directly buff Stellar-Conduct, all the aforementioned factors make her a competitive support for Sandrone. Escoffier can hold Favonius Lance if available to help lower Sandrone’s and her teammates’ ER requirements. |
 Cryo Traveler | Cryo Traveler acts as a quickswap DPS unit in Sandrone’s Stellar-Conduct teams. They can skip their Burst in the first rotation to build stacks for the 2nd rotation onward. |




Flex
Vodyanitsa | Vodyanitsa is a good teammate for Sandrone thanks to her interruption resistance, Cryo RES Shred, and gear buffs from TTDS and 4pc TotM. |
 Sucrose | Sucrose shreds enemy Cryo RES with 4pc Viridescent Venerer and grants a nice EM buff to the team. She can hold R5 TTDS. |
 Xilonen | Xilonen shreds enemy Cryo RES without the need to Swirl and can buff team EM by holding 4pc Instructor. |
 Nicole | Nicole grants a solid ATK buff and shield. While she does not directly buff Stellar-Conduct, the current lack of competitive supports specifically for Stellar teams makes her a worthwhile option. As Nicole does not use her Burst nor does the team require Elemental DMG% buffs, Nicole should opt to maximize her ATK stat with a 2pc + 2pc ATK% combo in lieu of a 4pc artifact set. |
 Iansan | Iansan grants a Flat ATK buff to Sandrone, especially at higher Constellation levels. Sandrone easily maintains full uptime on Iansan’s Burst buff as she can move around quickly with her Skill and Charged Attack. Since Stellar-Conduct does not scale with Elemental DMG Bonus, 4pc Noblesse is preferred over 4pc Scroll. |
 Bennett | Bennett grants a massive Flat ATK buff to Sandrone if she stays within his Burst AoE. He typically holds 4pc Noblesse and a high Base ATK Sword. |
  Columbina + Ineffa | Columbina and Ineffa form a Lunar-Charged team core that deals competitive team damage. While this team structure does not cater to Stellar-Conduct, it can be a viable alternative if you lack Stellar-Conduct–specific supports or the enemy scenario requires Lunar Reactions. |
Example Teams
This is not a comprehensive list of teams. The inclusion or exclusion of any given team does not necessarily reflect its power level.

This is one of Sandrone’s best team paradigms with Yae Miko and Odette as her core off-fielders. The last slot is quite flexible with Escoffier, C6 Qiqi, and C6 Alyosha performing the best. Sucrose is the best free option at any Constellation. Other options include pre-C6 Qiqi, pre-C6 Alyosha, Xilonen, Nicole, C6 Beidou, C6 Diona, and Lan Yan.
Sample Rotation (Escoffier)
Yae Miko 3[E] > Odette 2[E] (Q)¹ > Escoffier (Q) E > Sandrone combo
¹Use Odette’s Burst when available or skip it entirely before her C4.
Sample Rotation (Qiqi)
Yae Miko 3[E] > Odette 2[E] (Q)¹ > Qiqi E (Q)² > Sandrone combo
¹Use Odette’s Burst when available or skip it entirely before her C4.
²Use Qiqi Burst if she is C6.
Sample Rotation (Alyosha)
Yae Miko 3[E] > Odette 2[E] (Q)¹ > Alyosha EQ > Sandrone combo
¹Use Odette’s Burst when available or skip it entirely before her C4.
Sample Rotation (Sucrose)
Yae Miko 3[E] > Odette 2[E] (Q)¹ > Sucrose ED N1 > Sandrone combo
¹Use Odette’s Burst when available or skip it entirely before her C4.

This is a strong team if you lack Yae Miko. Vodyanitsa performs the best here and enables strong weapon options: Blade of Atonement or Forged by the Golden Melody for Sandrone, and Emberwell for Odette. Her Hydro application occasionally removes Cryo aura and allows Alyosha to establish an Electro aura against enemies that are Freeze-resistant or cannot be Frozen.
Odette ideally holds 4pc DiDS while Alyosha holds 4pc HotF; however, Odette with 4pc HotF and Alyosha with 4pc NO isn’t far behind. The fourth slot is flexible beyond Vodyanitsa or Escoffier: Qiqi, Sucrose, Xilonen, Nicole, C6 Beidou, and C6 Diona can all work.
Sample Rotation (Vodyanitsa)
Odette 2[E] (Q)¹ > Alyosha EQ > Vodyanitsa E > Sandrone combo
Sample Rotation (Escoffier)
Odette 2[E] (Q)¹ > Alyosha EQ > Escoffier (Q) E > Sandrone combo
¹Use Odette’s Burst when available or skip it entirely before her C4.

This is one of Sandrone’s best team paradigms with Yae Miko and Qiqi as her core off-fielders. The last slot is fairly flexible without much DPS difference between them.
Sample Rotation (Escoffier with Qiqi on 4pc NO)
Yae Miko 3[E] > Escoffier (Q) E > Qiqi E Q¹ > Sandrone combo
¹Use Qiqi Burst if she is C6.
Sample Rotation (Escoffier with Qiqi on 4pc TotM)
Yae Miko 3[E] > Qiqi E (Q)¹ > Escoffier (Q) E > Sandrone combo
¹Use Qiqi Burst if she is C6.
Sample Rotation (Nicole)
Nicole E > Yae Miko 3[E] > Qiqi E > Sandrone combo
Sample Rotation (C6 Beidou)
Yae Miko 3[E] > Qiqi E > Beidou EQ > Sandrone combo
Sample Rotation (C6 Diona)
Yae Miko 3[E] > Qiqi E > Diona hEQ > Sandrone combo

This is a competitive team that swaps out Qiqi for Escoffier. Escoffier can feed her Skill’s particles to Sandrone.
Sample Rotation
Nicole E > Yae Miko 3[E] > Escoffier (Q)¹ E > Sandrone combo
¹Escoffier can use her Burst for healing.

This is a viable team if you happen to have both C6 Beidou and C6 Diona but lack Yae Miko, Qiqi, and Odette. Sucrose or Xilonen shreds enemy Cryo RES and buffs the team’s EM.
Sample Rotation (Sucrose)
Beidou EQ > Diona hEQ > Sucrose ED N1 > Sandrone combo
Sample Rotation (Xilonen)
Beidou EQ > Diona hEQ > Xilonen E N2 > Sandrone combo

This team allows you to admire the strong friendship between Sandrone and Columbina. Moreover, it is a viable alternative if you lack Stellar-Conduct–specifc supports or the enemy scenario requires Lunar Reactions.
Sample Rotation
Yae Miko 3[E] > Columbina E > Ineffa E (Q)¹ > Sandrone combo
¹Burst whenever available.
Limited Roster Alternatives
These teams are meant for newer players whose limited roster prevents them from using the teams above; as such, the teams below result in lower damage output.

Alyosha provides steady off-field Electro application and Stellar-Conduct DMG% and ATK% buffs. He should hold 4pc Heart of the Furnace.
Charlotte and Diona provide additional defensive utility. Diona’s shield is especially helpful to avoid Sandrone from becoming interrupted during her Charged Attack. Sucrose should hold TTDS to further buff Sandrone.
Sample Rotation (Charlotte)
(Sandrone E)¹ > Alyosha EQ > Charlotte EQ > Sucrose ED N1 (Q) > Sandrone combo
¹First rotation only.
Sample Rotation (Diona)
(Sandrone E)¹ > Alyosha EQ > Diona hEQ > Sucrose ED N1 (Q) > Sandrone combo
¹First rotation only.
On-Field Stellar Swirl DPS

While Sandrone prefers Stellar-Conduct teams, she can still be played as an on-field Stellar Swirl DPS if you lack viable Electro teammate options (e.g. Yae Miko, C6 Beidou). Despite this, even C0 Alyosha Stellar-Conduct teams tend to perform better as of Version 7.0.
Sandrone cannot trigger Stellar Swirl herself, so her best artifact options are limited to 4pc Blizzard Strayer or 2pc + 2pc set combinations.
Example Teams
This is not a comprehensive list of teams. The inclusion or exclusion of any given team does not necessarily reflect its power level.

This is Sandrone’s best on-field Stellar Swirl team as of Version 7.0. It lags behind in terms of DPS compared to a team consisting of Odette, C0 Alyosha, and Qiqi. This team should become a more competitive option when C6R5 Cryo Traveler is available.
Sample Rotation
Odette 2[E] (Q) > Sucrose N1 ED (Q) > Traveler¹ E N1C Q > Sandrone C E > Sucrose N1 ED > Sandrone combo
¹Traveler should skip N1C Q on the first rotation.
Credits
Writer(s): irokei
Contributors: haafr, luke_260, not.logic, meow.jl, acerbus114, pulsar79, antiguaa, luwunae, Vesera
Team images made with the KQM portrait generator.