Written by jamie#9248
Updated for Version 4.1
Table of Contents
Introduction
Daughter of the Yashiro Commission’s Kamisato Clan, and the Shirasagi Himegimi. A character for whom some waited 2 years since the very first Closed Beta test, Ayaka was one of the very first characters ever shown and to ever be playable in Genshin Impact. Yet, it wouldn’t be until Version 2.0 that our patience would be rewarded and would we finally be able to have her. Some even saved up tens of thousands of Primogems in anticipation for the Princess’ release.
And her debut certainly lived up to expectations. Her breathtaking aesthetic, animations, and grace encapsulate her character perfectly. Playing through her story quest and experiencing that cutscene is with no doubt a memory every Genshin Impact player will look back on with fondness…
Gameplay and meta-wise, she immediately performed at the very highest level, helping players of all skill (and wallet) levels absolutely breeze through end-game content. Ayaka remains one of the most popular characters to this day, and shows no signs of letting up.
This guide will cover that aspect, and will help you learn and play Kamisato Ayaka to the best of your abilities.
“Master of Inazuma Kamisato Art Tachi Jutsu — Kamisato Ayaka, present!”
For those in a hurry, here’s a TL:DR from KQM (discord.gg/keqing):
Pros
- Has a fairly simple playstyle to learn and execute.
- Has strong bursting potential and frontloaded damage.
- Has good Energy generation.
- Doesn’t greed over field time, allowing for quick swap playstyles and compositions.
- Despite generally being restricted to Freeze / Mono Cryo compositions, she is highly versatile and flexible within that space.
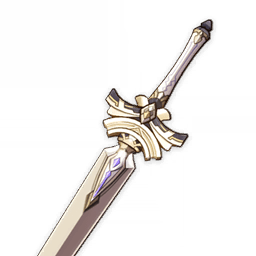
- Her best 4-star Swords, Finale of the Deep and Amenoma Kageuchi, are craftable weapons.
- Doesn’t need any unit to function; frees up plenty of meta supports for another team.
- Has synergy with an incredible number of prospective teammates.
- Has lots of Cryo Aura application, making her very favorable for content that requires Cryo as a shield breaking Element.
- Traverses the overworld very quickly.
- Is the Shirasagi Himegimi.
Cons
- The vast majority of her damage is coming from her Elemental Burst; by missing it, she’ll be left with very little to do.
- Requires good Energy management in order to avoid losing damage to build ER%.
- Limited Sword options at every rarity.
- Some of us were kept waiting for 2 years to play her since her initial showcase in the original summer 2019 Closed Beta Test 1
Character Overview
Talent Level Priority
Burst > Normal Attack > Skill
Don’t ignore any of Ayaka’s talents as her kit fully uses them all in combat. Leveling her to 90 is appreciated as it increases her Base ATK so she can make better use of the abundant ATK% buffs in her teams.
Talents
![]() Normal Attack | Kamisato Art: Kabuki
Normal Attack | Kamisato Art: Kabuki
Ayaka has a very beautiful attack string that pleases the samurai desires of many hearts, but the further you go into it, the less efficient it becomes. We’ll be going over her combos later on in the guide, but for now, let’s just go over her full Normal Attack string. Ayaka has a 5 hit combo, with the 4th & 5th strings being the coolest, but also the weakest ones. For the unaware, a string in a combo means the attack count; the 4th string would be the 4th attack.
Ayaka’s CA (Charged Attack) is a little more complex than your average unit, and the first of its kind. As such, we’ll be going over its mechanics now.
Mechanics
- A hitscan occurs for enemies in a radius around her after the NA before it is over.
- After selecting an enemy within the hitscan range, Ayaka will spawn a gadget that locks onto that enemy and follows them regardless of her regular range limitations.
- After a brief period, this gadget will stop following the enemy and do an additional 3 hitscans, one for each hit.
- A “cut” with a hitbox will be spawned for each enemy in range of the hitscans. This cut has a hitbox that can hit multiple enemies, but there is an ICD (internal cooldown) between each cut doing damage to the same enemy; this is to stop her cut from having quadratic scaling. If an enemy leaves the gadget’s range while it is still performing the hitscans, the enemy will not be affected by the remaining hitscans. Conversely, the remaining hitscans will affect any enemy that enters the gadget’s range even after it has started.
![]() Elemental Skill | Kamisato Art: Hyouka
Elemental Skill | Kamisato Art: Hyouka
Ayaka’s Elemental Skill is very straight forward. She creates a circle of ice around her that will launch smaller enemies into the air. This ability doesn’t have too long of an animation, but it can be shortened by dashing, which you’ll want to do for your combo’s sake anyway. This is her main source of Energy, creating 4-5 Particles per use, and you ideally want to fit in 2 uses of it in a rotation to drastically lower her ER% needs.
Despite being only a single application of Cryo, this is her strongest application at 2U worth of Cryo (double the normal Cryo strength; for more details on the meaning of 2U aura, please indoctrinate yourself with the teachings of the EGT: Elemental Gauge Theory over at https://library.keqingmains.com/).
 Elemental Burst | Kamisato Art: Soumetsu
Ayaka’s strongest technique. Her Elemental Burst is the main shareholder of her kit’s damage by a long shot, and is one of the strongest Elemental Bursts in the game as of the writing of this guide. This is what you absolutely cannot mess up. Ayaka’s Elemental Burst will unleash 19 cuts in a spherical AoE followed up by a final explosion.
This ability snapshots, meaning that its stats will be taken from the moment you cast it, rather than changing throughout its duration.
 Alternate Sprint | Kamisato Art: Senho
Ayaka is unlike most characters, with this trait shared only with Mona. Her normal sprint and dash are replaced with an alternate version, where she enters a frozen fog on the ground to gain great speed and the ability to run over water. Inside this form, Ayaka will not be immune to damage, but upon entering she will have normal i-frames similar to a standard dash. After exiting, she will apply Cryo to enemies hit and imbue her Sword with Cryo, allowing her Normal and Charged Attacks to deal Cryo damage for 5 seconds.
This sprint will be used regularly, and many team’s rotations will start with Ayaka dashing towards an enemy to apply Cryo.
 Ascension 1 Passive | Amatsumi Kunitsumi Sanctification
After casting her Elemental Skill, Normal / Charged Attacks will deal increased DMG for 6s. This passive is solid for Ayaka’s DPS. However, in most team compositions Ayaka does not necessarily want to stay on the field to fully make use of this buff, as refreshing other buffs and rotating the team will take priority. Nonetheless, still a strong boost when used.
 Ascension 4 Passive | Kanten Senmyou Blessing
This passive is extremely abuseable. Ayaka’s Alternate Sprint dash costs 10 stamina, meaning that if you keep hitting an enemy upon the exiting of her dash, it will not cost any stamina. Despite the wording, Ayaka does not have to apply Cryo with her dash, only hit an enemy. The reason this matters is because her dash, like the rest of her kit except for her E, uses standard ICD of 3 hits or 2.5 seconds (if you don’t understand what this means, you can read more on EGT: Elemental Gauge Theory over at https://library.keqingmains.com/). To reiterate, by managing to hit an enemy with the exit part of the dash, you can infinitely spam i-frames for safety if you need to stall for healing or are afraid of an enemy attack you don’t know the timing on how to avoid, but keep in mind that you can’t permanently stay inside the i-frames/become invincible, as there will be a window between the i-frames on the dash animation.
Non-combat tip: spamming this dash is an extremely effective and easy way to fill up your weekly Parametric Transformer meter for rewards.
Optimal Combos
Broadly speaking, Ayaka’s combo strings are mainly used to gap fill in rotations, meaning their primary purpose is to maintain damage whilst waiting for team cooldowns to recharge, refresh buffs/debuffs, and just generally rounding out rotations.
The DPS differences between the different combos are practically minimal; use what fits.
Alternatively, consult the Example Rotations in the Teams section of the guide to see use cases.
| N1C | Ayaka’s most inefficient combo in terms of stamina, however it is great for general AoE coverage and to attack lifted enemies trapped in Venti’s Burst. Also commonly used at the end of rotations, after casting her Skill whilst waiting to catch the Cryo Elemental Particles. |
| N2C | Ayaka’s primary combo with high damage potential. Recommended as the go-to combo to gap fill in between Elemental Skill usage. It is the most common combo used in rotations. |
| N3C | Ayaka’s 2nd best combo in terms of damage potential. Its DPS is similar to N2C, meaning it’s only really used if needing to fill slightly longer time in rotations. It also has better alignment with Xingqiu’s rainsword ICD, resulting in more rainsword triggers when using them together. |
| N4C | Although N4 is very cool looking and very flashy, it is generally less efficient than other options. However, it does have a use in higher Cryo application. Use this when trying to apply more Cryo to enemies. |
| Jump Cancels | Jump cancels are a perfectly fine alternative to dash cancels, but thanks to Ayaka’s A4, dashes have no stamina cost as long as your exit touches an enemy, making jumps have no benefit, and even opening the possibility of missing out on Cryo application, i-frames, and infusion duration. |
| N5 | As cool as Ayaka looks during her final dash, this combo is not in the least efficient, and should not be used for anything other than admiring her gracious movements in your free time. Not recommended. |
Constellations

Ayaka is an incredible unit at C0, and although her Constellations are strong, you don’t have to go out of your way for them. They’re not required to make her work and only give additional benefits, of which none make changes to her playstyle, just amplify her raw power.
Important Note: Take damage increase % with a grain of salt since they can differ depending on your exact team, gear and assumptions. Calculations made with a Ayaka-Kokomi-Shenhe-Kazuha team, which includes team buffs.
Full sheet with details can be found in the resources section.
 Constellation 1 | Snowswept Sakur
Gives Ayaka a chance to lower her Elemental Skill cooldown with every Normal and Charged Attack. Sadly this is almost a wasted constellation, as not only is its effect insignificant, but the time cut off from Elemental Skill does not change how many uses of it she gets in a rotation. Still, you may appreciate slightly faster Skill cooldowns for more fluid gameplay.
| Increase in damage from C0: 0% Total rotation damage increase from C0: 0% |
 Constellation 2 | Blizzard Blade Seki no To
Creates an additional 2 miniature storms on each side of Ayaka’s Elemental Burst, each dealing 20% damage of the original, this Constellation is good at dealing with split apart enemies and very significant vs most bosses, adding a huge chunk of additional damage and Cryo application. Nonetheless, it won’t perform as well (if at all) against medium/small sized enemies. Overall this is a good Constellation, but the mini storms have a lot of variation between being huge and doing nothing at all due to their hitbox and spread. (Additional note: the ministorms share ICD with the main one.) Potential stopping point for low-spenders.
| Elemental Burst damage increase: 0-40% Increase in full rotation damage from last Constellation: 0-27% (depends on how many C2 mini blades hit) Total rotation damage increase from C0: 0-27% |
 Constellation 3 | Frostbloom Kamifubuki
+3 Talent Levels to Ayaka’s Elemental Burst, a really good increase to her damage output. Nothing more to be said about it.
| Elemental Burst damage increase: 18%~ depending on Talent Level Increase in full rotation damage from last Constellation: 13.1% Total rotation damage increase from C0: 13.1-43.6% (depends on how many C2 mini blades hit) |
 Constellation 4 | Ebb and Flow
Ayaka’s most impactful Constellation. Defense shred is one of the hardest effects to find, and she has a very potent instance of it. It plays a large role not only to her own damage, but her teammates as well. Obviously, the team’s damage done before her Burst will not be increased.
| Increase in full rotation damage from last Constellation: 15.5% Total rotation damage increase from C0: 30.7-65.9% (depends on how many C2 mini blades hit) |
 Constellation 5 | Blossom Cloud Irutsuki
+3 Talent Levels to her Elemental Skill. A minor increase, in very few teams will Ayaka’s Elemental Skill be a significant part of her total output.
| Elemental Skill damage increase: 18%~ depending on Talent Level Increase in full rotation damage from last Constellation: 1.2% Total rotation damage increase from C0: 32.3-68% (depends on how many C2 mini blades hit) |
 Constellation 6 | Dance of Suigetsu
Gives Ayaka an additive DMG% bonus on 1 CA every 10 seconds. Due to it providing a huge DMG% bonus, this did get an indirect buff with the release of Shenhe, as it increases her Icy Quill output. It’s worth noting this as someone with this C6 is also likely to have Shenhe, even at C6 herself too. However this is still very expensive and therefore not recommended outside of collection purposes for high spenders.
| C6 buffed Charged Attack increase w/ Icy Quill: 100.5% (Shenhe w/ Favonius Lance and Talent Level 9 Elemental Skill) |
Increase in full rotation damage from last constellation (not factoring in Shenhe’s Icy Quills, only Ayaka’s personal output): 3.9%*
*Note: The standard rotation lines up so that only 1 CA combo will get buffed. However, players with C6 will be able to adjust their setups and rotations so they can get 2 sets of the buff. Importantly, this will also act as an additional “nuke” and a valuable tool to be adapted and used as needed, especially for speedrunning.
| Total rotation damage increase from C0 (not factoring in Shenhe’s Icy Quills, only Ayaka’s personal output): 37.5-74.6% (depends on how many C2 mini blades hit) |
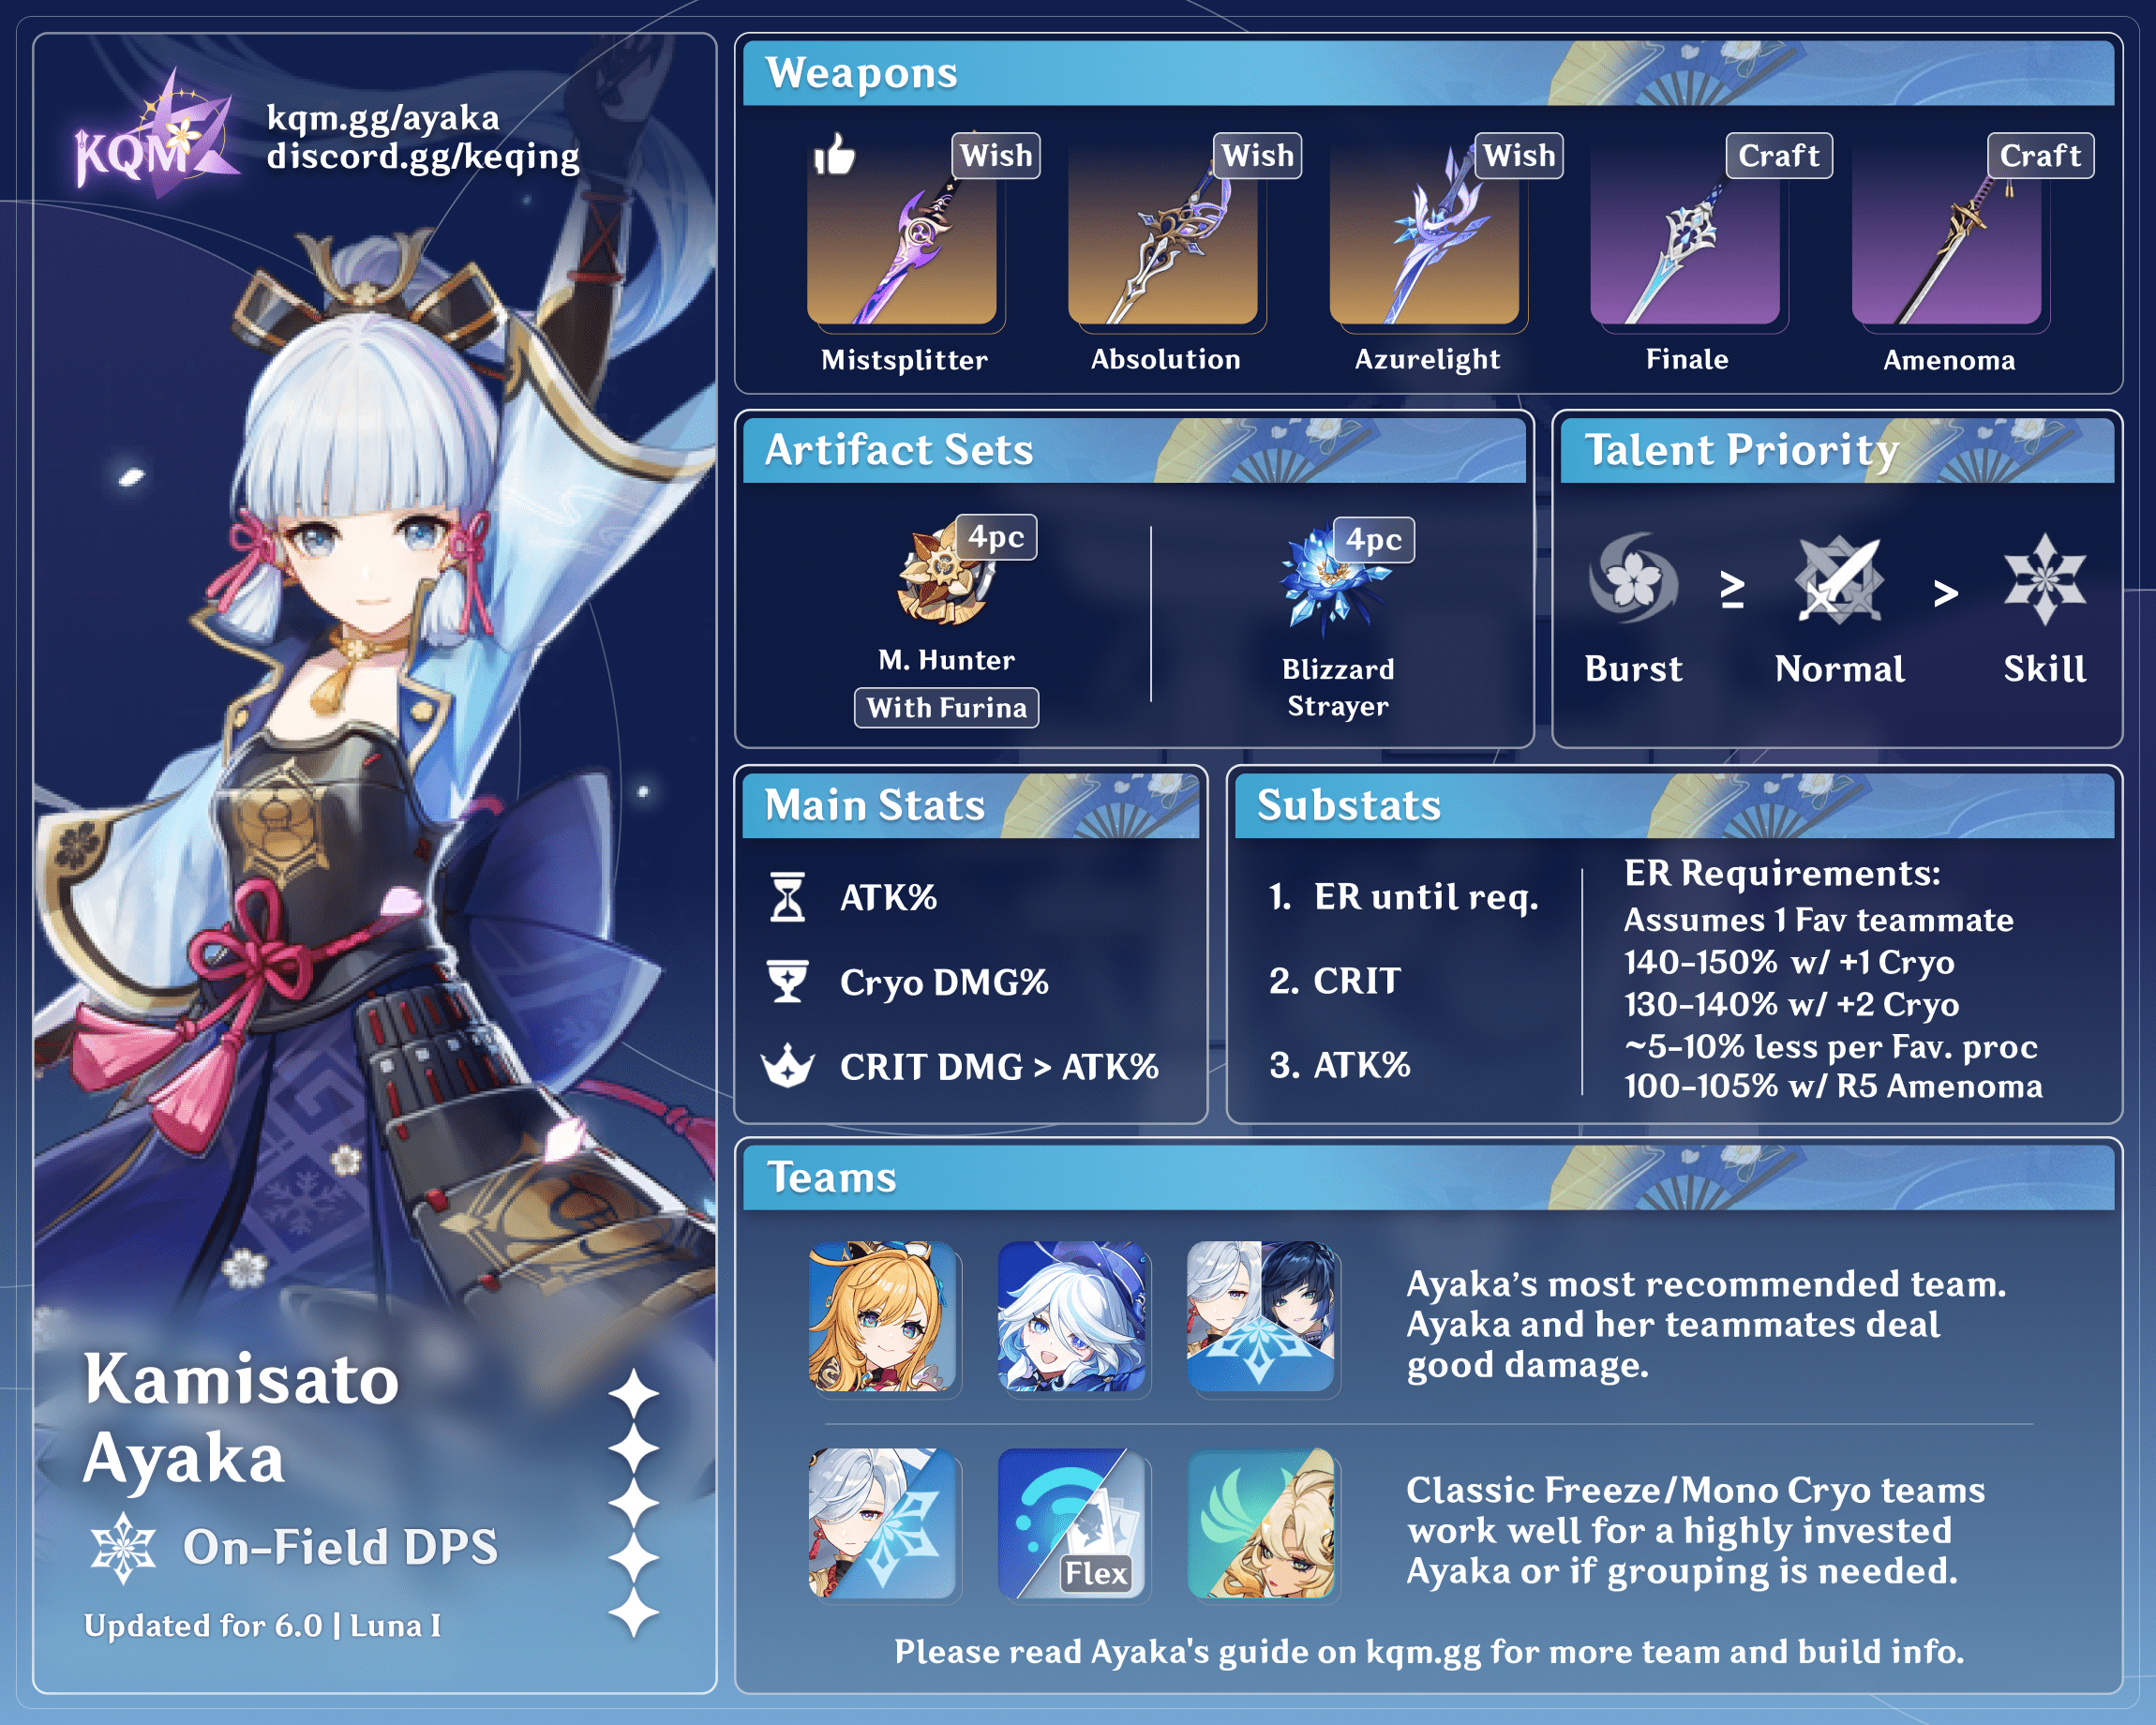
Artifacts

Artifact Stats
Sands | Goblet | Circlet |
| ATK% | Cryo DMG Bonus | CRIT DMG > ATK% |
Stat Priority: ER (until requirement) > CRIT DMG > ATK% ≥ CRIT Rate
As a general soft goal, aim for 140% ER for team flexibility, or 100-110% ER if using R5 Amenoma Kageuchi. For recommended ER in specific teams, see the Teams section for ballpark figures.
An ATK% Goblet can sometimes be a viable option over Cryo DMG% when using builds with high DMG% saturation, for example with Mistsplitter’s Reforged, Mona and Kazuha. ATK% Goblets are also more commonly dropped, and so they are more likely to have better substats.
For Ayaka’s Circlet, either CRIT DMG% or ATK% can give you the most optimal damage, accounting for multiple factors.
It is highly recommended to treat the following section as a general guideline. Ultimately, we recommend using the Genshin Optimizer to finalize your builds. In particular, it allows you to choose team buffs and can more accurately judge the correct balance between offensive stats for artifacts specific to your account. In case you need one, here’s a great tutorial for how to use Genshin Optimizer: Genshin Optimizer Tutorial Playlist.
Important: Do not forget to implement team buffs into Ayaka’s build, as well as enabling the Blizzard Strayer 4pc set effect; with the fully activated “Frozen” option for Freeze team optimization and the partially activated “Affected by Cryo” option for Mono Cryo team optimization.
Navigating the Genshin Optimizer and where to add Team Buffs and Blizzard Strayer options
Artifact Sets
Due to Ayaka’s reliance on her Elemental Burst and her standard ICDs making Melt not a reliable choice for her, there’s really only 1 option no matter how or where you use her, and that’s 4pc Blizzard Strayer.
 4pc Blizzard Strayer | Ayaka’s most common and recommended option. It’s her most optimal set in the majority of situations thanks to her condensed high count of Cryo aura application over a short period of time, which overtakes other enemy auras in the vast majority of situations. In Freeze teams, even mediocre artifacts can end up being your highest damaging options, mainly thanks to the sheer power of 40% CRIT Rate. Even in Mono Cryo compositions, the 20% CRIT Rate still holds serious stature and is often still enough to secure optimal set status. |
 2pc Mixed Sets | 2pc Bonuses: Cryo DMG Bonus, ATK%, Burst DMG Bonus The difference between a 4pc Blizzard Strayer and 2pc mixed sets is about 20% of Ayaka’s total damage. 4pc Blizzard Strayer gives such strong buffs that it’s very hard to have substats on 2pc mixed sets that overtake it in value. In the case of not having a good 4pc, you can use any 2pc combinations as a placeholder. Notably, a 2pc mixed set is likely to be your most effective option when using the Primordial Jade Cutter, which can have issues with over-capping on CRIT Rate when paired with 4pc Blizzard Strayer. |
Weapons
Calculations made with a Ayaka-Kokomi-Shenhe-Kazuha team, which includes team buffs.
Full Team = “Technically” Ayaka’s personal damage only
w/ 10 Icy Quills = Counting Shenhe’s Icy Quills damage as part of Ayaka’s damage. Icy Quills do not value ATK investment.
CRIT Rate weapons will perform relatively better in teams with worse Hydro appliers.
Full sheet with details can be found here.
Weapons that are not mentioned are not relevant enough and not recommended for consideration.
| Weapon | % of Amenoma Kageuchi (R1) | Description |
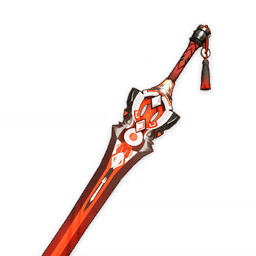
 Mistsplitter Reforged (R1) | CRIT DMG Circlet Full Team – 127.7% w/ 10 Icy Quills – 127.1% No Kazuha or Shenhe – 132.9% No TTDS / TotM – 120.6% ATK% Circlet Full Team – 123.4% w/ 10 Icy Quills – 120.4% No Kazuha or Shenhe – 128.5% No TTDS / TotM – 121.8% | Mistsplitter Reforged is Ayaka’s BiS (Best in Slot) and her signature weapon. She is able to fully utilize its passive. It has a high Base ATK so it scales well with team ATK% buffs. Although its passive will be less effective with teammates like Kazuha and Shenhe providing further DMG%, it still scales exceptionally well with Shenhe’s Icy Quills. ATK% Circlets will outperform CRIT DMG Circlets when lacking ATK team buffs and may be easier to farm, but can fall behind otherwise. Add a Normal Attack to your combo e.g. D -> N1 -> E -> Q to maximize this weapon’s value. |
 Haran Geppaku Futsu (R1) | Full Team – 114.7% w/ 10 Icy Quills – 113.4% No Kazuha or Shenhe – 116.7% No TTDS / TotM – 111.9% | Haran Geppaku Futsu is a great option, although it’s rare for players to have pulled this niche sword without also having an Ayato to wield it. It scales well with Ayaka in Freeze teams, mainly due to less of its power budget being put into CRIT Rate compared to Primordial Jade Cutter. The 12% Elemental DMG Bonus is useful, the Normal Attack buff less so. |
 Primordial Jade Cutter (R1) | Full Team – 113.4% w/ 10 Icy Quills – 111.6% No Kazuha or Shenhe – 113.5% No TTDS / TotM – 113.9% | Primordial Jade Cutter can make builds awkward since it provides a high amount of CRIT Rate stats which, when paired with 4pc Blizzard Strayer and Cryo Resonance, can lead to Ayaka overcapping on CRIT Rate. Additionally, the Flat ATK it provides from its passive does not scale particularly well with Shenhe’s Icy Quills. Nevertheless, it’s still a fantastic option even when slightly overcapping on CRIT Rate, and depending on the players artifact luck, may not even be an issue. |
 Light of Foliar Incision (R1) | Full Team – 113.3% w/ 10 Icy Quills – 114.2% No Kazuha or Shenhe – 113.3% No TTDS / TotM – 108.8% | Light of Foliar Incision is a great stat stick providing a lot of CRIT, although when building with this weapon, avoid oversaturating on CRIT DMG from artifact substats. A drawback is that most Ayaka builds have no desire to build EM for the weapon’s passive. Moreover, it doesn’t enhance Ayaka’s Burst or Charge Attacks, which are her main source of AoE and front-loaded damage. This can make the weapon less effective in practice. |
 Summit Shaper (R1) | Shielded Full Team – 115.0% w/ 10 Icy Quills – 112.1% No Kazuha or Shenhe – 115.2% No TTDS / TotM – 115.7% Not shielded Full Team – 111.3% w/ 10 Icy Quills – 108.9% No Kazuha or Shenhe – 111.4% No TTDS / TotM – 111.2% | Summit Shaper is a solid weapon for Ayaka especially if she’s shielded. Her Elemental Burst is unlikely to benefit from the passive fully as it usually snapshots the buff at low stacks. Additionally, a shielder may not always be common on Ayaka teams. Sadly when unshielded, its passive is significantly weaker. Although a shielder makes it much stronger for Ayaka, you have to consider if a shielder is worth bringing over something else that may benefit your team more. Due to the weapon’s solid Base ATK and Ayaka’s high craving for ATK% (like most Freeze-oriented characters), this weapon doesn’t really fall off too much with team buffs. However, it provides no stats that scale with Shenhe’s Icy Quills. Add a Normal Attack to your combo e.g. D -> N1 -> E -> Q to maximize this weapon’s value. |
 Finale of the Deep (R5) | Life Bond cleared Full Team – 110.9% w/ 10 Icy Quills – 108.6% No Kazuha or Shenhe – 111.0% No TTDS / TotM – 111.8% Life Bond not cleared Full Team – 103.3% w/ 10 Icy Quills – 102.0% No Kazuha or Shenhe – 103.3% No TTDS / TotM – 102.5% | Finale of the Deep is the recommended craftable weapon and Ayaka’s best 4-star weapon. Especially if fully refined, it just gives so much more ATK than Amenoma Kageuchi. It also utilises ATK% buffs better due to the higher Base ATK. To get the buff from its passive, Ayaka needs to be played with a strong healer who is able to clear the Bond of Life (e.g Kokomi, well built Diona). Furthermore, Ayaka cannot be properly healed either until this Bond of Life is cleared. Even if the Life Bond is not fully cleared, this weapon is still a great option for Ayaka. Learn more with in depth testing here. |
 Skyward Blade (R1) | Full Team – 104.1% w/ 10 Icy Quills – 103.6% No Kazuha or Shenhe – 104.5% No TTDS / TotM – 100.2% | Skyward Blade is a fine option for Ayaka. The ER it provides is essentially always overkill for a team’s needs but can be comfortable to have. It scales surprisingly well with great artifacts and team ATK% buffs that make use of its solid Base ATK. Otherwise, it can fall flat. The weapon’s passive procs do Physical damage and are usually weak. |
 Aquila Favonia (R1) | Full Team – 103.6% w/ 10 Icy Quills – 102.3% No Kazuha or Shenhe – 103.6% No TTDS / TotM – 100.0% | Aquila Favonia is also a fine option for Ayaka, provided she can still meet ER requirements. Its Physical DMG Bonus stat isn’t relevant at all and the passive isn’t really useful. However, it still has a high Base ATK which can get great returns from team ATK% buffs. It is harder to build around compared to Skyward Blade. |
 Amenoma Kageuchi | At R5 Full Team – 103.0% w/ 10 Icy Quills – 102.6% No Kazuha or Shenhe – 103.0% No TTDS / TotM – 103.7% At R1 Full Team – 100.0% w/ 10 Icy Quills – 100.0% No Kazuha or Shenhe – 100.0% No TTDS / TotM – 100.0% | Amenoma Kageuchi helps a ton with Ayaka’s ER needs, cutting down her ER requirements by ~40%. At R1, it is less efficient and only saves around ~20% ER. This weapon is outmatched by Finale of the Deep as the go-to, free 4 star weapon. Still, Amenoma Kageuchi can be easier to build for and can fit in more teams without needing strong healers. |
 Kagotsurube Isshin (R1) | Full Team – 101.7% w/ 10 Icy Quills- 100.6% No Kazuha or Shenhe – 102.3% No TTDS / TotM – 101.5% | Kagotsurube Isshin is given for free during the story and looks cool. It can be a viable 4-star weapon to use, for looks or to save on billet materials. Please note these % assume lots of ER substats, in comparison to Amenoma Kageuchi requiring little. Consider your own artifacts and judge accordingly. |
 The Black Sword | At R5 Full Team – 100.2% w/ 10 Icy Quills – 100.4% No Kazuha or Shenhe – 101.3% No TTDS / TotM – 97.8% At R1 Full Team – 98.4% w/ 10 Icy Quills – 98.7% No Kazuha or Shenhe – 98.9% No TTDS / TotM – 95.9% | The Black Sword is not recommended to get from the Battle Pass. Even for other sword users, this weapon is very niche in practice, despite having a seemingly strong passive. Regardless, if players already have it highly refined it’s still a viable option. |
 Harbinger of Dawn (R5) | Full Team – 98.6% w/ 10 Icy Quills – 100.6% No Kazuha or Shenhe – 98.6% No TTDS / TotM – 97.0% | Harbinger of Dawn requires not getting hit to maintain its passive. It has a low Base ATK which is unfavorable for Ayaka but provides a lot of CRIT stats in return which scale well with Shenhe’s Icy Quills. Use the craftable weapons instead if possible. |
 Blackcliff Longsword (R1-5) | Full Team – 98.3% w/ 10 Icy Quills – 99.2% No Kazuha or Shenhe – 98.2% No TTDS / TotM – 93.3% | Blackcliff Longsword is not recommended to use your Starglitter on. It faces 2 major flaws. First, its passive requires frequent kills to stack, meaning it does little if anything in the toughest content. Secondly, Ayaka’s Burst snapshots, meaning the first few rotations will have the bulk of Ayaka’s damage unbuffed, regardless of how many enemies end up being defeated. |
Master Ayaka’s Playstyle
Energy Management
Ayaka is a burst damage dealer, in both senses of the word. Her Elemental Burst will swiftly carry you to victory. Hence, the overarching goal of her teams is always the same:
- Set up as many enemies as possible to be hit by her Burst
- Buff her up and debuff the enemies as much as possible
- Unleash her Burst upon the land
- Profit
- Make sure you can do that all again as many times as required
It is highly recommended to learn how to properly distribute your Energy economically within the team. Knowing how to feed Ayaka Energy and knowing the timing for when team skills are off cooldown is essential. Build your teams around this.
Casting Rosaria’s Skill then immediately switching to Ayaka. Characters on the field receive more total Energy from particles.
Some teammates can supply additional Energy through Favonius or Sacrificial weapons. As long as these weapons aren’t heavily weakening an important damage dealer on your team, they can be greatly beneficial.
Generally popular teams will want 130-140% ER on Ayaka with a proper energy management, yet if you make mistakes, Ayaka will need to either diverge from usual rotations to keep charging energy or need 190%+ ER, which is a massive hit to her personal damage output and it means you are neglecting her. Try harder for your waifu’s happiness, you monster!
Actions
Ayaka has a general combo [dash > (N1 w/ Mistsplitter Reforged) > E > Q] that you will consistently strive for each time you prepare for a Burst. What happens after this is highly flexible and dependent on the team. She is one of those special characters who can be seen as both a high field time carry and a quick swap carry, however the lines get blurred.
Most commonly, Ayaka swaps out after her Burst to allow the team to reapply buffs/debuffs, then coming back into the fray to use her Normal/Charged Attacks and her Elemental Skill when its cooldown ends.
Skill before Burst, or after?
The answer depends on the team and situation; both can be fine. In teams with Ayaka as a high field time carry, notably w/ Xingqiu as an off-field DPS and high Normal/Charged Attack usage, it is preferred to use her Elemental Skill after Bursting, in order to maximize buffs from her Ascension 1 passive.
However in more commonly played teams with other Hydro supports or Mono Cryo variants, the reverse is generally recommended. This is because Ayaka is often swapped out shortly after bursting, in order to refresh team buffs/debuffs like Shenhe’s Skill and 4pc Viridescent Venerer. It’s important to refresh these effects as soon as possible rather than delaying them and potentially extending rotations resulting in lost damage. Since these effects must be immediately refreshed after Ayaka’s Burst, she doesn’t need the 6s worth of buffs and doesn’t need to risk not catching her own Cryo Energy Particles and affecting her Energy economy.
Note: In Speedruns, it can actually be common to just shorten Ayaka’s sequence entirely to just using Q/Burst right away, then using her Skill and Combos after. E.g. [Q > dash > E > N1C]
Shaving off these parts can be important to reaching her Burst window as fast as possible. Despite losing out on buffs, even more with a weapon like Mistsplitter’s Reforged, some enemies may have low enough HP to not survive regardless.
See Abyss Speedrun Showcases and/or the FAQ section to learn more.
Grouping
As mentioned before, Ayaka deals the majority of her damage through her Elemental Burst. The key to success is making sure she is hitting as many enemies as possible, with as many ticks of her Burst as possible.
The sequence of Rosaria > Kazuha > Kokomi neatly groups up frozen enemies in front of Ayaka
In addition to having synergy with Ayaka herself, many of her teammates have notable synergy with each other. It’s crucial to understand how different team mates interact with each other, as this can have an impact on how well enemies are set up for her. For example Kokomi will Freeze Cryo-inflicted enemies next to her, meaning Kazuha who can group enemies towards you can be smoother for her than Venti, who fires his vortex a few meters in front of his position. Many synergies between pairings will be covered in the following sections about team building.
Teambuilding
“Thank you for your guidance. With your assistance, I am gaining a more thorough understanding of my capabilities.”
– Feelings about Ascension: Building Up
※ Plan for the content in front of you
To make things clear, there is no answer to the question “what is Ayaka’s strongest team?”. What may perform perfectly in one scenario against one set of enemies may have its effectiveness neutered with even the smallest change in circumstances.
To understand each different puzzle piece’s own strengths and weaknesses, then build a diverse supporting cast to give Ayaka freedom to pick from is the end goal. Like all RPG teams that play around status conditions, Freeze in Genshin Impact is no exception. There will be content where it won’t work, and you don’t want to be in a position of temporarily benching Ayaka due to not having the coverage. Treat the eldest daughter of the Kamisato Clan right, and do your diligence to make her a winner in every contest.
※ Example considerations
Are you facing freezable enemies?
Definitely the most pertinent question to immediately consider upon building a team. Freeze naturally makes fights easier, as frozen enemies temporarily cannot fight back. It also makes grouping easier and smoother, creating seamless fights akin to a dance. Damage wise, higher crit rate from Blizzard Strayer is an instrumental part in cleaving through enemies. As such, a supporting cast of a cryo battery, anemo grouper and hydro applicator is the default composition for an Ayaka team.
Nonetheless, there are many important fights with enemies these days which aren’t freezable, presenting us with a roadblock which must be tackled from multiple angles.
Basic enemies with innate auras (e.g. Electro or Pyro slimes)
- Can still be grouped with Anemo CC, although with Venti enemies may be thrown into the air (compared to stuck frozen on the ground). This creates poor synergy with cryo teammates who cannot consistently hit in his Burst. Consider not using Rosaria or Kaeya.
- Venti’s elemental infusion via his Burst and therefore his energy refund will lose any consistency and therefore you may have to build higher energy on the cryo members or just subject yourself to potentially longer rotations.
Are the enemies able to be grouped?
Ungroupable enemies (Ruin Machines etc.) bring substantially more chaotic situations, and the control using standard setups can be noticeably less efficient. The comfort of grouping enemies with Venti or Kazuha, and freezing them in place with a hydro support before unleashing Ayaka’s Burst will therefore be inconsistent. Kazuha’s buffs/debuffs can still bring value, but consider replacing Venti with a 3rd cryo character.
Unfreezable and ungroupable bosses
The value of Anemo cc in these 1v1 encounters is essentially redundant, although these Anemo supports can still provide plenty of value to make the cut like Kazuha’s and Sucrose’s buffs. However, Venti’s value can be heavily diminished. Since these bosses are free to move around, the accuracy of his Burst is often questionable, which has repercussions on team damage and energy.
In this case, Hydro supports lose value, as without freeze and it’s accompanying effects, there is little synergy tying them and Ayaka together. Consider using Mono Cryo, which especially with Shenhe is designed specifically to combat against this.
Bosses with limited dmg window opportunities
Think PMA. It is invulnerable for moderate periods of a fight and therefore you only have brief opportunities to burst it down. Fortunately, this is Ayaka’s area of expertise. However, off-field dps characters like Ganyu who rely on consistent sustained icicles will lose value. During chaotic fights like this, you may find more success building the team purely around supporting Ayaka, with buffers like Kazuha and Shenhe making sure her quick Burst can cut through each phase.
※ Ultimately, play what you have
Even when freezing isn’t effective, that isn’t necessarily the writing on the wall for prospective hydro teammates. You still could have Mona or Kokomi fully geared, who can provide Ayaka ATK% buffs from TTDS, ToTM and Noblesse, debuffs from Omen, healing via Prototype Amber or Kokomi’s talents. Or, your Xingqiu can still provide solid damage as an off-field DPS and interruption resistance. Ultimately, whilst they will most certainly be less efficient than an alternative, you may not have invested in an alternative, and things can still be serviceable enough to “brute force” through the challenge despite the circumstances.
Teammates 101
This section will be a deep dive on the many potential characters you could field alongside Ayaka.
Cryo
Aside from speedrunning teams, Ayaka will always have at least 1 Cryo teammate, for battery purposes at the very least. Outside of that, roles and utility vary heavily depending on the unit. Use who you need.
 Shenhe Synergy: S (Freeze), S+ (Mono Cryo) | Main Role: Buffer/Debuffer Secondary Role: Off-Field DPS, Battery Weapon: 4★ Favonius Lance, 5★ Calamity Queller, 5★ Skyward Spine Artifact Set: 4pc Noblesse Oblige, 4pc Blizzard Strayer, 2pc ATK% Artifact Stats: ATK%/ER, Cryo DMG Bonus/ATK%, CRIT DMG/CRIT Rate/ATK% General ER ballpark: 180% (Freeze), 150% (Mono Cryo) Shenhe can be considered the premier Cryo support for Ayaka teams overall. Unlike other units who can take her slot who provide Energy, personal dps or defensive utility, Shenhe provides more buffs to Ayaka while still offering good amounts of energy. Shenhe’s damage from Icy Quills scales incredibly well with Ayaka due to both her high amount of DMG% and her high amount of Cryo damage hits. As such, teams with these two have no problem fully using allocated Icy Quills, even twice per rotation. Additionally, Shenhe has fantastic synergy with other common teammates. Notably, despite Diona’s main role as a shielder for Ayaka, with Shenhe she can deal respectable damage via Icy Quills. Kazuha even moreso, as not only can he proc Quills of his own, but will also buff the team with Cryo DMG% to further increase the Quill’s value. Nonetheless, it’s worth mentioning that Shenhe’s Quills are less effective against higher amounts of enemies. Past a certain enemy count (usually 3), substituting her with a teammate like Ganyu may provide higher overall damage output. However, these kinds of mob heavy encounters are getting less common in end game content, and such fights are typically easier and quicker to clear. In essence, the harder the content, the better Shenhe performs. Overall, Shenhe can be considered as an enhancement to Ayaka. Ayaka is naturally incredibly competent in the majority of end game content, but due to her (over)reliance on Freeze she is naturally fated to a performance dip against unfreezable enemies. Shenhe helps Ayaka shore up these weaknesses, bolstering her viability in these encounters, meaning that no longer does one have to consider benching Ayaka again. |
 Ganyu Synergy: A (Freeze), B (Mono Cryo) | Main Role: Off-Field DPS, On-Field DPS Secondary Role: Buffer, Battery Weapon: 4★ Prototype Crescent, 4★ Alley Hunter Artifact Set: 4pc Blizzard Strayer Artifact Stats: ATK%, Cryo DMG Bonus, CRIT DMG General ER ballpark: 100% (with Venti), 130% (without Venti) Most commonly played with a team core of Ayaka/Ganyu/Venti, Ganyu’s benefits are less about batterying and more about her Burst contributing to the blender of damage that this team creates. With a final teammate providing Hydro application for Freeze, this core is absolutely lethal in fights with high mob count. Ganyu is able to share field time with Ayaka, and is usually able to gap-fill with one or two Charged Attacks. Even though her purpose isn’t explicitly to provide Energy, Ganyu isn’t a bad battery, especially since she can cast her Skill every 10 seconds, with it exploding whilst Ayaka is on the field. She also provides a valuable teamwide 20% Cryo DMG Bonus. If you’re using Prototype Crescent against enemies that are able to be headshot, it’s advised to land one prior to using her Skill and Burst to snapshot the buff. Tough to consider valuable in Mono Cryo teams, given the composition is mainly played in single-target fights or fights with unfreezable and ungroupable enemies, meaning that in those scenarios her Burst’s performance is weaker. The toughest content is moving away from Ganyu/Venti’s strengths, meaning that she is seeing reduced play across the board in favor of teammates more focused on supporting Ayaka’s personal damage. |
 Diona Synergy: A- (Freeze), A+ (Mono Cryo) | Main Role: Battery, Shielder Secondary Role: Healer Weapon: 4★ Sacrificial Bow, 4★ Favonius Warbow Artifact Set: 4pc Noblesse Oblige Artifact Stats: HP%, HP%/Cryo DMG Bonus, HP%/CRIT Rate/CRIT DMG General ER ballpark: 155% (with her C1 or Venti) A very popular teammate for Ayaka, Diona can offer great battery utility with a Sacrificial Bow, a strong shield and some healing for solace. Perhaps still the most common choice for players of all skill levels. However one reason why Diona is losing favor in Freeze teams is that the Cryo teammate slot is full of off-field DPS candidates, whereas the Hydro applicator is generally the position that lacks damage, with the most popular choices, Kokomi and Mona, being generally built for their Hydro utility and buffing with little regard for their personal damage. As such, having 2 teammates that deal no damage is less than ideal, therefore players often look to fill this position with a more offensive Cryo support instead. Furthermore, a strong Cryo shield can often feel redundant in a Freeze team. Contrary to almost all other situations where she sees play, in Mono Cryo Diona can actually be built for damage, due to her strong synergy with Shenhe. With her Cryo DMG% ascension, a Cryo DMG% Goblet and a CRIT Rate/DMG Circlet, Diona has enough multipliers to deal relevant amounts of damage with the help of Shenhe’s Quills. This is most notable from the 5 paws via Diona’s Hold E, which can turn it from a wet noodle into a mini “nuke”. Due to Mono Cryo’s lack of Freeze, her shield can also see more value due to more frequent attacks from enemies. Her C6 will also provide high EM buffs to increase damage from Anemo characters, and in particular Kazuha can benefit from this EM to transfer even higher DMG% buffs to the team. However these buffs dynamically refresh with each new Swirl, depending on his EM at the time. This means ideally, just delay casting his Burst until after Ayaka’s Burst in rotations. More on this can be found in the Mono Cryo teams section. Ultimately, Diona can potentially deal respectable damage for the team. and combined with her typical utility makes her very viable in this composition. |
 Layla Synergy: A- (Freeze), A+ (Mono Cryo) | Main Role: Battery, Shielder Secondary Role: Minor Buffer (C4) Weapon: 3★ Harbinger of Dawn, 4★ Favonius Sword, 4★ Sacrificial Sword Artifact Set: 4pc Tenacity of the Millelith Artifact Stats: HP%, HP%/Cryo DMG Bonus, HP%/CRIT Rate/CRIT DMG General ER ballpark: 100-130% (Freeze), 100% (Mono Cryo at C2) An alternative to Diona. Her shield and some of her damage scale with HP, meaning leveling her to 90 is important. Layla’s Skill creates a shield which can be quite a bit stronger than Diona’s, and even more so at C1. At the cost of this, Layla is not able to heal although this is a fine tradeoff for Ayaka teams which hardly needed both in the first place. With an active shield, Layla creates frequent Cryo Particles for Energy over time. Although the overall amount generated won’t necessarily be as much as other Cryo supports could, this form of battery can be considered a QoL improvement as it may be less tedious than needing to constantly switch characters to funnel energy into Ayaka. Make sure Layla has sufficient HP stat investment for this shield though. If it breaks, she will stop generating Cryo Particles. With Harbinger of Dawn and proper artifact investment, her Burst is capable of contributing okay damage. This does theoretically make her a more offensive choice over Diona, but outside of Mono Cryo, her damage contribution is barely noticeable. Still it’s helpful, but due to the previously mentioned utilities it isn’t advised to sacrifice too many HP% stats for this damage. At C4, Layla is able to provide modest buffs to some of Ayaka’s Normal and Charge Attacks based on Layla’s Max HP. |
 Rosaria Synergy: A+ (Freeze), A (Mono Cryo) | Main Role: Off-Field DPS, Battery Secondary Role: Buffer Weapon: 4★ Favonius Lance, 4★ Wavebreaker’s Fin Artifact Set: 4pc Blizzard Strayer, 4pc Noblesse Oblige Artifact Stats: ATK%, Cryo DMG Bonus, CRIT Rate/CRIT DMG General ER ballpark: 140% (Freeze), 100% (with Favonius Lance at C4) Rosaria can be considered in teams where Diona or Layla’s defensive comfort is not needed when using supports like Kokomi or Mona w/ Prototype Amber as both can fulfill a similar role. Due to this, Rosaria sees common use, providing good team Energy while contributing good damage as an off-field DPS. Her C2 and C5 are very good upgrades. Her Elemental Skill’s ability to pursue targets and improve positioning is very underrated and brings unquantifiable quality. Rosaria has strong synergy with common teammates like Kokomi, Shenhe and Kazuha, due to the circular AoE of their abilities and Kazuha’s grouping abilities, which pull enemies towards him and keep these abilities hitting efficiently. She has noteworthy synergy with Favonius Lance, especially when R5, since it can empower her to generate high amounts of both Cryo and clear Particles every 6s, providing incredible utility for Ayaka. She can also buff the team with CRIT Rate from her A4 Talent. This will be less useful in Freeze compositions, where Ayaka has plenty of CRIT Rate. Nonetheless, her passive is still very appreciated, especially in Mono Cryo teams. Note that she will struggle to hit enemies, lifted by Venti’s Burst, consistently with her own Burst unless they are Frozen and dragging on the ground. |
 Kaeya Synergy: A- (Freeze), B (Mono Cryo) | Main Role: Off-Field DPS, Battery Secondary Role: Buffer Weapon: 3★ Harbinger of Dawn, 4★ Favonius Sword Artifact Set: 4pc Blizzard Strayer, 4pc Noblesse Oblige Artifact Stats: ATK%, Cryo DMG Bonus, CRIT Rate/CRIT DMG General ER ballpark: 140% Very similar in scope to Rosaria, except Kaeya has higher natural battery potential in Freeze teams thanks to his A4 Passive. A huge amount of 4-5 Elemental Particles, potentially every 6s if rotations allow it, is insane. However, it is easy to overkill on his ER needs thanks to his A4 Passive and high Energy generation. He can feel comfortable and efficient in more Normal and Charged Attack-focused Ayaka playstyles, especially alongside Xingqiu. While Kaeya at C0 has similar scalings on his Burst to a C2 Rosaria, and thus can potentially output higher damage in single-target, it lacks the AoE of Rosaria’s Burst, which is where Freeze teams are usually played. Thus, it can be unrealistic to use him to his full potential. Moreover, Rosaria’s Constellations, particularly her C2 and C5, are much more accessible as she can be obtained more easily through wishes. Kaeya’s Constellations are periodically available in the Starglitter Exchange but mostly only obtained through sheer luck on the Standard Banner. |
Anemo
Anemo units will predominantly provide grouping and debuffs via 4pc Viridescent Venerer.
 Kazuha Synergy: S (Freeze), S+ (Mono Cryo) | Main Role: Buffer/Debuffer Secondary Role: Grouper, Off-Field DPS Weapon: 4★ Favonius Sword, 4★ Iron Sting, 5★ Freedom-Sworn Artifact Set: 4pc Viridescent Venerer Artifact Stats: EM, EM, EM General ER ballpark: 170% Kazuha will generally have time to cast his Elemental Skill twice per rotation. This makes him the most consistent grouper due to his ability to do so regularly throughout fights. His grouping also pulls enemies towards him, and its circular nature has synergy with common Ayaka teammates, such as being able to pull enemies towards Rosaria or Shenhe’s Bursts. Kazuha’s value is less reliant on his grouping than Venti. This means that even if both characters’ grouping ability is diminished due to either ungroupable enemies or single-target fights, Kazuha still has his buffs, debuffs and even more consistent damage due to his Burst’s AoE range. He also has low reliance on his Burst in general. Although it is definitely preferable to be casting it when available (and you will generally build enough ER to use it every rotation). His Elemental Skill by itself does everything the team (and Ayaka) needs, including buffs, debuffs, grouping, Energy and damage. So in game, if for some reason Kazuha does not have enough Energy to use his Burst on demand, skip it. Kazuha also has special synergy with Mono Cryo compositions, being able to increase the entire party’s Cryo DMG% which improves Shenhe’s Icy Quill damage tremendously. He can also proc Quill damage himself with the Elemental Absorption from his Plunge and Burst. He takes more field time than his contemporaries, so it’s recommended to keep track of timings and cooldowns to prevent extending rotations and missing windows for teammates. Note that his plunge can trigger Shatter on Frozen targets, potentially undoing careful grouping. However, this is generally a minor issue that can be avoided by not Plunging but even if he triggers Shatter, it can deal okay damage due to his natural high EM investment. |
 Venti Synergy: S (Freeze), S (Mono Cryo) | Main Role: Grouper, Debuffer Secondary Role: Battery, Off-Field DPS Weapon: 4★ The Stringless, 4★ Favonius Warbow, 5★ Elegy of the End Artifact Set: 4pc Viridescent Venerer Artifact Stats: ER/EM/ATK%, EM/Anemo DMG Bonus, EM/CRIT Rate/CRIT DMG General ER ballpark: 160% Ayaka’s Elemental Burst, Elemental Skill and Charged Attacks can all reach inside Venti’s Elemental Burst, and the Energy refund from him helps a great deal as well. Additionally, Venti has high natural synergy with most of Ayaka’s popular teammates, particularly in Freeze teams. For example, he can proc Shenhe’s Quill damage himself with his Burst’s Elemental Absorption. It’s a very worthwhile consideration using Favonius Warbow on him, especially if Ayaka is not wielding an Amenoma Kageuchi. Even if it’s not highly refined, the additional Energy he can generate for the team will be much appreciated. Many recent enemies are unfreezable or highly resistant to grouping. This hits Venti the hardest, as not only does his primary asset get hampered, but if enemies can just walk out of his Burst, then his vortex no longer hits them. This not only neuters his damage, but since his Elemental Absorption does not immediately occur, this can also prevent his Energy refund too. As mentioned, Mono Cryo teams are often drafted against single-target fights. Regardless of which Anemo unit you bring, reduced scaling of Swirls means their damage contribution is drastically lowered. Combined with these fights not requiring grouping by nature, Venti’s key assets of strong grouping and great damage are pretty redundant in such scenarios. |
 Jean Synergy: C (Freeze), C+ (Mono Cryo) | Main Role: Healer, Debuffer Secondary Role: Weak Grouper Weapon: 4★ Amenoma Kageuchi, 4★ Festering Desire, 5★ Primordial Jade Cutter Artifact Set: 4pc Viridescent Venerer Artifact Stats: ER/ATK%, Anemo DMG Bonus, CRIT Rate/CRIT DMG General ER ballpark: 120% (with Amenoma Kageuchi), 170% (otherwise) Jean provides RES Shred via 4pc Viridescent Venerer, healing and weak crowd control. In Freeze teams, she is a rare pick, mainly due there being a plethora of other healing options for Ayaka to choose from. Healers who also fill the Cryo or Hydro slots enable the Anemo position for characters with more preferable grouping power and buffs. She can gain some more value in Mono Cryo compositions, due to it predominantly being played against bosses and single-target fights. In these teams she has less competition as a healer, and her Elemental Skill launching enemies away isn’t an issue when these enemies generally aren’t pushed around much. However, she is still not ideal in these teams due to her inability to trigger Shenhe’s Quills without infused Cryo damage. Her C2 can be useful. In combat, the ATK Speed buffs can help Ayaka slightly, and outside of combat the Movement Speed buffs can make her a fantastic duo with Ayaka allowing even faster traversing of the overworld. |
 Sucrose Synergy: A (Freeze), A (Mono Cryo) | Main Role: Grouper, Debuffer Secondary Role: Buffer, Healer (Prototype Amber) Weapon: 4★ Prototype Amber, 4★ Favonius Codex, 3★ Thrilling Tales of Dragon Slayers (TTDS) Artifact Set: 4pc Viridescent Venerer Artifact Stats: ER/EM, EM, EM General ER ballpark: 200% (with Prototype Amber) Effectively functions as a 4-star alternative to Kazuha, except her 20% Elemental DMG buff requires C6 and heavy investment into her ER to ensure frequent Bursts. Note she can still function just using her E, however it’s only advised if you lack the investment to do otherwise. No longer needing Energy can free her up to wield TTDS to buff Ayaka, however that role is often already taken by a Hydro support. She is more valuable in Mono Cryo teams where grouping isn’t needed and Cryo teammates aren’t Catalyst users. Uniquely, she can wield Prototype Amber and compresses key team roles of Anemo grouping and healing. This can allow more offensive oriented teammates. Additionally since she’s a Catalyst user, she can easily apply 4pc Viridescent Venerer’s RES Shred which helps when deviating from static rotations in actual gameplay. Her team-wide EM buffs are entirely wasted in Ayaka teams, however Sucrose should still build EM instead of offensive stats since Swirls are a higher proportion of her damage. CRIT Rate investment is needed if using Favonius Codex. She can proc Shenhe’s Quill damage herself with her Burst’s Elemental Absorption, though damage will be minimal as you are unlikely to have notable CRIT investment. C1, C2 and C6 are all good upgrades, since her role in Ayaka teams generally revolves heavily around her Burst. |
Hydro
Hydro units will predominantly provide Hydro application for freezing. Uptime and AoE of said application is valuable. Further utility beyond this is appreciated.
 Kokomi Synergy: S | Main Role: Good AoE Off-Field Hydro Applier, Healer Secondary Role: Buffer Weapon: 3★ Thrilling Tales of Dragon Slayers (TTDS) Artifact Set: 4pc Tenacity of the Millelith, 4pc Ocean-Hued Clam Artifact Stats: ER/HP%, HP%, Healing Bonus General ER ballpark: Burst generally unused Kokomi provides long lasting AoE off-field Hydro application using her Skill making her close to an ideal Hydro applicator for Ayaka. It lines up perfectly for Ayaka’s rotations and the AoE radius matches just right, overall making Kokomi a very comfortable option. She can hold TTDS and 4pc Tenacity of the Millelith to buff Ayaka. It is generally considered a DPS loss to cast Kokomi’s Elemental Burst to refresh her Hydro application. It is also very hard to get enough ER to cast it every rotation. However, it is definitely comfortable for more casual players who will enjoy potentially 100% Freeze uptime and the ease of fights. FAQ: Should I use Kokomi’s Burst? Use her Burst if: • It’s available, you’re fighting a stationary enemy, and you would appreciate longer Freeze uptime. It’s a perfectly valid reason to make fights easier. • You need emergency healing. Don’t use her Burst if: • You think it’s tedious to mentally keep track of the jellyfish’s duration timer. As her Elemental Skill doesn’t have a clear indicator for when it will disappear, it’s possible to be late in casting to refresh, and you’ll end up wasting her Burst. • You want to stick to smooth, seamless rotations. For people who care about efficiency, Kokomi’s Burst takes enough time where it might be interfering with refreshing buffs off-cooldown, Anemo absorption, generating Energy and mixing in Ayaka’s Normal/Charged Attacks. For various reasons it’s often a DPS loss. • Enemies are no longer next to the jellyfish. Her Burst only refreshes its duration at the current position. |
 Mona Synergy: S | Main Role: Poor AoE Off-Field Hydro Applier, Buffer Secondary Role: Healer (Prototype Amber) Weapon: 4★ Prototype Amber, 4★ Favonius Codex, 3★ Thrilling Tales of Dragon Slayers (TTDS) Artifact Set: 4pc Noblesse Oblige, 4pc Tenacity of the Millelith Artifact Stats: ER, Hydro DMG Bonus, CRIT Rate/CRIT DMG General ER ballpark: 240% (with TTDS and 1 Favonius weapon), 200% (with Prototype Amber) Mona’s Hydro application is very noticeably shorter and clunkier than Kokomi’s, but in reality she is still generally the second best option. Her Omen debuff gets extended during Freeze, making her a premiere buffer for Ayaka, creating an insane pairing for bursting down enemies. Contrary to popular belief, it is borderline impossible to build her for damage due to ER substats and Energy generating weapons taking top priority; she needs to Burst on demand every rotation. It is heavily advised to avoid attempting to build damage as lacking Energy to Burst in gameplay is the worst case scenario. Although TTDS is generally seen as the gold standard, Mona actually sees increasing use with Prototype Amber. Like Sucrose, this combines key team roles of Hydro application and healing and allows more offensive oriented teammates for a net gain. The icing on the cake is the weapon’s Energy generating passive which significantly helps Mona charge her Burst. Her Energy generation in practice can be even worse than expected, as it relies on her taunt exploding near enemies. Her setup time compared to Kokomi’s is much longer due to her Burst animation. |
 Ayato Synergy: A | Main Role: Good AoE Off-Field Hydro Applier Secondary Role: DPS Weapon: 4★ Amenoma Kageuchi Artifact Set: 4pc Emblem of Severed Fate, 4pc Blizzard Strayer Artifact Stats: ER/ATK%, Hydro DMG Bonus, CRIT Rate/CRIT DMG General ER ballpark: 155-190% (with Amenoma Kageuchi) Ayato is Ayaka’s brother. For some that’s a good enough reason to play them together by itself! His Burst provides long lasting AoE Hydro application and damage, further elevated with his on-field Hydro infused attacks. His Burst scales quadratically, allowing him to have great synergy with Venti, a common teammate of Ayaka. Despite his ability to contribute good damage, the tradeoffs can make him an underwhelming option in most situations. This is because with preferred supports like Kokomi and Mona, their power budget comes through greatly boosting Ayaka’s damage, without requiring much field time nor needing much personal damage contributed by themselves. Ayato however, will not be adding to Ayaka’s damage, rather will be contributing damage personally. He will want both high field time and buffs, in order to make this contribution significant but it’s usually less effective than buffing options. However, an advantage of this is shifting an Ayaka team to be less Burst focused. This benefit can be seen in multi-wave content. Normally Ayaka’s Burst damage can often be overkill, and even the end of its duration can be wasted with enemies already defeated. With Ayato, his sustained damage can be helpful vs new enemies spawning in. It’s recommended to use 1 Elemental Skill per rotation, otherwise Ayaka and the rest of the team will be losing too much DPS by not using their Bursts sooner. This can require building higher ER on Ayato, but Energy is easier gained in AoE multi-wave content, which is where the Ayato-Ayaka pairing excels more. |
 Xingqiu Synergy: A | Main Role: Good single-target Off-Field Hydro Applier Secondary Role: Off-Field DPS, Healer Weapon: 4★ Favonius Sword, 4★ Sacrificial Sword (R5), 5★ Primordial Jade Cutter Artifact Set: 4pc Emblem of Severed Fate Artifact Stats: ER/ATK%, Hydro DMG Bonus, CRIT Rate/CRIT DMG General ER ballpark: 190% The preferred Hydro applier for more Normal and Charged Attack-based Ayaka playstyles. Although a far less common playstyle (and generally less efficient), Xingqiu is substantially more accessible than the previous two characters and therefore less resourceful Ayaka players may have little choice but to try to make this synergy work. And it very much works. Although his sword rain attacks are primarily single-target with a small AoE, Xingqiu is really good at keeping enemies frozen, and Ayaka’s N3C combo gets decent value from his Burst, albeit not as much value as he gets in his other teams that perform consistent Normal Attacks. As Freeze teams are generally safer to play than the average team, it is not out of the ordinary to consider Xingqiu’s minute healing as sufficient for most content. |
 Yelan Synergy: A | Main Role: Good single-target Off-Field Hydro Applier Secondary Role: Off-Field DPS, Buffer Weapon: 4★ Favonius Warbow, 4★ Sacrificial Bow (R5) Artifact Set: 4pc Emblem of Severed Fate Artifact Stats: ER/HP%, Hydro DMG Bonus, CRIT Rate/CRIT DMG General ER ballpark: 210% (with Favonius Warbow), 175% (with Sacrificial Bow at R5) Will play similarly to Xingqiu, requiring regular Normal Attacks by Ayaka and her teammates in order to maintain Freeze uptime. However, unlike Xingqiu, she does not have orbitals to apply AoE Hydro, meaning without these Normal Attacks you will not be keeping enemies frozen. Her A4 Passive can provide a strong DMG% buff to Ayaka, which can heavily increase her Burst’s output. Use Yelan early in the team setup to allow this buff to ramp up close to its peak before using Ayaka’s Burst. The buff only applies to the active character, meaning Ayaka must remain on the field throughout her Burst’s duration to fully buff it. Overall, her synergy with Ayaka leaves much to be desired. Yet, if one can maintain constant Normal Attacks to keep enemies frozen, her DMG% buff is valuable. Most players who do have both Ayaka and Yelan generally prefer playing them on separate teams. |
 Barbara Synergy: B | Main Role: Poor AoE Off-Field Hydro Applier, Healer Secondary Role: Buffer Weapon: 3★ Thrilling Tales of Dragon Slayers (TTDS) Artifact Set: 4pc Ocean-Hued Clam Artifact Stats: ER, HP%, Healing Bonus General ER ballpark: Burst during an emergency Barbara is a free to play accessible alternative to the above characters. Most commonly would be used as a last resort if Xingqiu is required for another team and one has failed to acquire Mona or Kokomi. Like the others, she still compresses useful team roles of Hydro application and healing, meaning her inclusion can still have plenty of value even if things look dire. She can hold TTDS to buff Ayaka and she is incredibly accessible with low investment cost. Her Elemental Skill can have higher uptime with her C2 and A4 Talent. Her Burst is also a very solid emergency button for teamwide healing. Due to Ayaka’s proximity to enemies, you are able to somewhat make use of Barbara’s Hydro application, but it’s still very awkward in both use and cooldown. The Hydro application instances are few and far between with small range, therefore in gameplay enemies will be constantly unfrozen. She also applies Hydro to the on-field character frequently, notably making you very susceptible to being frozen yourself. How ironic. |
Teams
Rotation Notation
- N = Normal Attack
- C = Charged Attack
- A = Aimed Shot
- P = Plunging Attack
- E = Elemental Skill
- tE = Tap Skill
- hE = Hold Skill
- Q = Elemental Burst
- D = dash (cancel)
- J = jump (cancel)
- W = walk (cancel)
- > = switch character
- ( ) = these actions are optional; please refer to the notes below
- [ ] = repeat these actions the specified number of times
※ Freeze
Pros
- Frozen enemies cannot fight back consistently
- Enemies are easier to group to better facilitate focused AoE damage
- Gets stupendous value from Blizzard Strayer and its CRIT Rate buffs
- Ayaka is incredibly flexible with Freeze teammates and needs no more than the reaction itself to flourish. Success can be found with a hyper invested Ayaka and 3 undesirable supports
Cons
- Many of the best supports are 5-stars
- The hardest parts of current end game content are against unfreezable enemies
- Recent updates also trend towards enemies who are resistant to grouping. The harder it is to group, the faster cracks in Freeze playstyles start to show
Single Target: C-A
- Depends on Ayaka’s Burst. Grouping loses value and some teammates scale worse. Drops down to a C against unfreezable targets who survive the Burst window.
Low AoE: S
- Ayaka’s abilities have a great coverage for 2 targets within close proximity.
Medium AoE: C-S
- Fights against enemies spread apart play substantially different depending on how functional the grouping and Freeze consistency is.
Mobbing: S
- With proper setup and grouping, the team’s bursts become a blender.
Freeze compositions are Ayaka’s forte. The go-to in most situations thanks to the unrivaled crowd control, grouping they provide, as well as the huge CRIT Rate boost thanks to Blizzard Strayer. On top of all that, Freeze teams’ output can scale massively in performance when facing more and more enemies.
However, despite saying “most situations”, it is very apparent that the scenarios that don’t favor Freeze teams are becoming more and more common, especially in the hardest content. We are now frequently seeing ungroupable enemies, unfreezable enemies and more single-target fights.
Freeze Team New Player Mistakes/Tips!
Freeze Recommended Team #1
Team Description
- Use Prototype Amber on Mona. This lets her perform healing duties, keeps her Burst topped up with Energy and allows you to run the two supports who can increase Ayaka’s damage output the most. If able to play without healing, then Thrilling Tales of Dragon Slayers is ideal instead for further buffing Ayaka’s damage. This will also require more ER on Mona’s build.
- The second key note is not plunging with Kazuha whilst enemies are in a Frozen state. This is because Mona’s Hydro application has pretty low uptime, and Kazuha’s plunge will shatter right as her application ends. Any disruption can mess up Ayaka’s Burst’s CRIT Rate and potentially scatter grouped enemies.
Team Gearing
| Ayaka | Shenhe | Mona | Kazuha |
| Example Weapons: Amenoma Kageuchi Mistsplitter Reforged Artifacts: 4 Blizzard Strayer ATK/Cryo/CRIT ER% Ballpark: 105-125% R5-R1 AK 145% w/ Mistsplitter | Example Weapons: Favonius Lance Artifacts: 2 Glad/2 SR or 4 Noblesse Oblige ATK/ATK/ATK or ATK/ATK/CRIT ER% Ballpark: 180%, needs CRIT Rate for Fav Lance | Example Weapons: Prototype Amber TTDS Artifacts: 4 Noblesse Oblige or 4 Tenacity ER/Hydro/CRIT ER% Ballpark: 190% 230-240% w/TTDS | Example Weapons: Iron Sting Favonius Sword Artifacts: 4 Viridescent Venerer ER/EM/EM ER% Ballpark: 175% |
Example Rotation
Sample Rotation
(Ayaka D)1 > Kazuha tEPQ > Shenhe tEQ > Mona Q E > Ayaka D N1 EQ > Kazuha tE2 > Shenhe tE > Ayaka D 2[N2C] E
1First rotation only.
2Skip Kazuha’s Plunge.
Freeze Recommended Team #2
Team Description
- A more comfortable version of the above team, thanks to Kokomi’s increased healing and longer Hydro application. Her Skill should comfortably last long enough for Ayaka’s entire Burst duration, and Kazuha’s shatter will cause minimal disruption.
- Additionally, Kokomi allows for faster setups due to only needing her Elemental Skill.
- With all 4 character’s talent casts being centered around the character model, the team plays fluidly around one central Freeze AoE zone, and Kazuha’s E pulling enemies towards this area will maintain consistency.
- Kokomi will buff Ayaka’s Attack, Kazuha buffs her Cryo DMG% and reduces Cryo RES. The two buffing unique multipliers results in greater efficiency. Whilst Shenhe does intersect with her many utilities, her Icy Quills act as its own separate thing, and still benefits further with most ongoing buffs/debuffs. The overall diversity of the teams buffs/debuff coverage makes for little concern over diminishing returns.
- If you have all of the pieces, this team is highly recommended as the go-to team of choice for general content.
Team Gearing
| Ayaka | Shenhe | Kokomi | Kazuha |
| Example Weapons: Amenoma Kageuchi Mistsplitter Reforged Artifacts: 4 Blizzard Strayer ATK/Cryo/CRIT ER% Ballpark: 100-120% R5-R1 AK 140% w/ Mistsplitter | Example Weapons: Favonius Lance Artifacts: 4 Noblesse Oblige ATK/Cryo/CRIT or ATK/ATK/CRIT ER% Ballpark: 175%, needs CRIT Rate for Fav Lance | Example Weapons: TTDS Artifacts: 4 Tenacity of the Millelith HP/HP/Healing ER% Ballpark: Burst not necessary | Example Weapons: Iron Sting Favonius Sword Artifacts: 4 Viridescent Venerer ER/EM/EM ER% Ballpark: 170% |
Abyss Speedrun Showcase
Example Rotations
Example Rotation #1:
Sample Rotation
Shenhe Q tE > Kazuha tEPQ > Kokomi E > Ayaka D N1 EQ N2C > Shenhe tE > Ayaka D N2C > Kazuha tEP > Ayaka D N1 E N1C
Example Rotation #2:
Sample Rotation
(Ayaka D)1 > Kazuha tEPQ > Shenhe tEQ > Kokomi E > Ayaka D N1 EQ N2C > Kazuha tEP > Shenhe tE > Ayaka D N2C ED N3C
1First rotation only.
Freeze Recommended Team #3
Team Description
- A more accessible version of the Shenhe team, and Rosaria even uses the same gear as Shenhe except needing less ER. Whilst the team will have less power, Rosaria’s shorter Skill cooldown allows her to cast it three times per rotation, and with a refined Favonius Lance she will make the teams ER requirements, especially Ayaka’s, a lot more relaxed.
- As with the previous team, the player-centric casting of talents in this team also has great fluidity over the Freeze AoE zone. Also worth noting is how Rosaria’s Elemental Skill is also similar to Shenhe’s in how it also involves dashing forwards.
- Moreover, as previously mentioned Kazuha and Kokomi’s buffs do not overlap and instead buff unique multipliers for great efficiency.
- This team’s Extended Rotation is notably longer (approx. 23s) than others. Unfortunately this can’t be avoided if you want to utilize Rosaria’s short Skill cooldown and low ER requirements.
- The Alternate Rotation is shorter and has an incredible feel especially in AoE fights; it showcases Rosaria, Kazuha and Kokomi’s great synergy and why player-centric casting is so valuable.
- Rosaria Skill will position the player next to an enemy
- Saving Kazuha’s Skill for this moment will group surrounding enemies
- Whilst Kazuha’s still pulling in enemies, Kokomi will Freeze them on top of her, neatly grouping them for Ayaka’s Burst.
Team Gearing
| Ayaka | Rosaria | Kokomi | Kazuha |
| Example Weapons: Amenoma Kageuchi Mistsplitter Reforged Artifacts: 4 Blizzard Strayer ATK/Cryo/CRIT ER% Ballpark: 100% w/ AK 125% w/ Mistsplitter 140% w/ Mistsplitter in Alternate Rotation | Example Weapons: Favonius Lance Artifacts: 4 Noblesse Oblige ATK/Cryo/CRIT ER% Ballpark: 100%, needs CRIT Rate for Fav Lance | Example Weapons: TTDS Artifacts: 4 Tenacity of the Millelith HP/HP/Healing ER% Ballpark: Burst not necessary | Example Weapons: Iron Sting Favonius Sword Artifacts: 4 Viridescent Venerer ER/EM/EM ER% Ballpark: 170% |
Example Rotations
Example Rotation Video:
Extended Rotation
(Ayaka D)1 > Kazuha tEPQ > Rosaria EQ > Kokomi E > Ayaka D N1 EQ > Rosaria E > Kazuha tEP > Ayaka D 3[N1C] > Rosaria E > Ayaka ED N1C
1First rotation only.
Alternate Rotation
(Ayaka D)1 > Kazuha Q > Rosaria EQ > Kazuha tEP > Kokomi E > Ayaka D N1 EQ > Kazuha tEP > Rosaria E > Ayaka D 2[N2C] E N1C
1First rotation only.
Freeze Recommended Team #4
Team Description
- Ayaka’s version of the Morgana team. A very popular lineup for quickly clearing through high enemy count content with easily groupable enemies.
- All these supports are the opposite of player centric casting. Diona, Mona and Venti’s talents are aimed ahead of the player. This is why they have natural synergy with Ganyu. Fortunately, since Ayaka has to dash towards enemies and aim her Burst, this lineup still functions well and does not feel anti-synergistic. (Note: these issues only become apparent when mixing the two styles of supports)
Team Gearing
| Ayaka | Diona | Mona | Venti |
| Example Weapons: Amenoma Kageuchi Mistsplitter Reforged Artifacts: 4 Blizzard Strayer ATK/Cryo/CRIT ER% Ballpark: 100% w/ AK 130% w/ Mistsplitter 120% w/ Diona using R4+ Sac Bow | Example Weapons: Sacrificial Bow Favonius Warbow Artifacts: 4 Noblesse Oblige ER/HP/HP ER% Ballpark: 155% | Example Weapons: TTDS Artifacts: 4 Tenacity of the Millelith ER/Hydro/CRIT ER% Ballpark: 240% | Example Weapons: The Stringless Favonius Warbow Artifacts: 4 Viridescent Venerer ER/EM/EM ER% Ballpark: 160% |
Example Rotation
Sample Rotation
Diona tEQ > Venti EQ > Mona Q E > Ayaka D N1 EQ > Venti E > Mona N3 > Diona hE > Ayaka D N2C E N1C
Freeze Recommended Team #5
Team Description
- One of the most popular choices. Not necessarily due to strength, but rather because of how both Diona and Mona are not limited and so (despite still using three 5-star characters), in a way this ends up being one of the more accessible lineups.
- Diona’s defensive utility, whilst often put down for being overkill in Freeze teams, offers great comfort for the vast majority of the playerbase. She will also help players more easily run TTDS on Mona, and although the ER requirements for her to be consistent with it are daunting, the weapon will still help bring this team closer to the more offensively orientated lineups in damage potential.
- If using 5-star weapons on Ayaka, this lineup is questionable without a highly refined Sacrificial Bow, since Ayaka’s ER requirements can skyrocket without Venti’s Energy refund.
- Kazuha also extends rotations due to his higher field time than Venti, and there’s not many ways this team can work around that…
Team Gearing
| Ayaka | Diona | Mona | Kazuha |
| Example Weapons: Amenoma Kageuchi Mistsplitter Reforged Artifacts: 4 Blizzard Strayer ATK/Cryo/CRIT ER% Ballpark: Assuming Diona w/ R4+ Sac Bow 100% w/ AK 145% w/ Mistsplitter | Example Weapons: Sacrificial Bow Favonius Warbow Artifacts: 4 Noblesse Oblige ER/HP/HP ER% Ballpark: 155% w/ Sac Bow and C1 185% at C0 | Example Weapons: TTDS Artifacts: 4 Tenacity of the Millelith ER/Hydro/CRIT ER% Ballpark: 240% | Example Weapons: Iron Sting Favonius Sword Artifacts: 4 Viridescent Venerer ER/EM/EM ER% Ballpark: 180% |
Example Rotation
Sample Rotation
Diona tEQ > Kazuha tEPQ > Mona Q E > Ayaka D N1 EQ > Kazuha tE1 > Diona hE > Ayaka D 2[N2C] E N1C
Freeze Recommended Team #6
Team Description
- These pairings may seem questionable at a glance, considering Shenhe scales better with low amounts of enemies whereas Venti is the opposite. However Shenhe is still the premier Cryo support for 1-2 targets, and Venti can still find great success in low AoE ecounters if they are groupable. His Energy refund capabilities are also very useful in this team keeping Ayaka and Shenhe in more comfortable positions as far as Energy goes.
- Venti will be able to trigger Shenhe’s Quills with Cryo absorption in his Burst. If enemies are groupable this is relatively easy to achieve. Venti also benefits from being more viable for a CRIT Build as opposed to Kazuha.
- On a side note, this lineup can open up both Kazuha and Bennett for a second Abyss team, potentially giving net gains on overall Abyss performance.
Team Gearing
| Ayaka | Shenhe | Mona | Venti |
| Example Weapons: Amenoma Kageuchi Mistsplitter Reforged Artifacts: 4 Blizzard Strayer ATK/Cryo/CRIT ER% Ballpark: 100% w/ AK 125% w/ Mistsplitter | Example Weapons: Favonius Lance Artifacts: 2 Glad/2 SR or 4 Noblesse Oblige ATK/ATK/ATK or ATK/ATK/CRIT ER% Ballpark: 160%, needs Crit Rate for Fav Lance | Example Weapons: Prototype Amber TTDS Artifacts: 4 Noblesse Oblige or 4 Tenacity ER/Hydro/CRIT ER% Ballpark: 190% 230-240% w/TTDS | Example Weapons: The Stringless Favonius Warbow Artifacts: 4 Viridescent Venerer ER/EM/EM or EM/EM/CRIT ER% Ballpark: 145% |
Example Rotation
Sample Rotation
Shenhe Q tE > Venti EQ > Mona Q E > Ayaka D N1 EQ N1 > Shenhe tE > Venti E > Ayaka D 2[N2C] N2D E N3
Freeze Recommended Team #7
Team Description
- A dominant team against 3+ enemies and general mobbing fights where enemies are both groupable and freezable. Both Mona and Kokomi are frequently used and very interchangeable, and realistically other less than ideal Hydro supports can work too as we will have the core trio doing the heavy lifting.
- Notably, Kokomi takes less field time than Mona, and when playing optimally can allow for faster rotations or space for Ayaka to do an extra N1C. Mona works well with Prototype Amber, TTDS is pretty overkill and wont buff Ganyu either.
- Ganyu optimally will perform a “dual carry” role and dish out a few Charged attacks. Although it can be more comfortable to just use her as an off-field DPS and just spending that time instead on Ayaka, potentially Ganyu E > Ayaka Dash + 2N2C + Dash + E + N1C >
- As expected by now, the composition does fall off in bossing fights, with Ganyu and Venti losing much value in single-target fights, and with Venti’s Burst bringing less to the table and even potentially missing altogether.
Team Gearing
| Ayaka | Ganyu | Mona / Kokomi | Venti |
| Example Weapons: Amenoma Kageuchi Mistsplitter Reforged Artifacts: 4 Blizzard Strayer ATK/Cryo/CRIT ER% Ballpark: 100% w/ AK 120% w/ Mistsplitter | Example Weapons: Prototype Crescent Alley Hunter Artifacts: 4 Blizzard Strayer ATK/Cryo/CRIT ER% Ballpark: 100% | Example Weapons: Kokomi -> TTDS Mona -> P. Amber Artifacts: 4 Tenacity of the Millelith Kokomi -> HP/HP/Healing Mona -> ER/Hydro/CRIT ER% Ballpark: Kokomi -> Burst not necessary Mona -> 200% | Example Weapons: The Stringless Favonius Warbow Artifacts: 4 Viridescent Venerer ER/EM/EM ER% Ballpark: 160% |
Example Rotations
Sample Rotation (Kokomi)
Ganyu Q E > Venti EQ > Kokomi E > Ayaka D N1 EQ > Venti E > Ganyu E 2[C] > Ayaka D N1 E N1C
Sample Rotation (Mona)
Ganyu Q E > Venti EQ > Mona Q E > Ayaka D N1 EQ > Venti E > Ganyu E 2[C] > Ayaka D N1 E
※ Mono Cryo

Pros
- Covers scenarios where Freeze compositions lose value.
- Improved single-target damage, which is often the hardest parts of end game content
- Still benefits from buffs like Blizzard Strayer, albeit to a lesser extent.
- Better team Cryo Particle generation; worth noting as single-target fights naturally provide less free Energy from enemy drops.
Cons
- Shenhe isn’t mandatory but is very instrumental in the team’s makeup. Not everybody has her.
- Blizzard Strayer, although often the best performing set, does immediately lose out on 20% CRIT Rate due to the loss of Freeze. This can unbalance the strength of your existing artifacts built for Freeze.
- Shenhe’s Icy Quills have less value the more enemies you are facing, and similarly the more enemies you face the more difficult fights can be without Freeze.
Single Target: S
- No longer relying on freeze and grouping to scale damage, in addition to Shenhe’s Quills gaining maximum efficiency against one enemy makes Mono Cryo very potent in single-target situations.
Low AoE: S
- Ayaka’s abilities have a great coverage for 2 targets within close proximity. Shenhe is still her optimal Cryo support despite Quills being spread thin.
Medium AoE: B
- With more enemies and no Hydro application, the implications behind losing Freeze will show.
Mobbing: B
- The teams can certainly still overpower mobbing situations through sheer damage but Icy Quills lose a lot of value. Also, most mobs are still groupable even if not freezable.
Do I need Shenhe to play Mono Cryo?
No. As explained throughout the guide, Freeze teams generally lose a ton of value in situations which favor Mono Cryo anyway. Whether your roster contains her or not, things like Venti’s grouping and overall accuracy will be ineffective in boss fights. So you will be considering substituting him with someone more favorable to the situation at hand regardless.
Having said that, Shenhe is pretty much tailor-made for stacking Cryo teammates, and therefore she is very much recommended.
Mono Recommended Team #1
Team Description
- The most popular Mono Cryo variant with high synergy amongst the cast.
- Diona will be built for some damage. Note she does not need ATK% investment. With Cryo DMG% ascension, Cryo DMG% goblet and a CRIT Rate/DMG circlet, Diona has enough multipliers to deal relevant amounts of damage from Shenhe’s quills. This is most notable from the 5 paws via Diona’s Hold E, which can go from a wet noodle into a mini “nuke”.
- Her shield (albeit weaker due to less HP% substats) can also see more value due to the more hostile environments this lineup will be played in.
- Shenhe should be free to run 4pc Blizzard Strayer in this lineup, with Diona taking Noblesse Oblige duties. This can increase her personal damage and/or make Favonius Lance’s energy generation more consistent.
- Kazuha will boost the entire party’s Cryo DMG% which increases Shenhe’s Icy Quill output tremendously. He can also proc Quill damage himself with Elemental Absorption via Plunge and Burst.
- Note that Example Rotation #1 does a dash cancel on Ayaka’s E. For most teams and rotations this is generally an unnecessary level of optimization, however here it helps extend her Cryo infusion long enough for a following N3C combo. This is something you can consider and experiment with in other lineups. For a more relaxed experience, the standard input sequence with an N2C after Q will be perfectly fine.
- With C6 Diona, you can use Example Rotation #2 as a guideline instead. In addition to a faster setup time, delaying Kazuha’s Burst allows him to transfer his DMG buff to Ayaka’s Burst with an extra 8% from the 200EM via Diona’s C6. Since Kazuha’s A4 buff refreshes every Swirl, you otherwise normally lose this extra 200EM. Evidence: Diona C6 and Kazuha Passive interaction.
Team Gearing
| Ayaka | Shenhe | Diona | Kazuha |
| Example Weapons: Amenoma Kageuchi Mistsplitter Reforged Artifacts: 4 Blizzard Strayer ATK/Cryo/CRIT ER% Ballpark: Assuming Diona w/ R4+ Sac Bow 100% w/ AK 125% w/ Mistsplitter | Example Weapons: Favonius Lance Calamity Queller Artifacts: 4 Blizzard Strayer ATK/Cryo/ATK or ER/Cryo/ATK ER% Ballpark: 155% w/ CQ 145% w/ Fav Lance | Example Weapons: Sacrificial Bow Artifacts: 4 Noblesse Oblige HP/Cryo/CRIT ER% Ballpark: 155% w/ Sac Bow and C1 185% at C0 | Example Weapons: Iron Sting Favonius Sword Artifacts: 4 Viridescent Venerer ER/EM/EM ER% Ballpark: 175% |
Example Rotations
Example Rotation #1 (C0 – C5 Diona)
Sample Rotation
Diona tEQ > Kazuha tEPQ > Shenhe tEQ > Ayaka D N1 EDQ N3C > Kazuha tEP > Shenhe tE > Diona hE > Ayaka D N1 E N1C
Example Rotation #2 (C6 Diona)
Sample Rotation
Diona tEQ > Kazuha tEP > Shenhe tEQ > Ayaka D N1 EQ N1C > Kazuha Q tEP > Shenhe tE > Diona hE > Ayaka D N1 E N2C
Mono Recommended Team #2
Team Description
- Essentially a scuffed version of the previous team. Sucrose and Jean are viable choices, but with Kazuha missing, Rosaria feels like more value than Diona by making up for damage lost.
- C6 Sucrose w/ Prototype Amber can feel better in AoE to play than Jean here, since:
- She can actually trigger Icy Quills
- Her C6 can buff the party for Cryo DMG%
- Her grouping is a lot more beneficial to her teammates who appreciate enemies being pulled towards their Bursts
- When fighting bosses, Sucrose’s grouping isn’t useful and relying on Prototype Amber’s healing can be too ambitious. Even if Jean cannot contribute much damage wise, she provides much appreciated comfort with her party wide healing.
- To take advantage of her short 6s Skill cooldown, we can also equip her with a highly refined Favonius Sword, allowing her to help party members by reducing their ER needs and allowing them to focus more investment into damage.
Gameplay Example
※ Mono Cryo (With Bennett)
Example Team #1
Team Description
- One of the more popular speedrunning Ayaka teams, particularly with cycles featuring bosses.
- This is not a Melt team, this is Mono Cryo boosted with Bennett’s buffs.
- If Bennett is C6, it can be awkward using Ayaka’s Pyro infused Basic attacks. Fortunately, because the team is so focused on powering up Ayaka’s Burst, after it’s activation most of the time should be spent reapplying buffs and batterying the team.
- Whilst reapplying buffs and batterying, Shenhe standing in Bennett’s Buff circle will temporarily spike the power of her Icy Quills. This is even more impactful with Shenhe’s C1, justifying the field time with recasting two sets of her Icy Quills.
- Since this is a speedrunning-esque team, adaptable setups are more important than following rotations to a tee. Casting Kazuha’s Burst isn’t crucial for the fastest setups, but it will contribute solid damage. It is important to cast it before using Bennett’s Burst, in order to not absorb pyro. Not only will cryo absorption benefit from Shenhe’s Quills, but it will be easier to maintain Cryo application on the enemy, allowing Ayaka to benefit from Cryo Res and her Blizzard Strayer artifacts. Alternatively, re-gear Ayaka’s artifacts for different sets and higher Crit Rate.
Team Setups
(judge accordingly and add or remove parts to adapt to each fight as necessary)
Example Setup #1:
Shenhe tEQ > Kazuha Q > Bennett Q > Ayaka D N1 Q E
Example Setup #2:
Bennett Q > Shenhe tEQ > Kazuha hEP > Ayaka D N1 Q E
Refresh Buffs + Regenerate Energy
Kazuha tEP > Shenhe hE > Ayaka field time
Gameplay Examples
FAQ
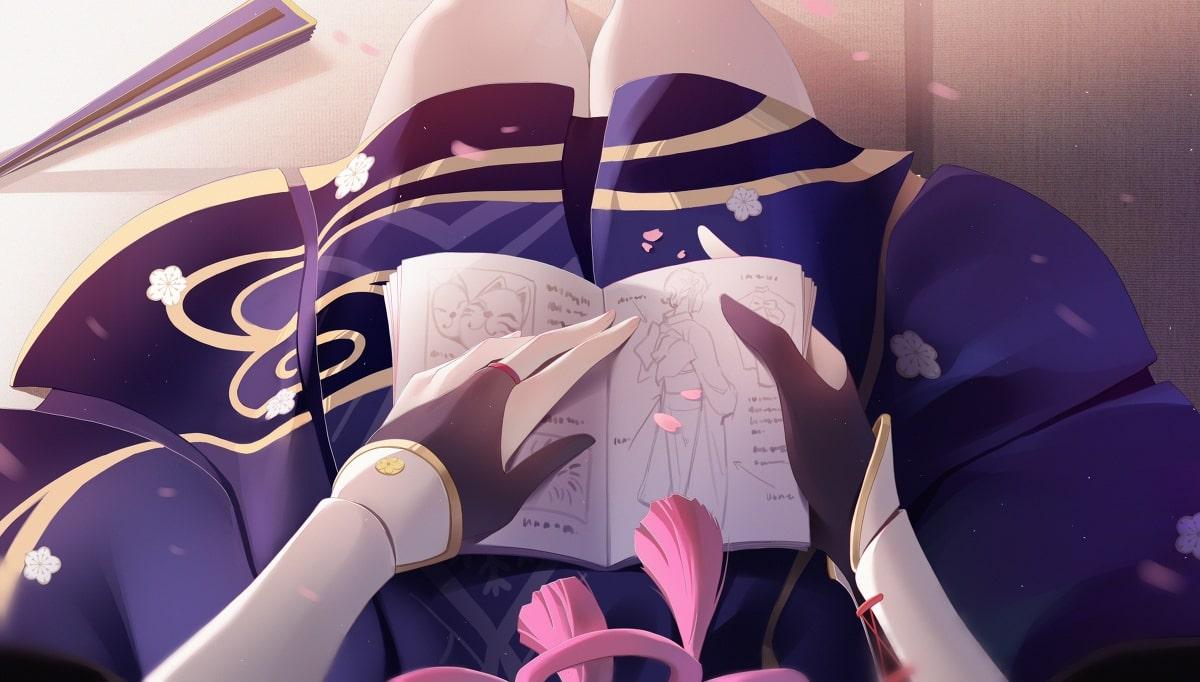
How important is Kokomi’s Burst?
Already covered. See Kokomi’s section in Teammates 101.
Upgrade/Investment Path?
For example, it can be common for players to be starting with a team like these:
How should they prioritise investments? Here are some suggestions (Warning: this topic is obviously a subjective opinion, and naturally is less relevant than the order these things actually rerun in the future)
Without Mona: Mistsplitter’s Reforged > Kazuha > Kokomi > Shenhe
With Mona: Mistsplitter’s Reforged > Kazuha > Shenhe > Kokomi
Luxury Pickups: Shenhe’s C1, Ayaka’s C2, Venti, Freedom Sworn (for Kazuha)
Note: The order of these placings were not based purely on mathematics or DPS.
How critical is it to learn the Example Rotations?
It’s not that important. However it is helpful to study why moves are placed in the orders they are, and which parts are crucial to the success of a team. If those are understood, rotations can be just used as guidelines. In fact, many things can be tweaked and cut in practical application to play even more effectively.
One example is to shave off early parts of a rotation in order to setup for Ayaka’s Burst as fast as possible. Often, things like Kazuha’s Burst can be skipped, and even Ayaka’s Dash + N1 + E can be completely cut. Despite losing out on buffs, even more with a weapon like Mistsplitter’s Reforged, some enemies may have low enough HP to not survive regardless.
Closing Words
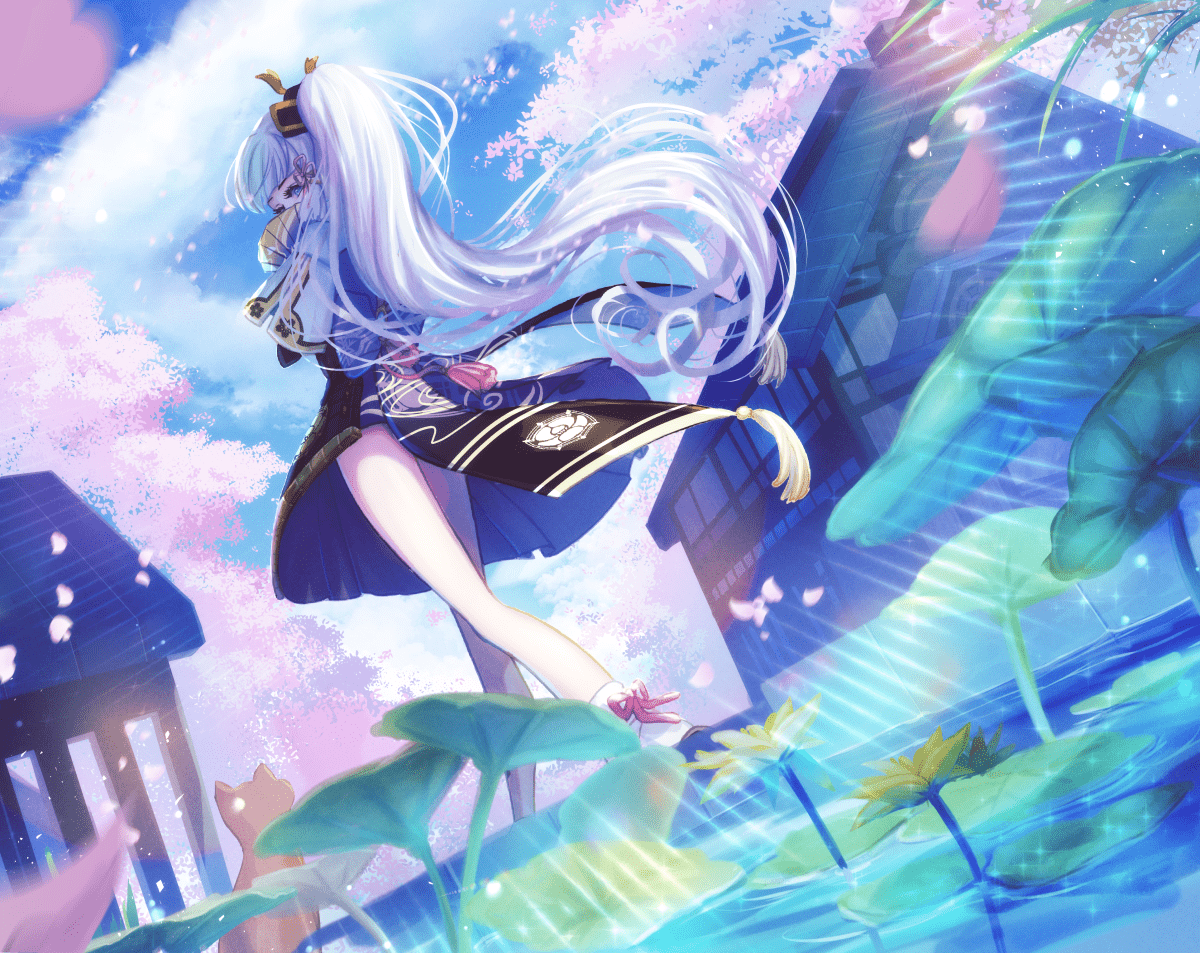
“Thank you very much. It has been richly rewarding to learn from you so far, and I believe my skills with the blade can go even further still.”
Ayaka – Feelings about Ascension: Intro