A Neuvillette Guide
by caramielle.
Updated for Version 5.8
“The Chief Justice of Fontaine, known as the Iudex, is renowned for his unassailable impartiality.”
Table of Contents
Introduction
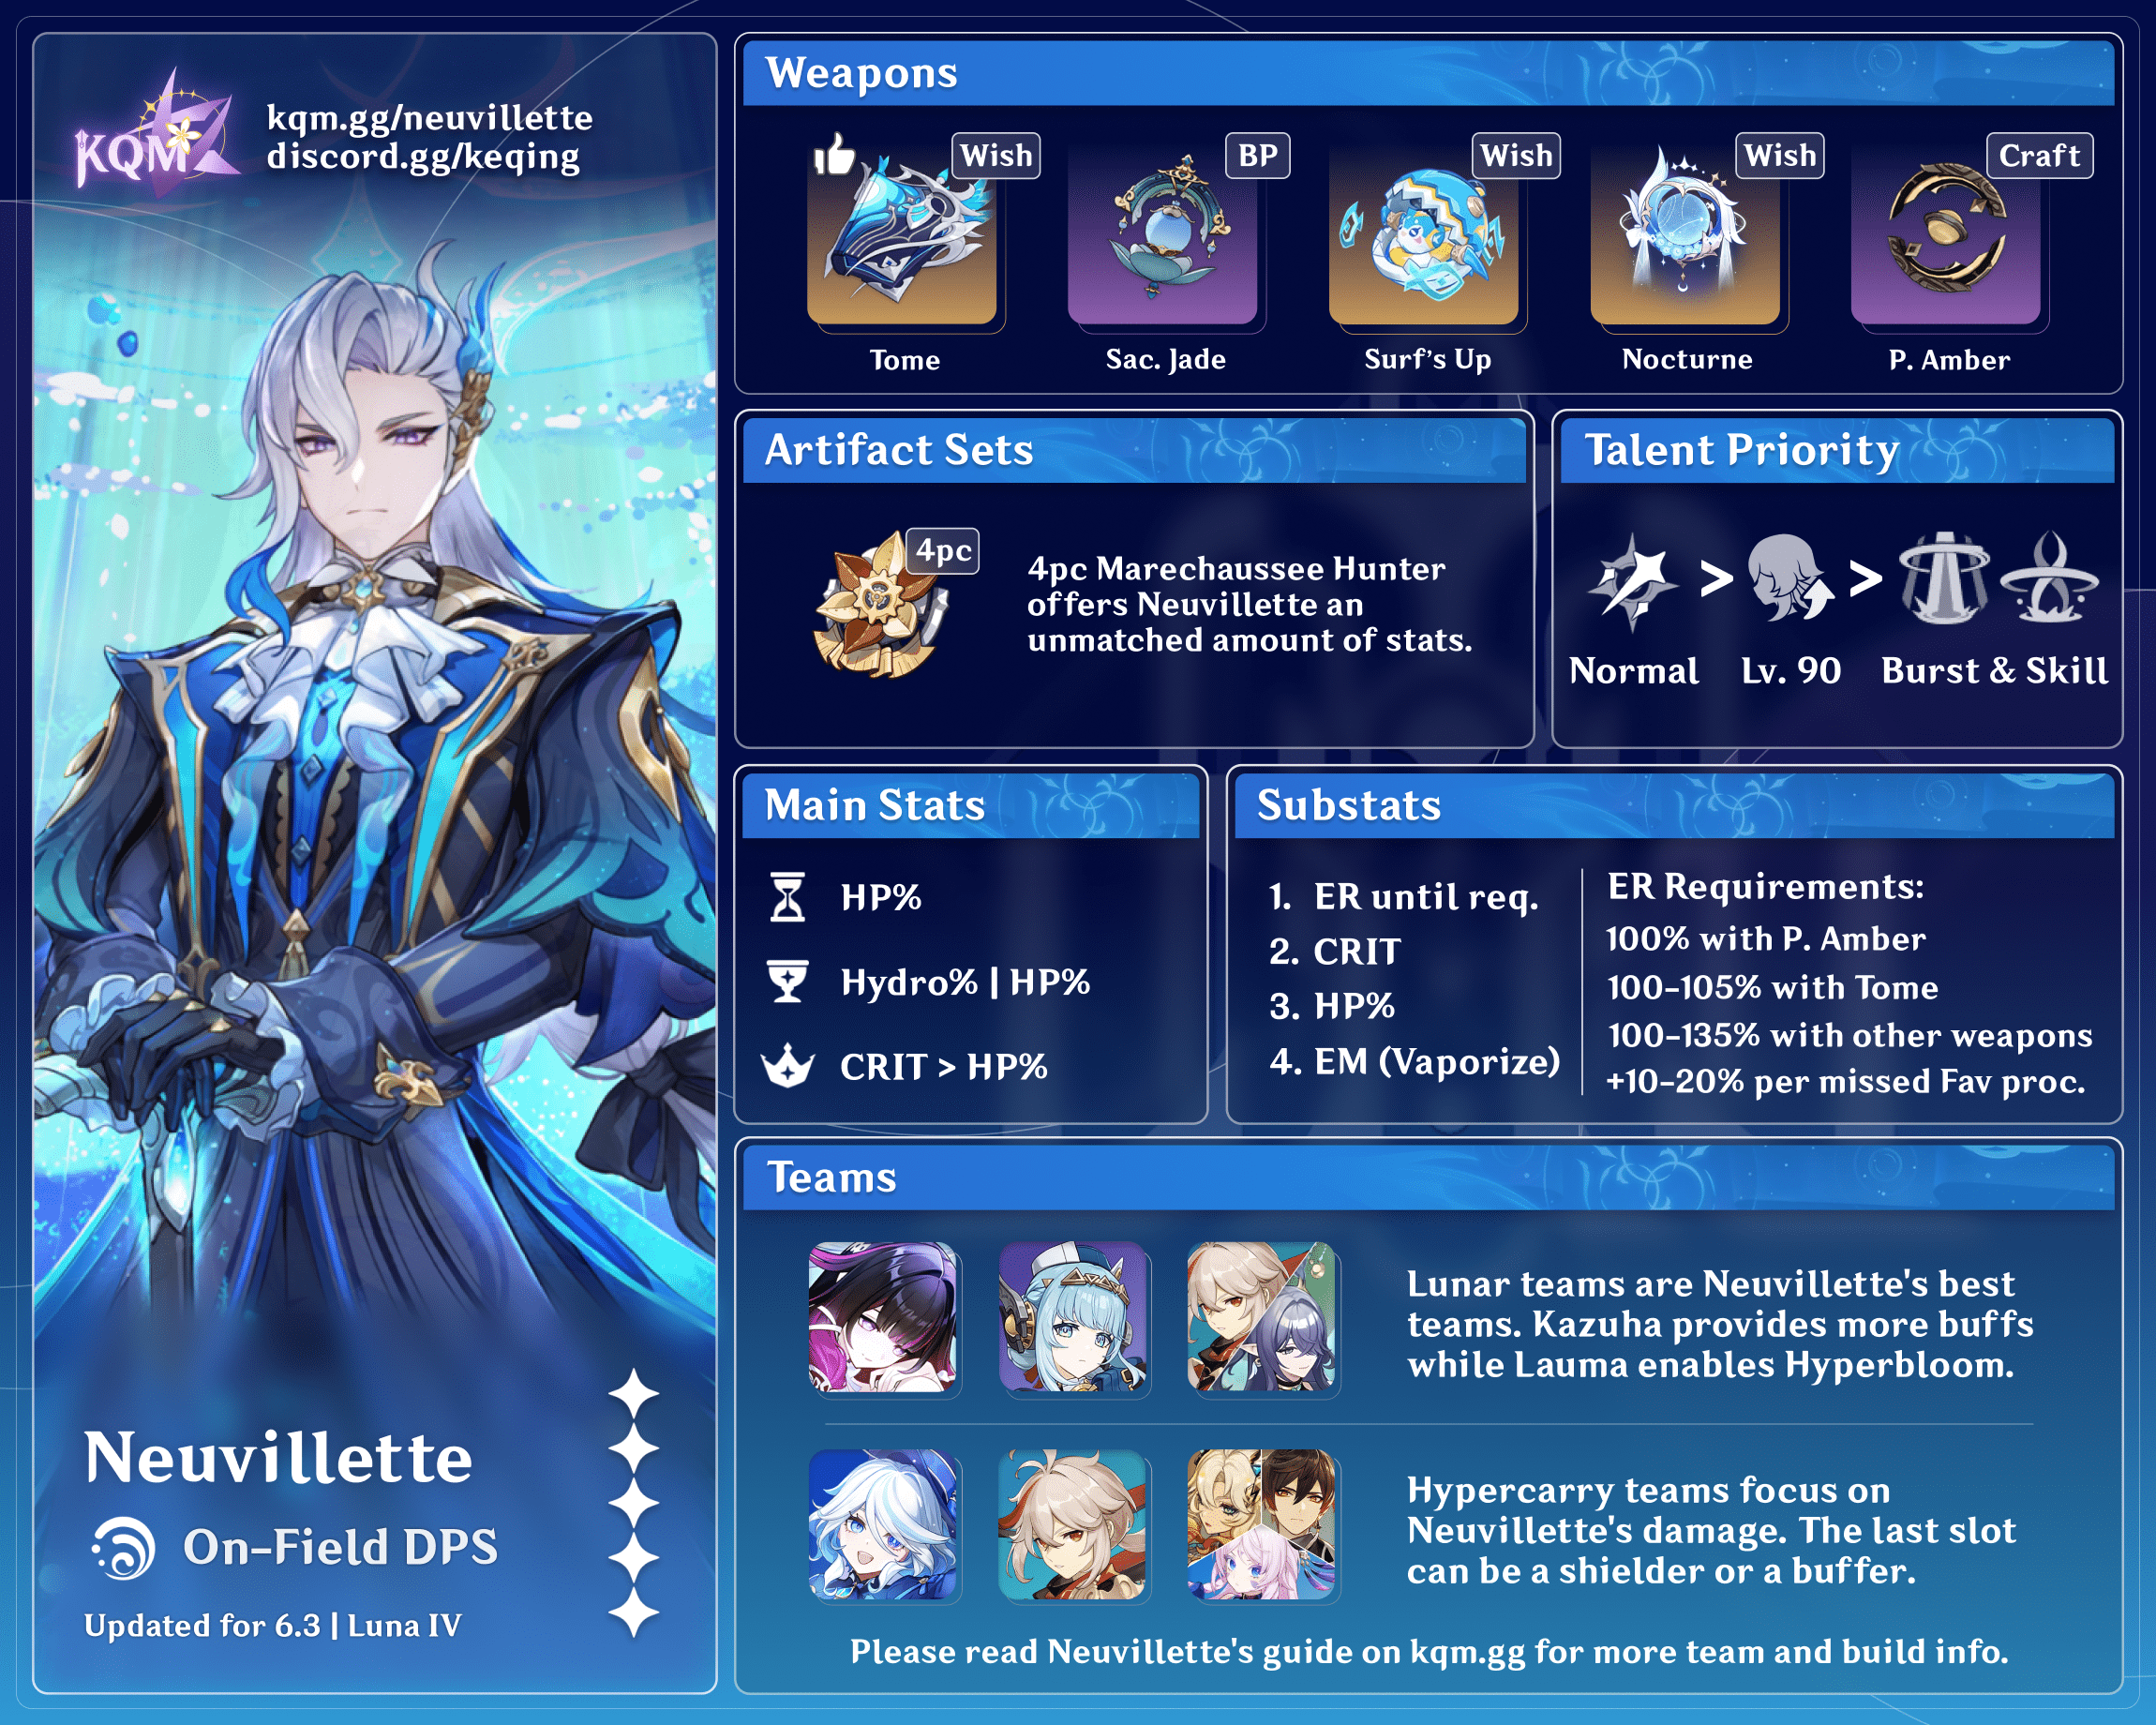
Neuvillette is a 5-star Hydro Catalyst character in Genshin Impact with a unique on-field playstyle whose focus is dealing damage through his enhanced Charged Attacks. This guide will review Neuvillette’s best weapons, best artifact sets, best teams, Talent priority, combos, preferred artifact stats, and more!
Why Play Neuvillette?
“Ah, how to describe Monsieur Neuvillette… I guess a good analogy would be rocky reefs in the sea.”
Pros
- Strong personal damage lets him perform well in a variety of teams at any investment
- Self-reliant, as his self sustain lets him forgo a healer and his kit is balanced around the lack of buffers for HP-scaling characters
- Comfortable to play: has simple gameplay, a large range, and flexible rotations
- Synergistic with several teammates, but not reliant on any particular unit
- Looks pretty…
Cons
- Inability to make use of many common sources of buffing due to his HP scaling and long stretches of field time
- Vulnerable to interruption at C0
- DPS-wise, his best F2P weapon performs noticeably worse than his paid alternative / signature
- Limited Hydro application outside of his Charged Attacks can lead to complicated rotations to ensure Hydro Swirls / A1 stacks
TL;DR
Credits to: cuppacote, euphorysm, caramielle, haafr, clevernt, and KQM Staff
Glossary
FAQ
Builds, Teams, and Rotations
Does C0 Neuvillette require a shielder?
No. C0 Neuvillette does not require a shielder. Regardless, a shielder is recommended for players who get interrupted during his Charged Attacks. Players who are able to avoid getting staggered at C0 can forgo a shielder so long as they feel comfortable. Note that his ability to run without a shielder is dependent on the enemies and scenarios faced.
Do I need to adjust my rotation if Neuvillette is using Sacrificial Jade?
Generally, no. The vast majority of Neuvillette’s rotations have him leave the field within the 10s maximum required to maintain Sacrificial Jade’s passive. Should there be buff uptime concerns, players can check if the buff icon above his HP bar disappears during his field time, or record the rotation to see if he stays on-field for over 10s. If he does, shuffle the order of his actions between his field time stretches or with teammate actions to spread out his field time more evenly — below is an example of how this can be done:
| Regular 4CA | Neuvillette E > [team setup] > Neuvillette C E C Q > [buff refresh] > Neuvillette 2[C] |
| Sac Jade 4CA | Neuvillette E > [team setup] > Neuvillette C E C > [buff refresh] > Neuvillette Q 2[C] |
Is it okay to not get all three A1 stacks?
Yes. Although Neuvillette’s A1 stacks significantly boost his damage, it is perfectly fine to forgo a stack as long as the unit who slots in can compensate with strong supportive capabilities or damage (e.g., Furina). More information can be found in the Talents section, including an overview of some of Neuvillette’s Double Element archetypes.
Is it worth upgrading Neuvillette’s Burst and Skill past TL6?
Leveling Neuvillette’s Skill and Burst provides a damage increase similar to leveling ATK-scaling damage dealers from Level 80/90 to 90/90. Whether it is worth the cost depends on the availability of resources and the current investment into him. Though minimal, upgrading Talent levels provides a guaranteed DPS increase that may be more Resin-efficient than min-maxing artifacts, especially in Vaporize teams where Neuvillette Vapes his Skill or Burst.
Is it worth crowning Neuvillette’s Normal Attack Talent?
Absolutely. Players who have the resources to level his Skill and Burst past Talent Level 6 should consider crowning his Normal Attack instead, as going from Talent Level 9 to 10 on his Normal Attack is a bigger damage increase than going from Talent Level 1 to 9 on both his Skill and Burst. For reference, Talent Levels 10/1/1 is a 3% damage increase over 9/6/6, and a 1% increase over 9/9/9.
Neuvillette and Furina Teams
Do I have to run a healer in Neuvillette’s Furina teams?
No. Because of Neuvillette’s ability to stack Fanfare via his innate HP manipulation, running buffers is better for team damage (e.g., Kazuha's DMG% buff brings more damage than Jean's healing). Buffers who also heal are of course ideal, but currently only Xilonen and Escoffier fill that niche. Although replacing dedicated healers means Furina loses her special HP multiplier over time, her damage share is lower than Neuvillette. The multiplier loss is also mitigated by her benefiting from the same buffs Neuvillette does.
However, if strong buffers are unavailable, healers are still the best option. Healers who offer extra utility via interruption resistance or support artifact sets (4pc Scroll or, with a highly invested Neuvillette, 4pc Song of Days Past) can even be competitive with Non-Natlan buffers such as Zhongli or Lisa, especially when Zhongli is not equipped with 4pc Archaic Petra.
Should Neuvillette equip a Hydro DMG% or HP% Goblet when paired with Furina?
Neuvillette usually prefers a Hydro DMG% Goblet over an HP% Goblet. While Furina provides a hefty DMG Bonus, it is not enough to make Neuvillette prefer a HP% Goblet. Regardless, Hydro DMG% and HP% Goblets perform equally when Neuvillette equips weapons that provide large amounts of DMG Bonus (e.g., Tome). To get a more accurate answer, use Genshin Optimizer.
Does my Furina need a good build?
Although Furina’s damage share is smaller than Neuvillette, she still deals a solid portion of the team’s damage. Neuvillette also lowers her ER requirements, which lets her build more offensive stats. As such, you should farm a decent build for her at minimum. Luckily, since Golden Troupe and Marechaussee Hunter share a Domain, you can farm for both Furina and Neuvillette at the same time.
Check out the KQM Furina Guide or Quick Guide for tips on how to build her.
Constellations and Wishing
I’m a low spender. Should I pull C1 Neuvillette or R1 Tome of the Eternal Flow?
The value of Neuvillette’s C1 vs. R1 Tome is highly dependent on players’ budgets and accounts.
When upgrading from Prototype Amber, R1 Tome results in a bigger damage increase than Neuvillette’s C1. With the weapon banner change in 5.0 to require only one Fate Point for guarantee, it is no longer prohibitively expensive. Neuvillette’s C1 also loses value in teams that already maximize his A1 stacks or do not require additional interruption resistance.
However, pulling for C1 Neuvillette can be the better choice for players who want the flexibility of guaranteeing an A1 stack and playing comfortably, and who frequently run Neuvillette in teams that let him benefit from his C1 (e.g., teams with Furina and Xilonen over Zhongli). In such cases, Neuvillette’s C1 could yield a bigger DPS increase in practice.
Low spenders should compare the price and DPS increase of R1 Tome and C1 Neuvillette to consider whether forgoing both options and instead obtaining a R5 Sacrificial Jade would be more efficient. An R5 Sacrificial Jade even rivals R1 Tome: it performs just slightly worse in Furina teams and can sometimes be better in Vaporize teams with low ER requirements.
Is it worth pulling C1 in [insert team]?
The value of Neuvillette’s C1 varies across playstyles. Beyond the option to exchange a shielder for another damage dealer or support, its value for your team depends on how many A1 stacks Neuvillette can obtain and how much of the team's damage output Neuvillette is responsible for.
The chart below examines how Neuvillette’s C1 affects some team compositions.
| Team Archetype | Team DPS % from C0 | Neuvillette’s DPS % from C0 |
| Double Hydro (Furina) | ~117% | ~124% |
| Freeze | ~111% | ~123% |
| Double Electro (Fischl + Beidou) | ~111% | ~122% |
| Nilou Bloom | ~104% | ~106% |
Are Neuvillette’s Constellations or Furina’s Constellations a bigger damage increase?
Neuvillette and Furina both have strong Constellations that benefit their team similarly. Therefore — disregarding the comparative value of investing in a versatile support unit vs. a strictly on-field DPS — it is often best to invest equally and aim for the same number of Constellations on them. If they are already at equal Constellations, Neuvillette’s Constellation is usually the better investment.
The table below shows how different Constellation distributions compare at different investment levels. Assumptions can be found here.
(R1 Tome Neuvillette; 4pc AP Zhongli; 4-star weapon Furina; Kazuha)
| Constellation Distribution | % of C0 Neuvillette – C0 Furina (Team DPS) |
| 5-star Constellations: 1 | |
| C0 Neuvillette – C1 Furina | 110% |
| C1 Neuvillette – C0 Furina | 117% |
| 5-star Constellations: 2 | |
| C0 Neuvillette – C2 Furina | 123% |
| C2 Neuvillette – C0 Furina | 127% |
| C1 Neuvillette – C1 Furina | 129% |
| 5-star Constellations: 3 | |
| C0 Neuvillette – C3 Furina | 131% |
| C2 Neuvillette – C1 Furina | 139% |
| C1 Neuvillette – C2 Furina | 143% |
| C3 Neuvillette – C0 Furina | 147% |
| 5-star Constellations: 4 | |
| C1 Neuvillette – C3 Furina | 152% |
| C2 Neuvillette – C2 Furina | 153% |
| C3 Neuvillette – C1 Furina | 161% |
| 5-star Constellations: 5 | |
| C2 Neuvillette – C3 Furina | 164% |
| C3 Neuvillette – C2 Furina | 176% |
| 5-star Constellations: 6 | |
| C6 Neuvillette – C0 Furina | 179% |
| C3 Neuvillette – C3 Furina | 188% |
| 5-star Constellations: 7 | |
| C6 Neuvillette – C1 Furina | 198% |
Character Overview
Playstyles
On-Field DPS
Neuvillette’s playstyle focuses on dealing damage through his enhanced Charged Attacks, which he enables by using his Skill and Burst. He can slot into a variety of teams as an on-field damage dealer, performing especially well in teams with many different Elements.
Talents
Level and Talent Priority
 ≥
≥  >>
>>  =
= 
Normal Attack ≥ Level 90 >> Burst = Skill
Neuvillette benefits greatly from character levels as he scales with Max HP. Raising him to Level 90 is recommended to maximize his damage.
Neuvillette’s enhanced Charged Attacks make up the majority share of his damage, so leveling his Normal Attack Talent should be first priority. Conversely, his Burst and Skill need not be leveled past Talent Level 6, as they are mainly used to generate Sourcewater Droplets.
Because he scales so heavily with his Normal Attack Talent, it is strongly recommended to crown it before leveling his Skill and Burst past Talent Level 6 — this yields a bigger damage increase and costs less resources. To illustrate the difference in value between leveling Neuvillette’s Normal Attack Talent versus his Skill and Burst, bringing his Talents to 9/10/10 results in the same damage as 10/1/1.
The chart below provides further details on Neuvillette’s Talent and level breakpoints, including the value of crowning his Normal Attack Talent.
| Neuvillette’s Level | Talent Levels | Neuvillette’s DPS % of Lv. 90/90, TL9/6/6 |
| 90/90 | 10/9/9 | 109% |
| 10/1/1 | 103% | |
| 9/9/9 | 102% | |
| 9/6/6 | 100% | |
| 9/1/1 | 97% | |
| 80/90 | 10/9/9 | 100% |
| 10/1/1 | 94% | |
| 9/9/9 | 94% | |
| 9/6/6 | 91% | |
| 9/1/1 | 88% |
 Normal Attack | As Water Seeks Equilibrium
Talent Description
Normal Attack
With light flourishes, Neuvillette commands the tides to unleash a maximum of 3 attacks, dealing Hydro DMG.
Charged Attack Empowerment: Legal Evaluation
While charging up, Neuvillette will gather the power of water, forming it into a Seal of Arbitration. In this state, Neuvillette can move and change facing, and also absorb any Sourcewater Droplets in a certain AoE.
Every Droplet he absorbs will increase the formation speed of the Seal, and will heal Neuvillette.
When the charging is stopped, if the Symbol has yet to be formed, then a Charged Attack will be unleashed. If it has been formed, then a Charged Attack: Equitable Judgment will be unleashed.
Charged Attack
Consumes a fixed amount of Stamina to attack opponents with a rupturing blast of water, dealing AoE Hydro DMG.
Charged Attack: Equitable Judgment
Unleashes surging torrents, dealing continuous AoE Hydro DMG to all opponents in a straight-line area in front of him.
Equitable Judgment will not consume any Stamina and lasts 3s.
If Neuvillette’s HP is above 50%, he will continuously lose HP while using this attack.
Plunging Attack
Gathering the might of Hydro, Neuvillette plunges towards the ground from mid-air, damaging all opponents in his path. Deals AoE Hydro DMG upon impact with the ground.
Though pretty to look at, Neuvillette’s Normal Attacks see little use and deal insignificant damage. When holding the attack button, Neuvillette enters a charging state and releases a regular Charged Attack if he exits before fully charging. These regular Charged Attacks are largely unimportant outside of very niche scenarios to clear Elemental auras. Note that Neuvillette can still enter his charging state when out of Stamina — he just won’t perform a Charged Attack upon exiting.
The real star of Neuvillette’s kit and his main source of damage is his Equitable Judgment Charged Attacks. After an initial 4s windup, Neuvillette unleashes a long-range enhanced Charged Attack that deals continuous, AoE, HP-scaling damage to all enemies within range. These special Charged Attacks do not consume any Stamina and will continuously drain 8% of his HP every 0.5s over their duration if Neuvillette’s HP is above 50%.
Upon entering his charging state, Neuvillette can absorb up to 3 nearby Sourcewater Droplets. Each absorbed Droplet reduces the charging state’s windup time, and obtaining 3 Droplets lets Neuvillette release it near-instantly. While the Charged Attack still takes about 1s to release on its own, releasing the button as soon as 3 Droplets are absorbed allows Neuvillette to perform the Charged Attack near instantaneously. Be careful not to release the button too early, as any consumed Sourcewater Droplets will disappear if you mistime the release before the attack is fully charged. The absorbed Sourcewater Droplets also instantly heal off the hefty HP drain from his CAs plus some surplus healing.
It is vital that Neuvillette casts his Skill and Burst every rotation to generate the Sourcewater Droplets needed for his Charged Attacks.
Although Neuvillette can absorb Sourcewater Droplets created by Hydro Traveler or Sigewinne, he already generates enough Droplets on his own. Therefore, it is not recommended to use them to provide Neuvillette with additional Droplets. Note that Neuvillette cannot absorb other Neuvillettes’ Droplets in Co-Op Mode.
Elemental Skill | O Tears, I Shall Repay
Talent Description
Summons a Raging Waterfall that will deal AoE Hydro DMG to opponents in front of Neuvillette based on his Max HP. After hitting an opponent, this skill will generate 3 Sourcewater Droplets near that opponent.
Arkhe: Pneuma
At certain intervals, when the Raging Waterfall descends, a Spiritbreath Thorn will descend that will pierce opponents, dealing Pneuma-aligned Hydro DMG.
Neuvillette’s Skill deals AoE damage to opponents in front of him before creating 3 Sourcewater Droplets. If the Skill does not hit an enemy, Droplets will not be created. It is primarily used to generate both Energy and Sourcewater Droplets, and does not make up a significant portion of Neuvillette’s damage.
The Skill summons a Spiritbreath Thorn after its initial hit, dealing Pneuma-aligned Hydro damage with a 10s cooldown between procs. This can be used to weaken Ousia-aligned enemies or solve Ousia puzzles. The Spiritbreath Thorn technically deals Hydro damage, but it does not apply enough Hydro to trigger reactions.
Elemental Burst | O Tides, I Have Returned
Talent Description
Unleashes waves that will deal AoE Hydro DMG based on Neuvillette’s Max HP. After a short interval, 2 waterfalls will descend and deal Hydro DMG in a somewhat smaller AoE, and will generate 6 Sourcewater Droplets within an area in front.
Neuvillette’s Burst deals three instances of damage: one initial AoE Hydro attack that creates 3 Sourcewater Droplets, followed shortly by two smaller Hydro attacks that generate 2 and 1 Sourcewater Droplets, respectively. Sourcewater Droplets always spawn in front of Neuvillette and at his elevation. Unlike his Skill, Neuvillette’s Burst will generate Droplets regardless of whether it hits an enemy or not.
Neuvillette’s Burst only makes up a small portion of his damage, but the amount of Sourcewater Droplets it generates makes it mandatory to use every rotation.
 Ascension 1 Passive | Heir to the Ancient Sea’s Authority
Talent Description
When a party member triggers a Vaporize, Frozen, Electro-Charged, Bloom, Hydro Swirl, or a Hydro Crystallize reaction on opponents, 1 stack of Past Draconic Glories will be granted to Neuvillette for 30s. Max 3 stacks. Past Draconic Glories causes Charged Attack: Equitable Judgment to deal 110%/125%/160% of its original DMG.
The stacks of Past Draconic Glories created by each kind of Elemental Reaction exist independently.
A hefty damage boost, Neuvillette’s A1 Passive adds a Base DMG Multiplier for Neuvillette’s Charged Attacks. It increases their damage multiplicatively for every unique Hydro reaction triggered, up to 3 stacks. Neuvillette’s teams often aim to maintain as many stacks as possible. Note that the reaction does not need to be triggered by the active character. Additionally, despite Lunar-Charged and Electro-Charged being mentioned separately, it’s not possible to get a stack each from both reactions (e.g. by triggering Lunar-Charged and then removing Ineffa from the party to trigger Electro-Charged).
Each stack has a 30s duration, and is refreshed if the same Hydro reaction is triggered before the stack expires. Any party member (including Neuvillette) that triggers a reaction will generate a stack. It is possible to gain stacks by triggering reactions on enemies with auras, but this is risky and should not be relied on. In practice, Neuvillette’s A1 stacks are obtained by having three non-Hydro teammates, each of different Elements.
When stacks are gained or lost, a symbol will appear above the on-field character's head. A circle will light for each A1 stack gained, and this works as a visual indicator of how many stacks Neuvillette has.
The number of stacks your party maintains can significantly impact team DPS, so it is important to maximize Neuvillette’s A1 stack count and uptime. That being said, players must also consider a character’s utility when building Neuvillette’s teams. If options are scarce, it can be better to sacrifice a stack than force suboptimal teammates (e.g., running a second Hydro is better than forcing Diluc). Some units also provide benefits that compensate for the loss of an A1 stack (e.g., Furina’s damage and buffing). Certain teams also struggle to gain 3 stacks despite having three unique Elements, such as Hyperbloom or Vaporize teams with Nahida.
The table below outlines Neuvillette’s Double Element archetypes and their better teammate options.
| Double Hydro | Double Hydro teams offer valuable HP% from Hydro Resonance and Hydro Particles to battery Neuvillette. Additional buffs further helps compensate for the loss of an A1 stack. Neuvillette – Furina teams even outperform most of his 3-stack teams. |


|
|
| Double Cryo | Double Cryo teams with Escoffier compete with Neuvillette’s 3-stack teams, thanks to Escoffier’s RES Shred, personal damage, and the CRIT Rate from Cryo Resonance. Citlali and Shenhe are recommended second Cryos for their many buffs. Escoffier-less Double Cryo teams are worse, but can be decent options if teammate options are sparse. |


|
|
| Double Electro | Double Electro teams take advantage of existing Electro synergies. They trade an A1 stack for an additional off-field DPS to make up for the fall in Neuvillette’s damage. Electro Resonance and Fischl’s particle generation heavily reduce ER requirements. |


|
|
| Double Geo | Double Geo teams trade an A1 stack for comfort and ease of play. Geo Resonance effect, Xilonen’s buffs, and the buffs and personal damage from Zhongli and Chiori, respectively, keep the damage trade-off low. Double Geo teams with Zhongli are among Neuvillette’s easiest to play, while performing on par with many 3-stack teams. |


|
 Ascension 4 Passive | Discipline of the Supreme Arbitration
Talent Description
For each 1% of Neuvillette’s current HP greater than 30% of Max HP, he will gain 0.6% Hydro DMG Bonus. A maximum bonus of 30% can be obtained this way.
A minor but appreciated increase to Neuvillette’s damage. Since absorbed Sourcewater Droplets only heal him at the beginning of each Charged Attack, Neuvillette will gradually lose some of the Hydro DMG Bonus over the course of the attack’s duration. Though external healing can mitigate this, it is not worth running a healer specifically to extend Neuvillette’s A4 uptime.
 Utility Passive | Gather Like the Tide
Talent Description
Increases underwater Sprint SPD for your own party members by 15%. Not stackable with Passive Talents that provide the same effects.
A simple but appreciated speed boost when traversing Fontaine’s waters, and one of the few underwater Utility Passives available. This Talent mainly provides exploration QoL but has some use in underwater combat, where the extra speed can give players an edge over enemies.
Constellations
Assumptions can be found here. Numbers are rounded.
Constellations are compared based on the increase to Neuvillette’s personal damage.
 Constellation 1 | Venerable Institution
When Neuvillette takes the field, he will obtain 1 stack of Past Draconic Glories from the Passive Talent "Heir to the Ancient Sea's Authority." You must first unlock the Passive Talent "Heir to the Ancient Sea's Authority."
Additionally, his interruption resistance will be increased while using the Charged Attack Empowerment: Legal Evaluation and the Charged Attack: Equitable Judgment.
A solid first Constellation that is both a respectable damage increase and a valuable QoL improvement. Neuvillette now gains an A1 stack by simply taking the field, which lets him maximize the passive’s buffs in teams with two characters of the same Element. While some Double Element teams are already worth running at C0, Neuvillette’s C1 significantly increases their damage while giving him the extra flexibility to run teams that would otherwise be unable to compensate for the lost A1 stack.
Neuvillette’s C1 also increases his interruption resistance while charging and casting his enhanced Charged Attacks. This lets him slot in a buffer or an additional off-field damage dealer where he would otherwise require a defensive teammate, or provides a more comfortable playing experience for those who already run him shielderless.
Note that the exact value of this Constellation is variable. Teams that already fully stack Neuvillette’s A1 gain a significantly smaller DPS increase. Some defensive units are still worth running even when interruption resistance is not needed (e.g., Zhongli with his Universal RES Shred), rendering the QoL improvement wasted. Likewise, players who comfortably run shielderless Neuvillette at C0 also get limited benefits from his C1’s added interruption resistance.
Nonetheless, in teams where it is utilized, Neuvillette’s C1 is one of the stronger vertical investment options for low spenders.
| Personal DPS increase: 0–24% |
 Constellation 2 | Juridical Exhortation
The Passive Talent "Heir to the Ancient Sea's Authority" will be enhanced: Each stack of Past Draconic Glories will increase the CRIT DMG of Charged Attack: Equitable Judgment by 14%. The maximum increase that can be achieved this way is 42%.
You must first unlock the Passive Talent "Heir to the Ancient Sea's Authority."
A relatively straightforward damage increase. Depending on the number of his A1 stacks, Neuvillette gains up to 42% CRIT DMG for his enhanced Charged Attacks, which are by far the largest source of his damage.
This Constellation also synergizes with Neuvillette’s C1. Requiring only two Hydro reactions lets Neuvillette run team compositions such as Double Hydro or Double Electro with no issues.
| Personal DPS increase from previous Constellation: ~11% | Personal DPS increase from C0: ~38% |
 Constellation 3 | Ancient Postulation
Increases the Level of Normal Attack: As Water Seeks Equilibrium by 3.
Maximum upgrade level is 15.
Increases Neuvillette’s Normal Attack Talent level, his most important Talent by a significant margin. A decent damage increase, and a good stopping point for medium spenders.
| Personal DPS increase from previous Constellation: ~21% | Personal DPS increase from C0: ~66% |
 Constellation 4 | Crown of Commiseration
When Neuvillette is on the field and is healed, 1 Sourcewater Droplet will be generated. This effect can occur once every 4s.
Neuvillette’s self-healing lets him trigger his C4 for some extra Droplets per rotation. However, pre-C6 Neuvillette already generates enough Sourcewater Droplets for himself. When performing 3 Charged Attacks, he even has a surplus of unused Droplets each rotation, assuming you use his Skill twice.
Neuvillette is not able to take advantage of this Constellation’s additional Sourcewater Droplets before obtaining his C6. You should only pull Neuvillette’s C4 if you are also going for his C6.
| Personal DPS increase from previous Constellation: 0% | Personal DPS increase from C0: ~66% |
 Constellation 5 | Axiomatic Judgment
Increases the Level of O Tides, I Have Returned by 3.
Maximum upgrade level is 15.
Increases Neuvillette’s Burst Talent level. While his Burst only makes up a small portion of his damage, he uses it consistently in many rotations, so the minor damage increase is appreciated. Overall, an unnoteworthy stepping stone on the way to C6.
| Personal DPS increase from previous Constellation: ~1% | Personal DPS increase from C0: ~68% |
 Constellation 6 | Wrathful Recompense
When using Charged Attack: Equitable Judgment, Neuvillette can absorb nearby Sourcewater Droplets in an AoE. Each absorbed Droplet will increase the duration of Charged Attack: Equitable Judgment by 1s.
Additionally, when Equitable Judgment hits opponents, it will fire off 2 additional currents every 2s, each of which will deal 10% of Neuvillette’s Max HP as Hydro DMG. DMG dealt this way will count as DMG dealt by Equitable Judgment.
Neuvillette’s C6 increases his Charged Attacks’ duration and damage. He can now extend their duration by absorbing Sourcewater Droplets once the Charged Attack nears its end, 1s per Droplet absorbed. This lets him take advantage of his C4, which provides the extra Droplets needed to extend his Charged Attack by 2–3s. The aforementioned Charged Attacks also deal 2 additional instances of damage equal to 10% of Neuvillette’s Max HP each every 2s, further increasing their damage.
At C6, Neuvillette's rotations should be adjusted to fit his longer Charged Attacks. C6 Neuvillette deals more than enough damage to justify the extended field time, and the additional currents make his longer Charged Attacks further worth using. As a result, his rotations now resemble those of extended field time carry units, compared to his split fieldtime rotations pre-C6.
This Constellation is a significant damage increase for Neuvillette, though the exact increase is difficult to gauge. The longer Charged Attacks will affect buff and ability uptimes, which leads to rotation changes. Teams with shorter buff durations such as those provided by 4pc Viridescent Venerer or 4pc Archaic Petra face adjustments or lose uptime — though C6 Neuvillette deals enough damage that the enemy is often dead by the time buffs run out anyway. Teams with longer ability durations like Furina’s DMG% buff or Zhongli’s RES Shred more easily accommodate the extended field time.
As such, Neuvillette’s C6 is a solid damage boost and a fitting capstone for him.
| Personal DPS increase from previous Constellation: ~29% | Personal DPS increase from C0: ~118% |
Combos and Rotations
Combos
It is advisable to perform 3 or 4 Charged Attacks per rotation depending on what Neuvillette’s teammates can accommodate. Most commonly, Neuvillette splits his Charged Attacks across two stretches of field time; he uses 1–2 Charged Attacks at a time.
How many Charged Attacks Neuvillette performs depends on a couple considerations, each with their advantages and disadvantages. Below is a brief overview.
| 4 Charged Attacks | Neuvillette’s default combo. Recommended for nearly all scenarios, especially in teams where Neuvillette deals the vast majority of the damage, such as Furina teams. Usually a variation of E > Team > C E C Q > Team > 2[C]. |
| 3 Charged Attacks | An easier to play variant at the price of some damage. The exact combo is mostly unimpactful, but is commonly a variation of Q > Team > C E C > Team > C E. |
The difference between 2CA rotations and 4CA rotations mostly comes down to semantics. In both 2CA and 4CA rotations, Neuvillette essentially runs a Burst + 2 Skills + 4CA rotation. The key difference is that, in 2CA rotations, most of his teammates cast their Bursts twice.
Rotations
Neuvillette has high but flexible field time requirements, which gives his rotations added variety. The most important part is ensuring he always has available Sourcewater Droplets. Droplets are generated from his Skill and Burst, and have independent 15s durations before they expire. Unfortunately, they have no absorption priority, so Neuvillette risks absorbing new Droplets first and leaving old ones to expire before his next Charged Attack. Most rotations take Droplet uptime into account, so this should not be a recurring issue.
Players looking for an example rotation for their team can check out the Neuvillette Rotation Sheet.
The best way to craft rotations is by trying things in game, adapting existing rotations, and figuring out what works and what doesn’t. However, there are some helpful pointers when starting out.
Most commonly, crafting a rotation for Neuvillette starts with a skeleton, looking something like:
Neuvillette Skill or Burst > [teammates set up buffs/abilities] > Neuvillette’s 1st set of Charged Attacks > [short uptime buffs/abilities are refreshed] > Neuvillette’s 2nd set of Charged Attacks
In each rotation, Neuvillette wants to fit in a Burst, 1–2 Skills, and 3–4 Charged Attacks, but these can be flexibly distributed across his three stretches of field time. There are mainly two things to keep in mind:
- Neuvillette must cast his Skills 12s apart. This is mainly an issue in 3CA rots whose 24–25s rotations necessitate precise Skill timings, lest players run into Skill cooldowns. E.g., if starting with Neuvillette’s Skill, his next Skill use needs to be precisely halfway through the rotation.
- Droplets need to be available when Neuvillette performs his Charged Attacks. Their 15s duration is easy to navigate, but the lack of absorption priority causes issues when both old and new Droplets are on the field. A common workaround is moving a Charged Attack further up in the rotation to ensure old Droplets are used up before new ones are generated. For example, if Neuvillette starts the rotation with a Skill, instead of following with a Burst and then 3 Charged Attacks, he can do a Charged Attack before his Burst.
Keeping this in mind, some common variations of the above rotation skeleton are:
| 3 Charged Attacks | Neuvillette Q > [team setup] > Neuvillette E 2[C] > [buff refresh] > Neuvillette E C |
| 4 Charged Attacks | Neuvillette E > [team setup] > Neuvillette C E C Q > [buff refresh] > Neuvillette 2[C] |
Further rotation adjustments depend on Neuvillette’s teammates.
Anemo units holding 4pc Viridescent Venerer should go on-field shortly before Neuvillette to maximize Hydro RES Shred uptime. Similarly, shielders with limited uptime want to time the shield cast so that Neuvillette does not get interrupted during his Charged Attacks. In contrast, Bloom and Hyperbloom teams may skip the buff refresh phrase entirely as they often don’t utilize short-duration buffs like 4pc Viridescent Venerer or 4pc Archaic Petra.
These are only some examples; ideal rotations are optimized to ensure that team buffs and abilities maintain as high uptime as possible. Still, some players may prefer trading some damage for simpler rotations, either due to inexperience or for comfort.
Gearing
“I see the value in my own work, but I also see the meaning in all the endeavors of the people of Fontaine. I believe I will continue to take pride in fulfilling my duties.”
ER Requirements
Calcs and assumptions for ER requirements can be found here (last updated for Version 5.3). Favonius weapons are assumed for any teammates who should use them.
It is vital that Neuvillette has enough ER to Burst every rotation; this ensures he has enough Droplets for at least 3 Charged Attacks.
| Scenario | R5 Prototype Amber | R1 Tome | Other Weapons |
| Double Hydro with Furina | 100% | 100% | 100–130% |
| Double Electro with Others | 100% | 100–105% | 100–135% |
| Fischl/Ororon Solo Electro | 100% | 100% | 100–134% |
| Other Compositions | 100% | 100–105% | 100–135% |
The values above assume 2 Skills per Burst, as rotations with a single Skill — before C6 — are not recommended outside of niche cases due to impractical ER needs. At C6, Neuvillette often uses only one Skill per rotation due to his abundance of balls; players with C6 should test in-game or use the Energy Recharge Calculator for their precise ER requirements.
Increase ER requirements with 10–20% per missed Favonius proc if you are running less Favonius weapons than assumed. For a more accurate estimate of your ER requirements, use the Energy Recharge Calculator.
Artifact Stats
 Sands |  Goblet |  Circlet |
| HP% | Hydro DMG% or HP% | CRIT Rate, CRIT DMG, or HP% |
Substats:
ER% (until requirement is met) > CRIT = HP% > Flat HP
While HP% | Hydro DMG% | CRIT is often the best choice, builds with an HP% Goblet or HP% Circlet are usually competitive as the optimal pick leads by only a small margin. Even triple HP% builds can be viable.
The gap between HP% and Hydro DMG% Goblets further narrows in Furina teams, but Hydro DMG% is still the optimal pick. The exception is if Neuvillette is holding Tome or Lost Prayer and is paired with other sources of DMG% such as Kazuha or 4pc Scroll. In those scenarios, HP% Goblets marginally outperform Hydro DMG%. HP% Circlets are still worse than CRIT Circlets in all scenarios.
Keep in mind that suboptimal HP% main stats need high-quality substats to be competitive; additionally, triple HP% builds generally perform worse than alternatives even with good substats. Outside of Furina teams, an HP% Goblet needs decently better substats to beat a Hydro DMG% Goblet, compared to HP% vs. CRIT Circlets.
Comparison tables are included below to show how different main stats perform in various scenarios, but we recommend using Genshin Optimizer to compare your actual artifacts. Multi-Optimization configs for Neuvillette can be found here. For further detail on how to use the configs, check out the KQM Multi-Optimization Guide.
Artifact Stat Comparison Table
Assumptions:
Neuvillette — Yae Miko — Kazuha — 4pc AP Zhongli
4pc Marechaussee; 4CA rotation; Solo Hydro
Calcs can be found here
Listed % are of HP | Hydro | CRIT main stats on the same weapon.
| Weapon | HP | Hydro | CRIT | HP | HP | CRIT | HP | Hydro | HP | HP | HP | HP |
| R1 Tome of the Eternal Flow | 100% | 99% | 97% | 94% |
| R5 Sacrificial Jade | 100% | 94% | 97% | 89% |
| R1 Sacrificial Jade | 100% | 96% | 98% | 91% |
| R1–R5 Prototype Amber | 100% | 95% | 98% | 91% |
| R1 Lost Prayer | 100% | 97% | 99% | 95% |
Assumptions:
Neuvillette — Furina — Kazuha — 4pc AP Zhongli
4pc Marechaussee; 4CA rotation; Hydro Resonance
Calcs can be found here
Listed % are of HP | Hydro | CRIT main stats on the same weapon.
| Weapon | HP | Hydro | CRIT | HP | HP | CRIT | HP | Hydro | HP | HP | HP | HP |
| R1 Tome of the Eternal Flow | 100% | 101% | 96% | 96% |
| R5 Sacrificial Jade | 100% | 96% | 95% | 90% |
| R1 Sacrificial Jade | 100% | 98% | 96% | 92% |
| R1–R5 Prototype Amber | 100% | 98% | 97% | 94% |
| R1 Lost Prayer | 100% | 100% | 97% | 95% |
Artifact Sets
Assumptions
Neuvillette — Kazuha — 4pc AP Zhongli
R1 Sacrificial Jade; HP% | Hydro DMG% | CRIT; 3CA rotation; 128% base ER requirement; Solo Hydro;
Calcs can be found here.
| Artifact | DPS% of 4pc Marechaussee | Notes |
4pc Marechaussee Hunter | 100% | A set tailor-made for Neuvillette, and his BiS set by a significant margin. Marechaussee Hunter provides Charged Attack DMG Bonus with its 2pc set bonus and a hefty CRIT Rate increase with its 4pc bonus. The set passive is triggered by HP fluctuation, and Neuvillette’s HP fluctuations let him quickly stack the 4pc set effect with excellent uptime. It is highly recommended to farm this set. |
4pc Heart of Depth | 89% | 4pc Heart of Depth synergizes decently with Neuvillette. It provides Hydro DMG Bonus with its 2pc effect and Charged Attack DMG Bonus with its 4pc effect. However, it is notably worse than 4pc Marechaussee. Though it may be tempting to use an existing 4pc Heart of Depth set, even a mediocre 4pc Marechaussee Hunter set will outperform it. As such, 4pc Heart of Depth is only recommended as a placeholder while farming Marechaussee Hunter. |
2pc Mixed Sets  | 84–87% | 2pc Sets: Marechaussee Hunter, Hydro DMG%, HP% 2pc combinations that perform similarly to 4pc Heart of Depth but are easier to get good substats on. Pick whichever has better substats as a placeholder while farming 4pc Marechaussee. 2pc Marechaussee + 2pc HP% / Hydro DMG% is an especially good transition set. |
4pc Retracing Bolide, 4pc Wanderer’s Troupe, 4pc Nymph’s Dream | 85–86% | Other 4pc sets that perform worse than 4pc Heart of Depth and may be harder to get. Note that 4pc Retracing Bolide requires a high-uptime shielder such as Zhongli or Layla. Do not farm these sets for Neuvillette. They are only choices if one of these 4pc sets is already available and are not recommended as anything but temporary placeholders while farming for a proper 4pc Marechaussee set. |
Weapons
Weapon Overview
This is a general overview. The order in which each weapon appears is loosely ranked; see below for more detailed comparison tables.
Tome of the Eternal Flow | Neuvillette’s signature weapon and general BiS. Tome offers a hefty amount of CRIT DMG, and its passive provides some HP% and Charged Attack DMG Bonus. In addition, it has an Energy-restoring passive that lowers — or often eliminates — Neuvillette’s ER requirements to let him build more offensive stats. Tome performs significantly better than nearly all other weapons, with the sole exception being Sacrificial Jade. At low ER requirements, the damage gap between the two also becomes significantly smaller. Depending on team and scenario, R5 Sacrificial Jade can even outperform R1 Tome. |
Sacrificial Jade | Obtained from the Battle Pass, Sacrificial Jade is Neuvillette’s second-best weapon in most scenarios by a decent margin. It offers a decent amount of stats Neuvillette wants, with a CRIT Rate secondary stat and a passive that offers a large HP% buff. Its passive restricts field time to a maximum of 10s at a time, but this is generally a non-issue as Neuvillette wants to go off-field to refresh buffs anyway. Note that Sacrificial Jade’s CRIT Rate can make it hard to not overcap on CRIT Rate when combined with 4pc Marechaussee. Even at R1, Sacrificial Jade is a respectable enough improvement over its alternatives that it may be a worthwhile purchase. If Neuvillette’s ER requirements are low enough that Tome’s Energy restoration provides no benefit, the gap in their performance becomes significantly smaller. If playing Vaporize teams that can make use of its EM, or if lacking HP% buffs, R5 Sac Jade even outperforms R1 Tome. |
Surf’s Up | Surf’s Up offers a high CRIT DMG secondary stat and some HP% from its passive. It is effectively a stat stick only, since the rest of its passive is of no use to Neuvillette, even in Vaporize teams where he can activate it. It is Neuvillette’s second-best 5-star weapon by a high margin, though still behind R5 Sacrificial Jade. As such, it is not worth pulling for Neuvillette over saving for Tome. However, players who consistently lose Sacrificial Jade’s passive and conveniently have Surf’s Up available will find this a better alternative. |
Cashflow Supervision | Cashflow Supervision is a strong alternative, especially at high refinements. Neuvillette may not be able to make use of its ATK% passive, but it still offers CRIT Rate and a solid Charged Attack DMG Bonus. At best, the performance of a high refinement Cashflow only equals that of a R5 Sacrificial Jade. As such, it is not recommended to pull this weapon solely for Neuvillette. Nevertheless, if players already have a copy of Cashflow laying around or Wriothesley to share it with, this weapon is a solid pick. |
A Thousand Floating Dreams | Only recommended in Vaporize. Although Neuvillette generally prefers HP% weapons over EM weapons even in Vaporize teams, Floating Dreams is an exception. In addition to a high EM secondary stat, its passive also provides up to 30% DMG Bonus. This makes it a surprisingly competitive choice, especially with refinements. |
Jadefall’s Splendor | Neuvillette greatly appreciates HP%, which lets Jadefall’s Splendor perform on par with CRIT weapons thanks to its hefty HP% secondary stat. Though its passive has barely any uptime, Jadefall remains a solid stat stick, performing generally slightly better than Prototype Amber. A small consolation to the unfortunate players who lost to the green donut. An exception is in Furina teams, where the extra Fanfare from Prototype Amber makes it better for team damage. |
Ash-Graven Drinking Horn | An event weapon from Version 5.0, and Neuvillette’s best free weapon at low ER requirements (~120% or lower). Ash-Graven gives the same HP% secondary stat as Prototype Amber, but with a more offensive passive. Every 15s, Neuvillette will trigger an AoE attack that scales with his Max HP. This is a surprisingly impactful passive despite only activating 1–2 times per rotation thanks to Neuvillette’s high HP stat. Neuvillette’s teams tend to run multiple Favonius weapons, which leaves him with very low ER requirements and makes Ash-Graven’s additional damage more impactful than Prototype Amber’s Energy refund. Vice versa, if Neuvillette’s ER requirements are high (~125% or higher), Prototype Amber outperforms it. |
Lost Prayer to the Sacred Winds | Lost Prayer offers CRIT Rate and Elemental DMG Bonus, both of which Neuvillette appreciates. The CRIT Rate from 4pc Marechaussee can make it difficult to build around in practice, but it is still a strong option. Lost Prayer is also more accessible than other 5-star picks since it is obtainable from the Standard Banner. Much like other 5-star weapons, Lost Prayer is outperformed by Sac Jade, but it still remains a solid choice for players who have it — as long as Neuvillette’s ER requirements are low (~120% or lower). If his ER requirements are higher, Prototype Amber will outperform it. For players lacking HP% or overcapping on CRIT Rate, Prototype Amber also becomes the better pick. |
Prototype Amber | Prototype Amber not only is a strong pick for Neuvillette, but it is also completely F2P-accessible as a craftable weapon. It provides plenty of HP% through its secondary stat, minor teamwide healing, and a useful Energy restoration passive. With Furina, the teamwide healing both stacks Fanfare and increases her damage. As a result, it outperforms up to R5 Jadefall team damage wise. The small and infrequent healing from its passive can also be beneficial for his teammates since Neuvillette’s teams often lack healers. The higher Neuvillette’s ER requirements are, the further Prototype Amber pulls ahead — even surpassing several of the above weapons — though in the vast majority of scenarios players should run enough Favonius weapons to have minimal ER requirements. In teams with lower ER requirements (~120% or lower) where the Energy from its passive loses value, Prototype Amber performs worse. |
Kagura’s Verity | Kagura’s Verity offers CRIT DMG, Skill DMG Bonus, and Elemental DMG Bonus past Neuvillette’s first rotation. It performs slightly better on paper than R1 Widsith and slightly worse than R5 Widsith. However, unlike Widsith, Kagura offers guaranteed buffs with no RNG. It also notably outperforms Widsith in Furina teams. Since all Kagura stacks are refreshed when a Skill is used, Neuvillette will have full stacks on its passive starting from his second rotation. |
The Widsith | Widsith’s RNG passive makes it arguably the weapon passive version of CRIT-fishing. While it offers a very strong Elemental DMG Bonus with one of its passive’s effects, the two other buffs are useless to Neuvillette in most scenarios. If players aren’t willing to repeatedly retry Spiral Abyss, it is better to pick another, more consistent weapon. The exception is in Vaporize teams, where Neuvillette can also make use of the EM buff. In this context, Widsith is a decently stronger option at R1 and significantly outperforms Prototype Amber at R5. |
Everlasting Moonglow | For those who gambled on any weapon banner with Kokomi and lost, the donut is an acceptable stat stick on Neuvillette. Its passive is wasted as he does not perform Normal Attacks, but he still appreciates the HP%. Unfortunately, Moonglow is notably worse than Prototype Amber, and is not recommended outside of temporary use for Billet-less players without better alternatives. |
Ring of Yaxche | Ring of Yaxche is a Natlan craftable and provides the same amount of HP% as Prototype Amber and Ash-Graven, but without a passive that benefits Neuvillette. It is better to craft Prototype Amber instead. |
Waveriding Whirl | Waveriding Whirl is a weapon banner exclusive, offering a high ER substat and — at R5 — a hefty HP% passive. This makes it look good at a glance. However, its passive uptime is mismatched with Neuvillette’s rotations: he wants to use his Skill off cooldown at least once (after 12s), while its passive has a 10s duration with a 15s cooldown. As such, only every other Neuvillette Skill will activate the passive. The result is roughly two Charged Attacks dealing deceptively high damage, while the remaining Charged Attacks receive no buff at all — rendering Whirl’s overall performance subpar. It’s possible to work around the uptime issues, but this in turn comes at the price of suboptimal rotations and still results in lower total rotation damage than other options. Additionally, Whirl has so far only been featured on Neuvillette’s own weapon banner — where you are more likely to get R1 Tome than R5 Whirl. |
Weapon Comparison Tables
Assumptions:
Neuvillette — Yae Miko — Kazuha — 4pc AP Zhongli
4pc Marechaussee; HP | Hydro | CRIT; 4CA rotation; 128% base ER requirements Solo Hydro
Calcs can be found here
| Weapons | % of R5 Prototype Amber |
| R5 Tome of the Eternal Flow | 166% |
| R1 Tome of the Eternal Flow | 137% |
| R5 Sacrificial Jade | 130% |
| R5 Surf’s Up | 128% |
| R1 Surf’s Up | 118% |
| R5 Cashflow Supervision | 117% |
| R1 Sacrificial Jade | 115% |
| R5 Jadefall's Splendor | 106% |
| R5 Lost Prayer to the Sacred Winds | 106% |
| R1 Cashflow Supervision | 104% |
| R1 Jadefall's Splendor | 103% |
| R5 Ash-Graven Drinking Horn | 103% |
| R1 Lost Prayer to the Sacred Winds | 102% |
| R5 The Widsith (passive averaged) | 102% |
| R1–R5 Prototype Amber | 100% |
| R1 Ash-Graven Drinking Horn | 100% |
| R5 Kagura's Verity | 99% |
| R1 Kagura's Verity | 99% |
| R1 The Widsith (passive averaged) | 99% |
| R1–R5 Everlasting Moonglow | 98% |
| R1–R5 Ring of Yaxche | 96% |
| R5 Waveriding Whirl | 95% |
| R5 Ballad of the Boundless Blue | 94% |
| R1–R5 Tulaytullah's Remembrance | 92% |
| R5 Thrilling Tales of Dragon Slayers | 92% |
| R5 Hakushin Ring (with passive) | 90% |
| R1 Ballad of the Boundless Blue | 89% |
| R5 Flowing Purity | 88% |
Assumptions:
Neuvillette — Furina — Kazuha — 4pc AP Zhongli
4pc Marechaussee; HP | Hydro | CRIT; 4CA rotation; 116% base ER requirement; Hydro Resonance
Calcs can be found here
| Weapons | % of R5 Prototype Amber |
| R5 Tome of the Eternal Flow | 159% |
| R1 Tome of the Eternal Flow | 134% |
| R5 Sacrificial Jade | 132% |
| R5 Surf’s Up | 131% |
| R1 Surf’s Up | 121% |
| R1 Sacrificial Jade | 119% |
| R5 Cashflow Supervision | 118% |
| R5 Kagura's Verity | 111% |
| R5 Lost Prayer to the Sacred Winds | 108% |
| R1 Cashflow Supervision | 107% |
| R1 Kagura's Verity | 107% |
| R5 Ash-Graven Drinking Horn | 107% |
| R1 Lost Prayer to the Sacred Winds | 106% |
| R5 Jadefall's Splendor | 105% |
| R5 The Widsith (passive averaged) | 104% |
| R1 Ash-Graven Drinking Horn | 103% |
| R1 Jadefall's Splendor | 103% |
| R1–R5 Everlasting Moonglow | 101% |
| R1 The Widsith (passive averaged) | 101% |
| R1–R5 Prototype Amber | 100% |
| R1–R5 Ring of Yaxche | 99% |
| R1–R5 Tulaytullah's Remembrance | 96% |
| R5 Thrilling Tales of Dragon Slayers | 95% |
| R5 Ballad of the Boundless Blue | 93% |
| R5 Flowing Purity | 90% |
| R1 Ballad of the Boundless Blue | 89% |
| R5 Waveriding Whirl | 86% |
Assumptions:
Neuvillette — Xiangling — Lynette — Kirara
4pc Marechaussee; HP | Hydro | CRIT; 4CA rotation; 136% base ER requirement; Solo Hydro
Only one team Favonius Weapon (R3)
Calcs can be found here
| Weapons | % of R5 Prototype Amber |
| R1 Tome of the Eternal Flow | 139% |
| R5 Sacrificial Jade | 131% |
| R1 Sacrificial Jade | 113% |
| R5 Prototype Amber | 100% |
| R1 Lost Prayer to the Sacred Winds | 97% |
| R5 Ash-Graven Drinking Horn | 95% |
Assumptions:
Neuvillette — Shenhe — Kazuha — 4pc AP Zhongli
4pc Marechaussee; HP | Hydro | CRIT; 4CA rotation; 128% base ER requirement; Solo Hydro
Calcs can be found here
| Weapons | % of R5 Prototype Amber |
| R5 Tome of the Eternal Flow | 164% |
| R5 Sacrificial Jade | 137% |
| R1 Tome of the Eternal Flow | 136% |
| R5 Surf’s Up | 133% |
| R1 Surf’s Up | 123% |
| R1 Sacrificial Jade | 123% |
| R5 Lost Prayer to the Sacred Winds | 112% |
| R1 Lost Prayer to the Sacred Winds | 109% |
| R5 Ash-Graven Drinking Horn | 108% |
| R5 The Widsith (passive averaged) | 107% |
| R1 The Widsith (passive averaged) | 105% |
| R1 Ash-Graven Drinking Horn | 105% |
| R1–R5 Prototype Amber | 100% |
Other weapons can be compared relative to Sacrificial Jade
Assumptions:
Neuvillette — C6 Xiangling — Kazuha — C6 Kirara
4pc Marechaussee; HP | Hydro | CRIT; 4CA rotation; 110% base ER requirement; Solo Hydro
Calcs can be found here
| Weapons | % of R5 Prototype Amber |
| R5 Tome of the Eternal Flow | 168% |
| R5 Sacrificial Jade | 144% |
| R5 A Thousand Floating Dreams | 143% |
| R1 Tome of the Eternal Flow | 139% |
| R5 Surf’s Up | 135% |
| R1 Sacrificial Jade | 127% |
| R1 Surf’s Up | 125% |
| R1 A Thousand Floating Dreams | 119% |
| R5 The Widsith (passive averaged) | 117% |
| R5 Lost Prayer to the Sacred Winds | 111% |
| R1 The Widsith (passive averaged) | 109% |
| R5 Ash-Graven Drinking Horn | 109% |
| R1 Lost Prayer to the Sacred Winds | 108% |
| R1 Ash-Graven Drinking Horn | 106% |
| R1–R5 Prototype Amber | 100% |
Other weapons can be compared relative to Sacrificial Jade.
Gearing Neuvillette’s Supports
Neuvillette always deals the majority of his team’s damage; as such, his teammates should generally equip supportive gear. The most common options will be covered below.
Teammates who are unable to equip any weapon or artifact sets to support Neuvillette keep the same build as in their non-Neuvillette teams.
Artifacts
4pc Viridescent Venerer (VV) | The value of Hydro RES Shred makes 4pc Viridescent Venerer mandatory on any Anemo support. It is highly recommended to run an Anemo support in any team that allows Hydro Swirls. |
4pc Scroll of the Hero of Cinder City (Scroll) | 4pc Scroll is a great option for any teammate who can react with Hydro. It offers up to 40% DMG Bonus if held by a Natlan character, 12% otherwise. Both passive stacks have long durations (15s and 20s for the regular stack and Nightsoul-activated stack, respectively) and can be refreshed from off-field. The set can also buff multiple Elements at once; this lets the 4pc Scroll holder buff both Neuvillette and any non-Hydro off-field damage dealer. 4pc Scroll is also recommended on non-Natlan supports; 12% DMG Bonus is still better than most other buffing sets. For Geo characters, 4pc Scroll is also far easier to play around than 4pc Archaic Petra — at the price of a smaller buff. Note that 4pc Scroll’s DMG Bonus does not stack for the same Element. Therefore, it is better to give the set to a Natlan teammate if available and use a different set for other teammates. |
4pc Archaic Petra (AP) | A rare source of DMG Bonus and the on-paper BiS set for non-Natlan Geo teammates or non-Anemo teammates in teams with a Geo unit who is holding a different set. The downside is that the buff requires the set holder to pick up the shard. This can be difficult to execute mid-battle, and wasting time running around can cancel out any DPS increase the set offers. Players who are intent on min-max and have artifact fodder to spare can consider strongboxing the set. Even for casual players, the set is somewhat recommendable; unintentionally picking up a Hydro shard every couple rotations is still a DPS increase if the alternative is no support set at all. |
4pc Instructor | 4pc Instructor is a solid option when Neuvillette benefits from EM, but its 4-star base stats can be difficult to build around (e.g., reaching high ER requirements). If the teammate in question is a healer or shielder, their defensive utility is also impacted. Players who need more survivability should not hesitate to swap to another set. 4pc Instructor’s advantage is that it is obtainable at no Resin cost. This makes it easier to recommend even when it has limited uptime, as it is exceptionally affordable. The downside is that it is not farmable through any Domain. Instead, set pieces accumulate over time from opening chests, killing elite enemies, and defeating bosses. |
4pc Song of Days Past | Healers can equip 4pc Days Past to buff Neuvillette, but the buff is limited and easily spent, rendering it an insignificant upgrade over 4pc Clam. Even for players who wish to min-max, investing more into Neuvillette would be a more efficient use of Resin. Only at whale investment does the set pull ahead enough to be recommendable to farm (and only for units who cannot hold 4pc Scroll or 4pc Archaic Petra). Outside of whale investment, the set is mainly recommended for players who are already farming 4pc Nighttime Whispers. They can use 4pc Days Past to save some artifact fodder. Players who have a 4pc Clam set can go with whichever set has better stats. |
4pc Noblesse Oblige, 4pc Tenacity of the Millelith  | If none of the above artifacts are an option, a support can equip 4pc Tenacity or 4pc Noblesse in teams that have an ATK-scaling DPS. If the set holder is a shielder who scales with HP, 2pc Tenacity also improves their defensive utility. |
Weapon Options
Favonius Weapon Series | Because Neuvillette deals a significant portion of the team’s damage, every ER substat that he can exchange for an offensive substat is a direct team damage increase. As such, few teammates have better weapon choices than Favonius. Units who deal significant personal damage are exceptions, but even they may equip Favonius weapons should Neuvillette’s ER requirements demand it. |
Xiphos’ Moonlight | An option for supports who build EM. At high refinements, Xiphos serves the same purpose as Favonius Sword by letting Neuvillette prioritize more offensive stats over ER. Xiphos has the added benefit of not impacting the wielder’s damage. |
Hakushin Ring | As long as the holder can trigger Electro-Charged while on-field, Hakushin Ring offers a valuable DMG Bonus. Additionally, it is craftable, making it completely F2P. |
Below are gear options for higher-investment players. If available, they are recommended over more affordable alternatives, but aren’t worth pulling solely for Neuvillette’s teams for low spenders. As such, they will not be mentioned outside of this section.
Freedom-Sworn | A luxury option, Freedom-Sworn offers a valuable 16% Charged Attack DMG Bonus. The holder has to trigger Elemental Reactions to proc the weapon passive, but this can be done off-field. Recommended: Kazuha, Lynette, Jean, Kuki Shinobu, Layla. |
Peak Patrol Song | Peak Patrol Song offers around 10-25.6% all Elemental DMG Bonus depending on the holder’s DEF stat — a solid buff to Neuvillette’s damage. However, it has some caveats that limit its performance. Activating its passive extends the rotation — albeit not by much — and the holder has to build enough DEF to make up for the extension. This requires double or triple DEF% main stats, which e.g., healers and shielders cannot afford as it would sacrifice their utility (and thus the reason they are used in the first place). Nonetheless, it is a great pick for characters who can afford building high enough DEF and where the rotation extension to activate its passive is minimal (or non-existent, in Xilonen’s case). It especially performs well in Neuvillette teams with off-field damage dealers. Once refined to R2 or above, the increased buff also makes up for any caveats. Recommended: Xilonen, Lynette, Chiori, Albedo. Viable: Kuki, Jean |
Starcaller's Watch | Starcaller’s Watch offers a valuable 28% DMG Bonus to nearby enemies as long as its holder generates a shield (Crystallize shields count, as long as the Shard is generated by the holder). Its 15s uptime also lets it cover most of Neuvillette’s damage window. Note that Starcaller’s range is limited; Neuvillette should glue himself to enemies to make sure the buff is applied. Since it requires a shielder anyway, there is no risk of enemies interrupting Neuvillette. Regardless, there is still the risk of him being unable to get close enough: enemies may move away faster than he can follow, or — in AoE scenarios — stragglers may be too far away even when grouped. Recommended: Citlali, Baizhu, Lan Yan Viable: Ningguang (Crystallize), Yanfei (C4+) Starcaller range demonstration by sen_rin. Starcaller’s passive disappears when Neuvillette’s first CA ticks drop to the 1400s. |
Elegy for the End, A Thousand Floating Dreams, Key of Khaj-Nisut | Luxury options if Neuvillette wants EM. Key offers extra survivability if held by a shielder or healer who scales with HP, while Elegy buffs any ATK-scaling teammate run alongside Neuvillette. Players with very high investment should note that, since the EM share from Floating Dreams is stackable and scales badly with refinements, it is better to run multiple copies rather than refine them. Recommended (Elegy): Venti, Collei, Diona. Recommended (Key): Furina, Nilou, Kirara, Kuki Shinobu. Recommended (Floating Dreams): Nahida, Sucrose, Baizhu. |
Playstyles and Teams
“Though we live in a world of disarray, I shall undertake to restore all that has been broken.”
Rotation Notation
- N = Normal Attack
- C = Charged Attack
- A = Aimed Shot
- P = Plunging Attack
- E = Elemental Skill
- tE = Tap Skill
- hE = Hold Skill
- Q = Elemental Burst
- D = dash (cancel)
- J = jump (cancel)
- W = walk (cancel)
- > = switch character
- ( ) = these actions are optional; please refer to the notes below
- [ ] = repeat these actions the specified number of times
Hypercarry
Neuvillette’s signature playstyle. Hypercarry teams center around maximizing his personal damage, letting him dish out the majority of the team’s DPS. They scale very well with investment into Neuvillette, not only through Constellations and BiS weapons, but also through artifact quality and farming.
Although Neuvillette’s hypercarry teams used to be limited by a lack of options that directly buff his damage, this is an issue of the past thanks to the release of 4pc Scroll and units that provide buffs he can utilize – on top of already existing ones. E.g., Furina offers a hefty DMG Bonus, enables Hydro Resonance for +25% HP, and lowers his ER requirements, making her a staple teammate in this playstyle. Xilonen and Kazuha are also recommended due to the DMG Bonus they can provide on top of Hydro RES Shred.
That being said, none of the mentioned premium 5-star units are necessary for Neuvillette’s hypercarry compositions to perform well. They are recommended, but can be substituted for whichever supports and off-field damage dealers are available. The team will still clear despite the damage lost thanks to Neuvillette’s exceptional personal damage – albeit maybe with some struggle. This makes his hypercarry teams accessible not only to veteran players, but also to newer or less invested players.
The remaining team slots can be filled by an offensive flex to contribute additional buffs and their own personal damage, or a defensive flex to provide appreciated interruption resistance and survivability. Both should accommodate Neuvillette’s field time requirements. Geo units and healers can equip 4pc Scroll, or – if there is already a Scroll holder – 4pc Archaic Petra or 4pc Days Past respectively for valuable buffs. Teammates who can stack Neuvillette’s A1 Passive are also preferable for maximizing DPS, though not required. His C1 makes this less of a concern, and lets players replace the shielder slot for another damage dealer or support.
Pros
- Not as reliant on hyperinvestment as other hypercarries; his teams are strong even at “F2P” investment
- Very flexible when it comes to teammates
- DPS is not locked behind complicated combos that are mechanically hard to execute
- High ceiling for those who wish to invest into Neuvillette
- Somewhat resource-cheap, as technically only his Normal Attack Talent needs to be leveled
Cons
- Neuvillette’s ceiling teams are expensive, with primarily 5-star teammates
- Few actual support units or sources of buffs, most of which come from 5-star characters
- The performance of his best F2P weapon option is a far cry from that of his best paid or gacha option
Team Composition

- Neuvillette deals the majority of the damage, and accommodating him is a priority.
- An Anemo unit with 4pc Viridescent Venerer and/or Xilonen is strongly recommended.
- Run supports and equip supportive artifacts/weapons to buff Neuvillette’s damage.
- An off-field damage dealer can slot in as an offensive flex if lacking available supports.
- A shielder can slot in as a defensive flex for players who want interruption resistance.
Notable Teammates
See the Extended Synergies section for a more detailed breakdown.
Pyro Units
 | Mavuika deals off-field damage with her Skill, can hold 4pc Scroll for 40% DMG Bonus, and dishes out a hefty nuke with her Burst. She is a strong offensive flex for Neuvillette teams, albeit at the price of being unable to run her as an on-field DPS in her own team — often the more optimal choice. |
 | Pyro Traveler is an accessible buffer, as they both fully activate 4pc Scroll for 40% DMG Bonus, and offer 6% DMG Bonus via their C1 on top. Note that the Traveler does not count as a Natlan character and will not trigger Nightsoul Bursts. |
Electro Units
| Ororon activates the full 4pc Scroll for 40% Hydro DMG Bonus, and deals some personal damage. He also provides QoL with his Burst’s Taunt, and can battery with Favonius Warbow and a modest Energy refund. | |
| Fischl is an excellent off-field damage dealer, with high personal damage and minimal field time. Her particle generation lets her battery Neuvillette. Note that her teams can require delicate setups to Swirl Hydro or trigger Hydro Scroll. |
 | Lisa is a highly accessible buffer who offers valuable DEF Shred. She can equip 4pc Scroll, and either hold Prototype Amber to stack Fanfare and forgo her Hold Skill, or wield Hakushin Ring for a teamwide Hydro and Electro DMG Bonus. |
 | Yae Miko deals solid personal damage from off-field with appreciated rotation flexibility. To alleviate her high ER requirements, she can Burst every other rotation, but it’s often worth forgoing her Burst entirely. |
Hydro Units
| Furina is Neuvillette’s premier buffer. She enables Hydro Resonance, brings a hefty DMG Bonus, and deals high personal damage. Since Neuvillette can stack Fanfare on his own, running a healer is optional. |
| Childe’s Utility Passive increases his party members’ NA Talent Level by 1, a solid buff for Neuvillette which does not require field time. He also enables Hydro Resonance for HP%, and can hold Favonius Warbow to lower ER requirements. |
| Yelan buffs Neuvillette with her Burst’s DMG Bonus and Hydro Resonance’s HP% and batteries him with her Skills and Favonius Warbow. It’s often not worth weaving Normal Attacks to trigger her Burst as her personal damage is comparatively low. |
 | Mona enables Hydro Resonance for additional HP%, and her Burst buff offers a large DMG Bonus. However, hypercarry teams lack ways to extend her Omen, limiting its value. She can hold Favonius Codex to lower team ER requirements. |
 | Other Hydro units like Xingqiu, Kokomi, or Barbara can buff Neuvillette by enabling Hydro Resonance while offering some utility, damage, or minor buffs, but they struggle to be competitive against other support picks. |
Anemo Units
 | Kazuha is Neuvillette’s best Anemo teammate. He provides Hydro RES Shred with 4pc VV, a sizable Elemental DMG Bonus with his A4, and strong grouping with his Skill. His Hydro-absorbed Burst can help with Swirl setups. |
| Lan Yan consolidates RES Shred and shielding, but needs Sacrificial Fragments or C6 for more than 50% uptime. Her slow animations limit her on-paper damage, but in practice, her shield makes her worth running for players who need it. At C6, she can equip support weapons like Prototype Amber or Favonius Codex. | |
 | Lynette provides Hydro RES Shred, slight grouping at C1, and a Burst Taunt that can prevent enemies from staggering Neuvillette. Her HP fluctuation helps stack Fanfare with Furina, and her Hydro-absorbed Burst can help with Swirl setups. |
 | Jean shines in Furina teams since she shreds Hydro RES with 4pc VV while quickly stacking Fanfare with her healing. She can hold Favonius Sword to lower ER requirements. |
 | Sayu is a solid pick with Furina due to her healing for Fanfare stacks and ability to shred Hydro RES with 4pc VV. She can lower ER requirements with Favonius Greatsword and deal some Swirl damage. |
 | Xianyun pairs well with Furina. She shreds Hydro RES with 4pc VV and stacks Fanfare with her healing. Her advantage lies in her mobility and ability to hold Hakushin Ring or Prototype Amber. |
 | Venti offers powerful grouping, Hydro RES Shred, and batterying capabilities with Favonius Warbow and his 15 Energy refund. He excels in multi-target and multi-wave content, but falls off otherwise. |
 | Sucrose shreds Hydro RES and offers decent grouping. She can Burst to offer Hydro DMG Bonus at C6, but the Absorption is unreliable. Her Burst can also juggle enemies and cause Neuvillette to miss his Charged Attacks. |
 | Heizou offers Hydro RES Shred and slight grouping with his cheap, short-cooldown Burst. He can hold Favonius Codex for Energy or Prototype Amber to stack Fanfare when paired with Furina. |
Flex Units
 | Xilonen is a powerful buffer for Neuvillette, thanks to her RES Shred and ability to activate 4pc Scroll’s full DMG Bonus. She also stacks Fanfare with her healing and can hold Favonius Sword for Energy. |
| Citlali consolidates powerful buffing with shielding. In addition to activating the full 4pc Scroll effect for 40% DMG Bonus, she also provides 20% Hydro RES Shred with her A4. Her shield has the same uptime as Zhongli’s, but with a far lower scaling. | |
 | Zhongli’s long-duration shield offers comfort, and his RES Shred makes him a solid pick to buff Neuvillette. He can battery units with Favonius Lance and can hold 4pc Archaic Petra for Hydro DMG%, though it comes with caveats. |
 | Kachina is both a great buffer and free. She is one of the few supports that can activate 4pc Scroll’s full DMG Bonus, making her a surprisingly potent buffer, and she can hold Favonius Lance to lower ER requirements. |
 | Baizhu is an excellent option if paired with Furina. His Skill healing stacks Fanfare and his Burst offers appreciated interruption resistance. He can also hold 4pc Scroll to further buff Neuvillette. |
| Chiori offers high off-field damage with low field time requirements. She can hold 4pc Archaic Petra to provide Hydro DMG Bonus, but struggles to refresh the buff. This also significantly sacrifices her personal damage. |
 | Kirara offers a strong shield that can be flexibly reapplied to accommodate Neuvillette’s field time. She also offers some DMG Bonus with her C6, and can hold 4pc Scroll and Favonius Sword for Hydro DMG Bonus and Energy respectively. |
 | Layla is a cheaper alternative to Zhongli with a similarly strong shield. She can hold Favonius Sword to lower ER requirements, and equip 4pc Scroll for Hydro DMG Bonus – albeit at the price of 4pc Tenacity’s added Shield Strength. |
 | Albedo deals respectable damage from off-field and can hold Favonius Sword to lower ER requirements. He can run 4pc Archaic Petra for Hydro DMG%, though the set’s caveats can make 4pc Scroll’s lesser but easier-to-trigger buff preferable. |
| Shenhe’s Hold Skill offers a Charged Attack DMG Bonus, and she can equip 4pc Scroll to buff Hydro DMG. She can also hold Favonius Lance to lower ER requirements. |
| Other partywide healers like Charlotte and Mika can slot into Neuvillette’s hypercarry teams with Furina. Their healing lets them quickly stack Fanfare, and they can hold Favonius weapons to offer Energy. |
Example Teams
These are only a small handful of examples. Check the Neuvillette Rotation Sheet for many more team examples and rotations.
NB: Neuvillette’s hypercarry teams with Furina and Citlai/Charlotte can be found in the Freeze section. His teams with Ineffa can be found in the Lunar-Charged section.
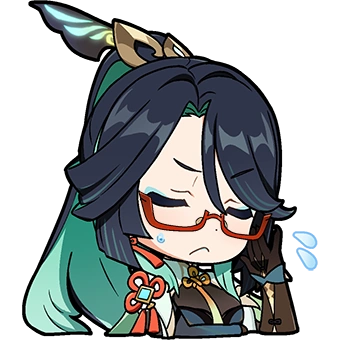
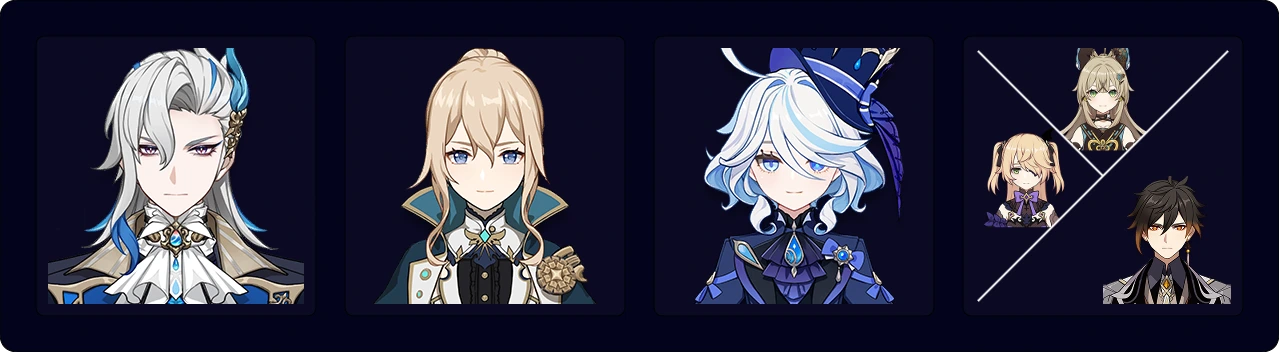
Neuvillette's strongest hypercarry team, and one of his premier teams regardless of investment. The team centers entirely around maximizing his damage; Furina provides plenty of DMG Bonus, HP% through Hydro Resonance, personal damage, and Energy, while Xilonen provides long-duration RES Shred, faster Fanfare stacking, and 4pc Scroll's full DMG Bonus.
The flex can be an Anemo unit with 4pc VV to further shred Hydro RES, or an off-field damage dealer with some utility. Kazuha is a recommended flex for his buffs and grouping, while Mavuika trades some buffs for high personal damage (though she also provides plenty of DMG Bonus). Lisa and Lynette are free alternatives with DEF Shred and a helpful Taunt, respectively.
Rotation (Kazuha and C0 Neuvillette)
Neuvillette E > Furina ED > Xilonen EQ N2 > Kazuha tEPQ > Furina Q > Neuvillette C E C Q > Xilonen E N2 > Kazuha tEP > Neuvillette 2[C]
Rotation Video
Rotation (Kazuha and C6 Neuvillette)
Neuvillette Q > Furina ED Q (N1) > Xilonen E N2 > Kazuha tEP > Neuvillette E C
Rotation Video
Rotation (Mavuika)
Neuvillette E > Furina ED > Xilonen EQ N2 > Mavuika Q C E > Furina Q > Neuvillette C E C Q > Xilonen E N2 > Neuvillette 2[C]
Rotation (Lynette)
Neuvillette E > Furina ED > Xilonen EQ N2 > Lynette E N1 Q > Furina Q > Neuvillette C E C Q > Xilonen E N2 > Lynette E N1 > Neuvillette 2[C]
Rotation Video
Rotation (Lisa)
Neuvillette E > Furina ED > Xilonen EQ N2 > Lisa Q1 > Furina Q > Neuvillette C E C Q > Xilonen E N2 > Neuvillette 2[C]
1If Lisa is holding 4AP, You can use her Elemental Burst after Furina Q and pick up the Hydro Shard with dash, maximizing 4AP uptime on Neuvillette
Rotation Video
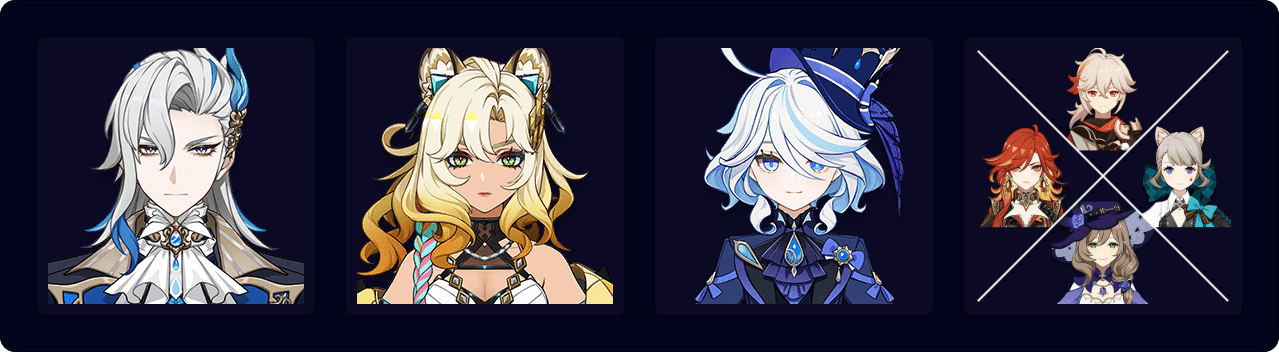
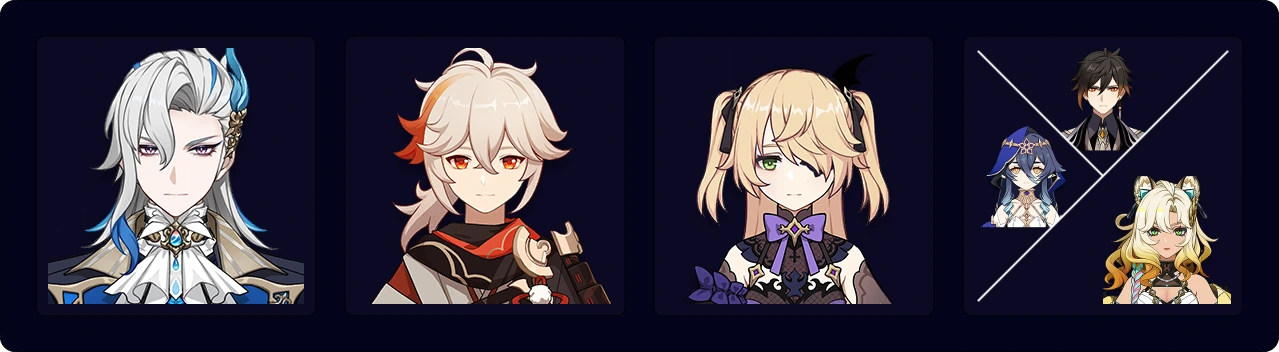
Another strong variation, only falling behind Neuvillette’s best Xilonen teams. The flex picks all perform similarly; Zhongli shreds Elemental RES and can hold 4pc Archaic Petra, while Baizhu stacks Furina’s Fanfare. Lisa is a more accessible alternative who provides a rare DEF Shred and can hold Prototype Amber for Fanfare. Fischl, meanwhile, trades buffs for personal damage and batterying.
At C2, Baizhu can remain entirely off-field. At high investment, he can hold 4pc Songs of Days Past if 4pc Scroll is taken.
Rotation (Zhongli)
Neuvillette E > Furina ED > Kazuha tEPQ > Zhongli hED > Furina Q > Neuvillette C E C Q > Kazuha tEP > Neuvillette 2[C]
Rotation Video
Rotation (Fischl)
Neuvillette E > Furina ED > Kazuha tEPQ > Furina Q > Fischl E > Neuvillette C Q E C > Kazuha tEP > Fischl Q > Neuvillette 2[C]
Rotation Video
Rotation (Lisa)
With Prototype Amber:
Neuvillette E > Furina ED > Kazuha hEPQ > Furina Q > Lisa Q > Neuvillette C E C Q > Kazuha tEP > Neuvillette 2[C]
Without Prototype Amber:
Neuvillette E > Furina ED > Kazuha Q > Lisa hEQ > Kazuha tEP > Furina Q > Neuvillette C E C Q > Kazuha tEP > Neuvillette 2[C]
Rotation (Baizhu)
Neuvillette E > Furina ED > Kazuha tEPQ > Baizhu Q E > Furina Q > Neuvillette C E C Q > Kazuha tEP > Baizhu E N1 > Neuvillette 2[C]
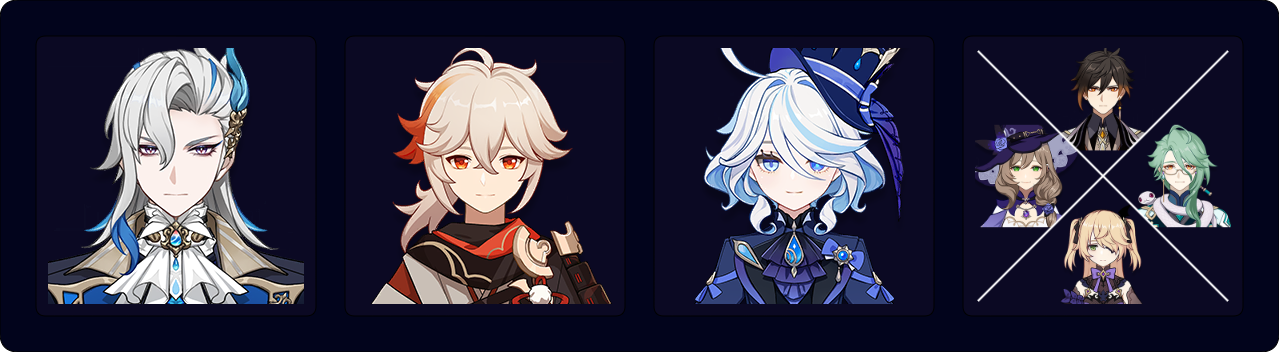
Ororon plays similarly to Fischl in Neuvillette’s hypercarry teams, but trades some of her personal damage for buffs via 4pc Scroll. This lets him perform equally to Fischl variants in single-target, and even better in multi-target. He also provides a Taunt, and lowers ER requirements with a modest Energy refund.
The remaining team slot should be another buffer e.g. Kazuha. Lynette is affordable and has minimal field time requirements, while Lan Yan offers comfort (with C6 and/or Sacrificial Fragments).
Rotation (Kazuha)
Neuvillette E > Furina ED > Ororon EQ > Kazuha tEPQ > Furina Q > Neuvillette C E C Q > Kazuha tEP > Neuvillette 2[C]
Rotation (Lynette)
Neuvillette E > Furina ED > Ororon EQ > Furina Q > Lynette EQ1 > Neuvillette C Q E C > Lynette E N1 > Neuvillette 2[C]
1 If Lynette is pre-C4, put this EQ before Furina Q
Rotation (Lan Yan)
Neuvillette E > Furina ED > Ororon EQ > Furina Q > Lan Yan E N1 (Q)1 > Neuvillette C Q E C > Lan Yan E N1 > Neuvillette 2[C]
1 If needed, use Lan Yan’s Burst for an instance of grouping.
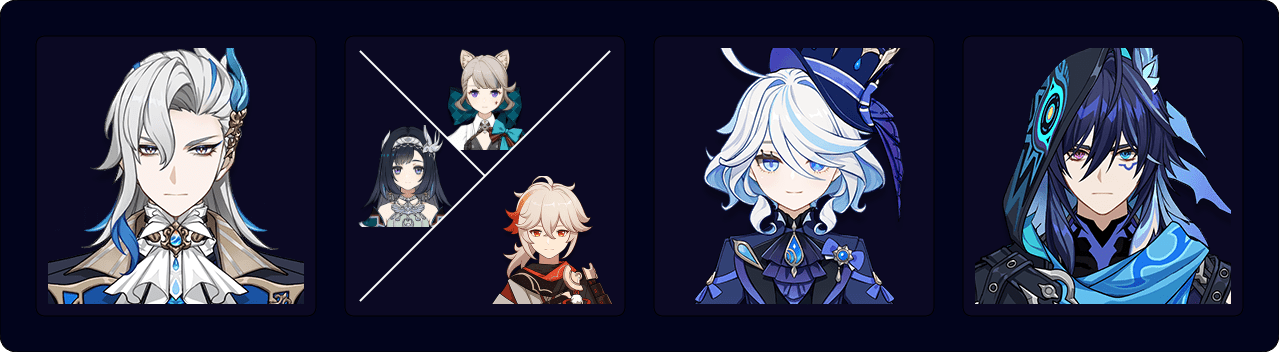
For players without Kazuha or for those who want a healer, Jean is an excellent pick as she brings comfort and helps stack Fanfare. Fischl batteries and offers damage, while Zhongli offers interruption resistance and RES Shred. Kirara is an alternative to Zhongli, and offers a modest DMG Bonus at C6.
Rotation (Zhongli)
Neuvillette E > Furina ED Q > Zhongli hED > Jean EQ > Neuvillette C Q E C > Zhongli hED > Jean (N1) E > Neuvillette 2[C]
Rotation Video
Rotation (Fischl)
Neuvillette E > Furina ED Q > Jean EQ > Fischl E > Neuvillette C Q E C > Jean (N1) E > Fischl Q > Neuvillette 2[C]
Rotation Video
Rotation (Kirara)
Neuvillette E > Furina ED Q > Jean EQ > Kirara shE > Neuvillette C Q E C > Jean (N1) E > Kirara shE > Neuvillette 2[C]
The “original” hypercarry Neuvillette team and a strong variation even after the release of Furina. Xilonen offers RES Shred and 4pc Scroll’s full DMG Bonus, while Fischl takes the place of a buffer to instead battery and deal personal damage. For players without Zhongli, Layla is a more accessible shielder.
Xilonen is a more offensive alternative to a shielder, trading comfort for strong buffs like higher RES Shred and 4pc Scroll's DMG Bonus.
Rotation (Xilonen)
Neuvillette E N1 > Kazuha Q > Xilonen E N2 > Fischl E > Kazuha tEP > Neuvillette C Q E C > Kazuha tEP > Xilonen E N2 > Fischl Q > Neuvillette 2[C]
Rotation Video
Rotation (Zhongli)
Neuvillette E N1 > Kazuha Q > Zhongli hED > Fischl E > Kazuha tEP > Neuvillette C Q E C > Kazuha tEP > Zhongli hED > Fischl Q > Neuvillette 2[C]
Rotation Video
Rotation (Layla)
Neuvillette Q N1 > Kazuha tEP > Layla Q (N1) E > Fischl Q > Neuvillette 2[C] E N3 > Kazuha tEPQ > Layla Q (N1) E > Neuvillette C E C
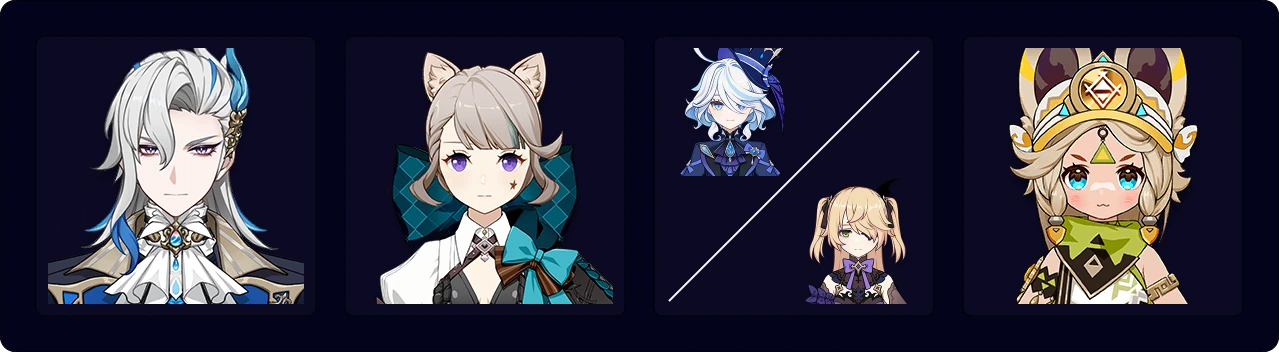
A cheap hypercarry team with at minimum two completely free units. Lynette shreds Hydro RES and provides a Taunt, and Kachina buffs with 4pc Scroll’s full DMG Bonus. Although Furina is highly recommended, Fischl is a more accessible alternative, trading buffs for personal damage and Energy.
Rotation (Furina)
Neuvillette E N1 > Furina ED > Kachina E > Lynette Q N1 E > Furina Q > Neuvillette C E C Q > Lynette E N1 > Neuvillette N1 2[C]
Rotation Video
Rotation (Fischl)
Neuvillette E N1 > Kachina E N2 > Lynette Q > Fischl E > Lynette E N1 > Neuvillette C Q E C > Lynette E N1 > Kachina Q > Fischl Q > Neuvillette 2[C]
Rotation Video
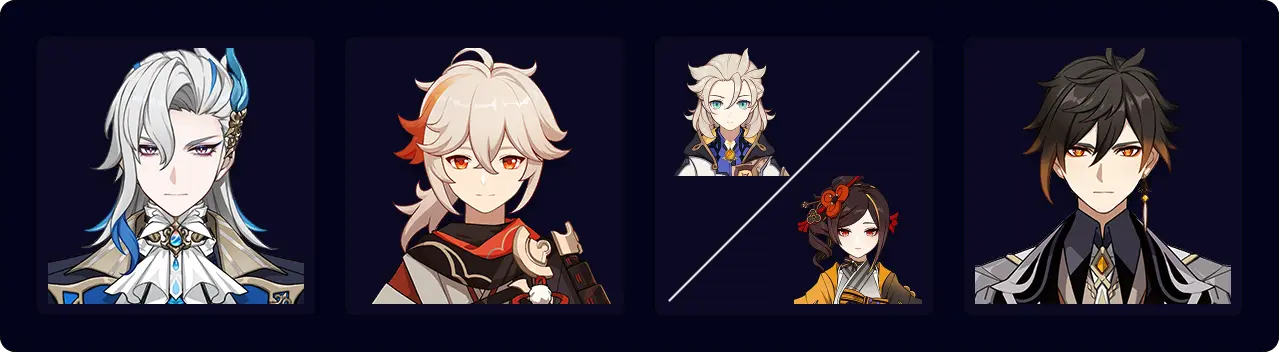
A variant of Neuvillette’s Furina-less hypercarry team. Instead of Fischl, the team runs Chiori or Albedo as an offensive flex for Geo Resonance. Zhongli’s sturdy shield ensures high uptime on Geo Resonance’s DMG buff and Chiori/Albedo allow for easier Swirl setups than the Fischl variant.
Zhongli should hold 4pc Archaic Petra to let Chiori/Albedo build for damage.
Rotation (Albedo)
Neuvillette E > Albedo E N1 > Kazuha Q tEP > Zhongli (Q)1 hED > Neuvillette C E C Q > Kazuha tEP > Zhongli N1 (pick up Hydro crystal)2 > Neuvillette 2[C]
1 Optional, to fill time for Neuvillette’s Skill cooldown.
2 To refresh 4pc Archaic Petra if equipped.
Rotation Video
Rotation (Chiori)
Neuvillette E > Kazuha Q tEP > Zhongli (Q)1 hED > Chiori 2[E] > Neuvillette C E C Q > Kazuha tEP > Zhongli N1 (pick up Hydro crystal)2 > Neuvillette 2[C]
1 Optional, to fill time for Neuvillette’s Skill cooldown.
2 To refresh 4pc Archaic Petra if equipped.

The Neuvillette-Furina-Zhongli core with 4-star Anemo options that help stack Fanfare. Sayu provides healing, Heizou can hold Prototype Amber, and Lynette has moderate HP fluctuation in her kit with the added benefit of being freely obtainable.
Rotation (Lynette)
Neuvillette E N1 > Furina ED > Lynette Q N1 E > Zhongli N1 hED > Furina Q > Neuvillette C E C Q > Lynette E N1 > Neuvillette N1 2[C]
Rotation Video
Rotation (Sayu)
Neuvillette E > Furina ED Q > Zhongli hED > Sayu tEQ > Neuvillette C Q E C > Zhongli hED > Sayu N1 E > Neuvillette 2[C]
Rotation (Heizou)
Neuvillette E > Furina ED Q > Zhongli hED > Heizou EQ > Neuvillette C Q E C > Zhongli hED > Heizou Q E > Neuvillette 2[C]
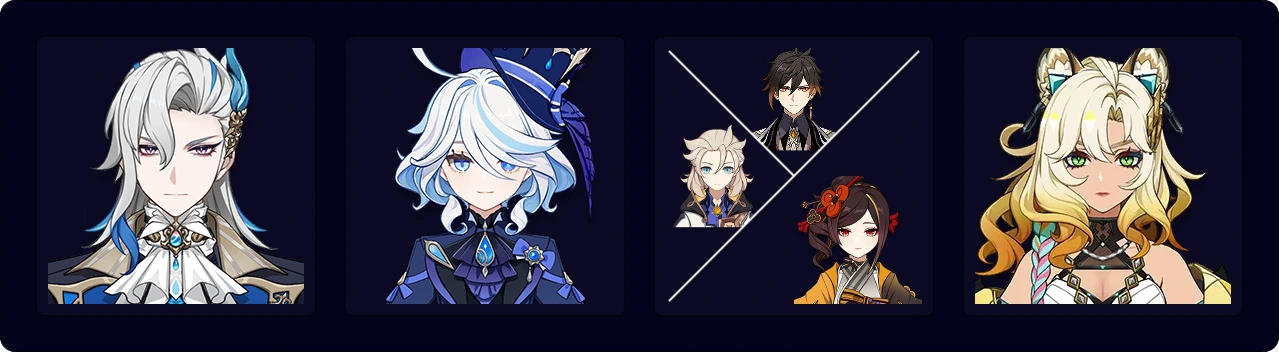
Since the gap between 1 and 2 stacks of Neuvillette’s A1 is less significant than the gap between 2 and 3 stacks, this team performs surprisingly well. Buff management is simple with Xilonen’s RES Shred, Furina’s DMG Bonus, and Geo Resonance. Zhongli’s sturdy shield ensures high Resonance uptime and comfortable gameplay, while other alternatives offer personal damage.
Navia should equip 4pc Archaic as her Hold Skill makes activating the set bonus simple; Zhongli and Albedo can opt to equip it.
Rotation (Chiori and C0 Neuvillette)
Neuvillette E N1 > Furina ED > Xilonen EQ N2 > Chiori 2[E] > Furina Q N1 > Neuvillette C E C Q > Xilonen E N2 > Neuvillette 2[C]
Rotation (Chiori and C6 Neuvillette)
(Chiori EE)1 > Neuvillette Q > Furina E D Q N1 > Xilonen E N2 > Chiori EE > Neuvillette EC
1Only open with Chiori Skill if she is C6
Rotation Video
Rotation (Zhongli)
Neuvillette E > Furina ED > Xilonen EQ N2 > Zhongli hED > Furina Q > Neuvillette C E C Q > Xilonen E N2 > Neuvillette 2[C]
Rotation (Navia)
Neuvillette E > Furina ED > Navia Q > Xilonen E Q N2 > Furina Q > Navia tE hE > Neuvillette C Q E C > Xilonen E N2 > Navia hE > Neuvillette 2[C]
Rotation (Albedo)
Neuvillette E > Furina ED > Albedo E N1 > Xilonen EQ N2 > Furina Q > Neuvillette C E C Q > Xilonen E N2 > Neuvillette 2[C]
Rotation Video
Vaporize
Forward Vape amplifies Neuvillette’s already sizable personal damage for impressive DPS output. His best Vaporize teams even perform on par with his best hypercarry teams at C0 (though his hypercarry teams outpace them already at C1). In addition to their general strength, these teams have also established themselves as solid speedrunning teams.
There are primarily two variants of Neuvillette’s Vaporize teams. In his standard Forward Vape teams, a Pyro unit with consistent Elemental application enables Vaporize. In his Burnvape teams, a Dendro applier sustains Burning and allows Neuvillette to Vaporize off the resulting aura. These teams can run units with much weaker Pyro application as long as they can enable Burning. Although both variations benefit from an Anemo unit, not all Vaporize teams get consistent Hydro Swirl, reducing the value of 4pc VV. Xilonen, on the other hand, has no such issues: she can shred Hydro RES regardless of whether Hydro is applied anywhere or not.
Similarly to Neuvillette’s hypercarry teams, his Forward Vaporize teams scale very well with investment into Neuvillette, whether that be through high-quality artifacts or Constellations – up until C6. At C6, Neuvillette’s extra Hydro application makes Forward Vaporize inconsistent at best, and his hypercarry teams easily outperform his Vaporize teams.
Note that, in Vaporize, a high-refine Sacrificial Jade pulls ahead of R1 Tome thanks to its EM buff. However, this does not mean Neuvillette builds EM — he still runs an HP% Sands, and any EM through substats should only be considered an appreciated bonus.
Pros
- A fun and strong playstyle with plenty of room for player skill expression.
- Teams with high ceilings and excellent speedrun potential.
- Investment can be funneled into Neuvillette which makes gearing the team easier.
- Seeing big numbers is satisfying.
- Some of his better teammates are 4-stars, including Xiangling who is available to all players.
Cons
- Hydro VV or Scroll can be difficult to ensure in some team compositions.
- Limited team options without Xiangling.
- Xiangling forces a closer range, which can be difficult to play around for C0 Neuvillette.
- Aura management can be delicate.
Team Composition

- It is vital that the team has sufficient Pyro application. Another teammate can slot in to ensure this; Nahida can sustain Burning, a second Pyro unit can assist with Elemental application, or an Anemo unit can Swirl Pyro.
- Hydro Swirls can be inconsistent, which makes an Anemo unit with 4pc VV less necessary.
- When running Xiangling, interruption resistance is appreciated.
Notable Teammates
See the Extended Synergies section for a more detailed breakdown.
Pyro Units
 | Xiangling provides unmatched Pyro application for Forward Vape, and long rotations keep her ER requirements low. She can also buff Neuvillette with 4pc Scroll or 4pc Instructor. Her Burst’s close range makes interruption resistance valuable. |
| Mavuika offers some off-field Pyro application and DMG Bonus from 4pc Scroll and her Burst, but is unable to enable Neuvillette without Nahida and an Anemo unit (and ideally her C1). Playing her as a Pyro enabler also comes at the price of being unable to play her more optimal on-field DPS playstyle. |
 | Dehya consolidates appreciated interruption resistance with some Pyro application, and can hold 4pc Scroll or 4pc Instructor. Similar to Mavuika, she should pair with either Nahida and an Anemo unit or another Pyro applier to help enable Vaporize, as she applies even less Pyro. |
| Pyro Traveler does not have sufficient Pyro application to enable Neuvillette. Instead, they can slot in as a flex buffer with 4pc Scroll and their C1’s DMG Bonus, and their Pyro application can slightly assist the team’s main Pyro enabler. |
Hydro Units
| Furina’s Hydro application makes Forward Vape less consistent, but Hydro Resonance and her massive DMG Bonus still makes her a solid pick. She compensates by buffing Neuvillette and dealing damage. |
| Childe’s Utility Passive increases his party members’ NA Talent level by 1 — a valuable buff that does not require field time. He enables Hydro Resonance, lowers ER requirements with Favonius Warbow, and can hold 4pc Instructor or 4pc Scroll. |
| Yelan offers HP% with Hydro Resonance and DMG Bonus with her Burst. She can battery Neuvillette with her Skill and Favonius Warbow, and can hold 4pc Scroll for some DMG Bonus. Weaving Normal Attacks to trigger her Burst risks stealing Vapes. |
| Mona enables Hydro Resonance for HP% offers a large DMG Bonus, though Vaporize teams lack ways to extend her Omen. She can hold Favonius Codex to battery, 4pc Scroll for DMG Bonus, and she does not steal Vapes from Neuvillette. |
Dendro Units
 | Nahida’s high Dendro application makes her the most consistent Burning enabler available. Her Skill’s range and long duration easily accommodate Neuvillette, and her Burst’s hefty EM buff increases his Vaporize damage. |
 | Emilie deals impressive off-field damage in Burnvape teams, to the point it makes up for her lack of buffs. She also enables Burning, but her slow, single-target application makes her inconsistent in teams with Furina, or in multi-target. |
 | Kirara offers a strong shield that can be flexibly reapplied to accommodate Neuvillette’s field time. She can hold 4pc Scroll or 4pc Instructor to buff Neuvillette, and her C6 also offers some DMG Bonus |
| Baizhu’s Skill provides healing and his Burst offers appreciated interruption resistance. He can hold 4pc Scroll, or, if there is already a Scroll holder, 4pc Instructor to buff Neuvillette’s Vaporize damage, or 4pc Days Past if at high investment. |
Anemo Units
| Kazuha can shred Hydro RES and provide a sizable Hydro DMG Bonus in teams where Hydro Swirl is consistent. His Skill offers strong grouping, and he can help enable Forward Vape by absorbing Pyro with his Burst. |
| Sucrose offers decent grouping and a hefty EM buff to significantly increase Neuvillette’s Vaporize damage and some grouping. However, she has significant consistency issues in rotations that rely on her Burst absorbing Pyro. |
| Lynette offers a Taunt that can prevent Neuvillette from getting staggered, Hydro RES Shred when Swirling Hydro is possible, and some grouping at C1. Absorbing Pyro with her Burst can help enable Vaporize. |
| Lan Yan consolidates RES Shred with a sturdy shield, but needs Sacrificial Fragments or C6 for sufficient uptime. Her slow animations limit her on-paper damage, but in practice her shield makes her worth running for players who need it. At C6, she can equip Prototype Amber or Favonius Codex. | |
| Venti offers powerful grouping in favorable content and valuable Energy with Favonius Warbow and a 15 Energy refund. He can shred Hydro RES when Swirling Hydro is possible, and absorb Pyro with his Burst to help enable Vaporize. |
 | Heizou is an option when Swirling Hydro is possible. He offers Hydro RES Shred, a small EM buff to boost Vaporize damage, and slight grouping with his Burst. He can hold Favonius Codex for Energy. |
| Jean pairs well with Furina; she quickly stacks Fanfare with her partywide healing while shredding Hydro RES with 4pc VV. She can hold Favonius Sword to provide the team with additional Energy. |
| Sayu can pair with Furina to stack Fanfare with her healing, shred Hydro RES with 4pc VV, and hold Favonius Greatsword for Energy. Her C6 lets her build for Swirl damage without compromising healing. |
| Xianyun pairs well with Furina due to her mobile healing to stack Fanfare and Hydro RES Shred with 4pc VV. She can hold Favonius Codex for Energy, or Prototype Amber for more Fanfare stacks. |
| Heizou is an option when Swirling Hydro is possible. He offers Hydro RES Shred, a small EM buff to boost Vaporize damage, and slight grouping with his Burst. He can hold Favonius Codex for Energy. |
Flex Units
 | Xilonen is a powerful buffer and even shreds Hydro RES in teams where Hydro Swirl is impossible. She can also activate the full DMG Bonus from 4pc Scroll and hold Favonius Sword for Energy. If Hydro Scroll is impossible, she can instead hold 4pc Instructor. |
| Zhongli offers a long-duration shield that is especially valuable when playing Neuvillette with Xiangling. Zhongli’s RES Shred buffs Neuvillette in teams unable to use 4pc VV. He can hold Favonius Lance for Energy, 4pc Instructor for EM, or 4pc Archaic Petra for Hydro DMG Bonus. |
| Citlali offers both a comfortable shield and 20% Hydro RES Shred in teams that can accommodate her Cryo application. She can activate the full 4pc Scroll DMG Bonus, or can hold 4pc Instructor if triggering Freeze for Hydro Scroll is impossible. | |
 | Kachina is a great free support; she can equip 4pc Scroll as long as she can trigger Hydro Crystallize at least once per rotation, and can hold Favonius Lance for Energy. Since she is from Natlan, she activates the full 4pc Scroll set effect. |
| Albedo deals respectable damage from off-field. He can hold Favonius Sword for Energy and either 4pc Scroll or 4pc Archaic Petra. If used, his Burst’s EM bonus increases Neuvillette’s Vaporize damage. |
| Chiori offers high off-field damage with low field time requirements. She can hold 4pc Archaic Petra, but struggles to refresh the buff. This also significantly sacrifices her personal damage. |
 | Raiden can trigger Hyperbloom in Burnvape teams that produce some Dendro Cores. Her Skill offers a minor Burst DMG Bonus and its range lets Neuvillette keep his distance from enemies. |
 | Kuki Shinobu can also slot into Burnvape teams with decent Dendro Core production to trigger Hyperbloom. Her Skill provides healing but requires Neuvillette to stay closer to enemies. |
| Layla is a cheaper defensive flex in teams that can accommodate her minimal Cryo application. She can hold Favonius Sword to lower ER requirements and 4pc Instructor to buff Neuvillette’s Vaporize damage. |
 | Diona trades some shield strength for healing; however, Neuvillette usually prefers a shield over healing. Her C6 offers some EM to increase Neuvillette’s Vaporize damage. |
| Off-field damage dealers like Fischl, Escoffier, Yae Miko or Ororon can slot in as flex picks to contribute personal damage if the team's Pyro applier can accommodate them. |
Example Teams
These are only a small handful of examples, visit the Neuvillette Rotation Sheet for many more team examples and rotations.
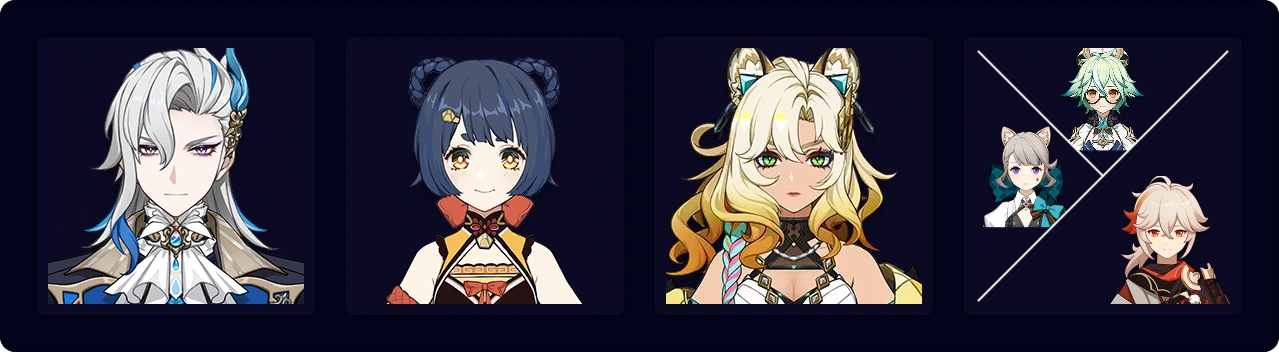
Neuvillette's best Vaporize team; Xilonen and Kazuha provide RES Shred and DMG Bonus, while Sucrose trades DMG% for EM. For players without an available Kazuha – and who are unwilling to deal with Sucrose's significant consistency issues – Lynette is a recommended alternative. She assists with Pyro application, provides QoL with her Taunt, and groups with C1.
Note that Sucrose has significant consistency issues. She is Best-in-Slot on paper, but this rarely translates to practice. Despite its Pyro priority, her Burst will often absorb another Element present – or no Element at all – which makes her highly unreliable since her rotation hinges on her Burst absorbing Pyro. As such, she is not recommended for players looking for easy gameplay.
Since Pyronado’s range is limited and Xilonen provides no interruption resistance pre-C1, the team requires some gameplay skill with C0 Neuvillette.
Rotation (Kazuha)
Neuvillette E N1 > Xilonen E N2 > Kazuha tEP > Xiangling Q N1 E > Neuvillette C Q E C > Xilonen E N2 > Kazuha Q(tEP) > Xiangling N2 E > Neuvillette 2[C]
Rotation Video
Rotation (Kazuha and C6 Neuvillette)
Neuvillette Q > Xilonen E N2 > Kazuha tEP N1 > Xiangling E D N1 > Kazuha Q > Xiangling Q > Neuvillette E C
Rotation Video
Rotation (Lynette)
(Neuvillette E N1)1 > Xilonen E N2 > Lynette E N1 > Xiangling Q ED > Neuvillette C Q E C > Xilonen E N2 > Lynette Q E > Xiangling N2 ED > Neuvillette 2[C] E N2D N2
1First rotation only.
Rotation Video
Rotation (Sucrose)
Neuvillette E N1 > Xilonen E N2 > Sucrose ED (ED) N1 > Xiangling (N1) Q ED > Neuvillette C Q E C > Xilonen E N2 > Sucrose EDQ > Xiangling (N2) ED > Neuvillette 2[C]
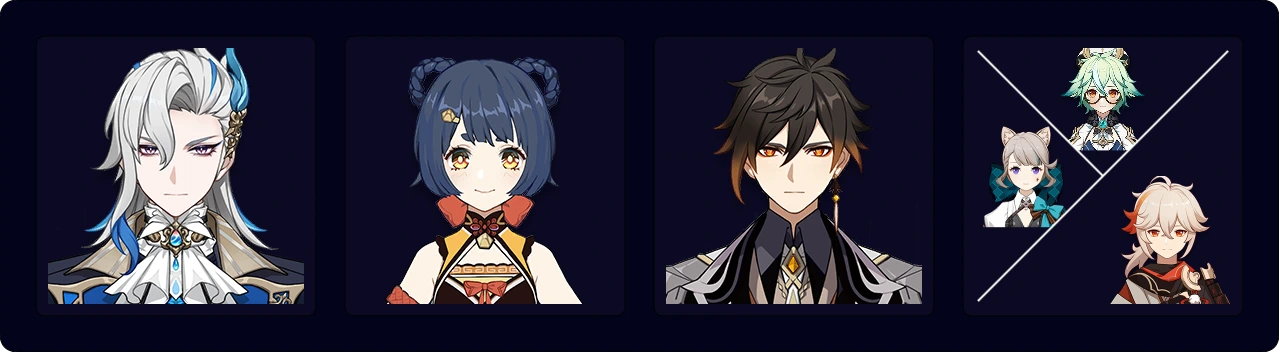
A more comfortable alternative to the previous team which trades Xilonen’s buffs for Zhongli’s shield. He also provides modest RES Shred and can equip 4pc Archaic Petra or 4pc Scroll (though he can only activate Scroll’s non-Nightsoul stack). Despite trading some DPS for comfort, the team still performs on par with some hypercarry teams.
Note that the same caveats mentioned above apply in regards to Sucrose.
Rotation (Kazuha)
Neuvillette E N1 > Zhongli hED N1 > Kazuha tEP > Xiangling ED Q > Neuvillette C Q E C > Kazuha tEPQ > Zhongli N1 tE > Xiangling N2 ED > Neuvillette 2[C]
Rotation Video
Rotation (Lynette)
Neuvillette E N1 > Zhongli hED N1 > Lynette E N1 > Xiangling Q ED > Neuvillette C Q E C > Lynette EQ > Xiangling N2 ED > Neuvillette 2[C]
Rotation Video
Rotation (Sucrose)
Neuvillette E N1 > Zhongli hED N1 > Sucrose ED > Xiangling Q ED > Neuvillette C Q E C > Sucrose EDQ > Xiangling N2 ED > Neuvillette 2[C]
Rotation Video
Burnvape with Furina to buff Neuvillette. Nahida offers up to 250 EM and consistent Burning aura, but Baizhu brings a more comfortable experience and makes up for lost Vapes by stacking Fanfare. Emilie brings personal damage but struggles to maintain Burning in AoE due to her slow, single-target Dendro application. Xiangling can build EM for Burgeon damage.
Since the team produces a decent amount of Dendro Cores, Xiangling can build some EM to increase Burgeon damage.
Rotation (Nahida)
Neuvillette E > Nahida E (N1) Q > Xiangling Q ED > Furina ED Q > Neuvillette C E C Q > Nahida E N1C > Xiangling ED (N1) > Neuvillette 2[C]
Rotation Video
Rotation (Nahida and C6 Neuvillette)
Neuvillette Q > Furina E D Q (N1) > Nahida E Q > Xiangling E D Q > Neuvillette E C
Rotation Video
Rotation (Emilie)
Neuvillette E > Furina ED Q > Emilie E > Xiangling Q E > Neuvillette C Q E C > Emilie Q > Xiangling N3 ED > Neuvillette 2[C]
Rotation (Baizhu)
Neuvillette E > Baizhu EQ > Xiangling Q ED > Furina ED Q > Neuvillette C E C Q > Baizhu E (N1) > Xiangling ED (N1) > Neuvillette 2[C]
Neuvillette – Emilie with a variety of flex options. Emilie provides high off-field damage and the flex unit provides buffs and utility. Xilonen or Citlali are recommended for their RES Shred and 4pc Scroll. Zhongli is an alternative to Citlali, offering less DMG Bonus, but a stronger shield and the same RES Shred. Nahida is another alternative who enables Dendro Resonance and provides a high EM buff.
Rotation (Xilonen)
Neuvillette E N2D N21 > Xilonen E N2 > Emilie E > Xiangling Q E > Neuvillette C Q E C > Xilonen E N2 > Xiangling N2 ED > Neuvillette 2[C]
1Normal attack with Neuvillette second rotation onwards to clear any lingering Dendro aura
Rotation (Citlali)
Neuvillette E N2D N21 > Citlali EQ > Emilie E > Xiangling ED Q > Neuvillette C Q E C > Xiangling N2 E > Neuvillette 2[C]
1Normal attack with Neuvillette second rotation onwards to clear any lingering Dendro aura
Rotation (Zhongli)
Neuvillette E N2D N21 > Zhongli hED N1 > Emilie E > Xiangling Q E > Neuvillette C Q E C > Zhongli tE N1 > Xiangling N2 ED > Neuvillette 2[C]
1Normal attack with Neuvillette second rotation onwards to clear any lingering Dendro aura
Rotation Video
Rotation (Nahida)
Neuvillette E > Nahida EQ > Xiangling Q E > Emilie E / Q > Neuvillette C Q C E > Xiangling N2 ED > Neuvillette 2[C]
Kachina is a solid alternative to Xilonen thanks to her ability to activate the full 4pc Scroll effect. For players without an available Kazuha, Lynette is an alternative; furthermore, she is given to all players for free just like Xiangling and Kachina, making the team as free-to-play as possible.
Rotation (Kazuha)
Neuvillette E N1 > Kachina E N1 > Kazuha tEP > Xiangling ED Q > Neuvillette C Q E C > Kazuha tEPQ > Xiangling N2 ED > Neuvillette 2[C]
Rotation Video
Rotation (Lynette)
Neuvillette E N1 > Kachina E N1 > Lynette N1 E > Xiangling Q ED > Neuvillette C Q E C > Lynette Q E > Xiangling N2 ED > Neuvillette 2[C]
Rotation Video
A cheaper variation of Neuvillette’s standard Vaporize team, with interruption resistance for those who need it. Kirara is a more accessible alternative to Zhongli and still offers a sturdy shield.
Rotation (Lynette)
Neuvillette E > Lynette N1 E > Kirara shE N1 > Xiangling N1 Q E > Neuvillette C Q N1 E C > Lynette EQ > Kirara shE(Q)1 > Xiangling ED N2 > Neuvillette 2[C]
1Use Kirara’s Burst if she is pre-C4.
Rotation Video
Rotation (Kazuha)
Neuvillette E N1 > Kazuha tEP > Kirara shE > Xiangling ED Q > Neuvillette C Q N1 E C > Kazuha tEPQ > Kirara shE > Xiangling ED N2 > Neuvillette 2[C]
Rotation Video

Burnvape teams with Xiangling and Nahida can accommodate a variety of flex units. Neuvillette’s limited Hydro application lets Yae Miko trigger both Aggravate and Overloaded for a fun mix of reactions. Ororon is another Electro flex option, trading personal damage to instead buff Neuvillette.
Rotation (Yae Miko)
Neuvillette E N2 > Yae Miko 3[E] > Nahida EQ > Xiangling Q ED > Neuvillette C E C Q > Yae Miko 3[E] > Xiangling N2 ED > Neuvillette 2[C] (regular-C)¹
¹Wait for Nahida’s Skill to run out and perform an unenhanced Charged Attack to ensure maximum stacks on Neuvillette’s A1. This can be skipped at C1, or at C0 in exchange for some damage.
Rotation Video
Rotation (Ororon)
Neuvillette E N1 > Ororon E N1 > Nahida EQ > Xiangling Q ED > Neuvillette C Q E C > Ororon Q > Xiangling N2 ED > Neuvillette 2[C] (regular-C)1
¹Wait for Nahida’s Skill to run out and perform an unenhanced Charged Attack to ensure maximum stacks on Neuvillette’s A1. This can be skipped at C1, or at C0 in exchange for some damage.
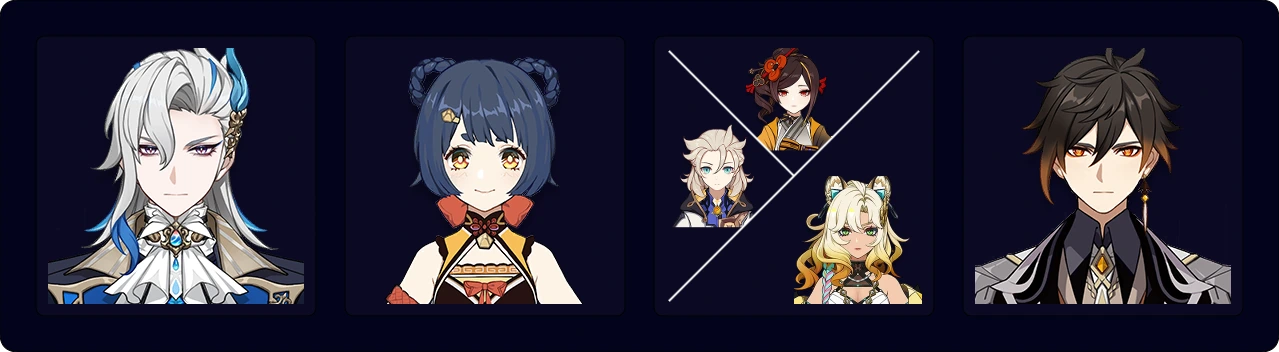
Double Geo Vaporize teams with Zhongli offer hassle-free gameplay with a sturdy shield, no delicate Swirl setups, and uncomplicated off-field buffers or damage dealers. They trade some damage for comfort, but the DMG Bonus from Geo Resonance, Zhongli’s universal RES Shred, and a powerful buffer like Xilonen ensures minimal DPS is sacrificed. Chiori or Albedo are alternatives to Xilonen, trading her buffs for personal damage and, in Albedo’s case, an EM buff.
Note that Albedo uses his Burst every rotation for an EM buff to maximize Neuvillette’s Vaporize damage. As such, the Chiori variant performs slightly worse.
Rotation (Xilonen)
Neuvillette E N1 > Xilonen N1 E N2 > Zhongli hED > Xiangling Q E > Neuvillette C Q E C > Xilonen E N2 > Xiangling ED N2 > Neuvillette 2[C]
Rotation Video
Rotation (Albedo)
Neuvillette E N3 > Zhongli hE N1 > Albedo EQ > Xiangling EQ > Neuvillette C EQ C > Xiangling N1 E > Neuvillette 2[C]
Rotation Video
Rotation (Chiori)
Neuvillette E N31 > Zhongli hE N1 > Xiangling EQ > Chiori 2[E] > Neuvillette C Q E C > Xiangling N1 E > Neuvillette 2[C]
1To catch his Hydro particles and to align his cooldown of Elemental Skill.
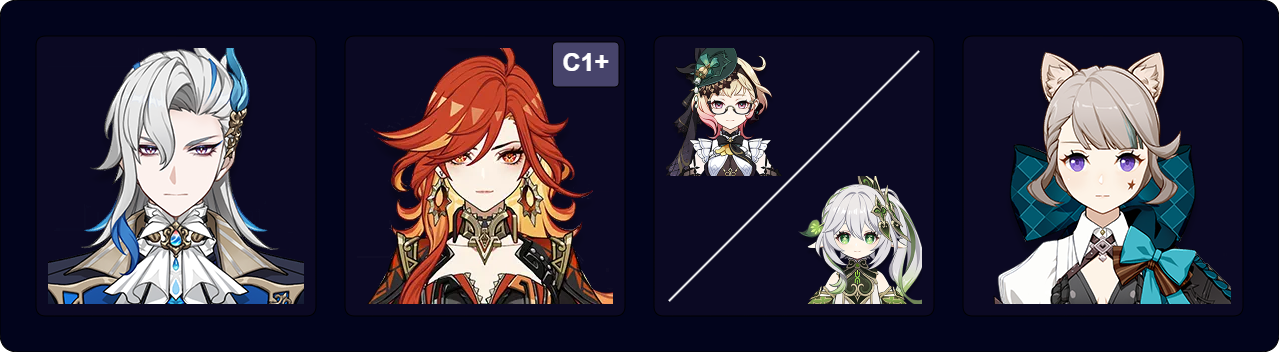
Mavuika may seem like an attractive replacement for players who are tired of Xiangling’s ER requirements and limited range, but her Pyro application is insufficient to enable Neuvillette alone. Even with both Burning and Lynette’s long-duration Burst, she struggles at C0. Her slightly higher Pyro application — combined with the DMG Bonus from 4pc Scroll and her Burst buff — still make her a better Xiangling replacement than Dehya at C0. Nonetheless, her C1 is highly recommended to ensure Neuvillette Vaporizes at least 3/4 of his Charged Attacks.
As a side note, Mavuika’s on-field playstyle is exceptionally strong, which makes her Neuvillette teams comparatively suboptimal. Players struggling to clear Abyss might want to save her for the other half and revisit her Neuvillette teams later.
Rotation (Nahida)
Neuvillette E N2D N21 > Lynette N1 E > (Mavuika Q)2 > Nahida EQ > Mavuika N1 E > Lynette Q N1 > Neuvillette C Q E C > Lynette N1 E > Neuvillette 2[C]
1Normal Attack to catch Skill particles and set up Hydro VV.
2Burst if available.
Rotation (Emilie)
Neuvillette E > Lynette E > (Mavuika Q)1 > Emilie E / Q1 > Mavuika N1 E > Lynette Q N1 > Neuvillette C Q E C > Lynette N1 E > Neuvillette 2[C]
1Burst if available. Otherwise use Emilie’s Burst instead of her Skill.
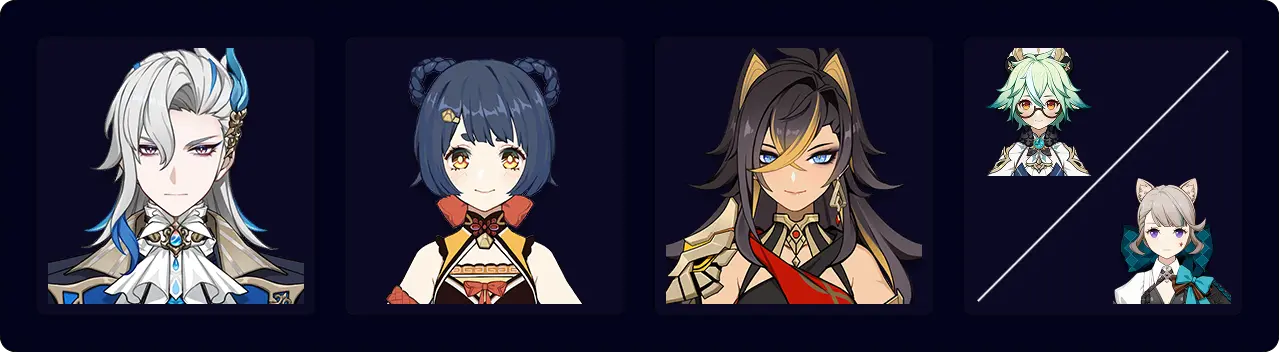
Another cheap team, albeit weaker than the Xiangling – Kachina variant. Xiangling and Lynette are given to every player for free and Dehya can be obtained from the standard banner and the yearly 5-star selector. Sucrose is a higher damage alternative, but comes with considerable caveats due to her Burst’s unreliable Absorption.
Rotation (Sucrose)
Neuvillette E N3 > Sucrose N1 ED > Dehya 2[E] > Xiangling Q ED > Neuvillette N1C Q E C > Sucrose N1 EDQ > Xiangling N2 ED > Neuvillette 2[C]
Rotation Video
Rotation (Lynette)
Neuvillette E N3 > Lynette E N1 > Dehya N1 E > Xiangling Q ED > Neuvillette N1C Q E C > Lynette EQ > Xiangling ED > Neuvillette 2[C]
Rotation Video
Electro-Charged / Lunar-Charged
On the surface level, Neuvillette’s Electro-Charged and Lunar-Charged teams resemble his hypercarry teams. However, whereas hypercarry teams focus entirely on buffing his personal damage, Electro-Charged and Lunar-Charged teams instead slot in off-field damage dealers. Neuvillette here acts as an on-field driver, dealing significant damage with his enhanced Charged Attacks while triggering Beidou’s Burst, Fischl’s A4, or Lunar-Charged with Ineffa.
Electro-Charged and Lunar-Charged teams thrive in multi-target scenarios, which lets Neuvillette take full advantage of his AoE capabilities. Nevertheless, they can easily slot in single-target units if content demands it. Apart from including an Anemo unit to shred enemy RES, team composition is flexible. Ineffa, Ororon and Fischl are recommended, but the other slot can be a Hydro unit for buffing and Hydro Resonance or another off-field damage dealer. The team can also run two Electro units: despite sacrificing Neuvillette’s third A1 stack pre-C1, Double Electro teams with Ineffa still keep up with Electro-Charged teams that fully stack his passive.
Since Neuvillette forgoes buffers for units with higher personal damage, his teammates deal larger portions of the team’s damage compared to other playstyles. As a result, these teams scale well with horizontal investment. Still, Neuvillette himself deals the majority of the damage, and buffing him should still be prioritized over buffing his teammates.
Note that despite being referred to as Electro-Charged teams, these teams are not focused around the reaction’s damage, and thus Neuvillette should not build EM. While the same goes for Lunar-Charged teams, the difference is that Lunar-Charged also scales with CRIT and thus synergizes with Neuvillette’s regular build.
Pros
- Flexible playstyle, can excel in both multi- and single-target depending on teammates.
- Takes advantage of strong, existing character synergies (e.g., Fischl and Beidou).
- Some of his best teammates are 4-star units, making Electro-Charged teams comparatively cheaper.
- Seeing many numbers is fun.
Cons
- Neuvillette’s own damage is less prioritized.
- Reaction setups are sometimes difficult to execute in the first rotation and require bothersome setups.
- Requires investment into more units compared to Neuvillette’s hyper teams, which is both resource-demanding and time-consuming.
Team Composition
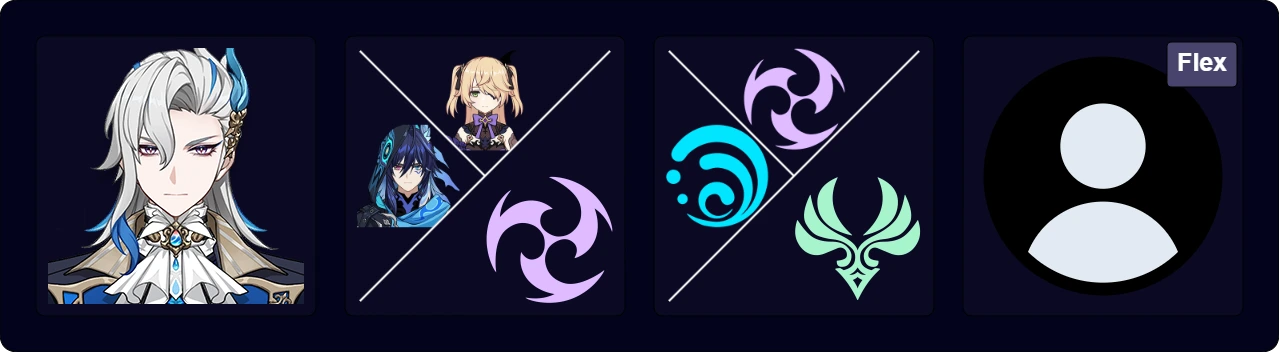
- Off-field damage dealers with low field time and high personal damage are recommended.
- Ineffa, Fischl and Ororon are highly recommended due to their off-field damage, batterying, and Ororon’s buffing.
- An Anemo unit with 4pc VV is beneficial.
- First rotations often need careful setups for Hydro Swirl.
Notable Teammates
See the Extended Synergies section for a more detailed breakdown.
Electro Units
| Ineffa deals excellent damage, batteries, and offers a shield. She enables Lunar-Charged, which replaces Electro-Charged. Since LC scales equally with CRIT and EM, Neuvillette can deal solid reaction damage without compromising his Talent damage. Ineffa also offers an EM buff to increase his LC damage. |
| Ororon deals solid personal damage and can activate the full 4pc Scroll for 40% Hydro and Electro DMG Bonus. He also provides QoL with his Burst’s Taunt, and can battery with Favonius Warbow and a modest Energy refund. | |
| Fischl deals significant damage with minimal field time. Electro-Charged teams further increase this by constantly triggering her A4. Her particle generation lets her battery her teammates. |
 | Beidou excels in multi-target and deals solid personal damage. She also offers appreciated interruption resistance. Due to her high-cost Burst, it’s recommended to pair her with Fischl. |
| Yae Miko offers high personal damage, and her Totem’s short cooldown and long duration gives her rotation flexibility. With Fischl she can Burst every rotation; otherwise, she should either Burst every other rotation or not Burst at all. |
| Lisa is a highly accessible buffer, offering valuable DEF Shred. She can equip 4pc Scroll and either hold Prototype Amber to increase Fanfare or wield Hakushin Ring. Double Electro teams lower her ER requirements. |
Hydro Units
| Furina provides a hefty DMG Bonus and Hydro Resonance. Her Skill deals high damage and lowers Neuvillette’s ER requirements. Since Neuvillette can stack Fanfare on his own, running a healer is optional. |
| Yelan buffs Neuvillette with her Burst’s DMG Bonus and Hydro Resonance’s HP%, and lowers his ER requirements. Neuvillette can weave Normal Attacks to trigger her Burst for some additional damage. |
| Mona enables Hydro Resonance for HP% and offers a large DMG Bonus, but Electro-Charged teams lack ways to extend her Omen. She can hold Favonius Codex to battery or Hakushin for DMG%. |
 | Other Hydro units, like Xingqiu or Kokomi, can buff Neuvillette by enabling Hydro Resonance while offering some utility or minor buffs, but they struggle to be competitive against other flex picks. |
Anemo Units
| Kazuha buffs his teammates with a sizable Elemental DMG Bonus and provides excellent grouping with his Skill. 4pc VV lets him shred Hydro and Electro RES, though Double Swirls often require delicate setups. |
| Lan Yan provides both RES Shred and a shield, but needs Sacrificial Fragments or C6 for sufficient uptime. Her slow animations limit her on-paper damage, but in practice her shield makes her worth running for players who need it. At C6, she can also hold support weapons like Hakushin Ring for more buffs. | |
| Lynette offers Hydro and Electro RES Shred, ATK% buffs for ATK-scaling teammates, and slight grouping at C1. Her Taunt can prevent Neuvillette from getting staggered, and her HP fluctuation can help stack Fanfare if with Furina. |
| Sucrose shreds Hydro and Electro RES, buffs EM, offers some grouping, and can hold Hakushin for DMG% buffs. Her Burst can offer Hydro or Electro DMG Bonus at C6, but it may interfere with Neuvillette’s aim by juggling enemies. Note that her value grows in LC teams, where she becomes the second best VV support pick. |
| Venti’s powerful grouping excels in multi-target and multi-wave content. He offers Hydro and Electro RES Shred and a conditional 15 Energy refund, but falls off in unfavorable content. |
| Heizou shreds Hydro and Electro RES and offers slight grouping with his Burst. He can hold Hakushin for DMG% buffs, Favonius Codex for Energy, or TTDS for ATK-scaling teammates. |
| Jean can pair with Furina to shred Hydro RES with 4pc VV and quickly stack Fanfare with her healing. She can lower ER requirements by holding Favonius Sword. |
| Sayu is a strong pick with Furina and easily stacks Fanfare with her healing. 4pc VV lets her shred Hydro RES, and her C6 lets her build for Swirl damage without compromising healing. |
| Xianyun shreds Hydro and Electro RES with 4pc VV and can hold Hakushin for DMG% buffs or Favonius Codex for Energy. She offers comfort with mobile healing and helps stack Fanfare with Furina. |
| Heizou shreds Hydro and Electro RES and offers slight grouping with his Burst. He can hold Hakushin for DMG% buffs or Favonius Codex for Energy. His modest EM buff gains some value in LC teams. |
 | Other Anemo units like Anemo Traveler can hold 4pc VV to shred Hydro and Electro RES, but struggle to be competitive due to lack of other utility. |
Flex Units
| Xilonen is a powerful buffer for Neuvillette, offering RES Shred, a potent DMG Bonus buff from 4pc Scroll, and Energy with Favonius Sword. She shreds Hydro RES with no issue, but can struggle to reliably trigger Hydro Crystallize for 4pc Scroll in a Solo Hydro team. | |
| Citlali consolidates shielding with powerful buffs. She both offers valuable interruption resistance, and buffs the team with 4pc Scroll’s 40% DMG Bonus and her own 20% Hydro RES Shred. She can also battery with Favonius Codex. | |
| Zhongli is an excellent defensive flex, offering a long-duration shield and RES Shred to buff his team. He can battery with Favonius Lance and can hold 4pc Archaic Petra, though it comes with caveats. |
 | Kachina is a great free pick and one of the few units that can activate 4pc Scroll’s extra DMG Bonus. Since the set buff stacks, she can buff both Neuvillette and his Electro teammates. She can also hold Favonius Lance for Energy. |
| Chiori offers high off-field damage with low field time requirements. She can hold 4pc Archaic Petra, but struggles to refresh the buff. This also significantly sacrifices her personal damage. |
| Layla is a cheaper defensive flex, with a strong shield to match Zhongli. She can hold Favonius Sword for Energy, and 4pc Scroll for DMG%. If there is already a Scroll holder, she can equip 4pc Tenacity to buff her ATK-scaling teammates. |
| Albedo deals respectable damage with low field time and can hold Favonius Sword for Energy. He can also hold 4pc Archaic Petra, though the set’s caveats can make 4pc Scroll’s lesser but easier-to-trigger DMG Bonus preferable. |
Example Teams
These are only a small handful of examples, visit the Neuvillette Rotation Sheet for many more team examples and rotations.
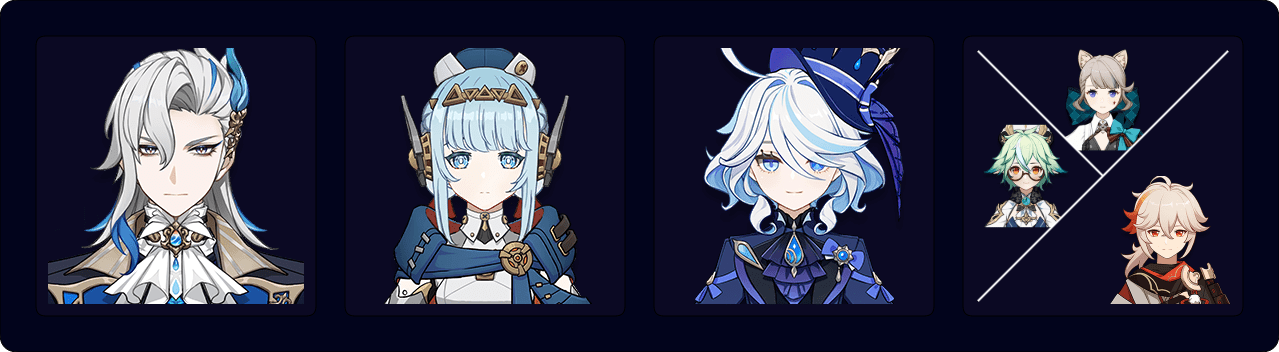
Ineffa enables a new reaction for Neuvillette: Lunar-Charged, which scales equally with CRIT and EM. As such, there is no need to choose between building for Talent or reaction damage; instead, the team essentially gains decent supplemental damage for free. Ineffa also provides a shield, batteries, and deals impressive damage, which makes her an overall excellent teammate for Neuvillette.
Furina and Kazuha are recommended despite Ineffa’s damage not benefitting from DMG Bonus; buffing Neuvillette takes priority. However, Sucrose’s EM buffs make her a strong alternative if Kazuha is unavailable. Lynette is a solid pick if neither is available, thanks to her ATK% buff increasing Ineffa’s personal damage, EM buff, and Lunar-Charged Base DMG buff.
Rotation (Kazuha)
Neuvillette E > Furina ED > Kazuha Q > Ineffa E > Furina Q > Kazuha tEP > Neuvillette C Q E C > Kazuha tEP > Neuvillette 2[C]
Rotation Video
Rotation (Sucrose)
Neuvillette E > Furina ED > Ineffa E > Furina Q > Sucrose ED(Q) > Neuvillette C Q E C > Sucrose ED / N2 > Neuvillette 2[C]
Rotation (Lynette)
Neuvillette E N1 > Furina ED > Ineffa E > Furina Q > Lynette EQ > Neuvillette C Q E C > Lynette E N2 > Neuvillette 2[C]
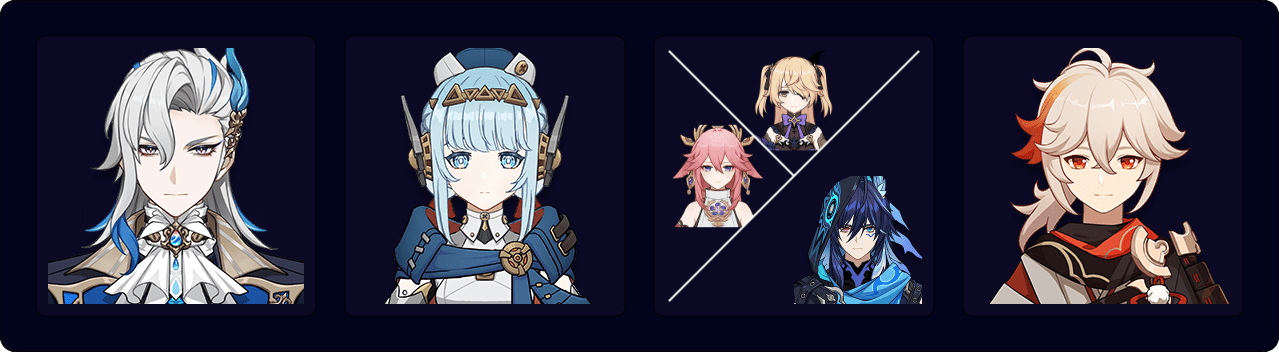
Ineffa is a solid upgrade for Neuvillette’s Double Electro teams, contributing high personal damage, shielding, and decent Energy. She can pair with any second Electro; Fischl offers high personal damage in single-target, while Ororon buffs Neuvillette with 4pc Scroll and offers more AoE oriented damage. Yae Miko is another alternative, though her damage output is limited by her long field time.
Rotation (Ororon)
Neuvillette E N1 > Kazuha Q > Ororon Q N1 > Kazuha tEP > Ineffa N1 E > Neuvillette C Q E C > Kazuha tEP > Ororon E N1 > Neuvillette 2[C]
Rotation (Fischl)
Neuvillette E N1 > Kazuha Q > Fischl Q > Kazuha tEP > Ineffa N1 E > Neuvillette C Q E C > Kazuha tEP > Fischl E > Neuvillette 2[C]
Rotation (Yae Miko)
Neuvillette E N1 > Kazuha Q > Yae Miko 3[E] > Kazuha tEP > Ineffa N1 E > Neuvillette C Q E C > Kazuha tEP > Yae Miko 3[E] > Neuvillette 2[C]
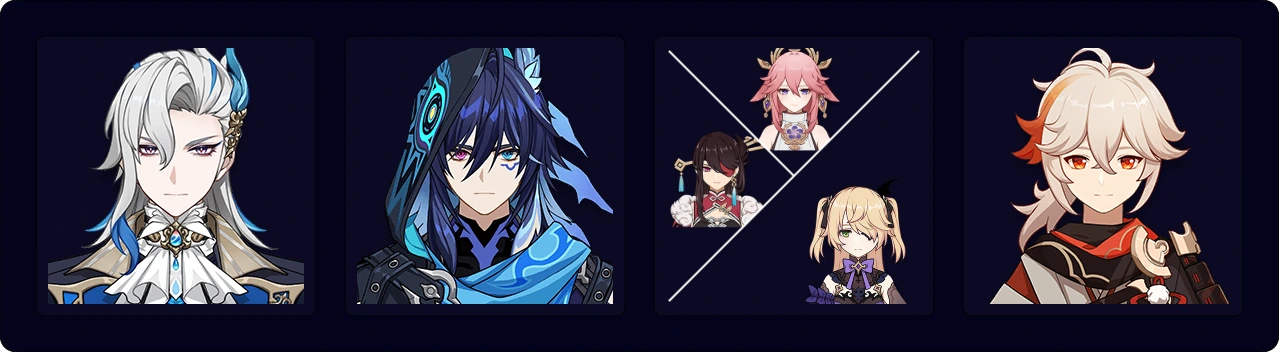
Ororon is an excellent pick for Neuvillette’s Double Electro teams, and can slot in as a potent buffer and off-field damage dealer. In addition to his personal damage, he activates the full 4pc Scroll buff and his Burst’s Taunt can help C0 Neuvillette players avoid interruption. His Energy refund helps reduce ER requirements.
The remaining team slot is flexible. Fischl deals high single-target damage, while Beidou is an option for multi-target thanks to her strong AoE damage. Both offer utility: Fischl generates Energy, and Beidou provides interruption resistance. Yae Miko is another alternative, albeit with higher field time requirements.
Rotation (Fischl)
Neuvillette E N1 > Kazuha Q > Ororon EQ > Kazuha tEP > Fischl E > Neuvillette C Q E C > Kazuha tEP > Fischl Q > Neuvillette 2[C]
Rotation Video
Rotation (Beidou)
Neuvillette Q > Kazuha Q > Beidou EQ > Kazuha N1 tEP N1 > Ororon Q > Neuvillette E 2[C] N1 > Kazuha tEP N1 > Ororon E > Beidou E > Neuvillette E C
Rotation Video
Rotation (Yae Miko)
Neuvillette E > Kazuha Q > Yae Miko 3[E] > Kazuha tEP > Ororon EQ > Neuvillette C Q E C > Kazuha tEP > Yae Miko 3[E] > Neuvillette 2[C]
Rotation Video
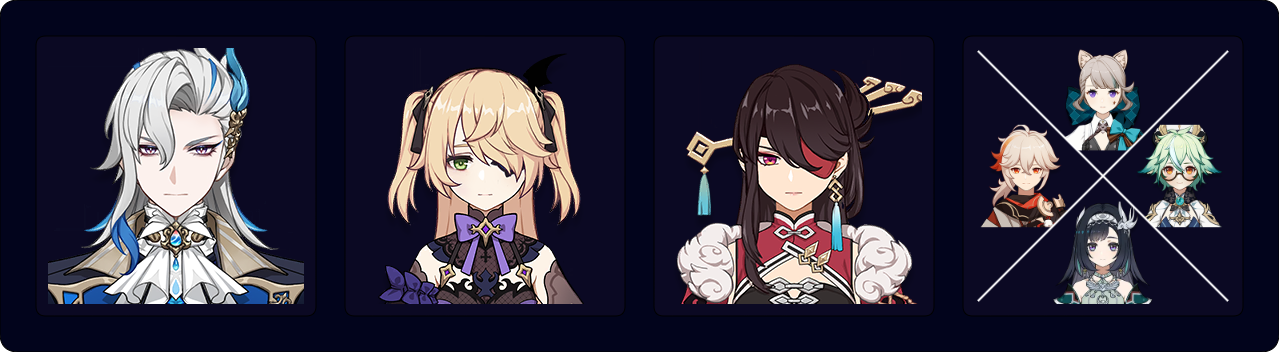
The classic Double Electro team composition. Fischl deals personal damage while batterying Beidou, and the flex pick provides RES Shred. Lan Yan offers extra comfort as her shield can supplement Beidou’s interruption resistance.
Rotation (Kazuha)
Neuvillette Q > Kazuha Q > Beidou EQ > Kazuha tEP > Fischl E > Neuvillette E (N1) 2[C] (N1) > Kazuha tEP > Fischl Q > Beidou E > Neuvillette E C
Rotation Video
Rotation (C6 Lan Yan)
Neuvillette E N1 > Lan Yan (E) N1 Q1 > Fischl E > Beidou EQ > Neuvillette C Q E C > Lan Yan E N1 > Fischl Q > Beidou E > Neuvillette 2[C]
1Use E N1 Q if Lan Yan is C6, otherwise N1 Q.
Rotation (Lynette)
Neuvillette E N1 > Lynette Q E > Fischl E > Beidou EQ > Neuvillette C Q E C > Lynette E > Fischl Q > Beidou E > Neuvillette 2[C]
Rotation Video
Rotation (Sucrose)
Neuvillette E N1 > Sucrose N1 EQ > Fischl E > Beidou EQ > Neuvillette C Q E C > Sucrose N1 E > Fischl Q > Beidou E > Neuvillette 2[C]
Rotation Video
A Double Electro variation that takes advantage of the synergy between Fischl and Yae Miko to deal strong single-target damage. The remaining slot is flexible; Kazuha is recommended for his buffs, but a shielder like Zhongli or Layla offers comfort.
Rotation (Kazuha with Yae Miko Burst)
Neuvillette Q > Kazuha Q > Fischl E > Yae Miko 3[E] > Kazuha tEP > Neuvillette 2[C] E > Kazuha tEP > Yae Miko Q 3[E] > Fischl Q > Neuvillette C E C
¹Adjust NAs so the next Skill is off cooldown, or to catch particles.
Rotation Video
Rotation (Kazuha without Yae Miko Burst)
Neuvillette E > Kazuha Q > Yae Miko 3[E] > Fischl E > Kazuha tEP > Neuvillette C Q E C > Kazuha tEP > Yae Miko 3[E] > Fischl Q > Neuvillette 2[C]
Rotation Video
Rotation (Zhongli)
Neuvillette Q (N1) > Zhongli hED > Yae Miko 3[E] > Fischl E > Neuvillette 2[C] E (N1–N3)¹ > Zhongli hED > Fischl Q > Yae Miko Q 3[E] or 3[N1 E] > Neuvillette C E C
¹Adjust NAs so the next Skill is off cooldown, or to catch particles.
Rotation Video
Rotation (Layla)
Neuvillette Q > Layla E (N1) > Yae 3[E] > Fischl E > Neuvillette 2[C] E N3¹ > Layla Q E > Yae Q 3[E] or 3[N1 E] > Fischl Q > Neuvillette C E C
¹To catch particles and fill time, all or some NAs can be removed if Skill cooldown allows.
Rotation Video
A mid-point between Electro-Charged and hypercarry, with Yelan or Furina providing HP% and DMG%. Yae Miko forgoes her Burst so as to not interrupt Neuvillette’s field time.
Rotation (Yelan)
Neuvillette Q > Yae Miko 3[E] > Yelan Q E > Kazuha tEPQ > Neuvillette (N1) E 2[C] > Yae Miko 3[C] > Kazuha tEP > Yelan E > Neuvillette E C
Rotation Video
Rotation (Furina)
Neuvillette E > Furina ED > Kazuha tEPQ > Yae Miko 3[C] > Furina Q > Neuvillette C Q C E > Kazuha tEP > Yae Miko 3[E] > Neuvillette 2[C]
Rotation Video
A team that pairs Fischl with some less common Electro units. Lisa buffs Neuvillette and Fischl’s damage with her A4 DEF Shred, and should equip Hakushin Ring for DMG%. Raiden is considerably worse as she neither offers buffs nor deals significant damage with only her Skill.
Rotation (Lisa)
Neuvillette E N1 > Kazuha Q > Lisa Q N1 > Fischl E > Kazuha tEP > Neuvillette C Q E C > Kazuha tEP > Fischl Q > Neuvillette 2[C]
Rotation Video
Rotation (Raiden)
Neuvillette E N1 > Kazuha Q > Raiden E N1 > Fischl E > Kazuha tEP > Neuvillette C Q E C > Kazuha tEP > Fischl Q > Neuvillette 2[C]
Rotation Video
Hyperbloom
Neuvillette’s Hyperbloom teams shine due to their high damage floors. Their investment requirements to clear Spiral Abyss are lower than his other playstyles, and they can use a wide variety of units. Combined with their flexible and easy rotations, this makes them highly accessible to beginners and more casual players.
Neuvillette acts as an on-field Hydro applier, generating Dendro Cores for an Electro unit to trigger Hyperbloom. His Charged Attacks’ AoE helps balance out the team's single-target nature. Thanks to his rotation freedom and wide variety of available combos, Neuvillette also meshes well with the more flexible rotations characteristic of Hyperbloom teams.
Due to his high scalings and subpar Hydro application, Neuvillette still deals a significant portion of the team’s damage even in his Hyperbloom teams. While this does not limit the teams’ DPS output, it necessitates more investment than just leveling the Electro trigger to 90 and building EM. On the other hand, it means the team can take advantage of vertical investment to a larger degree, opening an avenue for those who enjoy the Hyperbloom playstyle but still want to invest into their team.
Keep in mind that Neuvillette’s Hyperbloom teams are slightly restrictive when it comes to teambuilding. As he has no access to off-field Hydro application, he requires both an off-field Hyperbloom trigger and an off-field Dendro applier. Although Neuvillette’s teams have some Hydro application downtime, the resulting Dendro Core generation downtime is minor and does not make a second Hydro unit necessary.
Pros
- Lower investment requirement as Hyperbloom scales only with the triggers’ EM and character level.
- Flexible and beginner-friendly rotations that synergize with Neuvillette’s playstyle.
- Excellent single-target damage, but can also do well in multi-target.
- High damage at a comparatively cheap price.
- More room for vertical investment than other Hyperbloom variations.
Cons
- Neuvillette’s Hyperbloom teams still require some investment into him.
- Somewhat restrictive when it comes to teambuilding.
- Less focus on Neuvillette’s personal damage.
- Ceiling teams are expensive, as many of his best teammates are 5-stars.
Team Composition

- A reliable off-field Hyperbloom trigger is required.
- 4pc Deepwood Memories is mandatory to increase Hyperbloom damage.
- The team requires a Dendro unit with strong, off-field Elemental application.
- A second Hydro or Dendro unit can assist with Dendro Core generation.
- Increasing Neuvillette’s DPS can be just as good as increasing Dendro Core production.
- An Anemo unit can buff, but Swirls can be difficult to impossible depending on teammates.
Notable Teammates
See the Extended Synergies section for a more detailed breakdown.
Electro Units
| Ineffa is an excellent trigger: she consolidates shielding, solid Lunar-Charged damage, and good particle generation. Her slower Electro application only results in a limited loss of Hyperblooms, which her utility and damage compensate for. |
| Raiden is a strong off-field Hyperbloom trigger, and her Skill range lets Neuvillette keep his distance from enemies. Her Skill also offers a minor Burst DMG Bonus and Energy. |
| Kuki Shinobu is another great off-field Hyperbloom trigger. She offers defensive utility with her Skill’s healing, but requires Neuvillette to stay closer to enemies. Her Skill cooldown can feel awkward. |
| Fischl’s significant personal damage, low field time requirements, and great batterying capabilities make her a solid flex pick. Since Oz does not prioritize Dendro Cores, she does not steal many Hyperblooms. |
| Yae Miko offers high personal damage and flexible rotations. At high ER requirements she can Burst every other rotation or not at all. Her totems do not target Dendro Cores, so she barely steals Hyperblooms. |
 | Beidou deals significant personal damage in multi-target scenarios and offers some interruption resistance, but she struggles with high ER requirements. Only her Skills and initial Burst cast steal Hyperblooms. |
| Lisa can slot in to buff Neuvillette’s damage without stealing too many Hyperblooms. She offers valuable DEF Shred and can hold Hakushin Ring or Favonius Codex. |
Hydro Units
| Furina offers DMG Bonus with her Burst and HP% with Hydro Resonance. Her Skill deals significant damage and lowers Neuvillette’s ER requirements, and the added Hydro application helps generate Dendro Cores. |
| Yelan provides DMG Bonus with her Burst and HP% with Hydro Resonance, and can battery Neuvillette with her Skill and Favonius Warbow. Weaving Normal Attacks to trigger her Burst can help generate Dendro Cores. |
 | Kokomi offers healing, HP% with Hydro Resonance, and supplemental Dendro Core generation. She should hold 4pc Scroll for DMG Bonus, or, if there is already a Scroll holder, 4pc Instructor for EM or 4pc Days Past if Neuvillette is well-invested. |
| Mona offers a large DMG Bonus with her Burst, enables Hydro Resonance for HP%, and can hold Favonius Codex to lower ER requirements. However, Hyperbloom teams lack ways to extend the Omen, limiting its value. |
 | Xingqiu enables Hydro Resonance and shreds Hydro RES with his C2, but lacks other buffs. Instead, he offers valuable interruption resistance and Hydro particles. Weaving Normal Attacks to trigger his Burst helps Dendro Core production. |
Dendro Units
| Nahida’s unmatched Dendro application easily sustains Dendro Core production. Her Skill’s range gives Neuvillette valued mobility, and its long duration accommodates his field time. |
 | Baizhu provides healing with his Skill and valuable interruption resistance with his Burst. A second Dendro teammate is recommended due to his lacking Dendro application. |
| Kirara offers a strong shield that can be flexibly reapplied to accommodate Neuvillette’s field time. She wants another Dendro teammate to sustain Dendro Core production. |
 | Dendro Traveler can sustain Dendro Core production with their Burst’s consistent AoE Dendro application, but suffers from high ER requirements. Their more manageable Dendro application can allow for Hydro Swirl. |
 | Collei provides mobile off-field Dendro application to generate Dendro Cores, and has more manageable ER requirements. Her Skill’s and Burst’s short durations and limited range can be bothersome. |
 | Yaoyao provides defensive utility with comfortable healing, but lacks the interruption resistance Neuvillette often prefers. For sufficient Dendro application, she should pair with another Dendro teammate. |
Flex Units
 | Xilonen is a powerful buffer thanks to her long duration and near unconditional Hydro RES Shred. She also offers a large DMG Bonus by activating the full 4pc Scroll effect, and can hold Favonius Sword for Energy. |
| Zhongli’s long-duration shield offers unmatched comfort and shreds Hydro and Dendro RES in teams unable to use 4pc VV. He can hold Favonius Lance for Energy, and 4pc Archaic Petra or 4pc Scroll for DMG Bonus. |
 | Kachina is a solid free support option, and can buff Neuvillette with 4pc Scroll’s full DMG Bonus. She can also hold Favonius Lance. Note that depending on the Dendro teammate(s), activating 4pc Scroll may require some setup. |
| Mavuika is a solid flex pick, offering personal damage, DMG% buffs with 4pc Scroll and her Burst, and some Burgeons. However, this comes at the price of playing her as a DPS in her own team — often the more optimal choice. |
| Citlali consolidates interruption resistance with powerful buffing. On top of her shield, she also provides both 4pc Scroll’s full 40% DMG Bonus, and 20% Hydro RES Shred. | |
| Pyro Traveler is another solid free buffer, offering both 4pc Scroll’s 40% DMG Bonus and a small 6% DMG Bonus from their C1. They lack the Pyro application to trigger many Burgeons, but as a result also does not interfere with Hyperbloom. |
| Layla is a more accessible option with a shield nearly as strong as Zhongli’s. She can hold Favonius Sword to lower ER requirements and 4pc Scroll or 4pc Instructor for a DMG Bonus or teamwide EM buff, respectively. |
| Dehya offers some interruption resistance while triggering Burgeon. She can hold Favonius Greatsword for Energy, and 4pc Scroll or 4pc Instructor for a DMG Bonus or teamwide EM buff, respectively. |
| Anemo Units can hold 4pc VV for a solid buff to Neuvillette’s damage. However, depending on Dendro teammate, it can be difficult to Swirl Hydro, reducing their value. Kazuha or Lynette are recommended thanks to their Burst’s ability to absorb and apply Hydro. |
Example Teams
These are only a small handful of examples, visit the Neuvillette Rotation Sheet for many more team examples and rotations.
A strong team. Nahida and Furina ensure high Dendro Core generation, while Furina buffs Neuvillette’s personal damage. The extra Hydro application from Furina also provides some Lunar-Charged procs to keep Ineffa’s A1 active.
Ineffa is a solid hyperbloom trigger despite her slower Electro application, thanks to her shield and personal damage. Her only caveat is that she has to balance her build between Hyperbloom versus Lunar-Charged damage, but her EM self buff provides some help. Raiden and Kuki are the other recommended Hyperbloom triggers. Shinobu consolidates healing but forces Neuvillette closer to enemies, while Raiden lets Neuvillette move freely and attack from a range. Raiden’s long Skill duration also fits better in rotations, compared to Shinobu’s limited uptime and mismatched cooldowns.
Rotation (Ineffa)
Neuvillette E > Furina ED > Ineffa Q > Nahida E Q > Ineffa E > Furina Q > Neuvillette C E C Q > Nahida E C > Neuvillette 2[C]
Rotation (Raiden)
Neuvillette E > Furina ED > Raiden E > Nahida E (N2) Q > Furina Q > Neuvillette C (N1) E C Q > Nahida E > Neuvillette 2[C]
Rotation Video
Rotation (Kuki Shinobu)
Neuvillette E > Furina ED > (Shinobu Q) > Nahida E Q > Furina Q > Shinobu E > Neuvillette C E C Q > Nahida E > Neuvillette 2[C]
Rotation Video
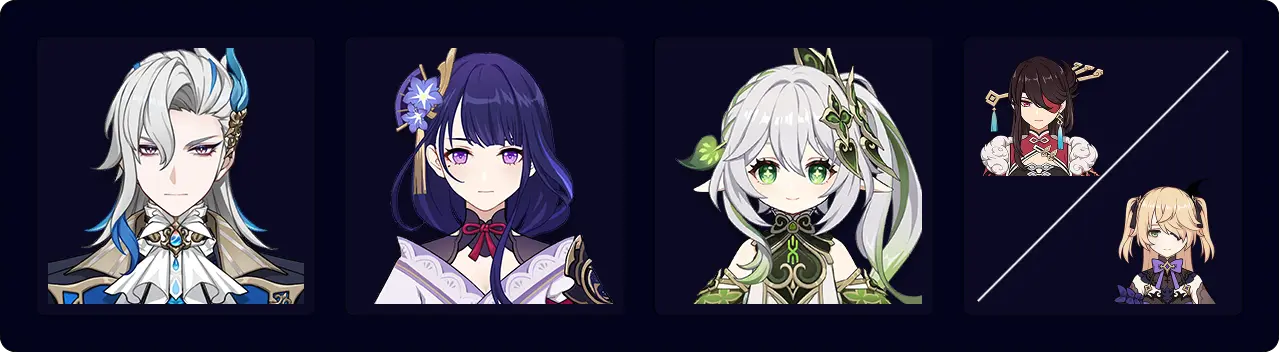
Raiden and Nahida let Neuvillette attack from a range while Fischl or Beidou supplement the team's damage. Swapping Fischl for Beidou raises the team’s ER reqs., but in exchange Beidou provides interruption resistance and multi-target damage.
Rotation (Fischl)
Neuvillette E N1 > Raiden N1 E > Nahida N1 E N2 Q > Fischl N1 E > Neuvillette N1C Q N1 E C > Fischl N2 Q > Nahida N1 E C > Neuvillette N1 2[C]
Rotation (Beidou)
1st Version:
Neuvillette Q > Raiden E > Nahida E > Beidou EQ > Neuvillette 2[C] E C
Rotation Video
2nd Version:
Neuvillette E > Raiden E > Beidou EQ > Nahida E > Neuvillette C Q > Beidou E > Neuvillette E 3[C]
Rotation Video

A more comfortable variant. Kirara or Baizhu provides interruption resistance for players who would like some comfort. Kirara’s interruption resistance is better for Neuvillette, but Baizhu offers a Hyperbloom buff and healing.
Neuvillette can weave Normal Attacks to help apply Hydro and generate more Dendro Cores.
Rotation (Baizhu)
Raiden E > Nahida E Q > Baizhu EQ > Neuvillette (N1) E (N1) C Q (N1) C > Baizhu E > Neuvillette (N1) E 2[C]
Rotation (Kirara)
Raiden E > Nahida E Q > Kirara shE Q > Neuvillette (N1) E (N1) C Q (N1) C > Kirara shE > Neuvillette (N1) E 2[C]
Rotation Video
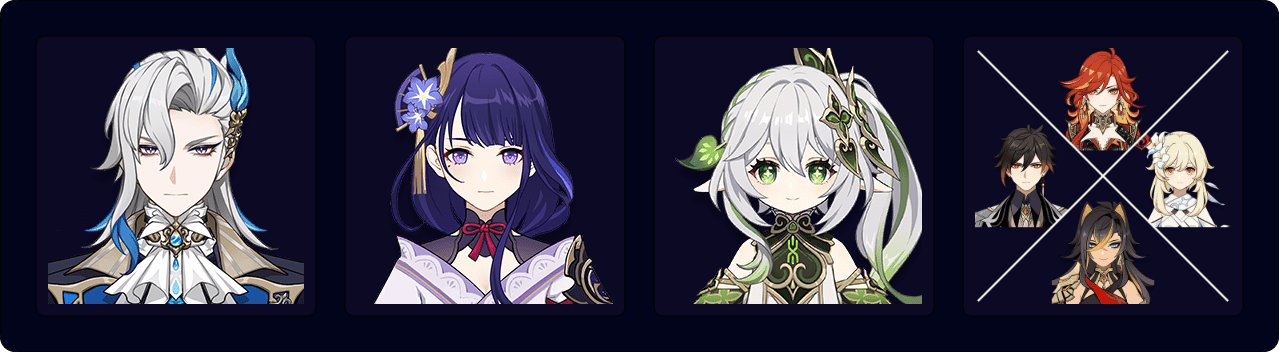
Flex options for Neuvillette’s Hyperbloom teams who also stack his A1 Passive. Zhongli provides a long-duration shield and universal RES Shred, Dehya offers less interruption resistance and instead triggers some Burgeons, while Mavuika trades their utility for personal damage and DMG Bonus buffs.
Rotation (Mavuika)
Neuvillette E N1 > Raiden N1 E > Nahida EQ N1C > Mavuika (Q) N1 E > Neuvillette C Q E C > Nahida E N2 > Neuvillette 2[C]
Rotation (Dehya)
Neuvillette E N1 > Raiden N1 E > Nahida EQ N2C > Dehya N1 2[E] > Neuvillette C Q E C > Nahida E N2 > Neuvillette 2[C]
Rotation (Zhongli)
Neuvillette E N1 > Raiden N1 E > Nahida EQ N2C > Zhongli hED > Neuvillette C Q E C > Nahida E N2 > Neuvillette N1 2[C]
Rotation (Pyro Traveler)
Neuvillette E N1 > Raiden N1 E > Nahida EQ N2C > Traveler Q E > Neuvillette C Q E C > Nahida E N2 > Neuvillette N1 2[C]
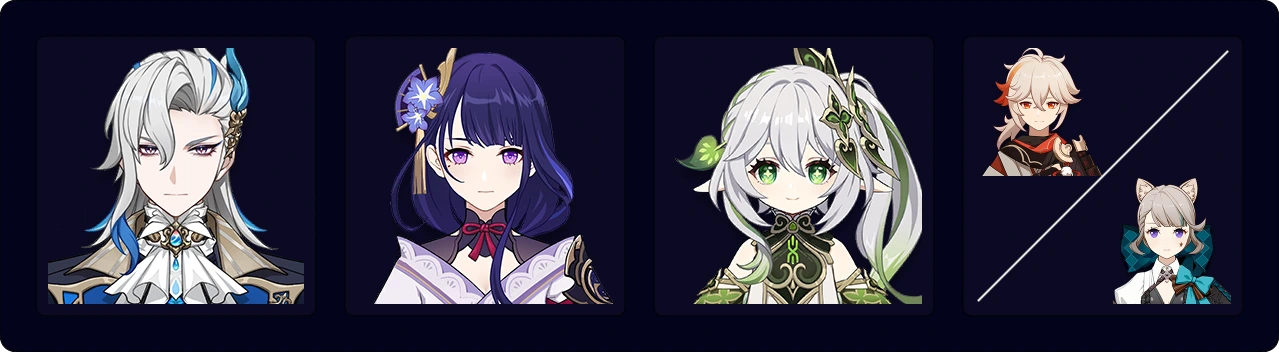
A more “tryhard” option of Neuvillette’s common Hyperbloom teams with 4pc VV, that also activates his third A1 stack. An Anemo unit that can absorb Hydro with their Burst slots in to buff Neuvillette’s damage by shredding Hydro RES and help with Dendro Core generation. Absorbing Hydro also helps enable Hydro Swirl, which is vital as Nahida’s rapid Dendro application interferes with Hydro Swirl consistency. Even so, the rotation only gets partial Hydro RES Shred uptime at best – and is highly inconsistent at worst.
Neuvillette should weave Normal Attacks to help Lynette or Kazuha absorb Hydro.
Rotation (Kazuha)
Raiden E > Nahida EQ > Kazuha tEPQ > Neuvillette N1 E C Q N1 > Kazuha tEP > Neuvillette N1C N1 E 2[C]
Rotation (Lynette)
Raiden E > Nahida EQ > Lynette EQ > Neuvillette N1 E C Q N1 > Lynette E N1 > Neuvillette N1C N1 E 2[C]
Nilou Bloom
Nilou Bloom teams remain a consistently strong option for Hydro and Dendro characters, Neuvillette included. These teams excel in multi-target, where Neuvillette can take full advantage of his Charged Attacks’ AoE. His range further mitigates Nilou Bloom teams’ lack of grouping, while his ability to move during his Charged Attacks lets him reposition himself with ease.
The key to this playstyle is to maintain Bloom uptime. To ensure this, Neuvillette should pair with two Dendro units, as Triple Hydro teams lack Dendro options who can accommodate him. The first Dendro unit is responsible for the majority of the team’s Dendro application, while the second should provide some form of support. Often a dedicated shielder or healer is preferred, as Neuvillette may struggle to survive solely off his own healing due to Bountiful Cores’ self-damage and his extended field time.
Notably, Neuvillette does not want to build partial EM in Nilou Bloom teams despite usually having majority ownership. While the hefty damage from Bountiful Cores in AoE traditionally means Nilou’s teammates prioritize maximizing their Bloom damage, Neuvillette’s poor Hydro application limits the amount of Bountiful Core’s produced. Combined with his high Talent multiplier, this makes him a rare case where he still prefers his ordinary HP | Hydro DMG% | CRIT build. Instead, he mainly gets EM through external buffs, with any EM from substats being merely an added bonus.
Pros
- Exceptional AoE damage and excels against multiple targets.
- Neuvillette’s HP-scaling and self healing make him a tanky, comfortable on-fielder
- Neuvillette’s mobility, range, and rotation flexibility mitigate Nilou Bloom teams’ lack of grouping.
- Neuvillette’s teams have more room for vertical investment compared to other Nilou Bloom teams.
- Hydro Resonance boosts Neuvillette’s personal damage.
Cons
- Despite the high damage, this playstyle does not utilize Neuvillette’s kit well.
- Bloom teams limit Neuvillette’s A1 to only 1 stack at C0, or 2 at C1.
- When combined with enemy attacks, the self-damage from Bountiful Bloom and HP drain can be difficult to keep up with.
- Neuvillette still wants investment into his personal damage as he does not build EM.
- The requirements for Dendro options in Neuvillette’s teams are somewhat strict.
Team Composition
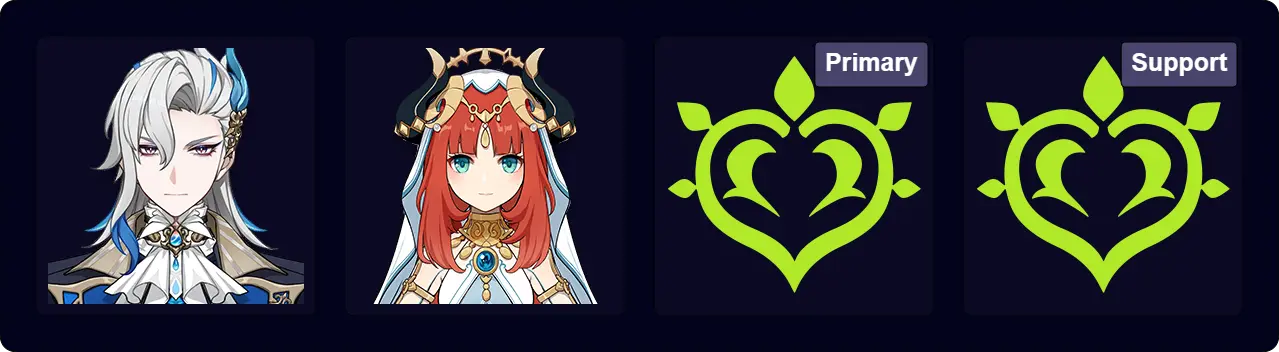
- Nilou limits her teams to only Dendro and Hydro characters.
- Neuvillette’s Bloom teams are primarily composed of himself, Nilou, and two Dendro units.
- The team needs at least one Dendro unit with consistent and strong Dendro application.
- The other Dendro unit ideally provides some form of support; healing, shielding, buffing, or additional Dendro application.
- Both Dendro units should have low field time requirements to accommodate Neuvillette.
Notable Teammates
See the Extended Synergies section for a more detailed breakdown.
Hydro Units
 | Nilou is mandatory for this playstyle. She massively buffs the team's Bloom damage, and her A1 minorly increases Neuvillette’s EM. Bloom teams without Nilou are not recommended. |
Main Dendro Applier
| Nahida offers unmatched Dendro application with her long-lasting Skill and provides comfort with her range and pseudo-grouping. Her Burst’s EM buff significantly boosts Neuvillette’s Bloom damage. |
| Dendro Traveler is a more accessible alternative, applying Dendro in a large AoE with their Burst. A second Dendro teammate lowers their high ER requirements and cover gaps in their Dendro application. |
 | Collei provides mobile off-field Dendro application to generate Dendro Cores, and has more manageable ER requirements. Her Skill’s and Burst’s short durations and limited range can be bothersome. |
2nd Dendro Units
| Baizhu consolidates healing and interruption resistance with his Skill and Burst. His A4 offers a modest Bloom DMG Bonus, and he can hold 4pc Instructor to buff Neuvillette’s EM if possible. |
| Kirara’s strong shield makes her a solid defensive pick, and its flexibility lets her accommodate Neuvillette’s field time. She can hold 4pc Instructor to buff his Bloom damage. |
| Yaoyao lacks interruption resistance, but her healing offers valuable survivability against Bloom’s self damage. She can hold 4pc Instructor to buff EM, and her Skill can help with Dendro application. |
 | Other Dendro characters can slot in as the team's second Dendro unit, but at the cost of survivability. Players may run both Nahida and Dendro Traveler together or pair one of them with Collei. |
Example Teams
These are only a small handful of examples, visit the Neuvillette Rotation Sheet for many more team examples and rotations.
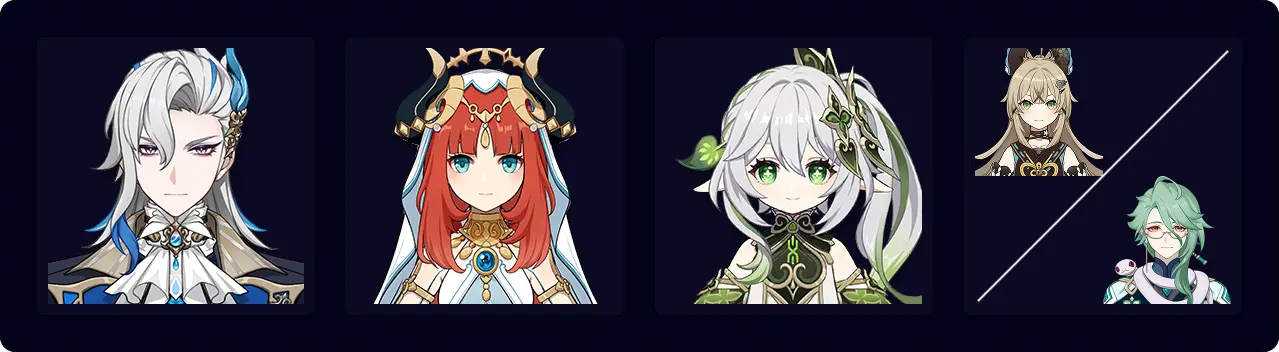
Neuvillette’s premium Bloom team. Nahida provides plenty of Dendro application while Baizhu or Kirara keeps the team alive, offers interruption resistance, and potentially holds 4pc Instructor or 4pc Scroll.
Rotation (Baizhu)
Neuvillette E > Nilou setup > Nahida EQ > Baizhu (N1) EQ > Neuvillette C Q E C > Baizhu E (N1) > Neuvillette (N1) 2[C]
Rotation Video
Rotation (Kirara)
Nilou setup > Nahida EQ > Kirara Q shE > Neuvillette E C Q C > Kirara shE > Neuvillette C E C > Nahida N1C
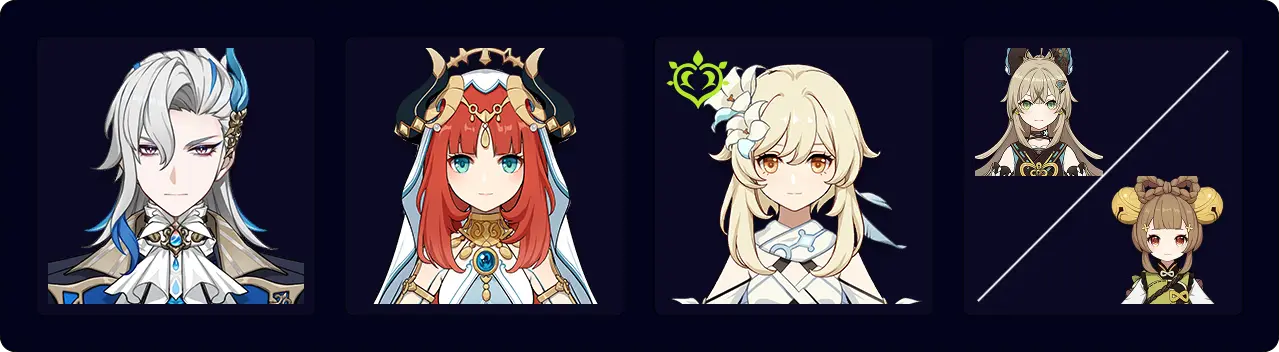
A cheaper variant. Dendro Traveler takes Nahida’s place and either Kirara or Yaoyao acts as the sustain. Kirara has the advantage of offering interruption resistance, while Yaoyao provides some minor Dendro application.
Rotation (Kirara)
Neuvillette E (N1) > Nilou setup > Kirara Q shE > Dendro Traveler EQ > Neuvillette C Q E C > Kirara shE > Dendro Traveler E (N1) > Neuvillette 2[C]
Rotation (Yaoyao)
Neuvillette E (N1) > Nilou setup > Yaoyao E > Dendro Traveler E N1 Q > Neuvillette C Q E C > Dendro Traveler E N1 > Neuvillette 2[C]
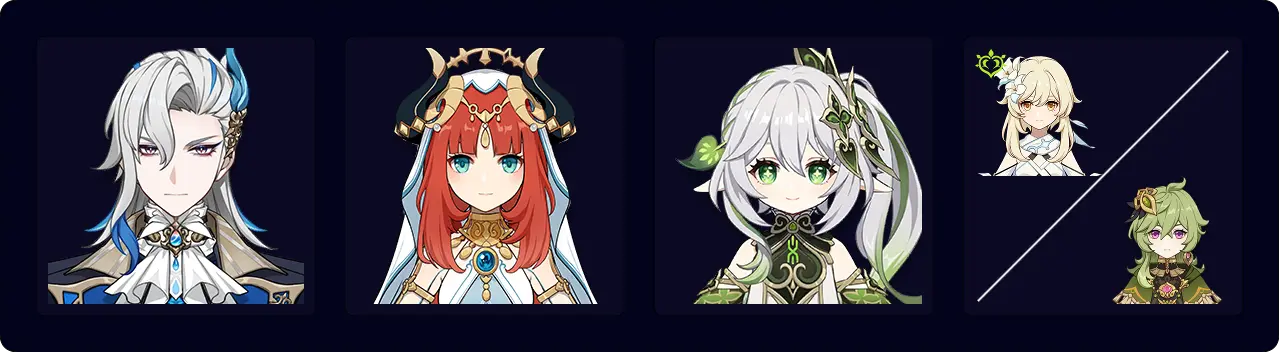
Skilled players can forgo the defensive slot entirely and run a second Dendro applier. It's recommended to run Prototype Amber on Nahida, if not on both her and Neuvillette.
Rotation (Dendro Traveler)
Nilou setup > Nahida E N1 Q > Dendro Traveler EQ > Neuvillette E C Q C > Dendro Traveler E N1 > Neuvillette C E C > Nahida N1C
Rotation (Collei)
Nilou setup > Nahida E N1 Q > Collei EQ > Neuvillette E C Q C > Collei E > Neuvillette E C E
Freeze
Neuvillette’s Freeze teams function largely the same as his ordinary hypercarry teams, but with an off-field Cryo unit to enable Freeze. His personal damage makes him a powerful on-field DPS pick, and Freeze’s ability to lock enemies in place lets him utilize his Charged Attacks’ AoE to the fullest. Frozen enemies can also neither move nor fight back, which opens a more comfortable playing experience for those who find maneuvering in Neuvillette’s Charged Attack state tedious, or those who would otherwise need a shielder at C0.
Neuvillette also does not run 4pc Blizzard Strayer, so his damage does not hinge on enemies being Freezeable. As such, he suffers from none of the content limitations that traditionally plague Freeze DPS options. Losing Freeze’s crowd control can be an issue, especially if relying on Freeze to run shielderless Neuvillette, but this is easily solved by running a shielder.
However, Neuvillette’s Freeze playstyle is limited by a lack of viable teammates. Most Freeze teams utilize on-field Cryo damage dealers with off-field Hydro appliers, while Neuvillette requires off-field Cryo teammates who either deal high personal damage or provide strong buffs — of which there are limited options. As a result, Furina, Escoffier, and/or Citlali are near mandatory teammates in Neuvillette’s Freeze teams. Non-premium Neuvillette Freeze still offers a fun and viable alternative for those interested in trying a different playstyle, but the damage loss without at least one of those 5-stars is noticeable.
Pros
- An alternative for players looking for something new.
- Teams with high Freeze uptime make it easier to play without a shielder at C0.
- Premium teams with Escoffier perform on par with Neuvillette’s Hypercarry teams at C0.
- Scales well with investment into Neuvillette, particularly his C1, and investment into his 5-star teammates.
- Escoffier-less teams can still perform on par with his other teams if running Furina.
Cons
- Non-premium teams have significantly lower damage output compared to other playstyles.
- Teams are expensive, with 4-star alternatives being a noticeable damage loss over Escoffier, Furina, and/or Citlali.
- Lack of strong off-field Cryo damage dealers also limit teammate options.
Team Composition

- Double Cryo or Double Hydro are the most common team compositions.
- At least one Cryo unit with off-field Elemental application is required.
- Buffers like an Anemo unit with 4pc VV are strongly recommended.
- A second Cryo unit can improve Freeze uptime and help ER requirements.
- A second Hydro unit (mainly Furina) can improve damage at the price of Freeze uptime.
Notable Teammates
See the Extended Synergies section for a more detailed breakdown.
Cryo Units
| Escoffier is the backbone of Neuvillette’s Freeze playstyle thanks to her high Hydro and Cryo RES Shred, hefty personal damage, and healing to stack Fanfare with Furina. Her buffs and damage make even pure Hydro–Cryo teams worth running (with C0 Neuvillette). |
 | Skirk can slot into Neuvillette’s pure Hydro–Cryo teams as a powerful quickswap DPS. She swaps in to use her Burst nuke in between Neuvillette’s field times, and even deals similar damage to Neuvillette himself. The only downside is playing Skirk as an on-field DPS in her own team is often the more optimal choice. |
| Citlali consolidates interruption resistance with powerful buffs. She offers a shield, 4pc Scroll’s 40% DMG Bonus, and her own 20% Hydro RES Shred. Her Cryo application also helps maintain Freeze, and she can battery with Favonius Codex. | |
 | Charlotte is a strong pick in Freeze teams with Furina. Her healing stacks Fanfare and her Skill and Burst offer off-field Cryo application. She can wield Favonius Codex for Energy and hold 4pc Days Past if at high investment. |
| Shenhe is the premier Cryo buffer available and significantly increases teammates’ Cryo damage. Her Charged Attack DMG Bonus buffs Neuvillette, and her Cryo-related buffs are appreciated in teams with strong Cryo DPS units like Escoffier and Skirk. She can hold 4pc Scroll or 4pc Noblesse if Scroll is occupied. |
 | Rosaria’s Burst deals respectable damage and applies Cryo from off-field, and her Skill’s particle generation lets her battery. Her A4 offers CRIT Rate and she can hold 4pc Scroll, or 4pc Noblesse if paired with an ATK-scaling teammate. |
| Layla offers a strong shield but is less valuable in Freeze teams. She can wield Favonius Sword to lower ER requirements and hold 4pc Tenacity to buff any ATK-scaling teammates. Her off-field Cryo application helps increase Freeze uptime. |
 | Ganyu is one of few viable Cryo damage dealer options. She forgoes her Charged Attacks to instead deal solid off-field Cryo damage with her Burst while ensuring high Freeze uptime. |
 | Ayaka is an unorthodox but viable pick for Double Cryo compositions. She deals significant damage with her Burst and can enable Freeze with help from an Anemo or Cryo unit. |
| Diona trades some shield strength for healing, which matters less in Freeze teams. She can hold Favonius Warbow for Energy and 4pc Noblesse for ATK-scaling teammates. Her healing lets her stack Fanfare with Furina. |
Hydro Units
| Furina’s high damage, Hydro Resonance, and massive DMG Bonus allows Neuvillette’s Freeze teams to match the damage of his other playstyles. Neuvillette stacks Fanfare on his own and can exchange a healer for a buffer or damage dealer. |
| Yelan buffs Neuvillette with her Burst’s DMG Bonus and Hydro Resonance’s HP%, and lowers his ER requirements. Neuvillette can weave Normal Attacks to trigger her Burst for some additional damage. |
| Mona enables Hydro Resonance for HP%, offers a large DMG Bonus, and can hold Favonius Codex to lower ER requirements. Freeze teams can take full advantage of her Omen by extending its duration. |
| Other Hydro units like Xingqiu, Kokomi, Dahlia or Barbara can buff Neuvillette by enabling Hydro Resonance while offering some utility or minor buffs, but they struggle to be competitive against other support picks. |
Anemo Units
| Kazuha is an excellent pick, since he offers a sizable Elemental DMG Bonus with his A4 and appreciated grouping with his Skill. 4pc VV lets him shred Hydro and Cryo RES, and his Burst can help with Freeze uptime. |
| Lynette offers Hydro and Cryo RES Shred, ATK% buffs for ATK-scaling teammates, and some grouping at C1. A Cryo-absorbed Burst helps Freeze uptime, but the Taunt loses some value. Her HP fluctuation helps stack Fanfare with Furina. |
| Lan Yan provides both RES Shred and interruption resistance, and can hold support weapons like Favonius Codex or Prototype Amber (with Furina). C6 or Sac Fragments also fixes her uptime issues, letting her cover Neuvillette’s field time for roughly 3.5 rotations. | |
| Venti offers unmatched grouping in favorable content and valuable Energy with Favonius Warbow and his 15 Energy refund. He can shred Hydro RES, and infusing his Burst with Cryo helps Freeze uptime. |
| Sucrose offers some decent grouping and Hydro and Cryo RES Shred. She can build Energy Recharge to Burst regularly , improving Freeze uptime if infused with Cryo and offering an extra Cryo or Hydro DMG Bonus at C6. |
| Other Anemo units like Xianyun, Jean, Sayu, Heizou, or Anemo Traveler can slot in as 4pc VV holders to shred Hydro and Cryo RES. Xianyun, Jean and Sayu are more competitive in teams with Furina due to their healing. |
Flex Units
 | Xilonen is a powerful buffer thanks to her long duration and near unconditional Hydro and Cryo RES Shred. She also offers a large DMG Bonus by activating the full 4pc Scroll effect, and can hold Favonius Sword for Energy. |
 | Kachina is a great buffer and accessible to all players. She activates the full 4pc Scroll buff and can hold 4pc Favonius Lance for Energy. Since 4pc Scroll stacks and she continues to apply Geo from off-field, she can even buff both Neuvillette and his Cryo teammate(s). |
| Zhongli’s long-duration shield has less value in Freeze teams, but he still shreds enemies’ Hydro and Cryo RES to buff his teammates. He can hold Favonius Lance for Energy and 4pc Archaic Petra for DMG%, although with caveats. |
| Off-field damage dealers like Fischl, Yae Miko, Chiori, or Albedo can slot in as flex picks to deal personal damage without reducing Freeze uptime too significantly. |
Example Teams
These are only a small handful of examples, visit the Neuvillette Rotation Sheet for many more team examples and rotations.
A powerful dual carry team and Neuvillette’s strongest Freeze team. Quickswap Skirk’s sky-high damage makes her one of the best 4th slot picks for Neuvillette’s Escoffier teams, and even lets her deal equal personal damage to Neuvillette himself. Her short field time also fits nicely into Neuvillette’s flexible rotations.
Skirk’s teammate Element requirements are also a non-issue, since Escoffier — Neuvillette teams already run only Hydro and Cryo units with no problems thanks to Escoffier’s buffs and damage.
Rotation
Neuvillette E > Furina ED > Escoffier Q¹ / N2 Q N2¹ > Skirk hEQ > Escoffier E N2 > Furina Q > Neuvillette C E C Q > Skirk hEQ > Neuvillette 2[C]
¹Do “N2 Q N2” second rotation onward to fill time for Skirk’s Burst cooldown.
Rotation Video
One of Neuvillette’s overall strongest teams — outperforming even most of his best Hypercarry teams at C0. Despite Escoffier limiting Neuvillette’s A1 stack(s), her high personal damage and buffs make it a worthy trade-off. Her and Furina provide the best of both worlds, consolidating powerful buffs with high off-field damage. Escoffier’s healing also helps stack Fanfare.
Citlali is recommended for the remaining teammate slot. She provides Hydro RES Shred for Neuvillette and Furina, in addition to 40% Hydro and Cryo DMG Bonus from Scroll. Shenhe is the second-best alternative; she provides Charged Attack DMG Bonus for Neuvillette, Scroll’s 12% Hydro and Cryo DMG Bonus, and plenty of Cryo-oriented buffs to maximize Escoffier’s damage.
Rotation (Citlali)
Neuvillette E > Furina ED > Citlali E N1 > Escoffier EQ > Furina Q > Neuvillette C Q E C > Citlali N2 > Neuvillette 2[C]
Rotation (Shenhe)
Neuvillette E > Furina ED > Shenhe hEQ1 > Escoffier EQ > Furina Q > Neuvillette C E C Q > Shenhe tE N2 > Neuvillette 2[C]
1 Shenhe can do Q hE to funnel her particles to Escoffier.
A strong Escoffier-less team. Citlali is a strong pick for Neuvillette’s Freeze teams, providing a shield, 4pc Scroll’s DMG Bonus, and 20% Hydro RES Shred. An Anemo unit is recommended for the last slot; Kazuha is a strong pick thanks to his DMG% buff, while Lynette is a free-to-play alternative with a helpful Taunt.
Shenhe is a more niche alternative, providing a Charged Attack DMG Bonus. Without 4pc VV, there are no short duration buffs to refresh, so Neuvillette simply remains on-field, making the Shenhe variant incredibly simple to play — though the damage is lower without the RES Shred from 4pc VV.
Rotation (Kazuha)
Neuvillette E > Furina ED > Kazuha tEPQ > Citlali EQ > Furina Q > Neuvillette C E C Q > Kazuha tEP > Neuvillette 2[C]
Rotation (Lynette)
Neuvillette E > Furina ED > Lynette Q E / Q N11 > Citlali EQ > Furina Q > Neuvillette C E C Q > Lynette E N1 > Neuvillette 2[C]
1Use Lynette’s Skill if she is C4+, otherwise N1.
Rotation (Shenhe)
Neuvillette E > Furina ED > Citlali EQ > Shenhe N1 hEQ > Furina Q > Neuvillette C E C Q 2[C]
Another strong variant, Furina buffs Neuvillette’s personal damage while Charlotte enables Freeze and increases the damage of Furina’s pets. Kazuha and Xilonen are preferable buffers, but Lynette is accessible to all players. Since Charlotte heals, Xilonen does not use her Burst.
Rotation (Kazuha)
Neuvillette E > Furina ED > Kazuha tEPQ > Furina Q > Charlotte EQ N11 > Neuvillette C E C Q > Kazuha tEP > Neuvillette 2[C]
1Catch particles.
Rotation (Lynette)
Neuvillette E > Furina ED Q > Lynette Q E > Charlotte E(Q) > Neuvillette C Q E C > Lynette E > Neuvillette 2[C]
Rotation Video
Rotation (Xilonen)
Neuvillette E > Furina ED > Xilonen E N2 > Furina Q > Charlotte EQ(D)1 > Neuvillette C Q E C > Xilonen E N2 > Neuvillette 2[C]
1Pick up Hydro Crystallize if Charlotte is on Archaic Petra, skip otherwise.
A Furina-less variant of Neuvillette — Escoffier that still keeps up with his other Furina-less teams. Teammate options with Escoffier are limited, but Yelan’s ramping A4 DMG Bonus, the HP% from Hydro Resonance, and Hydro particles make her a decent option. Citlali is strongly recommended for the 4th slot; alternatives perform significantly worse.
Citlali-less players can substitute her with Shenhe or Ayaka, both of whom perform similarly. Shenhe provides a modest Charged Attack DMG Bonus for Neuvillette and plenty of Cryo-oriented buffs for Escoffier. Ayaka provides no buffs, but teammate options are so limited that she wins out just by dealing high personal damage — even in an unorthodox Burst-oriented playstyle.
Rotation (Citlali)
Neuvillette E > Citlali N1 E > Yelan Q N1 > Escoffier E N1 > Yelan N2 E > Neuvillette N1C Q N1 E C > Yelan N1 E > Neuvillette N1C C
Rotation (Shenhe)
Neuvillette E > Yelan Q N1 > Shenhe hEQ > Escoffier E N1 > Yelan N2 E > Neuvillette N1C Q E C > Yelan N1 E > Shenhe tE N1 > Neuvillette 2[C]
Rotation (Ayaka)
Neuvillette E > Yelan Q N1 > Escoffier E N1 (Q) > Ayaka ED N1 Q N1 > Yelan E N1 > Neuvillette N1C E C Q > Ayaka ED N1C > Yelan N1 E > Neuvillette 2[C]
A decent Escoffier-less Freeze team. Furina brings DMG% and HP%, while Ganyu or Rosaria enable Freeze. Going without a healer or shielder becomes less risky with Freeze’s crowd control.
Rotation (Ganyu)
Furina ED > Neuvillette E > Kazuha Q > Ganyu EQ > Furina Q > Kazuha tEP > Neuvillette C Q E C > Kazuha tEP > Ganyu E > Neuvillette 2[C]
Rotation Video
Rotation (Rosaria)
Furina ED > Neuvillette E > Kazuha Q > Rosaria Q E > Furina Q > Kazuha tEP > Neuvillette C Q E C > Kazuha tEP > Rosaria E (N1) > Neuvillette 2[C]
Rotation Video

Double Cryo variants with Shenhe taking advantage of her Charged Attack DMG Bonus and Icy Quill effect while lowering Cryo teammates’ ER reqs. Trading a Cryo unit for Zhongli makes it closer to a hypercarry team, with both Shenhe and Kazuha focusing on buffing Neuvillette. The team is mostly a relic from pre-Furina and Escoffier — when Neuvillette’s teammate options were more limited — and deals far less damage than more modern teams.
Rotation (Rosaria)
Neuvillette E > Kazuha tE(P) > Shenhe hE > Rosaria EQ > Neuvillette C > Kazuha tE(P) > Neuvillette E C Q > Kazuha tE(P) > Shenhe hE > Rosaria EQ > Neuvillette C > Kazuha tE(P) > Neuvillette C
Rotation (Ganyu)
Neuvillette E > Kazuha tE(P) Q > Shenhe Q hE > Ganyu EQ > Kazuha tE(P) > Neuvillette C E C Q > Kazuha tEP > Shenhe hE > Ganyu EQ > Neuvillette 2[C]
Teammate Appendix
“…You have shown yourself to be trustworthy, and you have no problematic entanglements with Fontaine’s local factions. Therefore, I would be pleased to journey with you.”
This section is meant to be used as a reference for players after choosing which units they want to play with Neuvillette. Please do not feel obligated to read everything in the synergy tables.
Check out the Neuvillette Rotation Sheet for example teams and rotations, and Gearing Neuvillette’s Supports for a more detailed gearing breakdown (including higher-investment options). For characters whose builds don’t change, check out their linked guides for more information.
To help navigate Neuvillette’s never-ending number of teammates, ratings have been added to clearly show the unit’s synergy with Neuvillette. Additionally, playstyles in which the character is one of Neuvillette’s Best-in-Slot teammates are marked with a ★.
Characters are only rated for the playstyles listed as recommended or viable. Furthermore, characters with only one playstyle are only rated for their synergy in that playstyle, and characters with multiple playstyles are rated on their overall synergy (unless specified otherwise).
For further details on how characters’ synergy ratings are determined, click here
| S | The best picks; highly recommendable units and usually among the top options in their respective playstyles – if not the best. If you want the best possible Neuvillette team, these are the teammates you want. |
| A | Recommended teammates. Their synergy with Neuvillette is solid and they are better than most alternatives. Although not at S level, they are still notably above the rest of the cast. |
| B | The less stand-out but still good enough to be recommendable teammates. They are decent picks for your Neuvillette teams, but lack the stand-out synergy of A or S rated teammates. |
| C | Average synergy; neither remarkably good nor bad. Unless you want to run a specific character, you are likely to swap these units out once you get better alternatives, but they are still fine options. |
| D | Limited synergy. Mostly teammate alternatives for players with sparse rosters; these characters don’t offer much beyond the bare minimum of low field time, an A1 stack or Hydro Resonance, and Favonius weapons. |
| E | Minimal synergy, but your team will still be viable – just in spite of them and solely because of Neuvillette’s strength. Usually worse than free alternatives and should only be used for personal enjoyment. |
Updated for Version 5.7
Pyro Units
Notable Pyro Units
Xiangling Pyro Application / Off-Field Damage | Rating: S+ (Vaporize) / C (other teams) Xiangling is easily Neuvillette’s best Pyro enabler and highly recommended in Forward Vaporize. Unlike in most teams, she plays purely as a support; building for personal damage is rarely worth the investment, as Neuvillette’s teams do not run Bennett — significantly reducing Xiangling's damage. Xiangling’s ER requirements as solo Pyro are a non-issue in Neuvillette’s long rotations. In 4CA rotations, her ER requirements are comparable to those in Bennett’s teams, especially with Favonius Lance. Recommended gear: 4pc Scroll. Kitain Cross Spear if triggering Burgeon, Favonius Lance otherwise. In Burnvape teams with a Scroll holder, build for Burgeon with 4pc Gilded Dreams/Paradise Lost or 2pc EM combinations. In teams with a Geo unit (e.g., Xilonen), players willing to deal with the caveats can equip 4pc Archaic Petra. For high investment or speedrunning, 4pc Instructor is recommended. Notable investments: C4 increases Pyronado’s duration by 40% for more Pyro application uptime. Recommended Playstyles: ★ Forward Vaporize Viable Playstyles: Reverse Vaporize |
Mavuika Buffing / Personal Damage | Rating: S (other teams) / C+ (Vaporize) Mavuika is one of the best 4th slot picks in Neuvillette’s teams, consolidating personal damage and buffing. She offers up to 80% DMG Bonus in total, with 40% from fully activating 4pc Scroll and an additional 40% from her Burst’s decaying DMG% buff. Her personal damage is also excellent, especially since Neuvillette’s rotation setup often lets her Vaporize her Burst for a massive nuke. The only downside of running Mavuika with Neuvillette is that she loses out on her powerful on-field DPS playstyle, which performs on-par with — if not better than — Neuvillette’s teams. As such, players who are struggling to clear Abyss should prioritize running Neuvillette and Mavuika on separate sides. Mavuika can also slot into Neuvillette’s Vaporize teams, but her Skill’s tick rate and duration make her unable to sustain Forward Vaporize. Even with her C1’s longer Skill duration, she still wants both a Dendro unit and an Anemo unit who can absorb Pyro for consistent Forward Vaporize. Recommended gear: 4pc Scroll. Beyond that, Mavuika builds for personal damage. Notable investments: C1 lets Mavuika reliably Burst with her Skill’s Nightsoul consumption alone, and improves her Skill uptime for players who insist on using her as a Vaporize enabler. Her C2 provides 20% DEF Shred, and her C4 stops her Burst’s DMG Bonus buff from decaying. However, note that Mavuika’s Constellations significantly increase her personal damage to the point that playing her with Neuvillette quickly becomes a hefty DPS loss compared to playing her as an on-field DPS. Recommended Playstyles: ★ Hypercarry Viable Playstyles: Vaporize - Burnvape / Hyperbloom |
Pyro Traveler Buffing | Rating: A Pyro Traveler is a competitive support for Neuvillette thanks to their ability to activate the full 4pc Scroll effect for 40% DMG Bonus with minimal field time. While their Skill’s infrequent Pyro application cannot enable Forward Vaporize, it still gives the Traveler the opportunity to trigger additional Pyro reactions from off-field and trigger 4pc Scroll for multiple Elements. Their Pyro application is also slow enough to let them slot into Hyperbloom teams without interfering with Dendro Core generation. Additionally, Pyro Traveler is given for free after completing the final part of the Natlan Archon Quest. Their Constellations are also free, including their C1, which provides 6% DMG Bonus. Recommended gear: Favonius Sword. 4pc Scroll is mandatory, use 4-star pieces if necessary. Notable investments: C1 provides a 6% DMG Bonus for a small but better than nothing buff. Recommended Playstyles: ★ Hypercarry / Hyperbloom |
Dehya Interruption Resistance / Pyro Application | Rating: B (other teams) / C (Vaporize) Dehya offers damage mitigation with her Skill and valuable interruption resistance with her A1, but falls behind shielders due to her A1’s limited duration. Her Pyro application is slow enough to slot into Hyperbloom teams without interfering with Dendro Core generation, but can also enable Burnvape with Nahida and an Anemo unit who can absorb Pyro (albeit still inconsistently). Recommended gear: Favonius Greatsword and 4pc Scroll. 4pc Instructor if there already is a Scroll holder and Neuvillette wants EM. Notable investments: C2 extends Dehya’s Fiery Sanctum duration; this is valuable in Burnvape teams, where the longer Skill duration makes her a more reliable Burning enabler, otherwise mediocre as it does not extend her A1. Recommended Playstyles Vaporize / Hyperbloom Viable Playstyles Hypercarry |
Other Pyro Units
 Klee (C2+) Buffing | Rating: C C2 Klee is a luxury debuffer thanks to her DEF Shred. Since her DEF Shred only lasts 10s, she should swap in to refresh it between Neuvillette’s field time stretches. Neuvillette’s long rotations ensure she has both Skill charges off cooldown every rotation. Recommended gear: Favonius Codex and 4pc Scroll. She can otherwise build for personal damage or hold 4pc Instructor if Neuvillette benefits from EM. Viable Playstyles: Vaporize / Hypercarry |
 Thoma | Rating: D Thoma provides a shield, Pyro application for Neuvillette’s A1, and triggers Burgeon, but requires using Normal Attacks. Even if Neuvillette weaves Normal Attacks, Thoma’s shield strength is still severely reduced. At C6, Thoma gains value by offering a decent Charged Attack buff, but also requires Neuvillette to use N1C. Thoma’s ER requirements are also unappealing before C4. Recommended gear: Favonius Lance and 4pc Scroll. Prioritize HP% and ER for shield uptime. Viable Playstyles: Hypercarry / Vaporize |
 Xinyan Shielding | Rating: D Xinyan offers a shield, stacks Neuvillette’s A1, and can hold Favonius Greatsword for Energy, but is overall a suboptimal teammate. Recommended gear: Favonius Greatsword and 4pc Scroll. Viable Playstyles: Hypercarry – with Furina / Vaporize |
 Yanfei (C4+) Shielding | Rating: D C4+ Yanfei provides a shield and an A1 stack, but lacks other utility to make her recommendable over other shielders. Her shield is tied to her Burst, which requires significant investment into ER. Recommended gear: 4pc Scroll. Prioritize HP% and ER for shield uptime. If necessary, run Prototype Amber over Favonius Codex. Viable Playstyles: Hypercarry / Vaporize |
Electro Units
Notable Electro Units
Ororon Buffer / Off-Field Damage / Defensive Utility | Rating: S Ororon is a strong buffer for Neuvillette thanks to his ability to activate the full 4pc Scroll effect and minimal field time requirements. Since he enters the Nightsoul state when enemies take Electro-Charged damage and this triggers Electro DoT, Ororon can even keep the 4pc Scroll buff active from the second rotation onwards without taking the field (though this can cause issues with aligning cooldowns). Additionally, Ororon provides some utility with a Taunt via his Burst, which can be helpful for C0 Neuvillette players without a shielder. He also provides some Energy to lower Neuvillette’s ER requirements — albeit far less than Fischl. Furthermore, the Energy refund is only for the on-fielder; he does not battery the rest of the team the way Fischl does. Recommended gear: 4pc Scroll and Favonius Warbow. Notable investments: None of Ororon’s Constellations buff Neuvillette, though they are solid increases to Ororon’s personal damage. Recommended Playstyles ★ Hypercarry / ★ Electro-Charged / Hyperbloom Viable Playstyles Vaporize - Xiangling Burnvape |
Fischl Off-Field Damage / Energy | Rating: A+ One of Neuvillette’s better teammates, Fischl condenses a variety of roles. Her high particle generation lets her battery her team, allowing them to focus on offensive stats over ER. This is especially helpful for ER-hungry teammates like Beidou or Yae Miko. With Neuvillette triggering her A4, she also makes up a solid portion of the team's damage — albeit not enough to make her worth buffing over Neuvillette. Note that in Neuvillette’s solo Hydro teams, Fischl’s Electro application causes issues with Swirl setups in the first rotation. Double Swirl is often ping-dependent or inconsistent. This is mainly a concern with C6 Fischl, but can also be an issue at lower Constellations. If necessary, the optimal solution is always to prioritize buffing Neuvillette. Recommended Gear: Fischl builds for personal damage, though 4pc Scroll set with good stats can perform equally, if not better – especially with a higher investment Neuvillette. Notable Investments: Fischl’s most valuable Constellation is her C6, increasing both her damage and Oz’ uptime, but her C3 is a nice damage increase as well. Recommended Playstyles: Hypercarry / ★ Electro-Charged / Hyperbloom Viable Playstyles: Vaporize - Xiangling Burnvape / Freeze |
Iansan Buffing | Rating: B+ Iansan’s Flat ATK buff is of zero use for Neuvillette, but she is still a solid support thanks to her ability to activate the full 4pc Scroll effect. Since she has no off-field Elemental application, she should split her Skill and Burst to refresh 4pc Scroll in between Neuvillette’s field time stretches. Her lack of off-field Electro application also prevents her from triggering 4pc Scroll for multiple Elements, unlike other Scroll-bot alternatives. Recommended gear: Favonius Lance. 4pc Scroll is mandatory, use 4-star pieces if necessary. Notable investments: C1 lowers Iansan’s ER requirements. While her C6 provides 25% DMG Bonus, Neuvillette doesn’t move enough to repeatedly overcap Iansan’s Nightsoul points. At most the buff will activate once, which amounts to only 3s of buff uptime. Recommended Playstyles Hypercarry / Electro-Charged / Hyperbloom Viable Playstyles Vaporize - Xiangling Burnvape |
Beidou Off-Field Damage / Interruption Resistance | Rating: B (Electro-Charged) / C (other teams) Beidou deals significant personal damage in multi-target content. Her Burst triggers on Charged Attacks, making Neuvillette an excellent driver. Their shared AoE capabilities complement each other and Beidou easily accommodates Neuvillette’s field time requirements. Her defensive utility also lets Neuvillette benefit from interruption resistance without compromising on damage by running a pure shielder. In multi-target, Beidou makes up a decent portion of the team's damage, but her performance diminishes considerably in single-target. Since the vast majority of Beidou’s damage is tied to her high-cost Burst, running an Electro battery like Fischl is recommended. Recommended gear: Beidou builds for personal damage. Notable investments: Beidou has several strong Constellations, with her C2 being a notable boost to her personal damage. The shield from C1 offers some added survivability. Recommended Playstyles: Electro-Charged / Hyperbloom Viable Playstyles: Hypercarry / Vaporize |
Yae Miko Off-Field Damage | Rating: B (Electro-Charged) / C (other teams) Like Fischl, Yae Miko lacks direct ways to buff Neuvillette and instead compensates with personal damage. Her totems have low cooldowns, long durations, and do not snapshot, ensuring rotation flexibility. Their Electro application is also limited, which lets her stack Neuvillette’s A1 without interfering much with Swirl or Crystallize setups in solo Hydro teams. Although Yae Miko can hold Hakushin Ring to buff Neuvillette, it is rarely worth the damage trade-off, and she is better off focusing on her own damage. Compared to other alternatives, Yae Miko has higher field time requirements, but forgoing her Burst reduces them. Despite being a decent nuke, her Burst rarely fits into Neuvillette’s tight rotations. Bursting every rotation as the sole Electro unit also leads to high ER requirements, and Bursting every other rotation can cause timing issues. If Bursting, she can alternate between Q 3[E] and 3[N1 E] — weaving Normal Attacks to fill the time when not Bursting. Recommended gear: Yae Miko builds for personal damage. Hakushin Ring and 4pc Scroll are possible but rarely better. Notable investments: Most of Yae Miko’s Constellations are significant increases to her Skill damage, which is her main contribution in Neuvillette’s teams. However, investing into Yae Miko loses value in Neuvillette-focused teams (e.g., hypercarry teams), where similarly invested supports outperform her regardless. Her C1 is also conditional: it lets her Burst more regularly but is wasted if her Burst extends the rotation. Recommended Playstyles: Hypercarry / Electro-Charged / Hyperbloom / Vaporize – Burnvape Xiangling Viable Playstyles: Vaporize – other variants / Freeze |
Lisa Buffing | Rating: A (Hypercarry) / C (other teams) An accessible and strong buffer; Lisa provides DEF Shred and a stack for Neuvillette’s A1. She often forgoes her Hold Skill to minimize field time, but ER weapons and Neuvillette’s long rotations make her high ER requirements manageable. Lisa’s ER requirements are also less of an issue if played alongside Fischl in Electro-Charged teams. Additionally, when paired with Furina, Lisa equips Prototype Amber to help stack Fanfare. Its Energy passive also alleviates her ER requirements when skipping her Skill. Recommended gear: Prototype Amber if paired with Furina. Hakushin Ring or Favonius Codex otherwise. 4pc Scroll is recommended, otherwise 2pc Emblem and (with a Natlan teammate) 2pc Scroll if ER requirements are too high. Notable investments: None Viable Playstyles Hypercarry / Electro-Charged Viable Playstyles Hyperbloom / Vaporize |
Raiden Hyperbloom / Off-Field Damage | Rating: S (Hyperbloom) / D (other teams) Raiden is an excellent Hyperbloom trigger for Neuvillette. Her Skill also offers some Energy and a minor Burst DMG Bonus, and its short cast time and long duration keep her field time requirements minimal. She often only goes on-field once per rotation, while still providing full uptime for the team’s DPS window. Raiden can also function as an off-field damage dealer in non-Hyperbloom teams, but this is a strict downgrade from actual off-field damage dealers (e.g., Fischl or Yae Miko) due to her Skill’s poor damage. Recommended gear: EM weapons in Hyperbloom, Favonius Lance otherwise. Raiden builds full EM in Hyperbloom, otherwise 4pc Scroll. If the team already has a holder, she can build for personal damage; 4pc Golden Troupe is recommended since she does not Burst. Notable investments: None. Recommended Playstyles: ★ Hyperbloom / Vaporize - with Dendro Viable Playstyles: Electro-Charged / Hypercarry |
Kuki Shinobu Hyperbloom / Healing | Rating: A (Hyperbloom) / D (other teams) Shinobu can slot into most of Neuvillette’s teams with a Dendro unit to trigger Hyperbloom. Her downside is her Skill’s short range, which forces Neuvillette closer to enemies to ensure she reaches nearby Dendro Cores. Without a shielder, this increases the chance of getting interrupted. Her healing is not of priority to Neuvillette, though she still stacks some Fanfare in Furina teams. Recommended gear: Favonius Sword or Xiphos’ Moonlight, unless Freedom-Sworn is available. If Neuvillette benefits from EM and Shinobu is C4+, she can run Key (use E N1 Q to stack its passive). Stack EM in Hyperbloom, otherwise build for healing. She can hold 4pc Scroll to further buff Neuvillette, or — if there already is a holder — 4pc Days Past. Notable investments: C2 gives Shinobu’s Skill full uptime. Recommended Playstyles: Hyperbloom / Vaporize Viable Playstyles: ★ Electro-Charged / Hypercarry with Furina |
Other Electro Units
 Dori Healing | Rating: C (Hypercarry with Furina) Dori can slot into Neuvillette’s hypercarry teams with Furina. She stacks Fanfare and triggers his A1, but lacks other utility or buffs to make her competitive compared to other healers. Recommended gear: Favonius Greatsword. 4pc Scroll, 4pc Days Past if the team already has a Scroll holder. Viable Playstyles: Hypercarry – with Furina |
Cryo Units
Notable Cryo Units
Citlali Shielding / Buffing | Rating: S+ Citlali is an excellent buffer for Neuvillette, thanks to her 20% Hydro RES Shred and ability to activate the full 4pc Scroll effect for 40% Hydro DMG Bonus. She also provides a shield, thus freeing C0 Neuvillette players from having to choose between interruption resistance or buffing. In addition, her field time requirements are low, her buff duration is long and she can refresh both her RES Shred and 4pc Scroll from off-field, all of which lets her fit into nearly any Neuvillette team. The only caveat is that her lower shield scaling can make her less comfy than other shielders; nevertheless, her off-field Cryo application helps out against Freezable enemies. Since Citlali’s RES Shred activates after she reacts with either Hydro or Pyro, she is also an option for Vaporize teams where Hydro RES Shred would otherwise be impossible (though she won’t be able to trigger 4pc Scroll). Her Cryo application is a non-issue in teams with a strong Pyro applier such as Xiangling. Recommended gear: 4pc Scroll. Starcaller’s Watch or Favonius Codex. Notable investments: Starcaller’s Watch is recommended for its 28% DMG Bonus. C1 gives a buff similar to Shenhe’s Icy Quill effect, though it is limited to only 13 “quills”. It also procs on all damage, so off-field damage dealers (e.g., Furina, Escoffier) will steal procs. Beyond that, Citlali’s C2 provides 250 EM (only valuable in Vaporize) and her C6 provides a teamwide 60% Hydro DMG Bonus. Recommended Playstyles ★ Hypercarry / ★ Freeze / ★ Electro-Charged / Vaporize / Hyperbloom |
Escoffier Off-Field Damage / Buffing / Healing | Rating: S Escoffier deals impressive off-field personal damage with minimal field time, and her healing can help stack Fanfare in Furina teams. She also provides a high 55% Hydro and Cryo RES Shred, albeit in exchange for running only Hydro and Cryo teammates. Despite this, her personal damage and buffs are powerful enough to make a pure Cryo-Hydro team worth it for Neuvillette — even though he only gets one A1 stack. This is especially the case if Neuvillette is already running Furina (or any Double Hydro team), as the loss from his 2nd A1 stack is smaller than his 3rd A1 stack. Note that, without strong Hydro/Cryo teammate options (e.g., Citlali, Furina or Skirk), the lack of good alternatives make Mono Freeze worse than Hypercarry despite Escoffier’s buffs and damage. With Neuvillette’s C1, forgoing Escoffier’s full RES Shred to maximize his A1 Passive also becomes better. Recommended gear: Escoffier generally builds for damage, but can hold 4pc Scroll if there is no other option. Notable investments: Escoffier’s Constellations increase her damage, but are primarily geared towards boosting Cryo damage dealers. As such, they are not worth getting solely for Neuvillette. Note that C4 loses value in Neuvillette’s long rotations, which lower Escoffier’s ER requirements. Recommended Playstyles ★ Freeze |
Skirk Off-Field Damage / Dual Carry | Rating: S Skirk’s flexible kit lets her slot into Neuvillette’s teams as a quickswap DPS, swapping in between his damage windows to deal massive damage with her Burst nuke. Despite requiring minimal field time, her Burst is powerful enough that her team damage share often equals Neuvillette’s — making Skirk – Neuvillette teams rare true Dual Carry teams. As a consequence, she also demands similar Resin investment to Neuvillette for the team to shine. However, these teams are highly reliant on Escoffier. Without Escoffier to compensate for Neuvillette only getting one A1 stack, pure Hydro-Cryo teams perform significantly worse — albeit still on par with his less optimal Furina hypercarry teams. Escoffier is also easily Skirk’s best support. The other downside of playing Skirk with Neuvillette is that she loses out on her powerful on-field DPS playstyle, which performs on-par with — if not better than — Neuvillette’s teams. Recommended gear: Skirk builds for personal damage. Note that her quickswap playstyle favours 4pc Galleries. Notable investments: Every one of Skirk’s Constellations except C5 are solid increases to her quickswap playstyle and worth getting for higher spenders. C1, C3 and C4 are all similar and solid buffs, while C2 and C6 are massive personal damage increases. C2 also lets her Burst without absorbing Void Rifts in an emergency (against a Pyro slime). Her signature is also solid, and offers slightly more damage for slightly fewer wishes (in the worst case scenario) than her C1. Recommended Playstyles ★ Freeze |
Layla Shielding / Cryo Application | Rating: B Layla has one of the strongest shields in the game, which eliminates any concern of Neuvillette getting interrupted. Although she lacks Zhongli’s buff, her shield strength makes her a sufficient alternative. Her shield requires a refresh every 12s, but this is a non-issue for Neuvillette. At C4, she offers a miniscule Charged Attack buff. Note that Layla’s Burst can cause issues with Swirl or Crystallize setups in solo Hydro, though this is easier to overcome than with e.g. Fischl. Recommended gear: Favonius Sword. 4pc Scroll if no other teammate holds it. Otherwise, 4pc Tenacity to buff an ATK-scaling teammate — with the added benefit of increasing shield strength — or 4pc Instructor if Neuvillette benefits from EM. She can deal non-negligible personal damage, but this requires investment that is better spent elsewhere (such as on Neuvillette). Notable investments: C1 and C3 increase her already strong shield. C6 lets her build for personal damage without compromising shield strength, helpful for invested support builds. Recommended Playstyles: Freeze / Hypercarry / Electro-Charged / Hyperbloom Viable Playstyles: Vaporize |
Charlotte Healing / Cryo Application | Rating: B Charlotte’s strong healing offers comfort but lacks the interruption resistance shielders offer, though her Cryo application can compensate when the enemy is Freezable. Her Skill has a Tap and Hold variant, but she generally only uses the former. The main benefit of her Hold Skill is lowering her ER requirements enough to be able to run TTDS, but Neuvillette does not benefit from its ATK% buff. Recommended gear: Favonius Codex and 4pc Scroll. 4pc Days Past if there already is a Scroll holder, though it is only a small upgrade over 4pc Clam outside of whale investment Neuvillette. Notable investments: The sustained, party-wide healing from Charlotte’s C1 makes stacking Fanfare and — if applicable — 4pc Days Past easier. Following Constellations further increase her healing. Recommended Playstyles: Hypercarry – with Furina / Freeze |
Shenhe Buffing | Rating: C On the surface, Shenhe seems to offer little to Neuvillette since he has no use for her Icy Quill effect or Cryo RES Shred. However, her Hold Skill offers a decent, long-lasting Charged Attack buff. Neuvillette’s Charged Attacks are by far the largest share of his damage, and the long buff duration accommodates his field time requirements. She should use at least one Hold Skill per rotation regardless of team. Recommended gear: Favonius Lance and 4pc Scroll. If she is solo Cryo and Neuvillette does not need the Energy from Favonius Lance, she can build for damage. Notable investments: C1 and C2 may seem like nice QoL, but have little value in practice; her Hold Skill duration makes the extra C1 charge unnecessary, and her C2 — though it improves Freeze uptime — has no use outside of Double Cryo teams as it requires her Burst. As such, Shenhe’s Constellations should only be pulled for Cryo DPS teams — not for Neuvillette’s. Still, if she happens to have Constellations, Neuvillette’s Cryo teammates reap the benefits. Recommended Playstyles: Freeze / Hypercarry Viable Playstyles: Hyperbloom / Vaporize |
Rosaria Off-Field Damage / Cryo Application | Rating: C Rosaria offers personal damage and utility. Her quickswap nature lets her slot into Neuvillette’s rotations with ease and her particle generation provides some Energy. Her Skill’s pseudo-teleportation also lets Rosaria reposition towards enemies when cast strategically. Her A4 offers a CRIT Rate buff — appreciated for team damage and triggering Favonius Lance. Note that it can cause Neuvillette to overcap on CRIT Rate if on Sacrificial Jade, especially with Cryo Resonance. Recommended gear: Favonius Lance and 4pc Scroll. Otherwise, 4pc Noblesse if run alongside an ATK-scaling teammate. If Neuvillette does not need Energy and no teammate benefits from ATK%, she builds for damage. Notable investments: C2 is a valuable increase to her personal damage. Other Constellations are unremarkable, but the Burst Talent levels from C5 and lower ER requirements from C4 boost her damage. Recommended Playstyles Freeze |
 Mika Healing | Rating: C Mika offers healing, which lets him slot into Neuvillette – Furina teams to stack Fanfare. His Cryo application stacks Neuvillette’s A1, but he struggles to compete with other healers. Recommended gear: 4pc Scroll and Favonius Lance. 4pc Days Past is viable, but not worth farming. Recommended Playstyles Hypercarry – with Furina |
Ganyu Off-Field Damage / Cryo Application | Rating: C- Ganyu is an option for Neuvillette’s Freeze teams, where she completely forgoes Charged Attacks to instead focus solely on her Burst. She also offers some defensive utility with her Skill’s Taunt. Note that her Burst’s constant Cryo application often makes it harder to set up Neuvillette’s A1 and buffs that require Hydro reactions. Compared to her regular teams, Ganyu’s ER requirements rise in Neuvillette’s teams. She should use her Skill twice to keep ER requirements manageable. Although her Burst’s short cooldown and ability to snapshot its own buffs may make it tempting to cast it twice per Neuvillette Burst, the resulting ER requirements are rarely worthwhile. Recommended gear: 4pc Scroll if there is no holder yet, otherwise build for personal damage. At high ER requirements, 4pc Emblem performs similarly to 4pc Blizzard Strayer. Notable investments: None of Ganyu’s Constellations are worth pulling for Neuvillette’s teams. For players who already have a high Constellation Ganyu, C4 is a solid damage increase. C6 lets her perform 1–2 Charged Attacks per rotation, which in turn lets her take advantage of her C1 Cryo RES Shred. Keep in mind that at this level of investment, playing Ganyu with Neuvillette is strictly suboptimal and purely for personal enjoyment. Recommended Playstyles: Freeze |
Diona Healing / Shielding | Rating: D Diona offers a shield and healing for added comfort. She trades weaker shield strength in exchange for healing, but Neuvillette prefers interruption resistance. Her 15s Hold Skill cooldown also limits shield uptime in Neuvillette’s rotations. With Furina, Diona’s healing helps stack Fanfare, though she struggles to compete with stronger healers. Her Burst only heals the active character in slow intervals, which conflicts with Neuvillette's long stretches of field time and fast HP drain. Recommended gear: Favonius Warbow, Elegy if Neuvillette does not need Energy but wants EM. 4pc Scroll; 4pc Noblesse if there already is a Scroll holder and there is an ATK-scaling teammate. Her mediocre healing struggles to stack 4pc Days Past. Notable investments: Diona’s C6 shines in Neuvillette’s Vaporize teams, where he can take full advantage of the 200 EM buff. Other Constellations improve her healing and shield strength, but are otherwise unremarkable. Recommended Playstyles: Freeze / Vaporize Viable Playstyles: Hypercarry with Furina / Electro-Charged / Hyperbloom |
 Kaeya Cryo Application | Rating: D Kaeya is given for free and can slot into Neuvillette’s teams to offer Energy and some personal damage. The majority of Kaeya’s damage is from his Burst, and its off-field nature accommodates Neuvillette’s field time requirements. Its limited range forces Neuvillette closer to enemies however, which increases the risk of getting interrupted — though Freezing enemies somewhat mitigates this. Recommended gear: 4pc Scroll and Favonius Sword. 4pc Noblesse if the team already has a Scroll holder and there is an ATK-scaling teammate, otherwise build for personal damage. Notable investments: For those who have it, C6 is a solid increase to Kaeya’s Burst damage while lowering his ER requirements. In content where it can be utilized, the extended Burst duration from his C2 improves Freeze uptime. Recommended Playstyles: Freeze |
Other Cryo Units
Ayaka Off-Field Damage | Rating: D- At first glance, Ayaka and Neuvillette have little to no synergy. Ayaka usually has extensive field time requirements — clashing with Neuvillette’s own — and she prefers teammates who provide buffs or utility. Her viability stems entirely from her raw damage output and the scarcity of Cryo damage dealers with off-field presence. Still, she is limited to Freeze teams — specifically Double Cryo teams, which are suboptimal without Escoffier. Similar to Ganyu, Ayaka’s ER requirements spike with Neuvillette, and she should use two Skills per rotation to keep them manageable. A second Cryo unit can help with ER and provide appreciated buffs for her damage. With Ayaka, teammates who cannot support Neuvillette can instead equip Thrilling Tales and 4pc Noblesse/Tenacity to buff her. Still, buffing Neuvillette should be prioritized. Recommended gear: Ayaka builds for personal damage. At high ER requirements, 4pc Emblem performs similar to 4pc Blizzard Strayer. Notable investments: Neuvillette’s Freeze teams are just about the worst use possible for an invested Ayaka. Her Constellations should not be pulled for his teams. For lucky players who already have her C2 and C3, they are significant damage increases for her Burst. Her C4 also offers a rare source of DEF Shred to boost both her and Neuvillette’s damage. Recommended Playstyles: Freeze – Double Cryo Viable Playstyles: Freeze – Solo Cryo |
 Qiqi Healing | Rating: E+ Qiqi heals and triggers Neuvillette’s A1, but has significant downsides that leave her unable to compete with other healers in Neuvillette – Furina teams. Her Skill uptime is limited, and since Neuvillette cannot accommodate any field time for her, only her Skill’s ticks offer healing. The party-wide healing from her Burst is also locked behind high ER requirements, which are further worsened by Qiqi’s inability to generate Energy. Recommended Gear: Favonius Sword, 4pc Scroll. Viable Playstyles: Hypercarry – with Furina |
Hydro Units
Notable Hydro Units
Furina Buffing / Off-Field Damage / Energy | Rating: S+ Furina is one of Neuvillette’s best supports. She deals significant damage with her long-duration Skill, and her Burst provides a hefty DMG Bonus, stacking up to 75% (at C0, TL10) with HP changes. Neuvillette’s massive HP fluctuation lets him fully stack the buff on his own, allowing him to freely choose whether to run a healer or not depending on player comfort and teammate options. Furina also lowers Neuvillette’s ER requirements, enables Hydro Resonance for HP% that benefits them both, and easily sets up Hydro Swirl and Crystallize. While going healerless sacrifices some of Furina’s personal damage, the trade-off is worth it if the alternative is a more synergistic support for Neuvillette. Though sizable, Furina’s damage remains lower than Neuvillette’s, so exchanging some of her damage to increase his is worthwhile. However, keep in mind that forgoing a healer is not a clear cut damage decrease for Furina either. Slotting in e.g. Kazuha offers just as many buffs to Furina as to Neuvillette, minimizing the damage lost. Of course, if players lack other strong supports to buff Neuvillette, it is recommended to bring a healer to increase Furina’s Fanfare stacks. For many, exchanging a bit of the team’s hefty damage for a more comfortable playing experience is also preferable. Recommended gear: Furina builds for personal damage. Key of Khaj-Nisut is recommended if Neuvillette (or a teammate) benefits from its EM buffs. Furina can hold Favonius Sword if needed, but this is rarely optimal. Notable investments: Furina’s early Constellations are all excellent boosts to the damage output of Neuvillette’s teams. For higher spenders looking to invest into his teams, Furina’s C1-C3 are strong options. See the FAQ for details on how Furina’s Constellations compares to Neuvillette’s Constellations for team DPS. Recommended Playstyles: Hypercarry / Electro-Charged / Vaporize / Hyperbloom / Freeze |
Childe Buffing | Rating: A (Hypercarry without Furina) / B (other teams) Childe is an unexpected but surprisingly solid support for Neuvillette, thanks to his Utility Passive, which increases his party members’ NA Talent Level by 1. Since Neuvillette’s NA Talent levels are so significant for him, even a single Talent level noticeably increases his damage. Childe also offers HP% through Hydro Resonance, and Hydro application for Swirl/Crystallize setups. His extremely convenient buffs at the expense of zero field time make him a popular choice for speedruns. Childe’s personal damage is non-existent in Neuvillette’s teams; his gearing focuses entirely on supporting his team. Recommended gear: Favonius Warbow. 4pc Scroll – if he can reliably proc it – or 4pc Instructor if he triggers it consistently and Neuvillette wants EM. Notable investments: None. Recommended Playstyles: Hypercarry – without Furina Viable Playstyles: Vaporize / Hyperbloom / Electro-Charged |
 C2+ Sigewinne Speedrunning | Rating: A (speedrun) C2+ Sigewinne has significant pros in speedruns. She offers 35% Hydro RES Shred, and applies her buff quickly with minimal setup. The RES Shred also lasts for 8s and gets refreshed with each Skill bounce, resulting in solid multi-wave performance. Outside of C2+ speedruns, Sigewinne lacks synergy with Neuvillette. Although she generates Sourcewater Droplets, Neuvillette already generates enough Droplets on his own. Her healing also has little value to Neuvillette outside of Furina teams, and slotting her into his teams with Furina results in suboptimal Triple Hydro teams. Neuvillette’s Furina-less Double Hydro teams also have better second Hydro options. Recommended gear: Favonius Warbow. 4pc Scroll – if she can reliably trigger it – or 4pc Days Past. Notable investments: There is little point in running Sigewinne with Neuvillette without her C2. Recommended Playstyles Hypercarry – without Furina |
Yelan Buffing / Energy | Rating: B Similar to Furina, Yelan offers HP% through Hydro Resonance and a ramping DMG Bonus via her A4, though less potent. Although Neuvillette’s teams make limited use of the rest of Yelan’s kit, the scarcity of HP% buffs still make her a viable teammate. She can provide further utility by holding Favonius Warbow and funneling her Skills to Neuvillette, consolidating the roles of buffer and battery. As Yelan’s Exquisite Throw is only triggered by Normal Attacks, her typically significant personal damage falls off a cliff in Neuvillette’s teams. Despite Neuvillette generally using N1C combos in teams with Yelan, her personal damage is still comparatively low. Recommended gear: Favonius Warbow and 4pc Scroll if she can reliably trigger it. If the team already has a Scroll holder, build for personal damage. Notable investments: For high investment players, C4 is a rare source of HP%. Recommended Playstyles: Hypercarry – without Furina / Electro-Charged / Hyperbloom Viable Playstyles: Vaporize / Freeze |
Mona Buffing | Rating: D+ Mona offers a large DMG Bonus through her Burst, applying her Omen debuff onto enemies to significantly increase Neuvillette’s damage. However, the Omen debuff often expires before Neuvillette’s second Charged Attack in non-Freeze teams, reducing its value. Still, it provides a hefty damage boost while active. Mona can also Burst twice per Neuvillette’s Burst, which significantly improves uptime — at the price of steep ER requirements. This is a non-issue in Freeze teams, which reliably extend her Omen’s duration. In other teams, Mona equips 4pc Tenacity/Noblesse and Thrilling Tales to further buff her team, but Neuvillette benefits from none of these. While she can instead hold Favonius Codex or Hakushin to buff Neuvillette, this still makes her a less impressive buffer than usual. Recommended gear: 4pc Scroll if she can reliably trigger it and Favonius Codex; Hakushin Ring if with an Electro teammate. If played alongside ATK-scaling teammates, she can use her standard support build. 4pc Instructor is viable if Neuvillette wants EM, but hard to reach stat requirements with. Notable investments: Neuvillette’s teams make decent use of Mona’s C1 in Vaporize and Electro-Charged teams. Her C4 is a powerful CRIT Rate buff, but can cause Sacrificial Jade Neuvillette to overcap, especially with Rosaria or Cryo Resonance. Recommended Playstyles: Hypercarry / Freeze Viable Playstyles: Electro-Charged / Vaporize / Hyperbloom |
Kokomi Healing | Rating: D Kokomi enables Hydro Resonance for HP%, but has little inherent synergy with Neuvillette beyond that. Her healing can provide some extra damage from Neuvillette’s A4 Passive, though it is near impossible to keep up with his hefty HP drain. While Kokomi’s healing has limited use for Neuvillette, she still provides survivability for other teammates. Her Skill also provides some particles to lower Neuvillette's ER requirements, but her negative CRIT Rate makes Favonius Codex useless on her. At the price of higher ER requirements, Kokomi can use her Burst to refresh Bake-Kurage for increased uptime. Recommended gear: 4pc Scroll if there is no holder yet and she can reliably trigger it, otherwise build for healing. She can hold Hakushin Ring with an Electro teammate, and 4pc Tenacity with an ATK-scaling teammate. She can run 4pc Instructor if Neuvillette benefits from EM. Notable investments: None. Recommended Playstyles: Hyperbloom / Electro-Charged Viable Playstyles: Freeze / Hypercarry |
Nilou Bloom | Rating: S (Bloom) Nilou is practically mandatory for Bloom teams, with both of her Ascension Passives massively boosting Bloom teams’ damage output. Her Bloom buff is additive, and she boosts her teammate’s Bloom damage equally regardless of their EM (as long as they are level 90). This greatly benefits Neuvillette since he does not need to choose between personal damage and Bloom damage. Nilou’s A1 is a decent source of external EM for Neuvillette. At higher investment levels, Key of Khaj-Nisut also provides another source of external EM. This lets Neuvillette increase his Bloom damage without having to sacrifice personal damage to build EM. Recommended gear: Nilou’s build priorities remain the same as in non-Neuvillette teams. Notable investments: Key of Khaj-Nisut provides a valuable source of external EM for Neuvillette, and helps Nilou reach her Talent cap of 74,444 HP. Her C2’s Hydro RES Shred is another buff for Neuvillette, which he takes full advantage of as his personal damage is nearly equal to his Bloom damage. Recommended Playstyles: ★ Bloom |
Xingqiu Interruption Resistance / Energy | Rating: D If alternatives are scarce, Xingqiu can enable Hydro Resonance and provide minor utility with interruption resistance and damage mitigation. He can battery Neuvillette with his Skill and set up Hydro Swirl and Crystallize. His C2 also offers modest Hydro RES Shred if weaving the occasional Normal Attack. Recommended gear: Favonius Sword and 4pc Scroll if he can reliably trigger it. Notable investments: The C2 Hydro RES Shred is the only buff Xingqiu offers Neuvillette. Recommended Playstyles: Hyperbloom / Hypercarry – without Furina Viable Playstyles: Electro-Charged |
 Dahlia Shielding | Rating: D- Dahlia offers a shield and enables Hydro Resonance, but is generally a worse option than any other shielder. His shield is weak since Neuvillette struggles to gain Benison stacks to regenerate it, and its uptime doesn’t fully cover both of his field time stretches before C4. Dahlia also lacks other useful buffs, damage or utility. Dahlia’s only niche is in Neuvillette’s teams with Escoffier. These teams are limited to Hydro and Cryo units only; as such, there are fewer shielder options and thus less competition. Freeze also grants Dahlia extra Benison stacks, significantly improving his shield strength — though its uptime issues remain pre-C4, and it is still weak compared to alternatives (e.g. Layla). Recommended gear: Favonius Sword and 4pc Scroll if he can reliably proc it. Notable investments: C4 to fix his shield uptime issues. C1 reduces ER requirements, while C2 and C3 increase his shield strength. Recommended Playstyles Freeze — with Escoffier Viable Playstyles Hypercarry – without Furina / Hyperbloom / Electro-Charged |
Other Hydro Units
 Barbara Healing / Buffing | Rating: E Barbara enables Hydro Resonance and her C2 offers a minor Hydro DMG Bonus, which makes her a viable enough flex for Neuvillette. Like Xingqiu, she offers little else, but whereas Xingqiu’s interruption resistance makes him recommendable, Barbara lacks similar utility. Recommended gear: Favonius Codex and 4pc Scroll if she can consistently proc it. Viable Playstyles: Hypercarry – without Furina |
 Ayato Buffing | Ayato offers the bare minimum of enabling Hydro Resonance for HP%. He lacks any buffs or utility to compete with other Hydro options in Neuvillette’s hypercarry teams, but gains some value in teams that benefit from his off-field Hydro application. Recommended gear: Favonius Sword. 4pc Scroll if he can reliably trigger it. Viable Playstyles: Hyperbloom / Vaporize – Burnvape with Xiangling |
Hydro Traveler Buffing | Rating: E- Hydro Traveler enables Hydro Resonance, but offers nothing else that makes them worth running. They generate Sourcewater Droplets, but Neuvillette already generates enough Droplets for himself. Their Burst offers minor off-field Hydro application. Recommended Gear: Favonius Sword, 4pc Scroll if they can reliably proc it. Viable Playstyles: Hypercarry – without Furina / Hyperbloom |
Dendro Units
Notable Dendro Units
 Nahida Dendro Application / Buffing / Off-Field Damage | Rating: S (Hyperbloom, Bloom) / A (other teams) Nahida’s Skill provides unmatched off-field Dendro application, and is the only Dendro option able to consistently sustain Burning for Forward Vaporize. Her Burst offers up to 250 EM to increase Neuvillette’s damage in Vaporize or Bloom teams. In teams where EM is less valuable, it can still be used to fill up rotation time. Nahida easily accommodates Neuvillette’s field time requirements with her long Skill duration, and its large range gives appreciated mobility. Its chain-mechanic and pseudo-grouping is beneficial in multi-target content, and, in turn, Neuvillette’s flexibility mitigates Nahida’s multi-wave issues. Swapping to Nahida to reapply her Skill when a new wave of enemies spawns is largely a non-issue in Neuvillette’s teams. Recommended gear: Nahida’s build remains the same in Neuvillette’s teams. She should equip 4pc Scroll or 4pc Deepwood, and hold Floating Dreams if Neuvillette benefits from the EM (Favonius Codex otherwise). Notable investments: Nahida’s C2 is a significant damage increase to all her teams with Neuvillette, especially Bloom and Hyperbloom. His Burnvape teams with Nahida and Xiangling can also accommodate an Electro flex (e.g., Yae Miko) for the DEF decrease as well. A Thousand Floating Dreams can buff Neuvillette if he wants EM. Recommended Playstyles: Vaporize / Hyperbloom / Bloom |
 Emilie Off-Field Damage / Dendro Application | Rating: A Emilie is a strong off-field damage dealer in Neuvillette’s Burnvape teams. Her off-field Dendro application enables some Burning, which both lets her help sustain Vaporize and increases her own personal damage. The sheer amount of personal damage she deals also lets her perform on par with the other Burning enabler, Nahida, despite not providing buffs to Neuvillette. However, Emilie’s Dendro application is both slow and single-target; she can struggle to maintain Burning in AoE, especially in Neuvillette – Furina teams. With a higher invested Neuvillette, Emilie’s personal damage also falls behind Nahida’s buffs (unless, of course, Emilie is equally invested). Recommended gear: Emilie builds for personal damage. Notable investments: Constellations and her signature weapon improve Emilie’s personal damage but offer nothing to Neuvillette. They are only worth going for to invest in Emilie herself. Although her C2 offers 30% Dendro RES Shred, her teams with Neuvillette rarely trigger enough Burgeons for it to benefit anyone other than herself. Recommended Playstyles ★ Vaporize |
Baizhu Healing / Interruption Resistance / Buffing | Rating: A (Hypercarry with Furina, Bloom) / B (other teams) Baizhu offers strong healing and decent interruption resistance with his Skill and Burst — appreciated QoL for C0 Neuvillette. If the team triggers Dendro reactions, his A4 also offers a modest DMG Bonus, albeit only for the on-fielder and only for Dendro reactions (e.g. Bloom). He is a solid pick for Neuvillette – Furina teams, stacking Fanfare while offering interruption resistance. Although Baizhu’s Burst’s limited uptime may clash with Neuvillette’s rotations, timing it before his field time can help. Still, his pseudo-shields may feel insufficient for C0 Neuvillette players. Recommended gear: Favonius Codex and 4pc Scroll; optionally 4pc Days Past if there is already a Scroll holder. It is a minor damage increase for C0 Neuvillette, but recommendable at very high investment – albeit still after Scroll. He can equip 4pc Instructor if Neuvillette wants EM, though it requires reaching his ER requirements with 4-star artifacts. Notable investments: C2 lets Baizhu stack Fanfare and trigger Neuvillette’s A1 without going on-field even once, making him a stand-out teammate in higher invest Neuvillette teams. Recommended Playstyles: ★ Hypercarry – with Furina / Vaporize / Hyperbloom / ★ Bloom Viable Playstyles: Hypercarry – without Furina |
 Kirara Shielding | Rating: B Kirara offers a strong shield with potentially 100% uptime and — at C6 — a modest DMG Bonus. She needs to regularly swap in to cast her Skill for her shield, but Neuvillette’s rotation flexibility makes this a non-issue. For better durability and particle generation, she should use her short Hold Skill over her Tap Skill. Although Kirara offers some minor off-field Dendro application at C4, this is still insufficient to maintain Dendro Core uptime alone. In teams that require Dendro application, she is best suited as a flex pick while another Dendro unit handles Dendro application. Recommended gear: Favonius Sword and 4pc Scroll. Key of Khaj-Nisut if Neuvillette wants EM; use Kirara’s Hold Skill to stack it. She can similarly run 4pc Instructor at the price of shield strength. Otherwise, build purely for shield strength. Notable investments: C4 provides some off-field Dendro application to supplement another Dendro unit’s application. Her C6 offers a 12% DMG Bonus to buff Neuvillette. Recommended Playstyles: Vaporize / Hyperbloom / ★ Bloom / Hypercarry |
Dendro Traveler Dendro Application | Rating: C Dendro Traveler is available to all players, with Ascension materials and Constellations obtained for free. They offer sustained, off-field Dendro application with their Burst, which targets enemies randomly within its range. Although the Burst is stationary, its large AoE — which is further increased by infusing with Hydro — still allows Neuvillette the mobility he wants. They also offer a modest ramping EM buff. Dendro Traveler’s high-cost Burst results in high ER requirements, but a Dendro teammate and multiple Skill casts per Burst help alleviate this. A second Dendro unit also helps cover for any gaps in Dendro application caused by Traveler’s Burst’s random targeting. Recommended gear: Favonius Sword and 4pc Scroll. Notable investments: Most of Dendro Traveler’s Constellations offer either QoL or utility. C1 helps with Energy, C2 is a valuable Burst duration increase, and C4 helps speed up the ramping EM buff. At C6, they offer a DMG Bonus to buff Neuvillette, as long as their Burst infuses Hydro. Recommended Playstyles: Hyperbloom / Bloom Viable Playstyles: Vaporize |
Collei Dendro Application | Rating: C Collei is another accessible option, freely available after clearing Floor 4 of Spiral Abyss. She provides mobile off-field Dendro application, which she can increase with her C2. Her lower Burst cost also makes ER requirements more manageable than Dendro Traveler in Solo Dendro teams. The shorter durations of Collei’s Skill and Burst may feel awkward in some rotations. Their limited range also forces Neuvillette closer to enemies, which can make interruption resistance necessary at C0. Recommended gear: 4pc Scroll and Favonius Warbow. Notable investments: C1 helps Collei reach her ER requirements, and C2 increases her Dendro application. Her C4 offers a minor EM buff — an added bonus if Neuvillette wants EM. Recommended Playstyles: Hyperbloom / Bloom Viable Playstyles: Vaporize |
Yaoyao Healing / Dendro Application | Rating: C Yaoyao offers single-target healing with her Skill, and emergency party-wide healing with her Burst if needed (though never optimal). She lacks interruption resistance — which C0 Neuvillette prefers — and instead provides some off-field Dendro application. Though unable to sustain Dendro Core generation or Burning alone, she can supplement another Dendro unit, especially in multi-target. Recommended gear: Favonius Lance. 4pc Scroll if she reliably triggers Bloom. She can equip 4pc Instructor at the price of survivability, but may not always be able to reliably trigger a reaction while on-field to activate the set passive. 4pc Days Past is usable, but not worth farming. Notable investments: C6 further improves Yaoyao’s healing. Unnecessary unless triggering 4pc Days Past, or helping survivability if running 4pc Instructor. Recommended Playstyles: Hyperbloom / Bloom Viable Playstyles: Vaporize |
Anemo Units
Notable Anemo Units
Kazuha 4pc VV / Buffing / Grouping | Rating: S+ Kazuha is Neuvillette’s premier Anemo support, providing Hydro RES Shred and a powerful Elemental DMG Bonus with his A4 (often in the 30–40% range). Since his A4 refreshes from off-field, Kazuha often uses his Burst to maximize its uptime and better keep up with Neuvillette’s extensive field time. His Hydro-absorbed Burst also lets Kazuha set up Hydro Swirl/Crystallize later in the rotation. Kazuha also offers QoL benefits: his Skill’s short cooldown lets him flexibly refresh his A4 and 4pc VV, and the on-demand grouping keeps enemies gathered to maximize Neuvillette’s damage. Recommended gear: 4pc Viridescent Venerer. Freedom-Sworn if available, Xiphos’ Moonlight or Favonius Sword otherwise. Notable investments: Freedom-Sworn buffs Neuvillette’s Charged Attacks. C2 is also a solid buff in teams where Neuvillette wants EM. Recommended Playstyles ★ Hypercarry / ★ Electro-Charged / ★ Vaporize / ★ Freeze Viable Playstyles Hyperbloom |
Lan Yan 4pc VV / Shielding | Rating: A (shield needed or with Starcaller) / C (shield not needed) Lan Yan is an excellent Anemo support for C0 Neuvillette players who want interruption resistance thanks to her Skill’s shield, combined with her ability to hold 4pc VV. This lets her free up a team slot that would otherwise be occupied by a shielder for an extra buffer/off-field DPS. Her personal damage is also solid, and her Burst provides an instance of grouping. The only caveat is her Skill cooldown; Lan Yan requires either Sacrificial Fragments or her C6 for more than 50% shield uptime. Note that if Neuvillette is C1, if the team already has a shielder, or if the player is fine playing shielderless, Lan Yan is far less recommended. Her long animations make her a worse option on-paper than several of the below Anemo supports — most of her value lies in consolidating shielding and 4pc VV. The exception is if she can hold Starcaller’s Watch. Recommended gear: 4pc Viridescent Venerer. Sacrificial Fragments pre-C6. Starcaller’s Watch for C6 players who have it, otherwise Favonius Codex or Hakushin Ring, Notable investments: C6 lets Lan Yan equip weapons other than Sacrificial Fragments while still having full shield uptime for ~3.5 rots (before desyncing). Starcaller’s Watch is a great support weapon, but is not recommended pre-C6. Its passive’s short range forces Neuvillette close to the enemies — leaving him no space to avoid attacks — and pre-C6 Lan Yan without Sacrificial Fragments only has her shield up for half of the rotation. Recommended Playstyles ★ Hypercarry / ★ Electro-Charged / Vaporize / Freeze Viable Playstyles Hyperbloom |
Sucrose 4pc VV / Buffing / Grouping | Rating: A (Vaporize) / C (other teams) Sucrose is competitive in Vaporize teams and decent otherwise. She offers RES Shred, high EM buffs, and Hydro DMG Bonus at C6 (if her Burst absorbs Hydro). Her Skill and Burst also offers crowd control — though with caveats. Her Skill grouping is mediocre unless using 2 Skills successively, which is suboptimal with Neuvillette’s rotations. Her Burst often throws light enemies further into the air when hit, causing Neuvillette’s next Charged Attack tick to miss. Additionally, while Neuvillette’s Vaporize teams with Sucrose are his best on paper, they are hit-or-miss in practice. Her Burst absorption is highly inconsistent, often failing to absorb the right Element or any at all. This is a liability in Vaporize teams that rely on her Burst absorbing Pyro. As such, said teams are only recommended for players willing to reset repeatedly. Recommended gear: 4pc Viridescent Venerer. Sucrose can hold Prototype Amber with Furina, Hakushin Ring with an Electro teammate, Favonius Codex otherwise. Notable investments: The extra Skill charge from Sucrose’s C1 lets her fit better into Neuvillette’s rotations. Her C6 offers DMG Bonus, but requires using her Burst. Absorbing the correct Element is also difficult in practice. Recommended Playstyles: Vaporize / Electro-Charged / Freeze / Hypercarry Viable Playstyles: Hyperbloom |
Lynette 4pc VV / Defensive Utility | Rating: A- (Vaporize, hypercarry with Furina) / B (other teams) Lynette is an accessible option given for free to all players. In addition to Hydro RES Shred, Lynette offers a Taunt with her Burst to help prevent shielderless C0 Neuvillette from getting interrupted. Her extremely fast animations (and non-negligible personal damage, especially with Constellations) make her surprisingly competitive. At C1, Lynette’s Skill also provides some minor grouping. In practice, her grouping does little unless enemies are already somewhat close, but it is better than nothing. Lynette also offers an ATK% buff for any ATK-scaling teammates, though this is of little use to Neuvillette. Furthermore, when running Furina or in Vaporize, Lynette is a competitive pick. Her built-in HP fluctuation lets her help stack Fanfare. She does not offer as much stacking as a healer, but the contribution is still appreciated. To take full advantage, she should use her Skill shortly after Furina casts her Burst. In Vaporize, her Burst lets her assist with Pyro application. Recommended gear: 4pc Viridescent Venerer. Favonius Sword or Xiphos’ Moonlight. Notable investments: Most of Lynette’s Constellations benefit Neuvillette. C1 offers slight grouping and C2 significantly improves her ability to assist with Elemental application, which is valuable in Vaporize teams. The extra Skill charge from C4 lets her perform 2 Skills in shorter Neuvillette rotations (e.g., 3CA rots). Recommended Playstyles Hypercarry / Freeze / Vaporize / Electro-Charged Viable Playstyles Hyperbloom |
Venti 4pc VV / Energy / Grouping | Rating: C Venti provides Hydro RES Shred and plenty of utility. He offers powerful grouping and refunds 15 Flat Energy to teammates of the Element his Burst absorbs — especially appreciated in ER-hungry teams (e.g. Neuvillette’s Freeze teams). His Burst also uniquely provides continuous grouping; if enemy spawn location allows, it will even group multiple waves of enemies. This provides a degree of defensive utility as well by pulling in enemies before they attack. Note that Venti is highly situational. His grouping is unmatched against multi-target and multi-wave content, but he struggles against content that can’t be grouped. Recommended gear: 4pc Viridescent Venerer. Elegy if Neuvillette’s ER requirements are low and he wants EM, Favonius Warbow otherwise. Notable Investments: None of Venti’s Constellations benefit Neuvillette, and Elegy is mainly an option for players who already have it for other reasons. Recommended Playstyles: Hypercarry / Freeze / Electro-Charged / Vaporize Viable Playstyles: Hyperbloom |
Jean 4pc VV / Healing | Rating: A (Hypercarry with Furina) / D (other teams) Jean has a niche in Neuvillette – Furina teams, where she consolidates 4pc VV and healing. Her party-wide healing rapidly increases Fanfare, and Hydro RES Shred buffs Neuvillette and Furina. Having a healer also increases comfort; while Neuvillette himself self-sustains, his teammates are vulnerable to chip damage. Jean lacks other buffs, which she makes up for by stacking Fanfare in most Furina teams. With Neuvillette however, Jean merely supplements his own Fanfare stacking. As a result, she trails behind stronger supports like Kazuha. Still, she is a competitive pick, and is accessible compared to limited supports. Without such an alternative, Jean quickly becomes the better pick — but even with Kazuha available, she is still valuable as a comfort pick. Recommended gearing: 4pc Viridescent Venerer. Favonius Sword or Xiphos’ Moonlight (if built full EM). Notable investments: None. Recommended Playstyles: Hypercarry - with Furina Viable Playstyles: Hypercarry – without Furina / Electro-Charged / Vaporize / Hyperbloom |
Sayu 4pc VV / Healing | Rating: A- (Hypercarry with Furina) / D (other teams) Similarly to Jean, Sayu provides Hydro RES Shred and healing to stack Fanfare in Furina teams, making her a competitive pick. She heals less compared to Jean, but offers more damage through Swirl, especially when built full EM (though this sacrifices some healing pre-C6). Beyond stacking Fanfare, the healing Sayu provides is of limited use to Neuvillette himself. Still, it adds comfort by mitigating chip damage taken by his teammates. Recommended gear: 4pc Viridescent Venerer and Favonius Greatsword. Notable investments: C6 lets Sayu build for damage without compromising healing. Recommended Playstyles: Hypercarry – with Furina Viable Playstyles: Hypercarry – without Furina / Electro-Charged / Vaporize / Hyperbloom |
Xianyun 4pc VV / Healing / Buffing | Rating: B+ (Hypercarry with Furina) / D (other teams) Neuvillette has no use for Xianyun’s buffs as he does not Plunge. However, her ability to shred Hydro RES and her Burst’s strong healing still makes her a solid pick in his teams with Furina. She has less frontloaded healing, but this is a non-issue with Neuvillette, who already stacks plenty of Fanfare himself. Unlike Jean and Sayu, Xianyun’s healing follows the active character, not hindering mobility. As a Catalyst user, she also has access to more support weapons (e.g. Hakushin Ring). Recommended gear: 4pc Viridescent Venerer. Hakushin if paired with an Electro teammate, Favonius Codex otherwise. Prototype Amber is an option with Furina, for even faster Fanfare generation. Notable Investments: None. Recommended Playstyles: Hypercarry - with Furina Viable Playstyles: Hypercarry – without Furina / Electro-Charged / Vaporize / Hyperbloom |
 Heizou 4pc VV | Rating: D Heizou provides Hydro RES Shred and offers 80 EM to buff Neuvillette in teams where he wants EM. He also provides minor grouping through his Burst, increasing with his C2. In practice however, his Burst AoE is too narrow to do much against spread-out enemies, but it is better than nothing. With Furina, Heizou can hold Prototype Amber to stack Fanfare; his Burst-based grouping already incentivizes Bursting regularly. Recommended gear: 4pc Viridescent Venerer. Hakushin Ring if with an Electro teammate, Favonius Codex otherwise. Prototype Amber with Furina. Notable investments: C2 helps with Heizou’s grouping, and his C4 Energy refund significantly lowers his Burst cost. Recommended Playstyles Hypercarry / Electro-Charged / Vaporize Viable Playstyles Hyperbloom / Freeze |
Other Anemo Units
Mizuki 4pc VV / Healing | Rating: D- Mizuki can hold 4pc VV, but her kit has minimal synergy with an off-field support playstyle. Her buffs are tied to being on-field, and she only generates particles over time in her on-field Skill state. This increases both her and her teammates’ ER requirements, and makes Favonius Codex mandatory for Energy generation. Nevertheless, Neuvillette’s long rotations alleviate her ER issues, which allows her to use her Burst every rotation for the grouping and healing. This lets her provide some utility in addition to 4pc VV, though her healing is single-target and her grouping is one instance only. Recommended gear: 4pc Viridescent Venerer and Favonius Codex. Viable Playstyles Hypercarry / Freeze / Electro-Charged |
Anemo Traveler 4pc VV | Rating: D- Anemo Traveler offers Hydro RES Shred but little else. At C6, their Burst offers an additional 20% Elemental RES Shred, but only for the Element absorbed. In practice, it is hard to guarantee their Burst absorbs Hydro, however. Traveler’s Burst also carries lighter enemies away. Recommended Gear: 4pc Viridescent Venerer. Favonius Sword or Xiphos’ Moonlight. Viable Playstyles: Hypercarry / Freeze / Electro-Charged |
Geo Units
Notable Geo Units
 Xilonen Buffing / Healing | Rating: S+ Easily one of Neuvillette's best supports; Xilonen can slot into any Neuvillette team. Her field time requirements are minimal, and she offers Hydro RES Shred, healing to stack Fanfare in Furina teams, and the full 40% DMG Bonus from 4pc Scroll. Her RES Shred requires no aura management — letting her shred Hydro RES where it would otherwise be impossible — and lasts across multiple waves. Its duration is also longer than 4pc VV, though the Shred is slightly lower. For players willing to deal with the set's caveats, Xilonen also lets a teammate equip 4pc Archaic Petra to buff Neuvillette. Additionally, her Nightsoul Burst passive batteries ER hungry teammates (e.g., Lisa) if they equip 2pc Scroll. Her only downside is lacking interruption resistance before C1, though this is mostly an issue with short-ranged teammates (e.g., Xiangling). Neuvillette’s C1 also makes this a non-issue. Recommended gear: Peak Patrol Song if available, Favonius Sword otherwise. 4pc Scroll of the Hero of Cinder City is mandatory, use 4-star pieces if necessary. Notable investments: Prioritize Peak Patrol Song, then Xilonen’s C2 for its hefty 45% HP buff. Xilonen’s C1 provides some interruption resistance; it is no shield, but makes gameplay more comfortable and – more importantly – is a step closer to C2. Her C4’s value is limited as it only buffs 6 damage instances per character – less than one Neuvillette Charged Attack. Recommended Playstyles ★ Hypercarry / ★ Vaporize / Hyperbloom / ★ Electro-Charged / ★ Freeze |
Zhongli Shielding / Buffing | Rating: S Zhongli is an excellent pick for Neuvillette players who require interruption resistance. His shield’s unmatched strength and long duration makes it hassle-free to use, and its universal RES Shred boosts Neuvillette’s damage. Combined with his ability to hold 4pc Archaic Petra, this makes Zhongli one of Neuvillette’s best teammates. Depending on available teammates, pairing Zhongli with a second Geo unit (e.g. Xilonen or Chiori) for Geo Resonance is a viable option. This trades a stack of Neuvillette’s A1 Passive for buffing, albeit gaining only 15% DMG Bonus compared to Hydro Resonance’s +25% HP. These teams also often forgo 4pc VV, settling for Zhongli’s and Xilonen’s RES Shred instead. As a result, such teams are among Neuvillette’s easiest to play while sacrificing minimal damage. Recommended gear: Favonius Lance. 4pc Archaic Petra for players willing to deal with the caveats, otherwise 4pc Scroll. He can run 4pc Instructor if Neuvillette wants EM, as his impressive shield scaling lets him handle the stat loss from using 4-star artifacts. Notable investments: The Resin/strongbox fodder to farm 4pc Archaic Petra or 4pc Scroll. For players who already have a C6 Zhongli, the healing helps stack Fanfare with Furina. Recommended Playstyles: Hypercarry / Vaporize / Hyperbloom / Electro-Charged / Freeze |
 Kachina Buffing | Rating: A Despite having no inherent support capabilities, Kachina's ability to activate the full 4pc Scroll buff makes her a highly competitive buffer. She also remains in her Nightsoul state after leaving the field and deals Geo DoT, which lets her proc Scroll for multiple different-Element teammates — especially appreciated if Neuvillette runs off-field damage dealers (e.g., in Electro-Charged). Her field time requirements are minimal and she can let a teammate equip 4pc Archaic Petra to further buff Neuvillette. Note that unlike other Scroll holders, her Skill doesn't hit on cast, which may interfere with setups. She is given for free after completing Natlan's Archon Quest Introduction. Recommended gear: Favonius Lance. 4pc Scroll is mandatory, use 4-star pieces if necessary. Since her stats don’t matter, she can equip EM main stats to strengthen the shield from Crystallize. However, Crystallize’s scaling is incredibly low; it is unlikely there will be a noticeable difference in shield durability, thus not warranting the Resin spent. Notable investments: C2 summons Turbo Twirly with Kachina’s Burst, which lets her refresh 4pc Scroll during her Skill’s cooldown. Its value is limited as Scroll’s long duration already covers Neuvillette’s field time, but the flexibility is appreciated nonetheless. Recommended Playstyles Hypercarry / Vaporize / Hyperbloom / Electro-Charged / Freeze |
Chiori Off-Field Damage / Buffing | Rating: B Chiori is a solid off-field flex for Neuvillette; she plays similarly to Albedo, but offers higher personal damage and no risk of her Skill breaking. Neuvillette’s long rotations also keep her ER requirements low and let her use her Burst to fill rotation time. She performs well in Solo Geo teams and is among the best picks for Neuvillette’s Double Geo teams. Note that her Skill’s limited duration means she wants to go on-field shortly before Neuvillette. Her long cooldown also means she cannot refresh the duration to cover his second field time. Although Chiori can equip 4pc Archaic Petra, her long Skill cooldown and good personal damage make it a poor fit. She struggles to refresh the buff, and has to either use her Burst or rely on leftover Hydro Shards. As such, simply keeping her regular build is more preferable. In Double Geo teams, the other Geo unit should equip 4pc Archaic Petra. Recommended gear: Chiori’s Skill’s swap mechanic makes running 4pc Archaic Petra difficult, so build for personal damage. Favonius Sword only if absolutely necessary. Notable investments: C1 frees Chiori from needing Geo constructs, but still requires a Geo teammate. Double Geo Neuvillette teams often run teammates with Geo Constructs, making it effectively worthless outside of Xilonen teams. C2 spawns dolls after Chiori casts her Burst, which lets her generate dolls during her Skill’s downtime, and C4 increases the number of dolls created in such a manner. Recommended Playstyles: Hypercarry / Vaporize / Hyperbloom / Electro-Charged Viable Playstyles: Freeze |
Albedo Off-Field Damage / Buffing | Rating: B (Vaporize) / C (other teams) Albedo deals respectable personal damage with low field time requirements, and his Skill’s long duration fits unobtrusively into Neuvillette’s rotations. He does well in both Solo Geo and Double Geo teams, and is rarely a contested unit. In teams that benefit from EM, Albedo’s Burst also provides a 125 EM buff if the rotation can accommodate it. Note that enemies can break his flower, so consider careful positioning. Despite dealing decent damage, Albedo should still prioritize building to support Neuvillette e.g. by equipping Favonius Sword. Albedo can also hold 4pc Archaic Petra, but can struggle to generate Hydro Crystallize shards if his flower breaks. Still, players who prioritize min-maxing and are aware of the set’s issues can consider using it. Recommended gear: Favonius Sword. 4pc Archaic Petra; otherwise 4pc Scroll. Notable investments: C2 makes his Burst more valuable in teams that benefit from the EM buff, but it is not worth pulling for Neuvillette. Recommended Playstyles: Hypercarry / Vaporize / Hyperbloom / Electro-Charged / Freeze |
Other Geo Units
Geo Traveler Buffing | Rating: C Geo Traveler is free and offers some utility on top of 4pc Archaic Petra. At C1, their Burst offers a 10% CRIT Rate buff, and C6 increases the duration to 20s. Since their Skill can interfere with Neuvillette’s mobility and Furina’s pets, it should be placed out of the way. Recommended gear: Favonius Sword. 4pc Archaic Petra is recommended, but 4pc Scroll is a more comfortable, lower-damage alternative. Viable Playstyles Hypercarry |
 Navia Off-Field Damage / Buffing | Rating: C Navia is a surprisingly decent flex pick in Neuvillette – Furina teams, especially Double Geo variants. She deals some damage with low field time, stacks his A1, and buffs with 4pc Archaic Petra. Her personal damage takes a hit as focusing on Neuvillette yields better team DPS, but seeing her big Skill numbers is still satisfying. The normal caveats of using 4pc Archaic Petra also don’t apply with Navia: her Hold Skill pulls in nearby Crystallize shards, so there is no need to spend time chasing after them. Recommended gear: Favonius Greatsword or damage weapons. 4pc Archaic Petra is recommended. Viable Playstyles: Hypercarry – with Furina |
Credits

Author: caramielle.
Calculations: caramielle., kolvii
Editors: cuppacote, idkanonymized, polomo, leah2212, kolvii, clevernt
TC Contributors: kolvii, charliex3000, idkanonymized, caxia5, .tokkitsune, cynematic, haafr, clevernt, nikatosaurus, PJelJr, ren718.exe, dusted wind, jyro10, raspie, shampoobrain, astroluxeon, rezmir
Transcribers: bunnycookie, alehannita, chasing_haze
References
- Neuvillette Rotation Sheet by caramielle.
- Neuvillette Mastersheet by caramielle.
- Neuvillette Artifacts by kolvii.
- Neuvillette Multi-Optimization Config Sheet by clevernt
- Nevuillette ERC by PjelJr
Changelog
- 08/04/2024 - Lisa added to Hypercarry, Electro-Charged, and Hyperbloom; Lisa blurb rewritten and moved in teammate appendix; GMC blurb added to teammate appendix; Lisa added to existing Neuvillette — Furina — Kazuha — Zhongli/Baizhu example team; rotation notation for Baizhu EQ vs Q E added to said example team
- 08/19/2025 - Updated for Version 5.8; ER requirements reworked; Waveriding Whirl and Starcaller's Watch added to weapons; Mavuika, Pyro Traveler, Ororon, Iansan, Citlali, Escoffier, Skirk, Dahlia, Lan Yan, and Mizuki added to teammate appendix and appropriate team sections