Updated for Version “Luna VII”
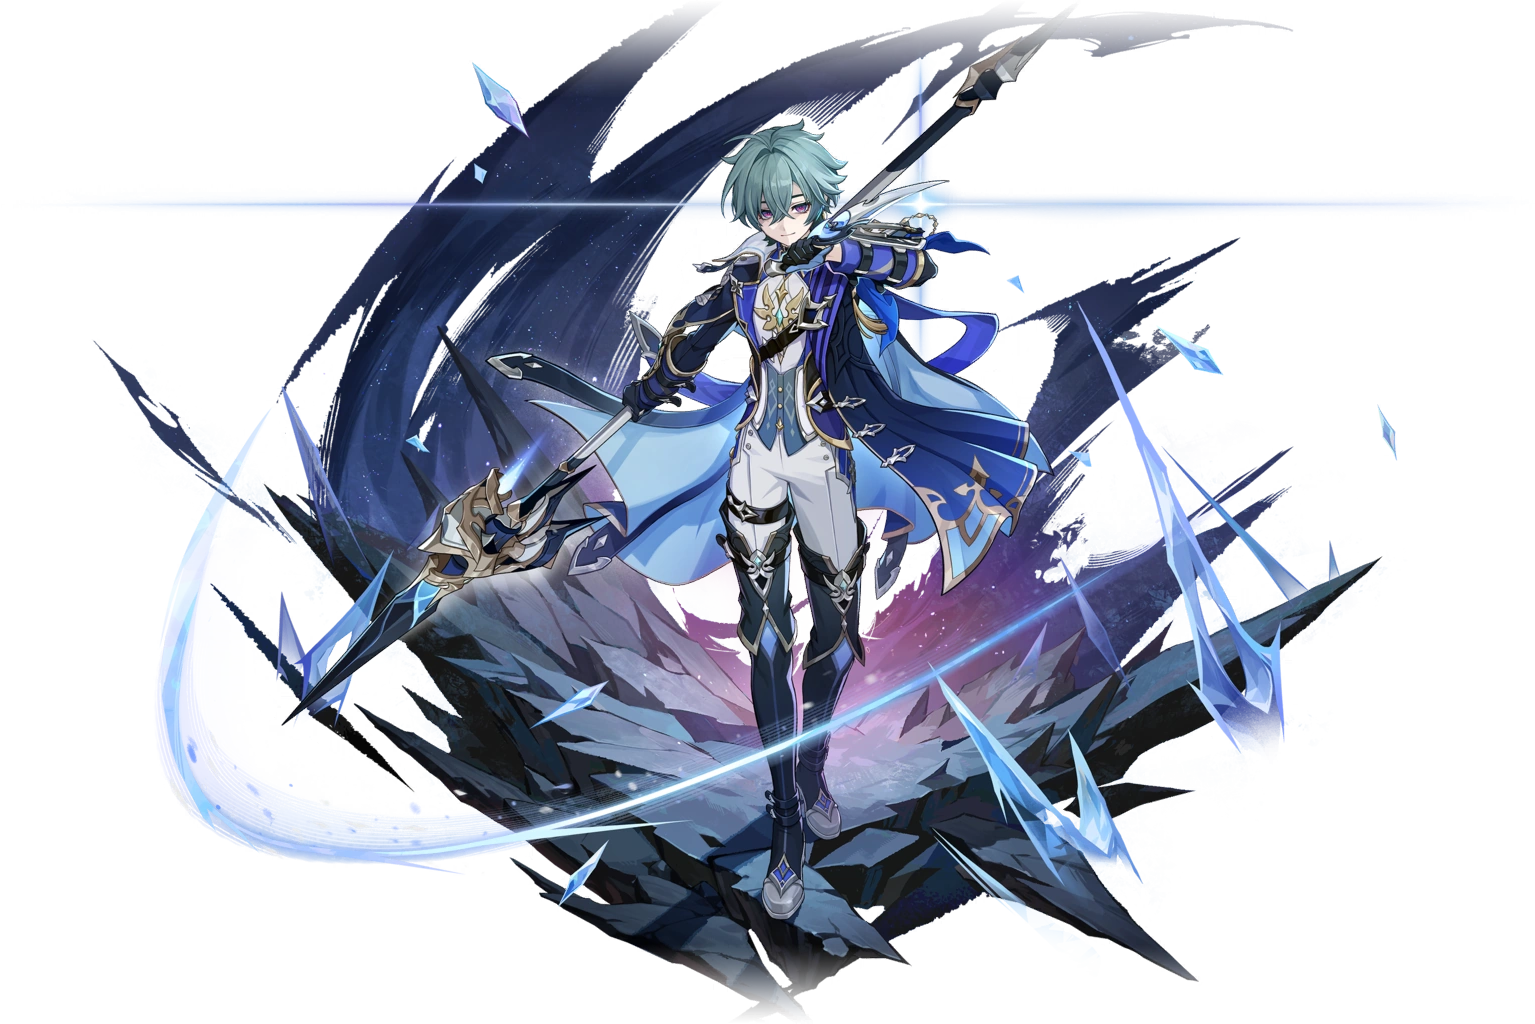
Lohen is a 5-star Cryo Polearm character in Genshin Impact who deals on-field Cryo damage and synergizes with certain off-field DPS units. Learn about Lohen’s best builds, best weapons, best artifacts, and best teams in this quick guide.
Note that the information given may change if new discoveries are made. More extensive testing is in progress.
Join our Discord to participate in the theorycrafting process.
Table of Contents
Infographic
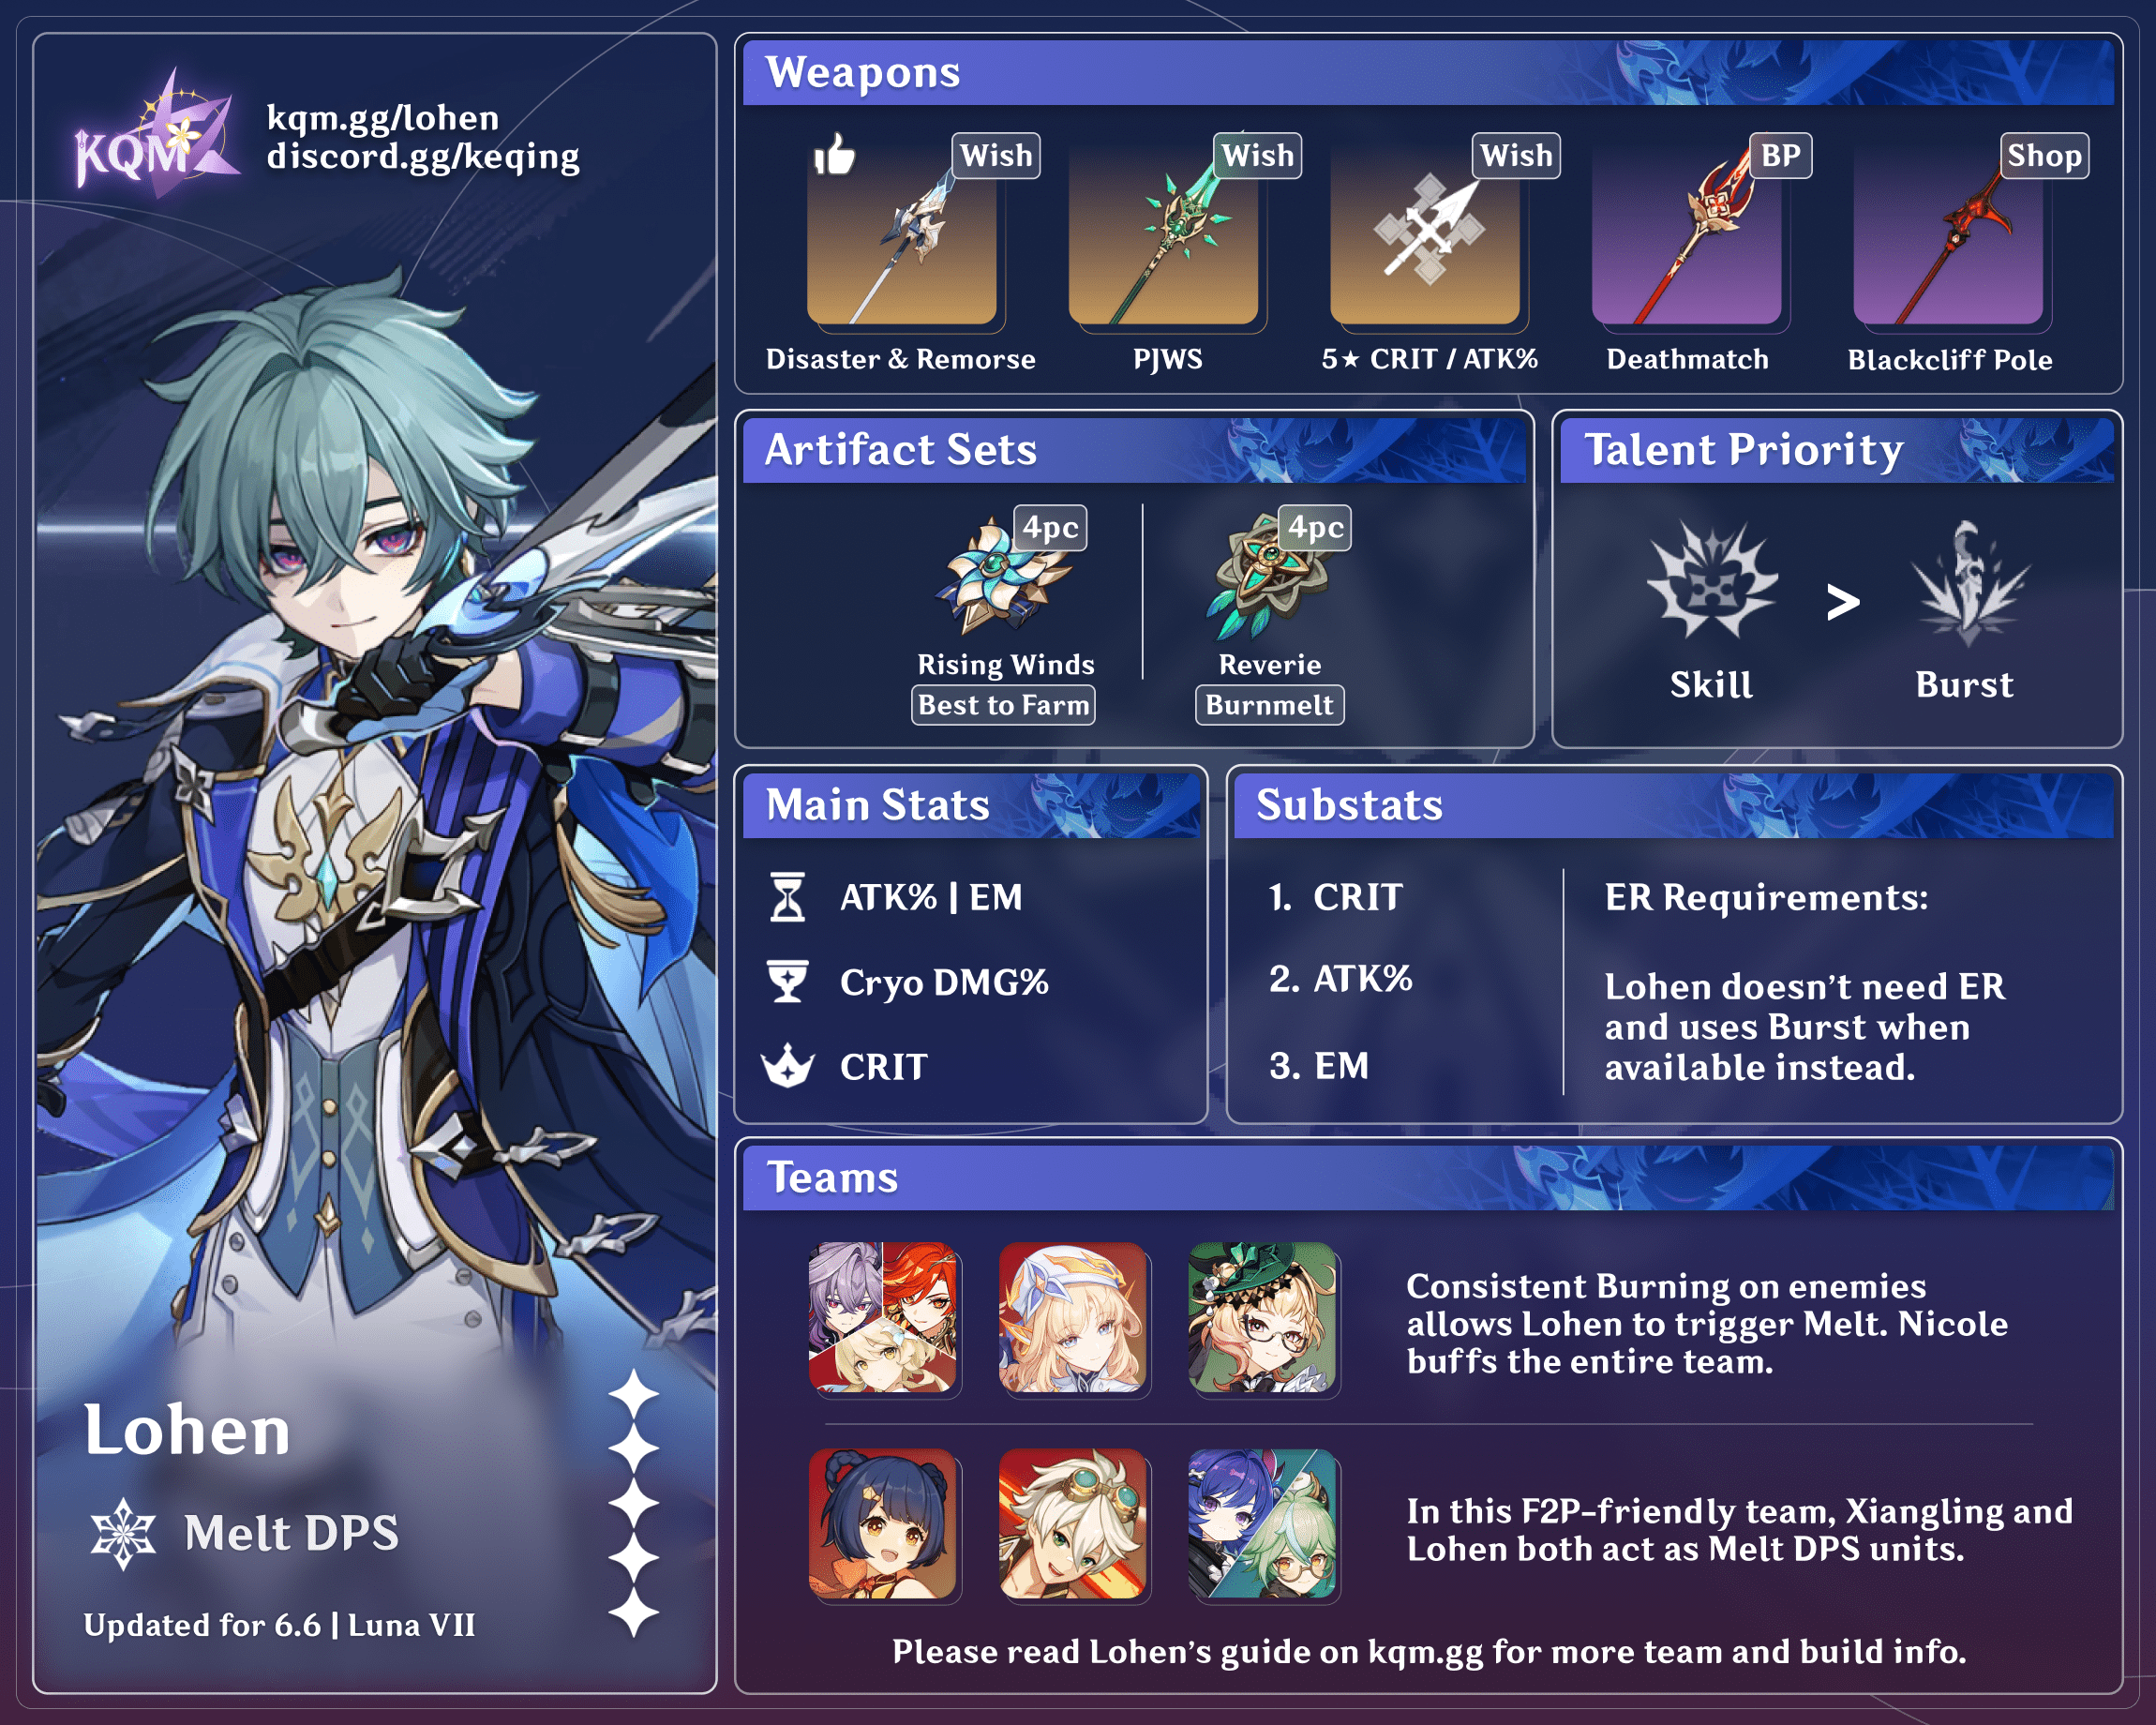
Credits to: cegewinne, irokei, and KQM Staff

Credits to: cegewinne, irokei, and KQM Staff
Character Overview
Pros
- Simple, fun, and unique gameplay for an on-field damage dealer.
- High rate of Cryo application in single-target scenarios.
- A consistent build across his most common team archetypes and playstyles.
- A sickening Burst animation.
Cons
- Extremely small AoE for attacks and abilities.
- Lackluster Constellations.
- Scant availability of viable free-to-play Polearms and teammates.
- Heavy reliance on Nicole and other 5-star characters to reach his highest potential.
Playstyles
In all of Lohen’s playstyles, he is an on-field DPS character that requires uninterrupted field time to stay in Masterstroke mode after initially casting his Skill. As such, his teammates should cast their abilities before he takes the field.
On-Field Melt Enabler
Lohen applies Cryo at a considerable rate with his N1C combos. This allows him to enable Durin or other off-field Pyro DPS units to Melt most or all of their hits. In such teams, Lohen’s share of personal damage is usually on par with or slightly lower than that of his off-field DPS teammates.
On-Field Cryo DPS
Lohen can serve as the primary DPS unit in Reverse Melt, Burnmelt, Freeze, and Mono Cryo teams. These teams tend to perform worse than Forward Melt teams with Nicole, but they can be viable options nonetheless.
Talents
Level and Talent Priority
Skill > Burst
Lohen’s Elemental Skill comprises the vast majority of his damage. His Elemental Burst is worth leveling, but it’s not as important as his Skill.
Lohen does not need to level his Normal Attack Talent because the Cryo-converted attacks in his Masterstroke mode scale with his Elemental Skill Talent.
Talent Overview
 Normal Attack | Spear of Favonius — Broken Oath
Talent Description
Normal Attack Performs up to 5 consecutive strikes. Charged Attack Consumes a certain amount of Stamina to perform a forward thrust. Plunging Attack Plunges from mid-air to strike the ground below, damaging opponents along the path and dealing AoE DMG upon impact.
Lohen’s Normal Attack Talent is fairly irrelevant. The Cryo-converted attacks during his Masterstroke mode scale with his Elemental Skill Talent.
Enemy Tracking
Before performing a Normal Attack (N1 or N1C), Lohen innately moves toward a nearby enemy. This gap close helps in multi-target scenarios or against highly mobile enemies.
 Elemental Skill | Unforeseen Strike
Talent Description
As he searches for weaknesses, Lohen switches to Masterstroke mode. While in this state:
- Lohen can actively accumulate Joy, using it to unleash the special Elemental Skill Etched Into Bone and Soul.
- Nearby party members can accumulate Will to Win for Lohen, increasing the DMG dealt by Etched Into Bone and Soul.
Lohen can unleash Etched Into Bone and Soul up to 3 times while in Masterstroke mode, after which, he will no longer be able to accumulate Joy.
Lohen’s Elemental Skill is the crux of his kit. The first cast of his Skill activates his Masterstroke mode, which also triggers movement towards a nearby enemy.
Masterstroke Mode
While the in-game text can be foreboding, the actual mechanics of Masterstroke mode are fairly straightforward:
- Lohen’s Normal, Charged, and Plunging Attacks are converted to Cryo and deal more damage.
- Lohen accumulates Joy while hitting enemies with Normal or Charged Attacks. Joy caps at 100.
- His teammates accumulate Will to Win while their abilities deal damage. Will to Win caps at 100 at C0.
- Lohen needs 100 Joy to cast an empowered, special Skill.
- The special Skill’s damage scales with the amount of Will to Win he possesses at the time it is cast.
All this to say, Lohen can regularly cast his special Skill as long as his teammates’ off-field abilities deal damage and he attacks on-field. Lohen can generate enough Joy after 6 hits of Normal or Charged Attacks (equivalent to 2[N1C]) to cast his special Skill. However, he can only cast his special Skill 3 times per Masterstroke mode duration prior to obtaining his C6.
The team accumulates more Will to Win when dealing instances of damage that are at least 10x Lohen’s Base ATK (including his weapon).
Cryo Application
Lohen has a unique ICD where he can only apply 6 instances of Cryo every 5s with his empowered Normal and Charged Attacks while in Masterstroke mode. With N1C combos, Lohen usually meets this 6-instance limit within 3–4s. Therefore, there may be a 1–2s gap where Lohen cannot apply any additional Cryo to the enemy with his Normal and Charged Attacks. However, he can cast his special Skill or his Burst to fill this gap and maintain consistent Cryo application.
 Elemental Burst | Manifest Judgment
Talent Description
Performs a swift series of forward strikes, consuming all Will to Win and dealing Cryo DMG. This DMG will be increased based on the amount of Will to Win consumed. If Lohen is in Masterstroke mode when this is performed, the duration of Masterstroke will be extended by 1.65s.
Lohen can cast his Burst instead of his special Skill when it is available. His Burst’s damage scales with accumulated Will to Win and consumes all current Will to Win stacks. Additionally, Masterstroke mode’s duration increases by 1.65s upon casting his Burst, so Lohen doesn’t lose as much uptime as he would otherwise.
 Ascension 1 Passive | Moratorium on Questioning
Talent Description
When nearby party members accumulate Will to Win for Lohen by dealing DMG while he is in Masterstroke mode, if that DMG is not less than 3,000% of Lohen’s Base ATK, it will accumulate an extra 60 Will to Win.
Lohen’s A1 Passive allows his teammates to accumulate more Will to Win if they deal instances of damage that are at least 30x Lohen’s Base ATK (including his weapon). It’s fairly easy for “big” Melt damage from his off-field Pyro DPS teammates to accumulate Will to Win in this manner.
 Ascension 4 Passive | Flippant Masterpiece
Talent Description
While in Masterstroke mode, for 8s after another nearby party member triggers a Cryo Reaction, that character’s ATK is increased by 15%, while Lohen’s ATK is increased by 15%.
Lohen’s A4 Passive gives a nice 15% ATK buff for 8s to himself and another party member who triggers a Cryo-related reaction. This fits well into his intended team compositions with off-field damage dealers.
 Utility Passive | When the Mood Strikes
Talent Description
Lohen gains “High Spirits” for 9s after he unleashes the Elemental Skill Unforeseen Strike: Increases the Skill Level of Unforeseen Strike by 1.
When unleashing an Elemental Skill, if the Level of any other party member’s Normal Attack, Elemental Skill, or Elemental Burst is not lower than Lohen’s Elemental Skill Level, the duration of this instance of High Spirits will be increased by an additional 6s.
High Spirits can be gained once every 18s.
Lohen has a unique Utility Passive that grants him +1 Elemental Skill Talent Level for 9s after initially casting his Elemental Skill. The duration increases to 15s if another teammate has a Talent whose level is equal to or greater than Lohen’s Skill. This passive considers the party’s effective Talent Level (i.e. the actual number displayed in the character’s “Talents” screen), so boosts from Constellations or Utility Passives count.
 Hexerei: Secret Rite | Unhealing Thorn
Talent Description
After completing Witch’s Homework: Of Various Foes, Lohen becomes a Hexerei character. When the party includes at least 2 Hexerei characters, you gain the Hexerei: Secret Rite effect, which enhances Hexerei characters.
Hexerei: Secret Rite
When the special Elemental Skill Etched Into Bone and Soul hits an opponent or the Elemental Burst Manifest Judgment is unleashed, if Lohen’s Will to Win is at 50% or more of its max limit, his Normal Attack and Charged Attack DMG will be increased by 40% for 6s.
Lohen’s Hexerei Passive is only active if another Hexerei character is in the party. It effectively grants a 40% Normal Attack and Charged Attack DMG for 6s after his special Skill or Burst hits an enemy. To consistently maintain this passive at C0, his off-field teammates need to deal 1 instance of 30x–Base ATK damage (60 Will to Win) or 3 instances of 10x–Base ATK damage (20 Will to Win) every 6s.
Constellations
In general, Lohen’s Constellations are not worth obtaining. If you play Lohen in Melt teams, it is a considerably better investment to pull Nicole, Durin, or their early Constellations (C1 or C2). If you play Lohen in Freeze teams, it is more worthwhile to obtain Escoffier, Furina, or their early Constellations. Nonetheless, Lohen’s C1, C3, and C6 are his best ones.
 Constellation 1 | O Breezes, That So Oft Bear Sorrowful Lament
Constellation Description
Lohen’s maximum Will to Win limit is increased to 300% of its original value.
Additionally, when other nearby party members deal DMG while Lohen is in Unforeseen Strike mode, they accumulate 500% as much Will to Win for him as they originally would have.
Lohen’s first Constellation increases his Will to Win cap to 300, causes 30x–Base ATK hits to reach this cap, and causes 10x–Base ATK hits to accumulate 100 Will to Win. This ultimately makes his special Skill and Burst deal a greater share of his personal damage compared to his N1C combos and results in a fair DPS increase.
 Constellation 2 | In Flight, I Strike Whatever Flies
Constellation Description
When in Masterstroke mode, after the special Elemental Skill Etched Into Bone and Soul hits an opponent or the Elemental Burst Manifest Judgment is unleashed, Lohen gains “Evilsbane Blade” for 4s: The next time Lohen hits an opponent with a Normal or Charged Attack while in Masterstroke mode, he will follow up with an additional strike that deals AoE Cryo DMG equal to 500% of his ATK, and increase the Elemental Mastery of other nearby party members by 200 for 8s. Evilsbane Blade can be triggered once every 4s.
Lohen’s C2 increases his personal damage and grants his party 200 EM. This Constellation is a minor DPS increase, even in Melt teams.
 Constellation 3 | Only the Spear That Wounds Can Heal
Constellation Description
Increases the Level of Unforeseen Strike by 3.
Maximum upgrade level is 15.
A standard +3 Elemental Skill Talent Level buff. This results in a nice buff to Lohen’s personal damage.
 Constellation 4 | Radiant Love, Laughing Death
Constellation Description
When Lohen unleashes the Elemental Burst Manifest Judgment while in Masterstroke mode, his Will to Win will be maxed out, causing this instance of his Elemental Burst to gain the maximum possible DMG increase.
Additionally, when Lohen switches to Masterstroke mode, the following will occur depending on how much Elemental Energy he has:
When Elemental Energy is not full: Lohen recovers 15 Elemental Energy.
When Elemental Energy is full: If, during the next 15s, Lohen unleashes the Elemental Burst Manifest Judgment, he will recover 15 Elemental Energy.
Lohen’s C4 grants him 15 Energy, which significantly reduces his ER requirements. It also incentivizes starting or ending his field time with his Elemental Burst.
 Constellation 5 | Never Ask, Nor Trouble You to Know
Constellation Description
Increases the Level of Manifest Judgment by 3.
Maximum upgrade level is 15.
A standard +3 Elemental Burst Talent Level buff. This is a very minor buff to Lohen’s personal damage.
 Constellation 6 | To Drown, to Sink, Unconscious — Supreme Joy
Constellation Description
Using the special Elemental Skill Etched Into Bone and Soul and hitting an opponent with it or, while Masterstroke mode is active, unleashing the Elemental Burst Manifest Judgment, will not consume any Will to Win. Instead, Lohen’s Joy will be maxed out, and if he hits an opponent the next time he uses the special Elemental Skill Etched Into Bone and Soul, the duration of this instance of Masterstroke will be extended by 1.25s. This effect can be triggered once every 7s.
Additionally, the CRIT DMG of all the DMG described above is increased by 175%, and the number of times Lohen can unleash Etched Into Bone and Soul during this instance of Masterstroke is increased by 2.
Lohen’s final Constellation grants him an additional 2.5s to Masterstroke mode and allows him to cast his special Skill 2 additional times per rotation (5 times total). It also significantly increases the CRIT DMG of his special Skill and Burst, resulting in the highest DPS increase among all his Constellations.
At C6, Lohen can cast his special Skill between N1C combos whenever it is available.
C1 vs R1
Compared to C0 Lohen with R1 Deathmatch, obtaining R1 Disaster and Remorse results in considerably higher DPS increases than obtaining Lohen’s C1. However, if you already own Primordial Jade Winged-Spear or other 5-star Polearms and are considering Constellations, it would be more worthwhile to go for 5-star teammates or their Constellations, most notably Nicole and Durin.
In general, Lohen’s Constellations are not worth obtaining unless you whale for C6.
Combos
Combo Notation
- N = Normal Attack
- C = Charged Attack
- A = Aimed Shot
- P = Plunging Attack
- hP = High Plunge
- lP = Low Plunge
- E = Elemental Skill
- tE = Tap Skill
- hE = Hold Skill
- Q = Elemental Burst
- D = dash (cancel)
- J = jump (cancel)
- W = walk (cancel)
- > = switch character
- ( ) = these actions are optional; please refer to the notes below
- [ ] = repeat these actions the specified number of times
Note that Lohen’s combos may change as new combos are discovered. More extensive testing is in progress.
Please also note that the exact number of N1C strings you can execute during Masterstroke mode depends on your ping, frame rate, mechanical ability to play the game, and enemy scenario.
Lohen’s optimal combos require animation cancels to execute properly. Furthermore, you cannot buffer inputs after a Charged Attack, so the cancel timing is quite precise. It will take some practice to figure out and get a feel for.
Additionally, it may be ideal to cut combos short if teammate abilities and buffs end before Masterstroke mode, or to decrease rotation length. Further testing and calculations are necessary to assess if this can be optimal.
| #[N1C] E/Q | Use Case: Standard Combo This is Lohen’s standard combo that fits 3 special Skills and 10–14 N1C strings during Masterstroke mode. The exact number of N1C strings you can execute depends on your ping, frame rate, mechanical ability, and enemy scenario. If Lohen has a Hexerei teammate, holds Disaster and Remorse, or is C1+, then he should perform 2[N1C] E at the beginning of his field time. Beyond that, you can cast Lohen’s special Skill after Joy and Will to Win are full. You can cast Lohen’s Burst instead of his special Skill when it’s available. The examples below maintain consistent Cryo application with Lohen as the sole Cryo applier for an off-field Melt DPS unit. Average Gameplay Full Combo Example E 2[N1C] E/Q 4[N1C] E 5[N1C] E Optimized Gameplay Full Combo Example E 2[N1C] E/Q 6[N1C] E 6[N1C] N1 E |
| E 15–17[N1C] (N1 E) | Use Case: No Hexerei Teammate, Low Will to Win Generation, Freeze, Mono Cryo This combo doesn’t require considering Will to Win stacks or Cryo application. If the team generates a low amount of Will to Win stacks or lacks a Hexerei teammate, then executing more N1C strings during Lohen’s field time can result in higher DPS. If Lohen holds Disaster and Remorse or is C1–C5, he should instead use the standard combo above (or a variation). With average gameplay, Lohen can perform 15–16 N1C strings in a row. While it is possible to perform 17 N1C strings, it requires near-frame-perfect input and ideal enemy scenarios. |
| Use Case: C6 Lohen’s C6 combos still need further testing. Stay tuned! |
Artifacts
ER Requirements
Calcs for ER requirements can be found here (last updated for Version 6.6).
Lohen’s Burst does not deal enough damage to justify building ER over other stats, so you can simply cast it when it’s available or convenient. However, feel free to use these ER requirements if you’d like to consistently see his Elemental Burst animation in action.
Assumptions:
- Lohen generates 5 Cryo particles on average per field time.
- Furina, Mona, Rosaria, Traveler, Xiangling, Xilonen, and Xingqiu hold Favonius weapons by default in the calculations.
- Kaeya triggers 1 Freeze per Skill cast in Freeze teams.
- Kaeya and Rosaria cast their Skill twice per rotation.
- Safe particle RNG and default enemy particles are assumed.
| Burst Every Rot | Every Rotation (C4+) | Burst Every Other | |
| Solo Cryo | 190–230% | 145-175% | 100–115% |
| + Citlali | 170–185% | 125-140% | 100% |
| + Escoffier | 155–175% | 115-130% | 100% |
| + Kaeya / Rosaria (2 Skills) | 135–155% | 105-115% | 100% |
Use the Energy Recharge Calculator to determine exact requirements for your team and rotation. For more details on how Favonius weapons will affect your team, please use Ac1d’s Favonius Mastersheet.
Artifact Stats
 Sands |  Goblet |  Circlet |
| ATK% or EM | Cryo DMG Bonus > ATK% | CRIT DMG or CRIT Rate |
Stat Priority: (ER until requirement) > CRIT > ATK% ≥ EM
Lohen’s Burst does not deal enough damage to justify building ER over other stats, so you can simply cast it when it’s available or convenient during Masterstroke mode. EM stats are valuable in Burnmelt or Reverse Melt teams where Lohen consistently triggers Melt.
An ATK% Sands is generally Lohen’s best option, but an EM Sands can be competitive in Burnmelt or Reverse Melt teams, especially those with many ATK buffs.
Cryo DMG Bonus Goblets almost always perform better than ATK% Goblets. An ATK% Goblet could compete with a Cryo DMG Bonus Goblet if Lohen’s team provides substantial DMG buffs and lacks ATK buffs.
Artifact Sets
Hover over artifact images for more information.
 4pc A Day Carved From Rising Winds (Rising Winds) | In almost all of his playstyles and team archetypes, Lohen’s best-in-slot artifact set is 4pc Rising Winds. Farm this set. Other options are presented below if you haven’t obtained a suitable 4pc set yet. |
4pc Shimenawa’s Reminiscence (SR) | 4pc Shimenawa’s Reminiscence is Lohen’s second-best artifact set (except in Freeze teams). He can trigger the 4-piece set bonus at the beginning of his field time. Note that Lohen will rarely use his Burst due to the Energy drain. This set is not worth farming, but it can be worth using if you already have a set available. Farm 4pc Rising Winds instead. |
| 2pc + 2pc Mixed Sets | – Cryo DMG – Normal and Charged Attack DMG – Elemental Skill DMG – ATK% – EM 2pc set combinations that grant the aforementioned bonuses can be used while farming for 4pc Rising Winds. 2pc Cryo DMG and 2pc ATK% combinations are the best options, faring roughly 10% worse than 4pc Rising Winds. |
Burnmelt
 4pc Unfinished Reverie | 4pc Unfinished Reverie is slightly better than 4pc Rising Winds in Burnmelt teams. Despite this, unless you have a spare set lying around, 4pc Rising Winds is a much better option to farm. The DPS difference is equivalent to only a couple substats, and Lohen should hold 4pc Rising Winds in any other team archetype. |
Freeze
  4pc Marechaussee Hunter, 4pc Blizzard Strayer | 4pc Marechaussee Hunter (with Furina) and 4pc Blizzard Strayer are Lohen’s runner-up artifact set options in Freeze teams. The DPS difference is a few substats behind 4pc Rising Winds, so you should still farm 4pc Rising Winds over these sets if you don’t have a workable set of either. Note that 4pc Blizzard Strayer is only worth considering if the enemy can be Frozen for a majority of Lohen’s field time. |
Weapons
Hover over weapon images for more information.
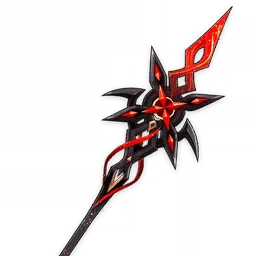
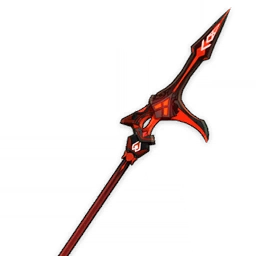
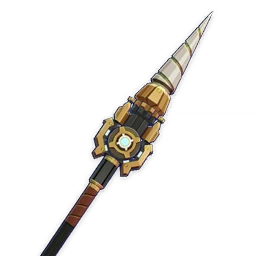
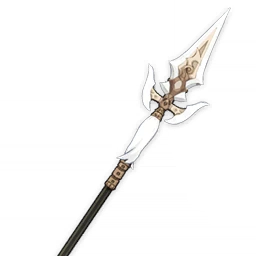
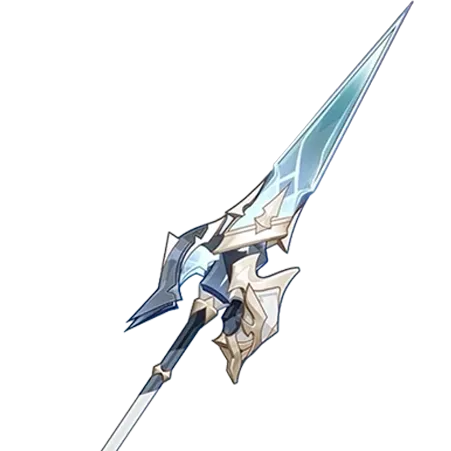 5★ Disaster and Remorse | Disaster and Remorse is Lohen’s best-in-slot Polearm. Its passive is tailor-made to maximize the damage from every part of his kit. |
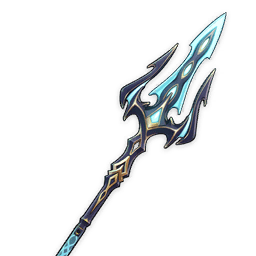
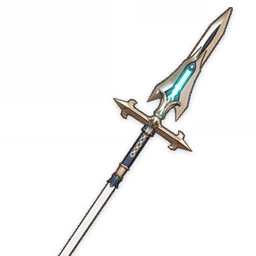
 5★ Primordial Jade Winged-Spear | Primordial Jade Winged-Spear is one of Lohen’s runner-up weapon options. He quickly reaches the maximum number of stacks with his Normal and Charged Attack combos. |
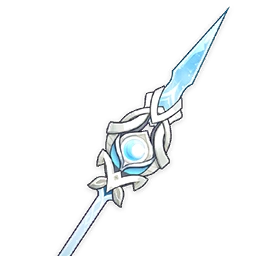
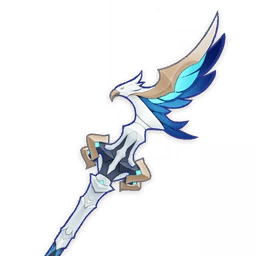
 5★ Crimson Moon’s Semblance | Crimson Moon’s Semblance is another one of Lohen’s runner-up weapon options, thanks to its stats. |
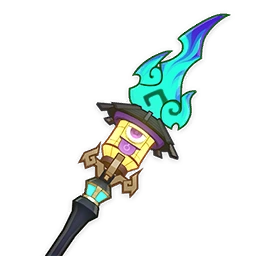
 5★ Staff of the Scarlet Sands | In Burnmelt and Reverse Melt teams, Staff of the Scarlet Sands (SoSS) is a solid option due to its passive. In other teams, R1 SoSS performs on par with R5 Deathmatch. With SoSS, an EM Sands performs better than an ATK% Sands. |
 Other 5★ Polearms | Staff of Homa, Lumidouce Elegy, Symphonist of Scents, Calamity Queller, Fractured Halo, Bloodsoaked Ruins These 5-star Polearms are all good options if you have them. They all fare better than R5 Deathmatch in any team. |
 4★ Deathmatch | Deathmatch is Lohen’s default 4-star option. It performs slightly worse in multi-target scenarios, but it is still his best overall 4-star option. |
 4★ Ballad of the Fjords | Ballad of the Fjords is a solid option in Burnmelt and Reverse Melt teams with at least 3 characters of different Elements, where it performs on par with Deathmatch at equal refinements. |
 4★ Blackcliff Pole | Blackcliff Pole underperforms compared to Deathmatch in single-target scenarios. It performs on par with Ballad of the Fjords without consideration of either’s passive. Blackcliff Pole fares better in multi-wave content since its passive is relevant after defeating the first enemy. |
 4★ Sacrificer’s Staff | Sacrificer’s Staff is a competitive gacha-exclusive option for Lohen, performing similarly to Deathmatch at equal refinements. |
 4★ Prospector’s Drill | Prospector’s Drill performs on par with Deathmatch at equal refinements in teams where Lohen can be healed. |
 4★ Favonius Lance | In teams where Lohen comprises a smaller share of the team’s overall damage (e.g. high-investment Durin Forward Melt), Favonius Lance may compete with Deathmatch in team DPS. It allows Lohen’s teammates to invest more into offensive stats. He can trigger its passive 3 times per rotation at R5. |
 4★ Dragon’s Bane | Dragon’s Bane can be a decent option in Burnmelt or Reverse Melt teams since there should be a stable-enough Pyro aura to maintain its passive. At R5, it is only slightly worse than R1 Deathmatch in such teams. |
  4★ Missive Windspear, Tamayuratei no Ohanashi | Missive Windspear and Tamayuratei no Ohanashi are Lohen’s best “technically free” 4-star options, obtainable only in Versions 3.1 and 5.4, respectively. |
 3★ White Tassel | R5 White Tassel is Lohen’s best permanently free option. It can be found in chests in Liyue. |
Teams
Rotation Notation
- N = Normal Attack
- C = Charged Attack
- A = Aimed Shot
- P = Plunging Attack
- E = Elemental Skill
- tE = Tap Skill
- hE = Hold Skill
- Q = Elemental Burst
- D = dash (cancel)
- J = jump (cancel)
- W = walk (cancel)
- > = switch character
- ( ) = these actions are optional; please refer to the notes below
- [ ] = repeat these actions the specified number of times
Teambuilding
- Teammates who deal strong off-field damage stack more Will to Win, resulting in higher special Skill and Burst damage.
- Supports who buff the entire team are generally better than those who only benefit the on-fielder, since Lohen’s most prominent teams also feature strong off-field DPS units.
- Shielders help Lohen survive and prevent him from becoming staggered while executing his combos.
- Nicole is required to approach Lohen’s DPS ceiling in Melt teams.
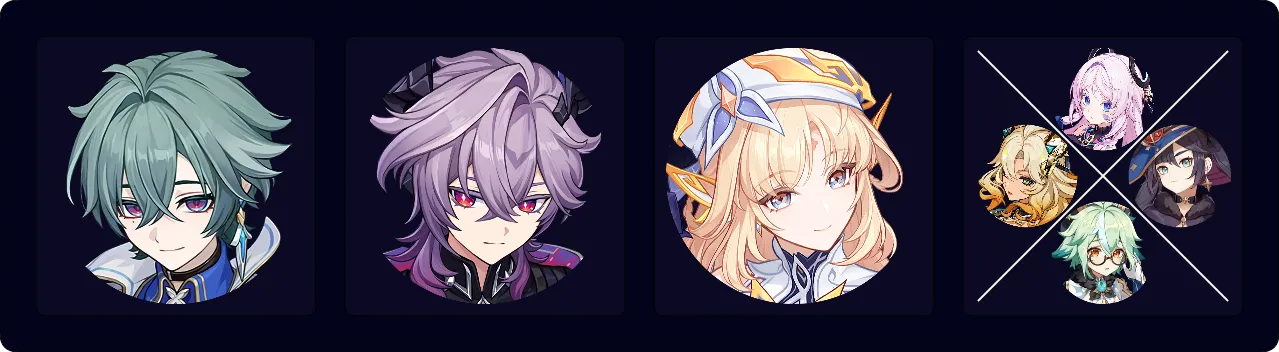
Forward Melt Enabler

Lohen most notably plays as a Forward Melt enabler thanks to the consistent, high rate of Cryo application from his N1C combos and special Skill. Nicole is his best teammate because of her buffs to Lohen and the off-field Pyro DPS. The last slot should be a support that benefits the off-field Pyro DPS.
Forward Melt teams easily stack Will to Win since the off-field Pyro DPS should deal enough damage with their Melted ability.
Notable Teammates
Nicole ★ | Nicole is Lohen’s premier teammate for her myriad buffs to Lohen and off-field DPS units. She enables Lohen’s Hexerei Passive and grants a shield that helps Lohen avoid interruption. She should hold 4pc Celestial Gift. |
Off-Field Pyro DPS
Durin ★ | Durin is a great off-field Pyro DPS in his Dark form. With Lohen’s Cryo application, Durin consistently Melts all of his Burst hits that apply Pyro. |
Mavuika | Mavuika is a viable alternative to Durin. While on-field Mavuika tends to perform better, she can still be played off-field and Melt her Burst when available. |
 Xiangling | Xiangling is a more F2P-friendly Pyro DPS option with a high rate of Pyro application on her Burst’s Pyronado. As such, Lohen requires another off-field Cryo applier to help maintain a Cryo aura. |
Flex
Citlali ★ | Citlali is a fantastic support option since she enables Cryo Resonance, holds 4pc Scroll to buff both Lohen and the off-field Pyro DPS, holds TTDS to buff the Pyro DPS, and shreds Pyro RES via her A1 Passive. |
Xilonen ★ | Xilonen shreds Cryo and Pyro RES and holds 4pc Scroll to buff the off-field Pyro DPS. |
 Sucrose, Prune | Sucrose and Prune are typically the best Anemo options since they are Hexerei, provide innate buffs, and can hold TTDS. They should trigger Pyro Swirl while on-field to activate the 4-piece set bonus of Viridescent Venerer. Note that Venti is not a good option since his Burst prioritizes Pyro Absorption, which would steal Melt instances from the team’s off-field Pyro DPS. |
 Bennett | Bennett lends strong buffs to Lohen within his Burst’s AoE. His ATK buff to Lohen is stronger than Nicole’s, but he often cannot buff the off-field Pyro DPS like Nicole. Additionally, Bennett cannot make use of 4pc Celestial Gift. Xiangling’s Burst can snapshot Bennett’s buffs, but neither Durin nor Mavuika directly benefit from Bennett as they cannot snapshot their relevant abilities. As such, he cannot fully replace Nicole in her capabilities for Durin or Mavuika, but he can still be a good option with Xiangling. |


Example Teams
This is not a comprehensive list of teams. The inclusion or exclusion of any given team does not necessarily reflect its power level.
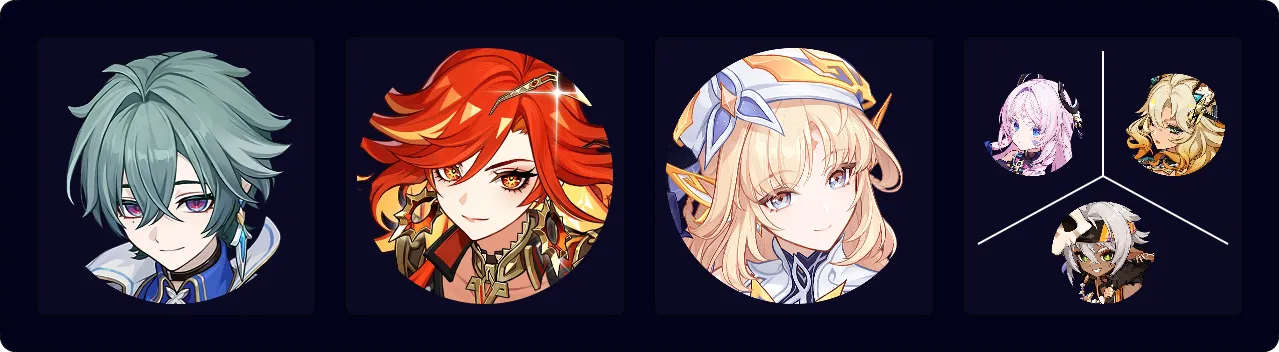
This Durin Forward Melt team is typically Lohen’s best team composition. Nicole should hold 4pc Celestial Gift, while Durin holds 4pc Rising Winds. There are several notable options in the last slot:
- Citlali enables Cryo Resonance, holds 4pc Scroll to buff both Durin and Lohen, holds TTDS to buff Durin, and shreds Pyro RES via her A1 Passive.
- Xilonen shreds Cryo and Pyro RES and holds 4pc Scroll to buff Durin.
- Mona provides many different buffs and becomes a more competitive option at C4+.
- Sucrose holds 4pc Viridescent Venerer to shred Pyro RES, holds TTDS to buff Lohen, and provides EM and DMG buffs via her passives. Prune could also work if she’s available.
Sample Rotation (Citlali)
Nicole EQ > Citlali EQ > Durin E N1 Q / Q E N1¹ > Lohen combo
Sample Rotation (Xilonen)
Nicole EQ > Xilonen E N2 (Q) > Durin E N1 Q / Q E N1¹ > Lohen combo
Sample Rotation (Mona)
Mona E > Nicole EQ > Durin E N1 Q / Q E N1¹ > Mona Q N4 > Lohen combo
Sample Rotation (Sucrose)
Nicole EQ > Durin E N1 Q / Q E N1¹ > Sucrose ED N1 > Lohen combo
¹The first rotation, Durin should always perform E N1 Q. In subsequent rotations, he can perform Q E N1 if he has enough Energy to cast his Burst.
Mavuika functions as an off-field Pyro DPS, albeit with lower DPS compared to Durin. Citlali, Xilonen, and Iansan should hold 4pc Scroll.
With Citlali, Mavuika can use her Burst earlier in the rotation thanks to the additional Cryo application; with Xilonen or Iansan, Mavuika should wait until the end of the rotation when there is a Cryo aura to Melt her Burst.
Sample Rotation (Citlali)
Nicole EQ > Citlali EQ > Mavuika QE > Lohen combo
Sample Rotation (Xilonen)
Nicole EQ > Mavuika E > Xilonen E N2 (Q) > Lohen combo > Mavuika Q
Sample Rotation (Iansan)
Nicole EQ > Mavuika E > Iansan E (C) Q > Lohen combo > Mavuika Q

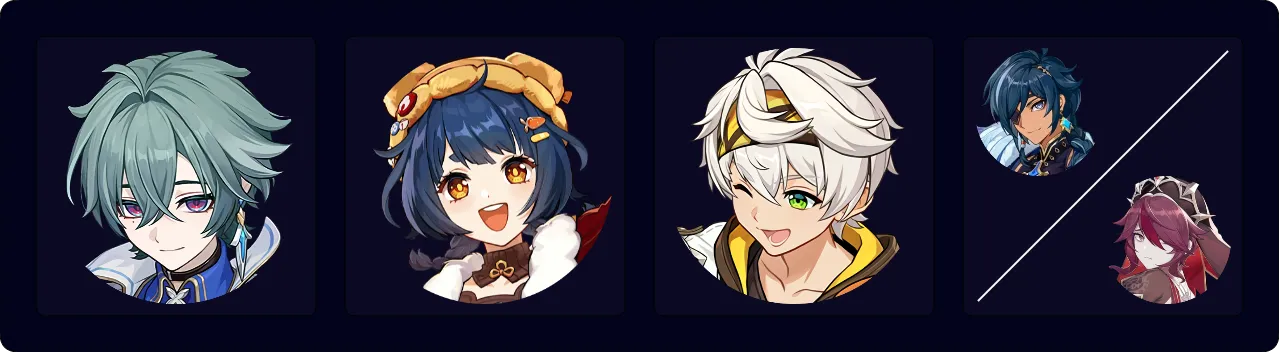
This is another Durin Forward Melt team. Albedo deals strong off-field damage and lends a DMG buff, while Xilonen provides her usual buffs with 4pc Scroll and her A4 Passive. Lohen also benefits from Geo Resonance, so be sure to pick up Crystallize shards to maintain a shield.
Sample Rotation
Albedo E > Durin E N1 Q / Q E N1¹ > Xilonen E N2 (Q)² > (Albedo Q)² > Lohen combo
¹The first rotation, Durin should always perform E N1 Q. In subsequent rotations, he can perform Q E N1 if he has enough Energy to cast his Burst.
²Burst when available or needed.

Escoffier and Furina buff Lohen more than Durin in this team, which results in Lohen dealing a greater share of the team’s damage. Ideally, Escoffier holds 4pc Noblesse or 4pc Scroll and Furina holds 4pc TotM. If you have a high-investment Durin, Escoffier can cast her abilities after Durin, so Scroll’s 4-piece set effect buffs Pyro + Cryo instead of Hydro + Cryo.
Mavuika could replace Durin like in other Forward Melt teams, but the overall team DPS would be too low to recommend this for more difficult end-game content.
Sample Rotation
Furina ED N1 Q > Escoffier EQ > Durin E N1 Q / Q E N1¹ > Lohen combo
¹The first rotation, Durin should always perform E N1 Q. In subsequent rotations, he can perform Q E N1 if he has enough Energy to cast his Burst.
Limited Roster Alternatives
These teams are meant for newer players whose limited roster prevents them from using the teams above; as such, the teams below result in lower damage output.
This is a variation of the Double Cryo, Double Pyro Melt archetype. The combined Cryo application between Lohen and Kaeya / Rosaria allows Xiangling to Melt more of her Pyronado hits. The rotation is extended to ~24s since Lohen’s extended field time prevents additional Skill casts from Bennett and the off-field Cryo teammate throughout the rotation; these extra Skills help keep ER requirements feasible.
Sample Rotation (Kaeya)
Bennett QE > Xiangling QED > Kaeya EQ > Lohen combo > Bennett E > Xiangling N3 > Kaeya E
Sample Rotation (Rosaria)
Bennett QE > Rosaria EQ > Xiangling QED > Lohen combo > Rosaria E > Bennett E > Xiangling N3
Burnmelt & Reverse Melt

Burnmelt and Reverse Melt teams focus more on Lohen’s personal damage than his designated off-field Pyro damage dealer’s.
Only a few team compositions can consistently enable Lohen to trigger Reverse Melt:
- In Burnmelt teams, Emilie is the preferred Dendro teammate due to her consistent Dendro application and high personal damage, but other Dendro characters can work. Lohen usually extinguishes a Burning aura 1–3 times per rotation, so consistent reapplication of both Dendro and Pyro from off-field is required.
- Xiangling applies enough Pyro by herself to allow near-consistent Pyro aura uptime in Reverse Melt teams.
- Without Dendro or Xiangling, 2 off-field Pyro characters are needed to maintain a semi-stable Pyro aura.
Nicole is a premier support for Lohen in Burnmelt and Reverse Melt teams. Teams without Nicole will see considerably lower team DPS.
Notable Teammates
Nicole ★ | Nicole is one of Lohen’s best teammates for her myriad buffs to Lohen as well as off-field DPS units. She enables Lohen’s Hexerei Passive and grants a shield that helps Lohen avoid interruption. She should hold 4pc Celestial Gift. |
Pyro Enabler
Xiangling | Xiangling applies enough Pyro by herself to allow a near-consistent Pyro aura, even with Lohen’s high Cryo application. As the sole Pyro teammate, she faces high ER requirements and is likely to need Favonius Lance or Kitain Cross Spear. When paired with another Pyro teammate, her ER requirements are significantly lower. |
The following Pyro options must be paired with another Pyro applier or Dendro applier to maintain a consistent Pyro aura. They cannot function by themselves as the sole Pyro enabler for Lohen to Melt.


Dendro
Note that Dendro Traveler is not a good teammate in Burnmelt teams, since their Elemental Burst will prematurely explode. Use Pyro Traveler with another Pyro enabler instead.
Emilie ★ | Emilie is the best Dendro option for Burnmelt teams thanks to her strong off-field damage and consistent Dendro application. |


Example Teams
This is not a comprehensive list of teams. The inclusion or exclusion of any given team does not necessarily reflect its power level.

Burnmelt teams with Emilie and Nicole are generally Lohen’s best options for team DPS. For the Pyro enabler, there are several competitive options:
- Durin offers strong off-field damage and buffs to Lohen. In this team, 4pc Rising Winds is still a strong option, but 4pc Noblesse Oblige will maximize the team’s damage. He also shreds Dendro RES with his A1 Passive.
- Mavuika provides good off-field damage and can hold 4pc Scroll to buff herself and Emilie. Her Burst can be used when available.
- Pyro Traveler is a free-to-play option that can also use 4pc Scroll. They apply Pyro slowly enough to trigger 4pc Scroll after Lohen’s first N1C combo clears the Burning aura.
Note that if Nicole holds TTDS, she should take the field immediately before Lohen in the rotation.
Sample Rotation (Durin)
Emilie E / Q > Nicole EQ > Durin Q 2E / 2E Q > Lohen combo
Sample Rotation (Mavuika)
Emilie E / Q > Mavuika (Q)¹ E > Nicole EQ > Lohen combo
Sample Rotation (Pyro Traveler)
Emilie E / Q > Nicole EQ > Traveler hEQ > Lohen combo
¹Burst when available.
Limited Roster Alternatives
These teams are meant for newer players whose limited roster prevents them from using the teams above; as such, the teams below result in lower damage output.

This is a more accessible Reverse Melt team. Sucrose should hold R5 Thrilling Tales of Dragon Slayers (TTDS) and 4pc Celestial Gift. While 4pc Viridescent Venerer is possible, it only benefits Xiangling’s personal damage because triggering a Cryo Swirl before Lohen’s field time is impossible without another Cryo teammate. Xiangling should hold Favonius Lance since her ER requirements are quite high otherwise.
Sample Rotation
Bennett QE > Xiangling Q ED > Sucrose ED N1 / Q¹ > Lohen combo > Bennett E > Sucrose ED N1 > Xiangling N3 > (Lohen Q)¹
¹Burst when available.
Freeze & Mono Cryo

Lohen’s Freeze and Mono Cryo teams can be viable, but they underperform in comparison to his Melt teams, especially those with Nicole. Escoffier and Furina form an exceptional pairing in Freeze teams. Mono Cryo teams can fare decently well against enemies with an innate Hydro or Pyro aura.
Teammates in Freeze and Mono Cryo tend to stack Will to Win more slowly than teammates in Melt teams, so Lohen can spam N1C to maximize his personal damage. At C0, it is still possible to cast his special Skills or Burst, but this tends to result in a DPS loss if Lohen consistently achieves 16 N1C combos at C0 per rotation.
Notable Teammates
Cryo
Cryo teammates enable Cryo Resonance. In teams with Xilonen or an Anemo 4pc VV holder, they also shred enemy Cryo RES prior to Lohen taking the field. The best teammates deal strong personal damage and provide buffs.
 Escoffier ★ | Escoffier is the premier teammate in Freeze teams thanks to her RES Shred and strong personal damage. The team should ideally consist of only Hydro and Cryo characters to make the most of her kit. |


Hydro
Hydro teammates enable Frozen to occur. Ideal teammates provide strong buffs or personal damage.
 Furina ★ | Furina provides plenty of DMG Bonus, can hold 4pc TotM to further buff Lohen, and deals decent off-field damage. The only caveat is that Furina requires a healer, but this is a non-issue in teams with Escoffier. |
 Mona ★ | As a Hexerei support, Mona can hold 4pc Celestial Gift to buff Lohen. Beyond being a Hexerei character, Mona provides a great buff with her Burst. Her C1 and C4 further enhance her buffs. |


Anemo
Anemo characters can hold 4pc VV and provide other buffs with their kit and equipment.


Geo
Xilonen is a viable alternative to Anemo 4pc VV units. Albedo provides strong off-field Geo damage. Zhongli provides a shield and Universal RES Shred.

Example Teams
This is not a comprehensive list of teams. The inclusion or exclusion of any given team does not necessarily reflect its power level.

This is Lohen’s preferred Freeze team. Escoffier should hold 4pc Noblesse or 4pc Scroll while Furina should hold 4pc TotM. Mona should hold 4pc Celestial Gift and R5 Thrilling Tales of Dragon Slayers (TTDS) if she can reach her ER requirements.
Skirk can replace Mona with her quickswap, Burst-oriented DPS playstyle. Skirk should hold a DPS-oriented set like 4pc Finale of the Deep Galleries; however, if Lohen has more investment, 4pc Noblesse Oblige could also work.
C0 Mona and C0 Skirk perform roughly the same, but C4+ Mona outperforms by a considerable margin.
Sample Rotation (Mona)
Furina ED N1 Q > Escoffier EQ > Mona EQ N1 > Lohen combo
Sample Rotation (Skirk)
Furina ED N1 Q > Escoffier EQ > Skirk hEQ > Lohen combo

This is a straightforward and functional Double Cryo, Double Geo team. Albedo and Escoffier deal strong off-field damage while Xilonen provides strong buffs via her A4 Passive and 4pc Scroll. Teams like this fare well against enemies with an innate Hydro or Pyro aura. Make sure Lohen picks up Crystallize shards to enable Geo Resonance.
Sample Rotation
Albedo E > Escoffier E (Q)¹ > Xilonen E N2 (Q)¹ > Lohen combo > Xilonen E N2
¹Escoffier and Xilonen can cast their Bursts if healing is necessary. Escoffier may want to Burst more frequently as it can deal substantial damage.
Limited Roster Alternatives
These teams are meant for newer players whose limited roster prevents them from using the teams above; as such, the teams below result in lower damage output.

Sucrose or Prune holds 4pc Viridescent Venerer to shred enemy Cryo RES. They should also hold R5 TTDS to buff Lohen’s ATK, but Prototype Amber can be used if the team needs healing. Xingqiu provides solid off-field Hydro damage and application along with some survivability. Kaeya is a free option that deals decent personal damage and enables Cryo Resonance.
Sample Rotation (Sucrose)
Xingqiu ED Q N1 > Kaeya Q N1 E N1 > Sucrose ED N1 (Q) > Lohen combo > Kaeya E
Sample Rotation (Prune)
Xingqiu ED Q N1 > Kaeya Q N1 E N1 > Prune 2[E] Q > Lohen combo > Kaeya E
Credits
Writer(s): irokei
Contributors: acerbus114, lostguide, maelstromica, bowtae, luwunae, haafr, Vesera
Team images made with the KQM portrait generator.