
Updated for Version “Luna VIII”

Nicole is a 5-star Pyro Catalyst character in Genshin Impact who supports teams with strong buffs and a defensive shield. Learn about Nicole’s best builds, best weapons, best artifacts, and best teams in this quick guide.
Note that the information given may change if new discoveries are made. More extensive testing is in progress.
Join our Discord to check on and participate in the theorycrafting process.
Table of Contents
Infographic
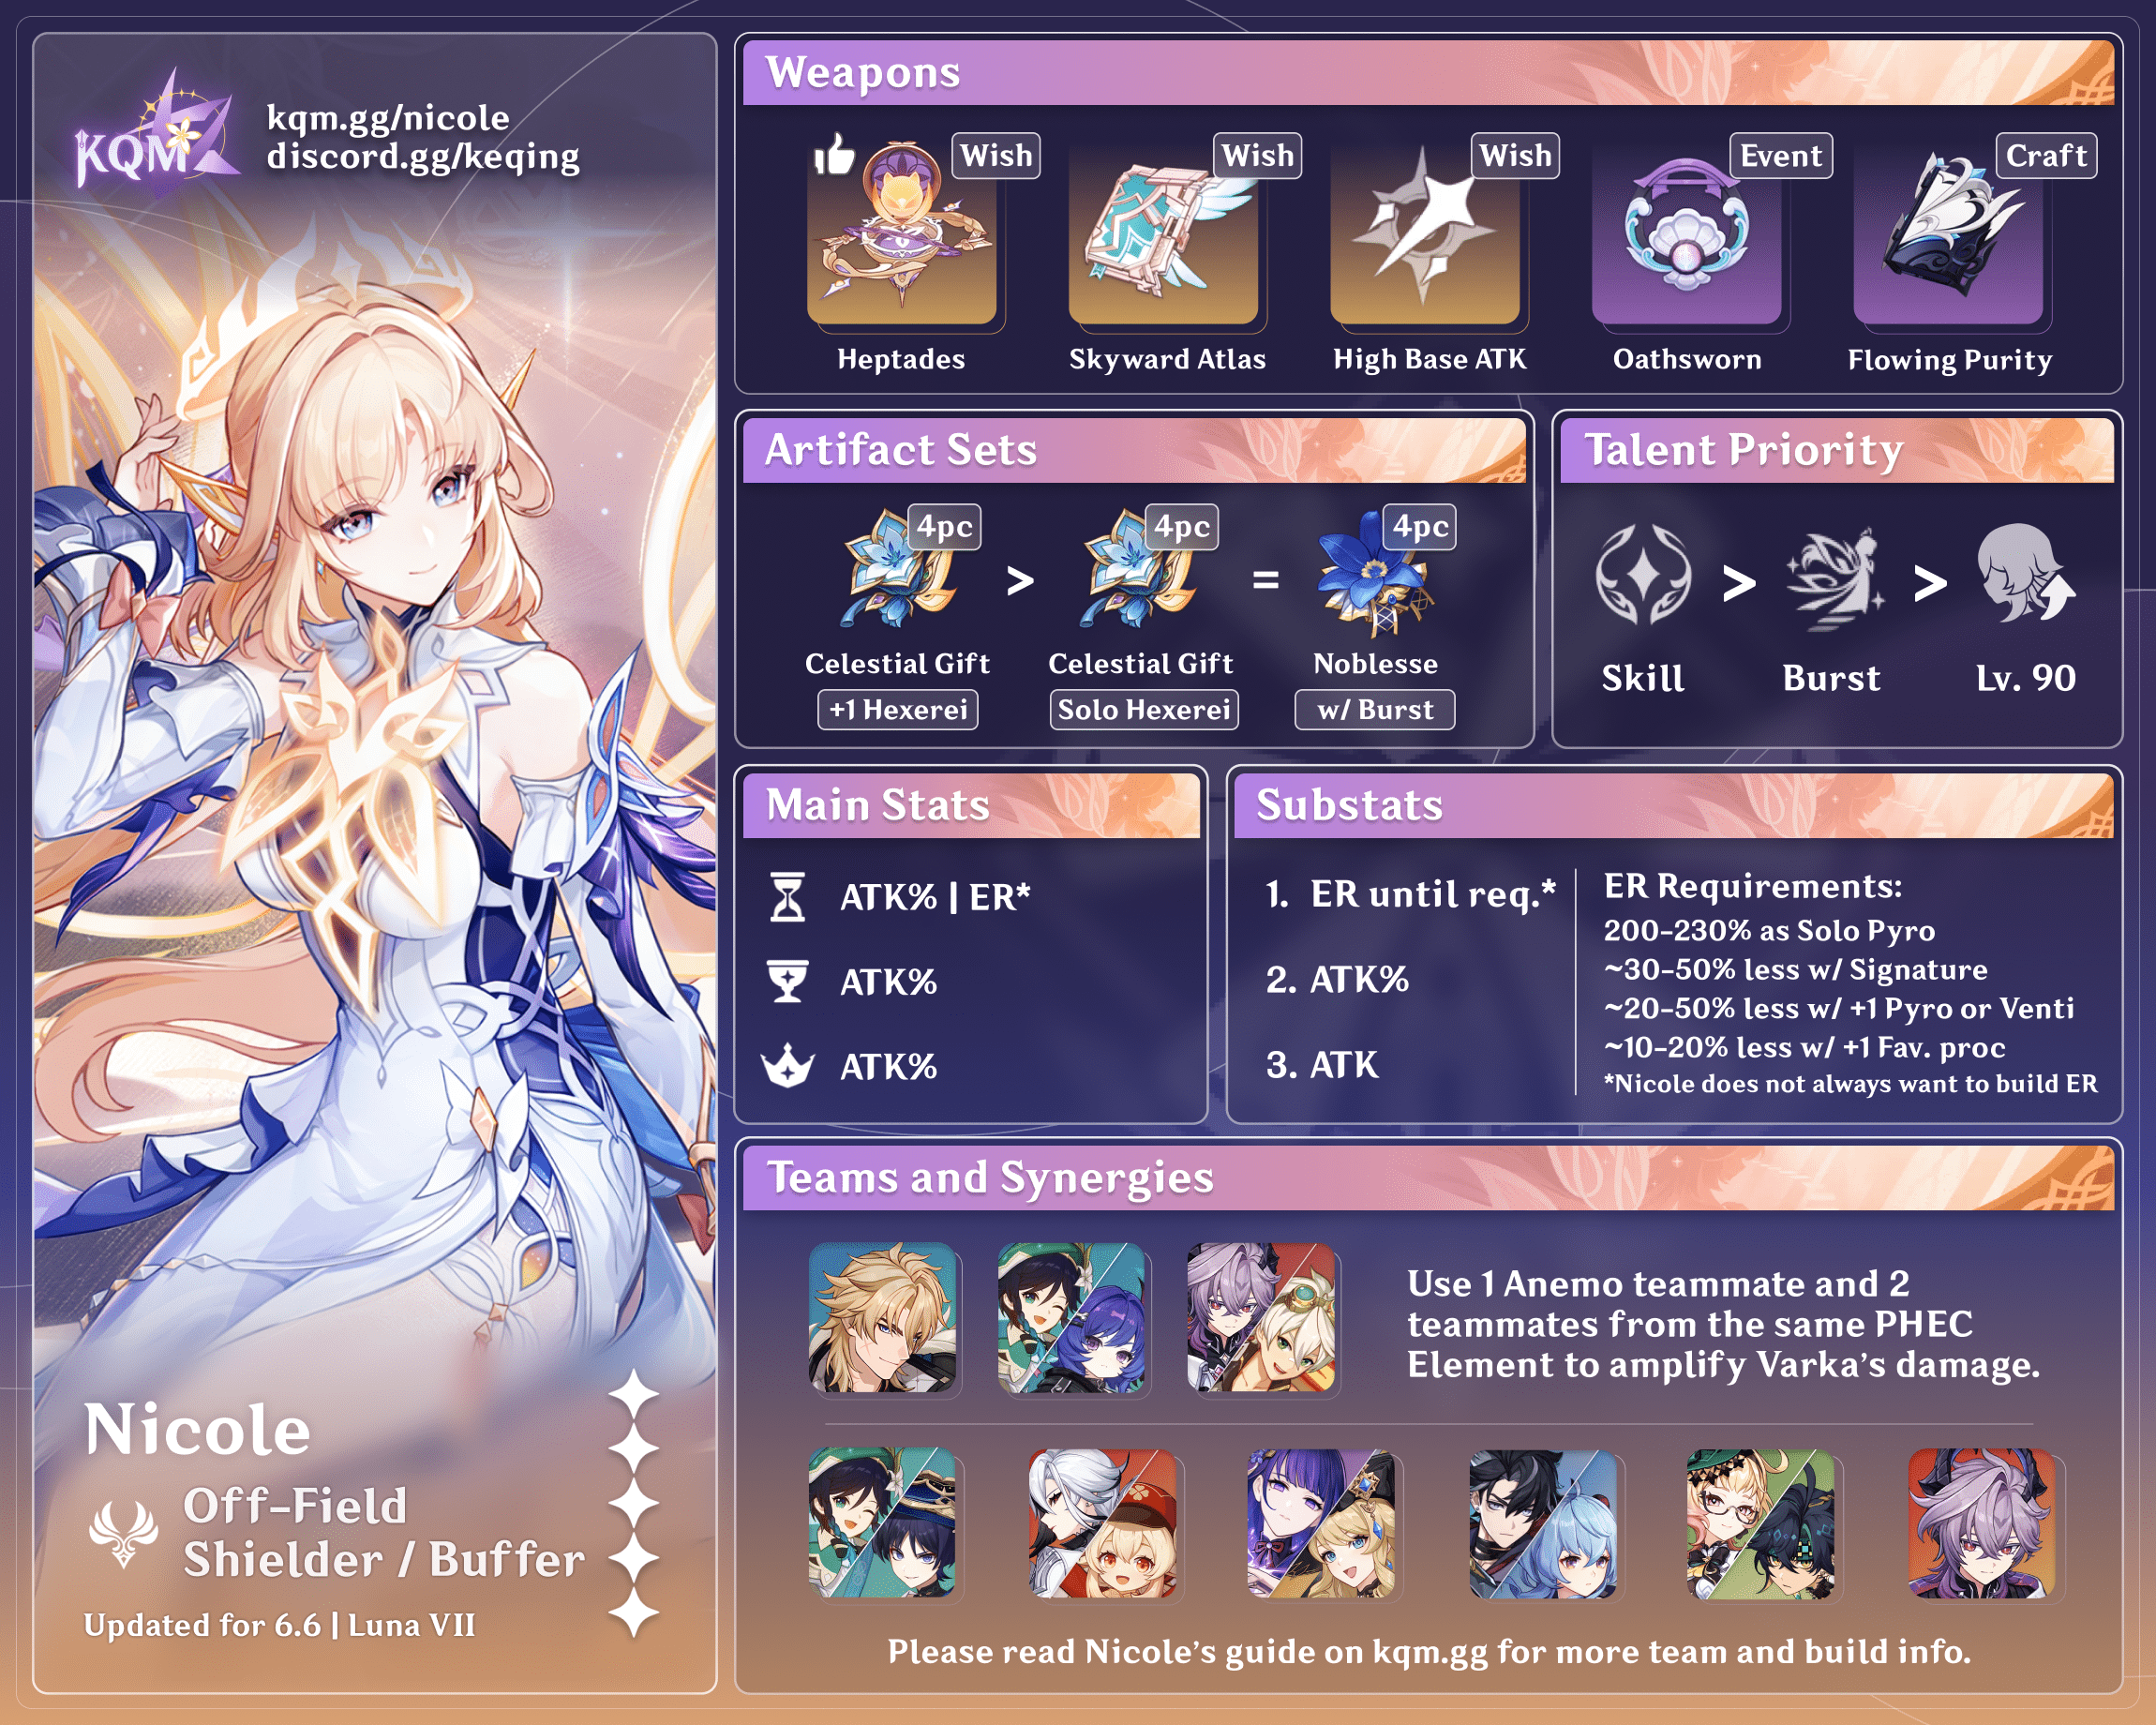
Credits to: cegewinne, haafr
Character Overview
Pros
- Solid ATK buffer who also buffs off-field characters.
- Access to a strong set bonus which improves in teams with an additional Hexerei character.
- Provides defensive utility and buffs without needing to use an Elemental Burst.
- Improves the ceilings of many teams via her great Constellations.
- Enables other characters’ Hexerei Passives.
- She’s literally an angel.
Cons
- Relies on teams having a second Hexerei character to get the full benefit of her set bonus.
- The full benefit of Nicole’s Elemental Burst is locked behind the on-fielder being Hexerei.
- Provides less ATK than Bennett, and is not necessarily a straight upgrade to him in teams where off-fielders do not do damage or can snapshot Bennett’s buffs.
Playstyles
Off-field Support
Nicole uses her Elemental Skill to increase the ATK of the party and generate a shield. In some teams, that is all she needs to do. In other teams, she can also use her Elemental Burst to give coordinated attacks.
The full breakdown of how Nicole’s abilities work can be found in the Talents section.
Talents
Level and Talent Priority
Skill > Burst ≥ Level 90
Nicole’s Elemental Skill is the priority to level, as it increases her Flat ATK buff and shield durability. Nicole’s Elemental Burst is worth leveling if it is used, although the additional scaling from her Hexerei passive makes leveling her Burst less impactful. Nicole appreciates reaching Level 90 to increase her Base ATK and make it easier to reach her ATK cap, but it is an overall minor increase that should not be a priority. Nicole’s Normal Attack does not need to be leveled.
Talent Overview
 Normal Attack | Allegoria
Talent Description
Normal Attack
Proclaims a decree in the primordial tongue and performs up to 3 attacks that deal Pyro DMG.
Charged Attack
Consumes a certain amount of Stamina to deal AoE Pyro DMG to opponents in front of her after a short casting time.
Plunging Attack
Nicole plunges towards the ground from mid-air, damaging all opponents in her path. Also deals AoE Pyro DMG upon impact with the ground.
A typical Catalyst 3-hit string Normal Attack that does not see use on a support such as Nicole.
 Elemental Skill | Revelation: Uncreated Light
Talent Description
Recreates a fleeting glimpse of an age long past, when the angels acted on the authority of the heavens, bestowing the Grace of Kenosis effect on nearby party members. This increases their ATK and deals AoE Pyro DMG, as well as creates a Shield of Blazing Light.
The Shield of Blazing Light’s DMG Absorption is based on Nicole’s ATK, and it will absorb Pyro DMG at 250% effectiveness.
Grants a shield that scales off of Nicole’s total ATK, and additionally increases the ATK of nearby teammates based on Nicole’s ATK. Regardless of the level of this talent, Nicole needs 4000 ATK to max the buff, providing up to 600 ATK at Talent Level 10. Note that ATK-buffing abilities such as Bennett’s Burst, Sara’s Skill, and Iansan’s Burst do not count towards this ability. However, buffs such as Chevreuse’s A4 Passive, Fischl’s Hexerei Passive, 4pc TotM, and Pyro Resonance do. Additionally, Nicole snapshots her Total ATK upon casting her Skill and uses it for her Skill’s Flat ATK buff. This allows Nicole to utilize buffs with short uptime more effectively.
 Elemental Burst | Revelation: Ladder of Divine Ascent
Talent Description
As Nicole weaves the path of anchored fate with golden threads of light, she deals AoE Pyro DMG and switches to Silent Contemplation mode.
In this mode, when nearby active party members hit an opponent, an Arcane Projection is summoned to perform a Coordinated Attack against the opponent, dealing AoE Elemental DMG of the character’s corresponding Elemental Type. This DMG scales based on the corresponding character’s ATK and will be considered as having been dealt by them.
This effect can occur once every 3s, and can be triggered up to 4 times each time Nicole switches to Silent Contemplation mode.
It is worth noting that Hexerei characters’ Arcane Projections appear to differ somehow in appearance from the others…
For 20s after Nicole uses her Burst, when the active character hits an enemy, a projection will be summoned that does additional damage based on the multiplier of this ability and the stats of the on-fielder. This attack does not benefit from type damage bonuses, such as Skill or Burst DMG Bonus, but is considered to be damage of the Element of the on-fielder, and thus benefits from Elemental DMG Bonus and Common DMG Bonus. It cannot apply an Element nor react, and can be triggered at most once every 3s and up to 4 times.
Additionally, if the on-fielder is Hexerei, the projection will be an image of the on-field character. Otherwise, the projection will feature Nicole.
 Ascension 1 Passive | Methexis
Talent Description
For 20s after unleashing the Elemental Skill Revelation: Uncreated Light, Nicole will continuously “observe” the other current active party members. After the observed character has remained on the field for 3s, their Grace of Kenosis is upgraded to Guidance of Theosis, increasing their ATK by an additional 300. If the observed character is a Hexerei character, Grace of Kenosis is upgraded to Guidance of Theosis straight away.
When characters other than Nicole who have Guidance of Theosis leave the field, their effect reverts to Grace of Kenosis.
After Nicole uses her Elemental Skill, if the on-field teammate is Hexerei or has been on-field for at least 3s, they are granted an additional 300 ATK boost until they leave the field.
 Ascension 4 Passive | Philokalia
Talent Description
When Elemental DMG from nearby active party members hits an opponent, Nicole’s own Grace of Kenosis effect is upgraded to Guidance of Theosis for 8s.
Nicole herself gains the benefit of the previous passive when enemies take elemental damage. This passive is mostly to increase the buff strength of her Hexerei Passive, and to enable her second Constellation to give permanent Pyro RES Shred.
 Hexerei Passive | Light in the Darkness
Talent Description
After completing Witch’s Homework: The Role of a Guide…?, Nicole becomes a Hexerei character. When the party includes at least 2 Hexerei characters, you gain the Hexerei: Secret Rite effect, which enhances Hexerei characters.
Hexerei: Secret Rite
Increases the DMG dealt by Hexerei characters’ Arcane Projections by 300% of Nicole’s ATK
When a Hexerei character is on-field and triggers the projection from Nicole’s Elemental Burst (or her C1), it gains additional scaling based on Nicole’s ATK.
Constellations
 Constellation 1 | Do Not Be Afraid, Child Who Is Love
Constellation Description
When the current active character of your own in the party hits an opponent, an additional special “Arcane Projection: Unity” will be summoned to perform a Coordinated Attack against the opponent, dealing AoE Elemental DMG of the character’s corresponding Elemental Type at 600% of their ATK. This DMG will be considered as having been dealt by the corresponding character.
This effect can trigger once every 6s.
Summons a projection when the active character deals damage, independent of Nicole’s Elemental Burst. These projections have the same characteristics as the projections from her Elemental Burst, except for having different scaling and cooldown.
This is a strong Constellation that improves Nicole’s supportive capabilities.
 Constellation 2 | I Will Guide You and Show You the Path You Should Tread
Constellation Description
Enhances the effects of the Elemental Skill Revelation: Uncreated Light: Grace of Kenosis increases ATK by an additional 300 (which does not count toward this effect’s ATK Bonus limit), while Guidance of Theosis decreases nearby opponents’ Elemental RES based on the corresponding character’s Elemental Type by 25%. This effect does not stack for the same Element.
Additionally, when Nicole unleashes her Elemental Skill Revelation: Uncreated Light, nearby active party members will also gain a Shield of Blazing Light.
Grants an additional 300 ATK increase to Nicole’s Elemental Skill Flat ATK buff. Additionally, enemies near characters affected by Nicole’s A1 Passive have their RES to the specific character’s Element decreased. This includes Nicole but does not stack RES Shred of the same Element. Furthermore, Nicole grants a shield to nearby Co-Op members when using her Elemental Skill.
A very strong Constellation that makes Nicole shine as a support for ATK scalers.
 Constellation 3 | A Lamp by Your Side, A Light to Shine the Way
Constellation Description
Increases the Level of Revelation: Uncreated Light by 3.
Maximum upgrade level is 15.
Increases the level of Nicole’s Elemental Skill, granting higher Flat ATK buff, as well as a stronger shield.
A simple but good Constellation overall.
 Constellation 4 | Whether Left or Right, No Matter Which Way You Turn
Constellation Description
When nearby party members have their Grace of Kenosis upgraded to Guidance of Theosis, Nicole also bestows upon them the Pathfinder’s Blessing effect for 20s. Each character can gain this effect once every 16s.
The Normal Attack, Charged Attack, Plunging Attack, Elemental Skill, and Elemental Burst DMG of characters with Pathfinder’s Blessing is increased by 70% of Nicole’s ATK. This effect will be removed once it has taken effect 8 times or when its duration is over.
When multiple opponents are hit at once, instances of Pathfinder’s Blessing are consumed equal to the number of opponents hit. Each character’s Pathfinder’s Blessing is counted independently.
When characters have the benefit of Nicole’s A1 Passive, she grants them additional damage based on her ATK, up to 8 times. This effect can be triggered every 16s and is counted independently per character.
This Constellation is quite good as Nicole already builds a lot of ATK to increase the potential of this additional damage buff (counted as Additive Base DMG Bonus).
 Constellation 5 | You Will Hear My Voice Beside You
Constellation Description
Increases the Level of Revelation: Ladder of Divine Ascent by 3.
Maximum upgrade level is 15.
Increases the scaling of Nicole’s Elemental Burst projections.
This Constellation is a varied damage increase as some teams do not utilise her Burst significantly. Overall, it is a rather weak one.
 Constellation 6 | This Is the Path, Walk It Without Delay
Constellation Description
When Nicole’s Grace of Kenosis is upgraded to Guidance of Theosis, all nearby party members’ Grace of Kenosis will also be upgraded to Guidance of Theosis. Once upgraded, Guidance of Theosis will no longer revert to Grace of Kenosis.
Additionally, DMG dealt by characters with Guidance of Theosis will ignore 40% of opponents’ DEF.
When Nicole’s A4 Passive is triggered, all teammates also gain the benefit of her A1 Passive, and as a result also gain the benefit of her C2 and C4. Furthermore, all characters on the team ignore a portion of Enemy DEF.
An amazing Constellation that highly benefits teams with multiple damage dealers, enables her to work with front-loaded non-Hexerei characters, and at a baseline considerably benefits all teams she is used in.
C1 vs R1
Nicole’s C1 is slightly better than her signature weapon in most teams that she is played in while also building to her strong C2, and the gap widens when Nicole already receives a lot of ATK buffs to max her Skill’s buff without relying on the tremendous ATK stats that Angelos’ Heptades provides.
Combos
Combo Notation
- N = Normal Attack
- C = Charged Attack
- A = Aimed Shot
- P = Plunging Attack
- E = Elemental Skill
- tE = Tap Skill
- hE = Hold Skill
- Q = Elemental Burst
- D = dash (cancel)
- J = jump (cancel)
- W = walk (cancel)
- > = switch character
- ( ) = these actions are optional; please refer to the notes below
- [ ] = repeat these actions the specified number of times
| EQ | The default combo for Nicole using her Elemental Burst. This combo should be used in teams with a Hexerei on-fielder, or teams where there is room in the rotation to fit her Elemental Burst in. If you find yourself with characters on cooldowns when you are rotating, fit Nicole’s Burst in. Alternatively, use her Burst every other rotation if her ER requirements are too high. |
| E | The default combo for Nicole when she does not use her Elemental Burst. This combo is used when Nicole’s Elemental Burst is not significant and the team can benefit from shorter rotations by skipping her Burst. For examples of these teams, see the Teams section. |
Artifacts
ER Requirements
Calcs for ER requirements can be found here (last updated for Version Luna VII).
| Signature | Other Weapons | |
| No Burst or Double Pyro + Raiden | 100% | XXX–YYY% |
| Solo Pyro | 160-180% | 200-230% |
| Double Pyro | 120-160% | 155-210% |
| Triple Pyro | 105-115% | 140-150% |
| Double Pyro + Venti | 100-105% | 125-150% |
Note that Nicole can forgo building ER if she does not use her Burst or use it every other rotation.
Use the Energy Recharge Calculator to determine exact requirements for your team and rotation. For more details on how Favonius weapons will affect your team, please use Ac1d’s Favonius Mastersheet.
Artifact Stats
 Sands |  Goblet |  Circlet |
| ATK% or ER | ATK% | ATK% |
Stat Priority: (ER until requirement) > ATK% > Flat ATK
Stack as much ATK as possible to reach the 4000 ATK requirement for Nicole’s Skill buff; this also boosts her shield durability and her Hexerei Passive’s extra scaling. Note that ATK-buffing abilities such as Bennett’s Burst, Sara’s Skill, and Iansan’s Burst do not count towards Nicole’s Skill Flat ATK buff. However, buffs such as Chevreuse’s A4 Passive, Fischl’s Hexerei Passive, 4pc TotM, and Pyro Resonance do.
It is often better to use Nicole’s Burst every other rotation instead of forcing ER Sands to Burst every rotation. If Nicole uses her Burst every other rotation, she can forgo building ER.
Artifact Sets
Hover over artifact images for more information.
 4pc Celestial Gift (Celestial) | 4pc Celestial is Nicole’s default set for essentially all her teams. If Nicole is the sole Hexerei member in the team, it gives a teamwide 20% Pyro DMG Bonus. With another Hexerei unit, this set provides the entire team 40% Pyro DMG Bonus and 40% DMG Bonus to the Element of the current on-fielder instead. |
 4pc Scroll of the Hero of Cinder City / 4pc Noblesse Oblige | Other supportive sets Nicole can use in teams where she is the only Hexerei unit, and the on-fielder does not benefit from Pyro DMG Bonus |
 2pc ATK% + 2pc ATK% | This mixed set combination can be preferred to increase Nicole’s ATK further in teams where she does not use her Burst and her teammates do not use DMG% buffs well to run 4pc Celestial or 4pc Scroll, e.g. some Lunar-Charged, Stellar-Conduct team |
Weapons
Hover over weapon images for more information.
 5★ Angelos’ Heptades | Angelos’ Heptades is Nicole’s best weapon by providing tons of useful effects. First, it gives her the largest amount of ATK a Catalyst can give, allowing Nicole to meet her 4000 ATK requirement and go beyond easily. Secondly, it buffs the on-fielder and Hexerei off-fielder with DMG Bonus. Lastly, it refunds Flat Energy to decrease her ER requirements considerably. |
 Other 5★ ATK Catalysts | Crane’s Echoing Call, Skyward Atlas, Memory of Dust, Vivid Notions, Cashflow Supervision, Tulaytullah’s Remembrance Other Catalysts with high Base ATK or ATK% secondary stats and passives that can be used for Nicole if available. However, note that the difference in Total ATK between Crane’s Echoing Call (the highest ATK-buffing option) and Tulaytullah’s Remembrance (the lowest one) can be up to 300-400 ATK. |
 5★ Starcaller’s Watch | Starcaller’s Watch trades Nicole’s Flat ATK buff for a DMG% buff to the active teammate. This is often a net gain for the on-fielder; however, it decreases Nicole’s buff to her off-field teammates, which can lead to lower team DPS compared to other 5-star ATK Catalysts. |
 4★ Wine and Song | At high refinements, Wine and Song provides the most attack of any 4-star Catalyst, making it her best 4-star option overall. At lower refinements, it still performs well when Nicole has high ER requirements. Dash before casting her Skill to enable the weapon’s passive. |
 4★ Oathsworn Eye | Without a high-refined Wine and Song, Oathsworn Eye is Nicole’s general best 4-star option with its high Base ATK, secondary ATK% stat and ER passive. Its only drawback is that it is only available for those who played the flagship event back in Version 2.5. |
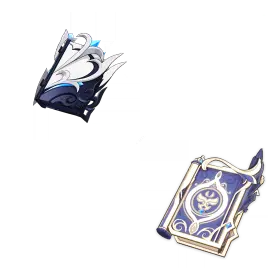 4★ Flowing Purity, Royal Grimoire | High Base ATK with secondary ATK% stat Catalysts that Nicole can use. Their passives and refinements do not matter for her. |
 4★ Hakushin Ring | Hakushin Ring can perform competitively at high ER requirements, especially when Nicole can trigger Overloaded for the weapon’s passive. However, its uptime is rather short. |
 4★ Favonius Codex | Favonius Codex should only be used if Nicole’s teammates heavily struggle to meet their ER requirements. However, losing the higher teamwide Flat ATK buff provided by other Catalysts usually offsets the benefit of her teammates needing less ER. Stick to the 4-star options mentioned above instead. |
 3★ Thrilling Tales of Dragon Slayers (TTDS) | TTDS trades Nicole’s teamwide Elemental Skill Flat ATK buff in exchange for an ATK% buff that is higher in value to the on-fielder. However, it requires the on-field character to be a hypercarry in a team with a 20s+ rotation for TTDS to find a worthwhile use. |
 Other ATK% Catalysts | Catalysts not mentioned above are not worth using over R1 Flowing Purity, Nicole’s most accessible 4-star option. |
Teams
Rotation Notation
- N = Normal Attack
- C = Charged Attack
- A = Aimed Shot
- P = Plunging Attack
- E = Elemental Skill
- tE = Tap Skill
- hE = Hold Skill
- Q = Elemental Burst
- D = dash (cancel)
- J = jump (cancel)
- W = walk (cancel)
- > = switch character
- ( ) = these actions are optional; please refer to the notes below
- [ ] = repeat these actions the specified number of times
Teambuilding
- Nicole is good at buffing multiple ATK-scaling damage dealers at the same time, especially those who are off-fielders and do not snapshot.
- She appreciates a second Hexerei teammate to enhance 4pc Celestial’s effect.
- Her Elemental Burst’s projection deals increased damage if the on-fielder is a Hexerei DPS.
On-Field Hexerei DPS
Nicole is best used to support Hexerei DPS units for her inherent synergy with them: Hexerei characters receive 300 ATK from her A1 Passive immediately when they enter the field; Nicole’s Burst projections deal increased damage if the trigger is a Hexerei on-fielder; 4pc Celestial Gift’s effect is also enhanced with a Hexerei teammate. Her sturdy shield also prevents these units from being interrupted during their combos.






Off-Field DPS
Nicole provides a teamwide Flat ATK buff with great uptime to off-field damage dealers. This makes her shine in teams with these characters over options such as Bennett or Iansan
 Durin | Durin forms a powerful duo with Nicole, providing significant off-field damage, buffings, and survivability to almost any teams they are in. As a stand-alone off-field DPS, Durin benefits greatly from Nicole’s teamwide Flat ATK buff and her particle generation. As such, Durin can perform decently as a hypercarry with Nicole, especially with further vertical investment. |
 Fischl | As a Hexerei teammate, Fischl can immediately trigger Nicole’s A1 Passive upon entering the field, allowing Oz to snapshot the buff. However, if Fischl uses her Burst and swaps out, the Oz summoned at the end will not benefit from the passive, as the buff expires before he takes the field. However, Fischl still synergizes well with Nicole despite this disadvantage. |
 Xiangling | For Xiangling, Nicole is a good substitute for Bennett as an ATK buffer. While she generally buffs less than Bennett, she offers good quality of life advantages by providing a strong shield and removing the need to cast multiple Bennett’s Skills thanks to Nicole’s immediate 5 particle generation. |




Other On-Field DPS
Nicole is still a good buffer for various ATK-scaling on-fielders despite their inability to make full use of her kit. This is achieved by having a Hexerei off-fielder in the team most of the time. Additionally, Nicole’s Burst loses its importance without having a Hexerei damage dealer trigger it, making it less essential to cast Nicole’s Burst every rotation or at all.
Note that this list of characters is not exhaustive and serves as an example only.












Special Interaction
   Bennett, Iansan, Sara | Nicole cannot use certain ATK buffs to increase her Skill Flat ATK buff. This includes Bennett’s Burst, Iansan’s Burst, and Sara’s Skill. However, their ATK buffs still increase Nicole’s shield strength. |
  Xianyun, Shenhe | These units’ Additive Base DMG Bonus buffs actively track their current ATK, and thus greatly appreciate Nicole’s teamwide Flat ATK buff. |
 Prune | Prune’s A4 Passive does not use Nicole’s Flat ATK buffs from her Skill and A1 to convert into extra DMG Bonus for the team. However, Nicole’s C2 Flat ATK buff is accounted for Prune’s A4, and Prune’s C6 Flat ATK buff is accounted for Nicole’s Skill Flat ATK buff. |
  Mona, Sucrose | Hexerei supports are paired with Nicole to enable 4pc Celestial for her. Nicole also enables their Hexerei Passive. |
Example Teams
This is not a comprehensive list of teams. The inclusion or exclusion of any given team does not necessarily reflect its power level.

In this team, Prune is on par with Venti even at low Constellations, and she comfortably surpasses him at C6.
Sample Rotation (Prune)
Durin 2[E] Q > Nicole EQ > Prune EQ > Varka E N1C 2[N4E] (N1)
Sample Rotation (Venti)
Durin 2[E] Q > Nicole EQ > Venti EQ N2 > Varka E N1C 2[N4E] (N1)

While Faruzan does not buff Durin, she is still slightly ahead of Prune (at equal Constellations) due to Venti’s larger Anemo damage proportion. The Anemo supports use 4pc Scroll in this team while Nicole holds 4pc Celestial.
Sample Rotation (Faruzan)
Faruzan E (C) Q > Durin 2[E] Q > Nicole EQ > Venti EQ N5D N3E N5D N5E (N2)
Sample Rotation (Prune)
Nicole EQ > Durin 2[E] Q > Nicole EQ > Venti EQ N5D N3E N5D N5E N1

Nicole’s teamwide ATK buffing allows Durin to deal impressive damage in this Dual Carry team.
Sample Rotation
Nicole EQ > Citlali EQ > Durin E N1 Q > Lohen combo

In this team, Durin is a hypercarry dealing Vaporized damage enabled by Mona. Mona should hold Favonius Codex and 4pc Noblesse in this team, but 4pc Rising Winds is competitive if she has high Constellations.
C1 Albedo is an upgrade over Sucrose in both DPS performance and ease of use.
Sample Rotation (Enabler Mona with Sucrose)
Nicole EQ > Durin E N1 Q > Sucrose N1 ED > Mona N2 Q N2 E N4 > Sucrose N1 ED/Q¹ > Mona 2[N2C]
¹Use Sucrose’s Burst if her Skill is not available.
Sample Rotation (Enabler Mona with Albedo)
Nicole EQ > Durin E N1 Q > Albedo E Q > Mona N2 E Q 4[N2C]

This Klee team is very comfortable to play thanks to Nicole’s strong shield and Xilonen’s good healing.
Sample Rotation
(Klee N1)¹ > Xilonen EN2 Q > Furina ED Q > Nicole EQ > Xilonen EN2 > Klee combo
¹First rotation only.
This is one of Razor’s best teams that is also comfy to play. However, not having Constellation 6 on any of the three 4-star units results in significant damage loss, especially Razor’s C6 and Bennett’s C6.
Sample Rotation
(Razor E)¹ > Chevreuse (Q)² hE > Nicole EQ > Bennett EQ > Razor hED N1 Q N3 ED 2[N3D] N3 ED N3D
¹First rotation only.
²Burst every other rotation.

Nicole frees Kinich from Bennett’s circle which is a tremendous QoL upgrade. Furthermore, while Nicole’s Flat ATK buff to Kinich is often less than Bennett’s, hers is teamwide, which benefits the team’s off-fielders, such as Durin or Emilie, and results in noticeable performance improvement.
Sample Rotation (Emilie)
Emilie E/Q > Nicole EQ > Durin 2[E] Q > Kinich combo
Sample Rotation (Iansan)
Nicole EQ > Durin 2[E] Q > Iansan E(C)Q > Kinich combo

This team is great for Navia’s raw personal damage output. Xilonen’s extremely generous particle generation lets Mona use TTDS. Both Mona’s and Nicole’s long-lasting buffs enable a long rotation of 20s, which in turn also allows for TTDS to buff Navia every rotation.
Sample Rotation
Nicole EQ > Xilonen E N2 > Navia Q > Mona Q N1 E N1 > Navia tE combo > Xilonen E N2 > Navia tE combo (tE)

Nicole can enable Fischl to give both ATK% and EM buffs from her Hexerei Passive in Overvape teams. This forms a very strong pair capable of providing strong buffing, survivability, and off-field damage for any Pyro DPS.
Sample Rotation
Nicole E > Yelan EQ N1 > Fischl E N1 / N1 Q > Yoimiya 3[N5D] N1

Nicole is a slight upgrade over Bennett when played together with Fischl in Chevreuse Overloaded teams. Nicole’s shield is particularly useful for Arlecchino.
Sample Rotation
Arlecchino E > Nicole EQ > Fischl N1 E/Q > Chevreuse hE Q¹ > Arlecchino N1C 5[N3D] N3
¹On second rotation and onwards, use Chevreuse before Fischl for 4pc Noblesse buff.

Nicole’s teamwide Flat ATK buff is greatly appreciated in this team, and her shield prevents Sandrone from getting interrupted while performing her Charged Attacks. Nicole’s Burst is generally a DPS loss, so skip it.
Sample Rotation
Nicole E > Yae Miko 3[E] > Qiqi E (Q)¹ > Sandrone combo
¹If Qiqi is C6.
Credits
Writers: mystathi, acerbus114
Contributors: haafr, rezmir, irokei, baloopy, idkanonymized, luxeby
Team images made with the KQM portrait generator.